
Are you looking to create a thriving online marketplace where multiple vendors can sell their products? If so, then you’ve come to the right place!
The combination of WordPress, the world’s most popular content management system, and a powerful multi vendor ecommerce plugin, offers you the perfect platform to launch and manage your online marketplace. Whether you want to create a niche marketplace or a large-scale ecommerce platform, WordPress has the flexibility and functionality to meet your needs.
What is Multi Vendor Ecommerce?

Multi vendor ecommerce refers to an online platform where multiple vendors can sell their products in a single marketplace. Unlike traditional ecommerce websites where only the site owner sells products, multi vendor ecommerce allows independent sellers to create their own stores within the platform and manage their inventory, pricing, and shipping.
This model offers numerous benefits for both sellers and buyers. For sellers, it provides an opportunity to reach a larger customer base, tap into an existing customer community, and benefit from the marketing efforts of the platform owner. Buyers, on the other hand, enjoy a wide variety of products from different sellers, competitive pricing, and the convenience of shopping from one central location.
Why Choose WordPress for Multi Vendor Ecommerce?
WordPress is a versatile and user-friendly platform widely known for its ability to create websites of various types, including ecommerce sites. Here are some reasons why WordPress is an excellent choice for building a multi vendor ecommerce website:
- Ease of Use: WordPress offers a user-friendly interface, making it accessible even to beginners. You don’t need to have coding or technical skills to set up and manage your online marketplace.
- Vast Plugin Ecosystem: WordPress has a vast ecosystem of plugins that can extend the functionality of your website. There are several powerful multi vendor ecommerce plugins available specifically designed for WordPress, providing you with the necessary tools to create a successful online marketplace.
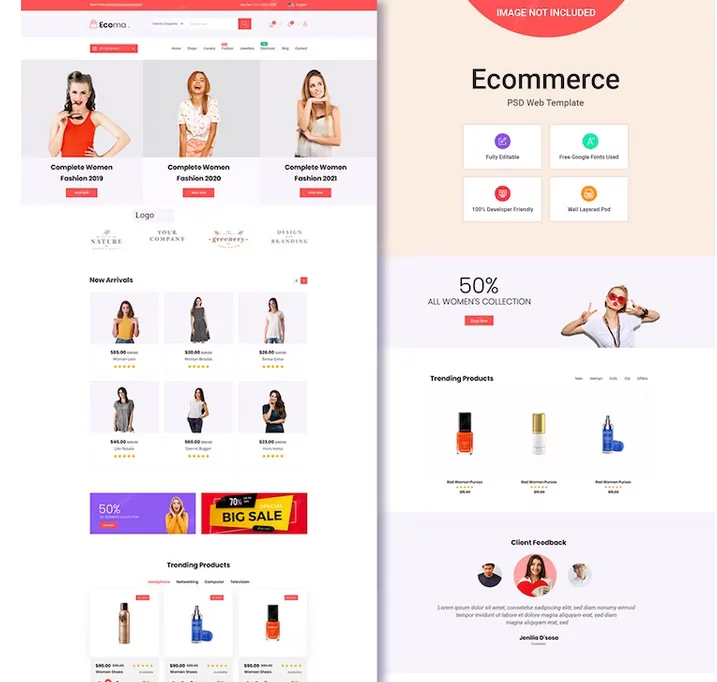
- Customization Options: WordPress allows you to customize the appearance and functionality of your website using themes and plugins. You can choose from a wide range of ecommerce themes to create a visually appealing and user-friendly storefront for your vendors and customers.
- SEO-Friendly: WordPress is built with search engine optimization (SEO) in mind. It offers various SEO plugins and features that help improve your website’s visibility in search engine results, driving more organic traffic to your marketplace.
- Community Support: WordPress has a large and active community of developers, designers, and users who are always ready to help. You can find support, tutorials, and resources to assist you in building and maintaining your multi vendor ecommerce website.
Setting up Your WordPress Website
In this section, we will walk you through the process of setting up your WordPress website to lay the foundation for your multi vendor ecommerce platform. We will cover everything from choosing a domain and hosting service to installing WordPress and selecting a suitable ecommerce theme.
1. Choosing a Domain and Hosting Service
Before you can start building your website, you need to choose a domain name and a hosting service. Here are the key considerations:
- Domain Name: Select a domain name that is easy to remember, reflects your brand or niche, and is available for registration. Consider using a domain registrar like GoDaddy or Namecheap to search for and register your domain.
- Hosting Service: Choose a reliable hosting provider that offers good performance, security, and scalability. Some popular hosting options for WordPress websites include Nestify.

2. Installing WordPress
Once you have a domain and hosting service, it’s time to install WordPress. Most hosting providers offer one-click WordPress installation. Follow these steps:
- Access Your Hosting Control Panel: Log in to your hosting account and access the control panel, usually cPanel.
- Find the WordPress Installer: Look for the “WordPress” or “Website” section in cPanel. Click on the WordPress installer.
- Choose Installation Settings: Select the domain where you want to install WordPress and configure other settings, such as choosing a directory (if applicable) and setting up an admin username and password.
- Complete the Installation: Click on the “Install” button to start the installation process. Once the installation is complete, you will receive a confirmation message with login credentials.
3. Selecting a Suitable Ecommerce Theme
Choosing the right ecommerce theme is crucial for creating an attractive and functional online marketplace. Consider the following factors when selecting a theme:
- Design and Layout: Look for a theme that aligns with your brand and has a clean and professional design. It should also have a layout that supports multi vendor functionality.
- Responsiveness: Ensure that the theme is mobile-friendly and responsive, as a significant portion of online shopping occurs on mobile devices.
- Compatibility: Check if the theme is compatible with popular multi vendor ecommerce plugins. This will ensure a seamless integration and smooth functioning of your marketplace.
- Customization Options: Look for a theme that offers customization options, such as color schemes, typography, and layout variations, to personalize your website.
Once you have selected a theme, follow the instructions provided by the theme developer to install and activate it on your WordPress website.
4. Configuring a Multi Vendor Ecommerce Plugin

A multi vendor plugin is essential for creating and managing a multi vendor ecommerce website. It provides the necessary functionality to allow vendors to create their own stores, manage their products, and handle orders, while you, as the site owner, oversee the entire marketplace. Here are some key benefits of using a multi vendor plugin:
- Vendor Management: A multi vendor plugin enables you to manage and onboard vendors easily. You can set up vendor registration, approve vendor applications, and provide a dedicated dashboard for each vendor to manage their store and products.
- Product Management: The plugin allows vendors to add, edit, and manage their products, including pricing, inventory, and product descriptions. It provides a centralized system for you to review and moderate vendor listings.
- Order Management: With a multi vendor plugin, you can handle order processing, fulfillment, and tracking across multiple vendors. You can also set up commission structures and payment systems to ensure smooth transactions between vendors and customers.
- Rating and Reviews: The plugin typically includes a rating and review system, allowing customers to provide feedback on vendors and products. This helps build trust and credibility within your marketplace.
5. Choosing the Right Plugin
When selecting a multi vendor plugin, consider the following factors:
- Features: Look for plugins that offer the features you need, such as vendor registration, product management, order tracking, commission settings, and more. Make a list of essential features and compare different plugins based on their offerings.
- Compatibility: Ensure that the plugin is compatible with your WordPress version and theme. Check if it integrates smoothly with other plugins you plan to use, such as payment gateways or shipping plugins.
- User-Friendliness: Consider the ease of use for both vendors and yourself. Look for a plugin with a user-friendly interface, intuitive vendor dashboards, and comprehensive documentation or support resources.
- Reviews and Ratings: Read user reviews and ratings to get insights into the plugin’s performance, reliability, and customer support. Consider popular plugins like WooCommerce, Dokan, or WC Vendors, which have a strong user base and positive reviews.
Installing and Setting up the Plugin
To install a multi vendor plugin:
- Navigate to Plugins: In your WordPress dashboard, go to “Plugins” and click on “Add New”.
- Search for the Plugin: Enter the name of the multi vendor plugin you have chosen in the search bar. Once you find it, click on “Install Now”.
- Activate the Plugin: After installation is complete, click on “Activate” to activate the plugin on your website.
Once the plugin is activated, you will typically find a dedicated section in your WordPress dashboard to configure the plugin settings. Follow the plugin’s documentation or setup wizard to set up essential details such as commission rates, vendor registration process, and payment options.
6. Managing Vendors and Products
In this section, we will dive into the process of managing vendors and products in your multi vendor ecommerce website. We will cover how to add and manage vendors, how to add and control products, and the essential steps to set up payment and shipping options.
How to Add and Manage Vendors
To create a successful multi vendor ecommerce website, it’s crucial to effectively manage your vendors. Here’s a step-by-step guide on how to add and manage vendors:
- Vendor Registration: Set up a vendor registration process on your website. This can be done through the plugin’s settings or by using a dedicated registration form plugin. Ensure that the registration process collects all necessary information from vendors, such as their contact details, business information, and payment preferences.
- Vendor Approval: Review and approve vendor applications based on your criteria. This step ensures that only legitimate vendors join your marketplace. You can manually approve vendors or set up an automated approval process.
- Vendor Dashboard: Provide each vendor with a dedicated dashboard where they can manage their store and products. This dashboard should include options for adding and editing products, managing inventory, viewing order details, and accessing sales reports.
- Vendor Support: Establish clear communication channels with vendors. Provide them with documentation, tutorials, and a support system to assist them in managing their store effectively. Regularly communicate with vendors to address any concerns or questions they may have.
How to Add and Control Products
Adding and controlling products is a crucial aspect of managing your multi vendor ecommerce website. Here’s how to handle product management:
- Product Submission: Enable vendors to submit their products for review and approval. Set up a system where vendors can provide all necessary product details, including title, description, images, pricing, and inventory levels.
- Product Moderation: Review and moderate vendor-submitted products to ensure quality and accuracy. You can set up an approval process where you manually review each product, or use automated moderation tools to streamline the process.
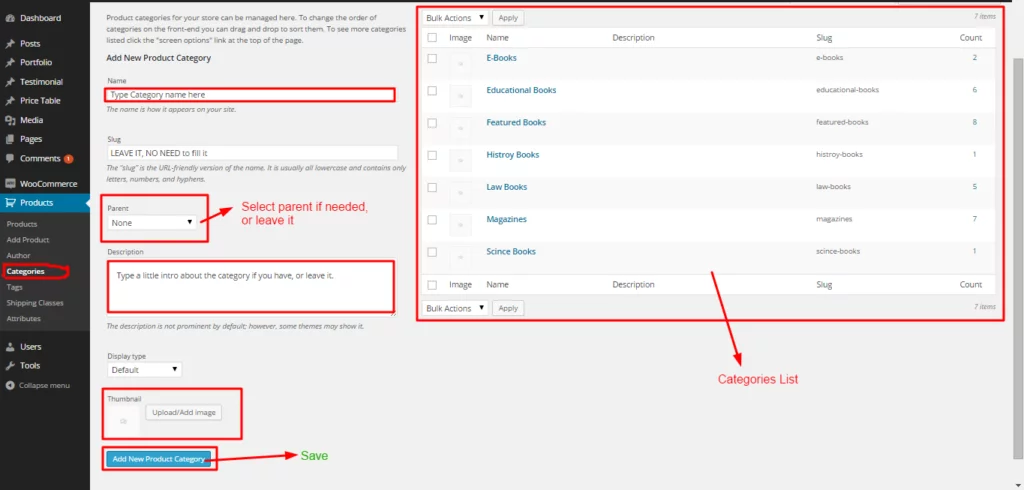
- Product Categorization: Organize products into relevant categories and subcategories for easy navigation and searchability. Establish a clear taxonomy that allows customers to find products quickly and efficiently.
- Product Display: Configure the way products are displayed on the frontend of your website. This includes deciding on the layout, product images, descriptions, and any additional information you want to showcase.
7. Setting Up Payment and Shipping Options
To facilitate transactions and create a seamless shopping experience, it’s essential to set up payment and shipping options. Here are the key steps:
- Payment Gateways: Integrate payment gateways that are compatible with your multi vendor plugin. Common options include PayPal, Stripe, and Authorize.net. Configure the payment gateway settings to ensure secure transactions and proper distribution of funds between vendors.
- Commission Structure: Determine how you will collect commissions from vendors. Define the commission rates and configure the plugin settings accordingly. Ensure that the commission structure aligns with your business model and is fair to both vendors and yourself.
- Shipping Options: Set up shipping options for vendors and customers. Configure shipping methods, rates, and any additional charges based on weight, distance, or other factors. Integrate popular shipping carriers like UPS, FedEx, or USPS to provide reliable shipping services.
By effectively managing vendors and products, and setting up streamlined payment and shipping options, you will create a seamless and efficient multi vendor ecommerce website. In the next section, we will explore how to maintain and grow your ecommerce site.
8. Maintaining and Growing Your Ecommerce Site
In this final section, we will discuss the important aspects of maintaining and growing your multi vendor ecommerce site. We will cover monitoring site performance, maintaining security and updates, and implementing marketing and SEO strategies to drive traffic and increase sales.
a. Monitoring Site Performance

Regularly monitoring the performance of your ecommerce site is crucial for ensuring a smooth user experience and identifying any issues that may arise. Here are some key areas to focus on:
- Website Speed: Optimize your website for fast loading times. Use caching plugins, optimize images, and leverage content delivery networks (CDNs) to improve page load speed.
- Server Uptime: Monitor your website’s server uptime to ensure it is accessible to customers at all times. Use uptime monitoring tools or services to receive alerts in case of any downtime.
- User Experience: Continuously analyze user behavior, such as bounce rates and conversion rates, to identify areas for improvement. Use tools like Google Analytics to track user engagement and make data-driven decisions.
b. Maintaining Security and Updates

Keeping your multi vendor ecommerce site secure is of utmost importance to protect customer data and maintain the trust of your vendors. Here are some essential security measures to take:
- Regular Backups: Set up regular backups of your website’s files and database. Store the backups securely on an external server or cloud storage service.
- Security Plugins: Install security plugins that provide features like malware scanning, firewall protection, and login protection. Some popular security plugins include Wordfence, Sucuri, and iThemes Security.
- Updates and Patches: Keep your WordPress core, themes, and plugins updated to the latest versions. Regularly check for updates and apply them promptly to ensure the latest security patches are in place.
- Secure Payment Gateways: Choose reputable and secure payment gateways to handle transactions. Ensure that the payment gateways you integrate with your multi vendor plugin are PCI-DSS compliant.
c. Marketing and SEO for Your Site

To grow your multi vendor ecommerce site and attract more customers, implementing effective marketing and SEO strategies is essential. Here are some key areas to focus on:
- Content Marketing: Create high-quality content, such as blog posts, tutorials, and product guides, to attract and engage your target audience. Use content to showcase your vendors’ products and establish your marketplace as an authority in your niche.
- Social Media Marketing: Leverage social media platforms to promote your products and engage with your audience. Create profiles on platforms relevant to your target market and share compelling content, product updates, and promotions.
- Email Marketing: Build an email list and develop personalized email campaigns to nurture leads and drive repeat business. Use email marketing tools like Mailchimp or Sendinblue to automate your campaigns.
- Search Engine Optimization (SEO): Optimize your website for search engines to improve visibility and organic traffic. Conduct keyword research, optimize product descriptions and meta tags, and build quality backlinks to improve your search engine rankings.
By consistently monitoring site performance, maintaining security and updates, and implementing effective marketing and SEO strategies, you can drive traffic, increase sales, and grow your multi vendor ecommerce site.
Conclusion:
WordPress, with its user-friendly interface and extensive plugin ecosystem, provides an excellent platform for building a multi vendor ecommerce website. The combination of a reliable hosting service, a suitable ecommerce theme, and a feature-rich multi vendor plugin can help you create a successful online marketplace. With the right strategies in place, you can attract vendors, offer a diverse range of products, and provide a seamless shopping experience to your customers.
Remember, building and maintaining a multi vendor ecommerce site is an ongoing process. Regularly monitor your site’s performance, keep it secure, and implement effective marketing strategies to achieve long-term success.
Good luck with your venture, and may your multi vendor ecommerce website thrive!
FAQs on Multivendor Ecommerce with WordPress:
What are some popular multi vendor ecommerce plugins for WordPress?
Some popular multi vendor plugins for WordPress include WooCommerce, Dokan, WC Vendors, and YITH WooCommerce Multi-Vendor. These plugins offer a range of features to support multi vendor functionality.
How can I attract vendors to my multi vendor ecommerce website?
To attract vendors, you can offer competitive commission rates, provide a user-friendly vendor dashboard, and promote the benefits of selling on your platform. Consider reaching out to potential vendors directly and showcasing successful vendors on your website.
Is it necessary to offer customer support for vendors on my multi vendor ecommerce site?
Yes, providing support for vendors is crucial. Clear communication channels, documentation, and a support system can help vendors effectively manage their stores. Regular communication with vendors can address their concerns and questions.
How can I promote my multi vendor ecommerce site on social media?
Create profiles on social media platforms relevant to your target audience. Share engaging content, product updates, and promotions. Interact with your audience, respond to comments, and consider running paid advertising campaigns to boost your site’s visibility.
What is the key to success in running a multi vendor ecommerce site?
The key to success is providing a seamless and trustworthy platform for both vendors and customers. This involves ensuring vendor satisfaction, offering quality products, maintaining security, optimizing performance, and implementing effective marketing strategies to attract and retain customers.
