WordPress is a popular CMS platform; more than 42% of the websites on the site are built using WordPress. With that much popularity comes a lot of testing and creating a user-friendly website. Whether you’re a company trying to test new features, plugins, and themes, or a small blogger trying XAMPP for the first time,
It’s easy to install and set up WordPress on the go, So are you ready to create your own website?
In this article, I will walk you through the step-by-step process of creating a WordPress website using XAMPP.
So let’s begin!
What is XAMPP?
XAMPP is a Widely used open-source software that offers a complete local server environment for testing and web development. It is a convenient all-in-one package for setting up a local server since it includes crucial parts including Apache, MySQL, PHP, and Perl.
Some of it’s notable features
- Cross-platform compatibility: XAMPP is available for Windows, macOS, Linux, and Solaris, allowing developers to work on various operating systems.
- Apache Web Server: The inclusion of Apache simplifies hosting and managing web applications locally.
- MySQL Database: XAMPP comes with MySQL, enabling you to create and manage databases for your projects.
- PHP and Perl: The support for PHP and Perl scripting languages ensures compatibility with a wide range of web applications.
Why Use XAMPP for WordPress Installation?
WordPress, being a PHP-based Content Management System (CMS), requires a server environment with PHP and a database to function correctly. XAMPP provides a user-friendly solution for setting up these requirements locally, enabling you to test your WordPress website before deploying it to a live server.
System Requirements
Before installing XAMPP and WordPress, ensure that your system meets the following minimum requirements:
Operating System Compatibility
- Windows: Windows Vista or later versions
- macOS: macOS 10.6 or later
- Linux: Any recent distribution with 32 or 64-bit architecture
Minimum Hardware Specifications
- Processor: 1.5 GHz dual-core or higher
- RAM: 2 GB or more
- Disk Space: At least 500 MB for XAMPP installation and additional space for WordPress files and databases.
Size
- Windows: 148 MB
- Linux: 150 MB
- macOS: 149 MB
Step 1: Download XAMPP
To begin creating a website locally, simply go to the official website of XAMPP, and select XAMPP for Windows, if you are using Linux or maxOS then select the other version.
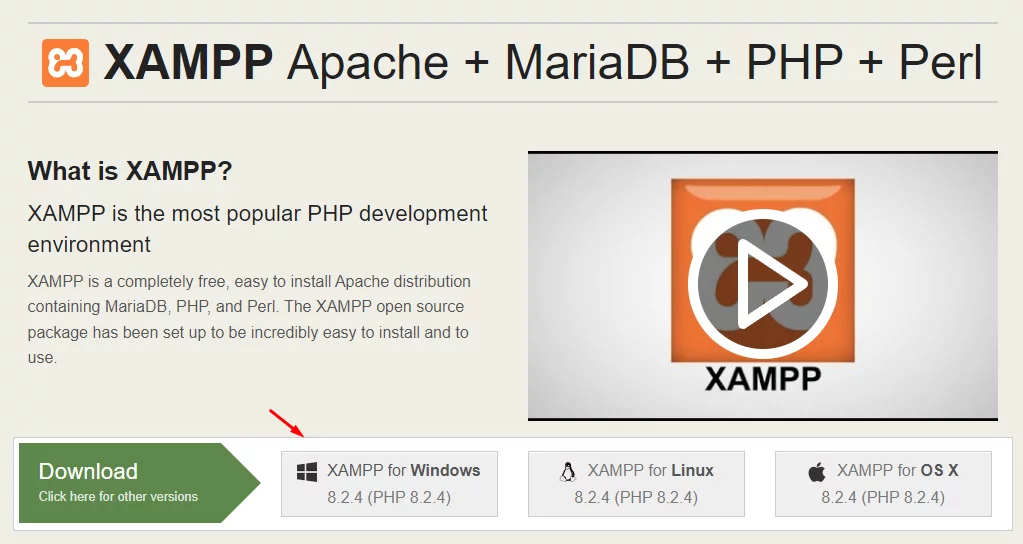
All the operating system OS downloading size is under 150 MB, so it won’t take much time to download. Once the download is complete, double click to install and then this message will pop-up.
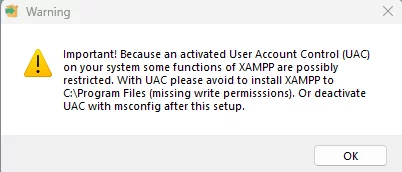
Don’t worry (this message pop-up because you have Antivirus installed), just click on “Ok” and move forward.
After that just like any other software installation:
- Click “Next” to install.
- Select all Components
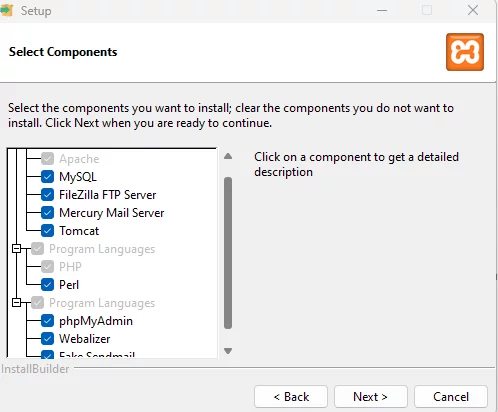
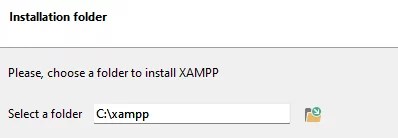
- Select a folder (use the default) – C:\xampp
After that select next for two times and click Finish.

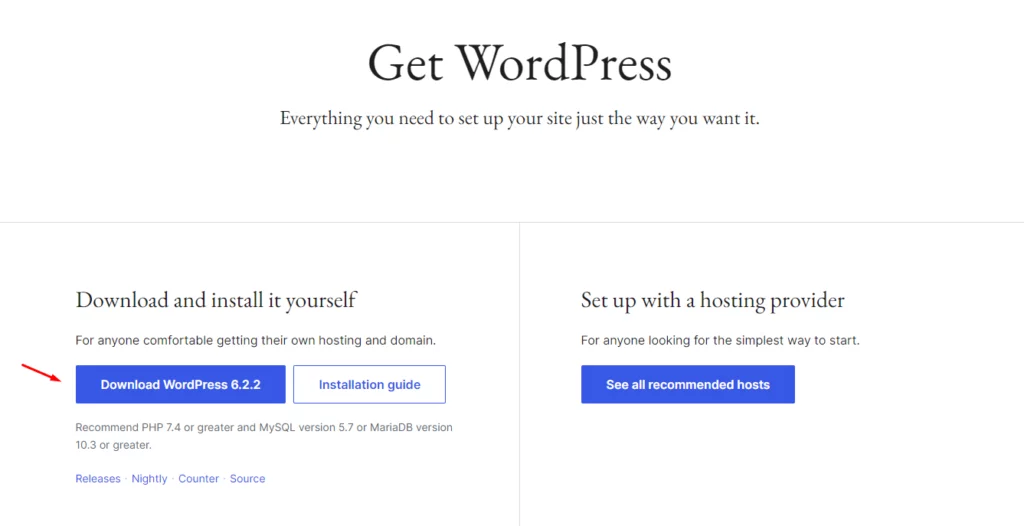
Step 2 Download WordPress
Next, let’s proceed with downloading WordPress:
- Visit the official WordPress website (Download – WordPress.org) to get the latest version of WordPress.
- Click the “Download WordPress 6.2.2” button; the Zip file should be roughly 24 MB in size.
Step 3 Start the Server, Name the folder and Create a Database
- Start the Server
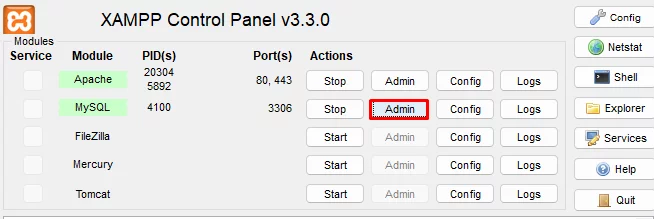
Now that XAMPP is installed, you need two modules to run WordPress locally (on your computer).
- Apache
- MySQl
To install WordPress, click on Actions ‘Start’ for both modules.
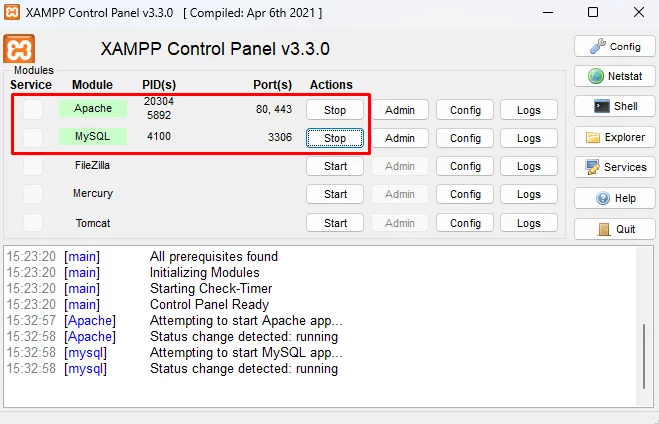
Once the module is started, you can observe that they turn green!
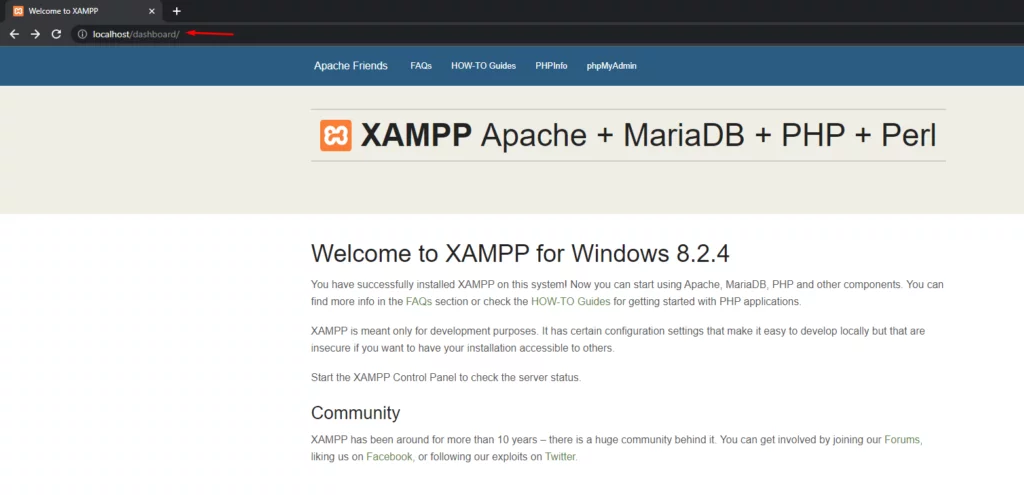
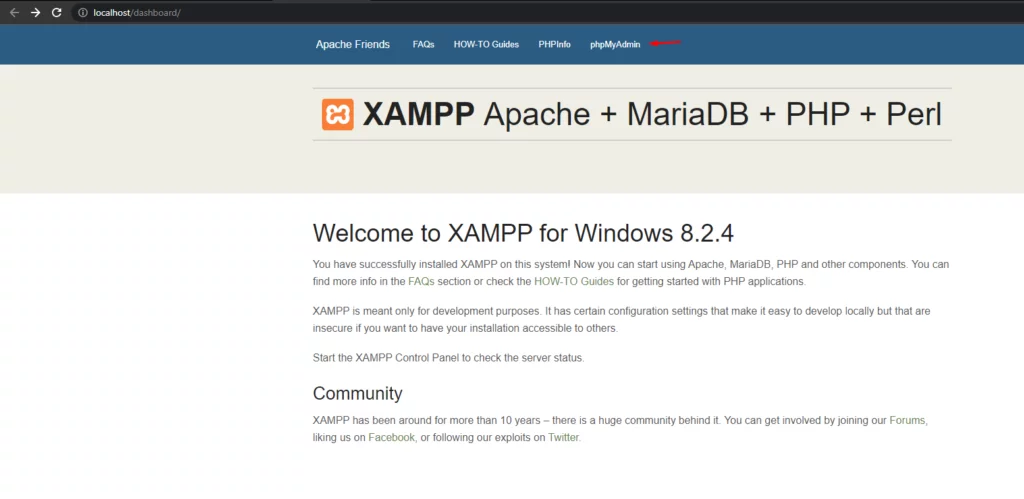
Now you can see your local server by visiting https://localhost/dashboard/ you can see your dashboard.
2. Name the Folder
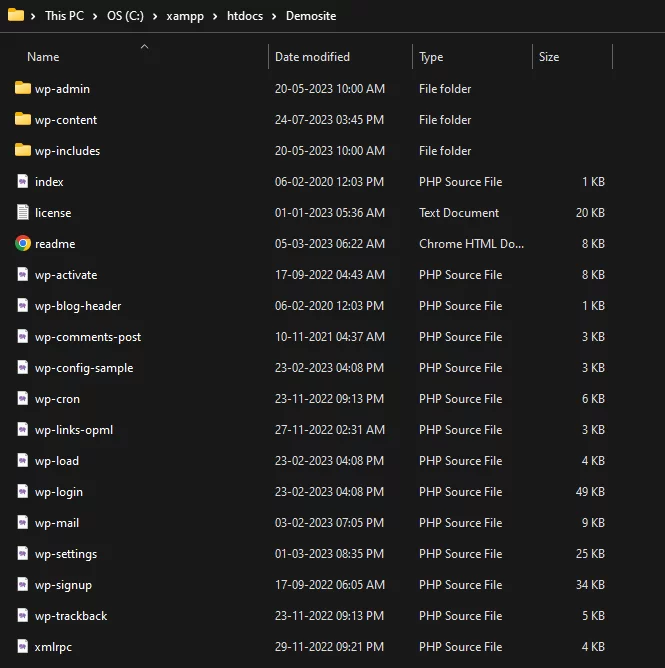
Right after visiting the local server, create a folder named ‘Demosite’ (Any name should be fine) but take it as a mandatory situation to create a folder in XAMPP C:\xampp.
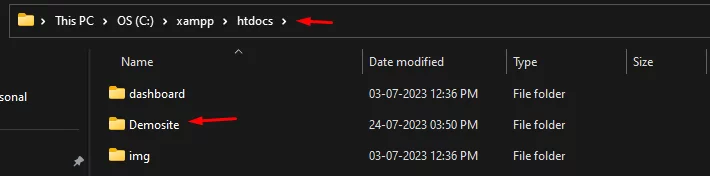
After naming the folder copy and paste WordPress.zip file into that folder ‘Demosite’.
3. Create a Database
The next step is to build a MySQL database for your WordPress installation. There are two ways to access phpMyAdmin, First method being XAMPP control panel ways and the second method is web-based interface for MySQL.
- To do so, navigate to your XAMPP control panel and launch PHPMyAdmin.
- Or go to your https://localhost/dashboard/ dashboard and click on phpmyadmin.
Then, at the top, select Databases:
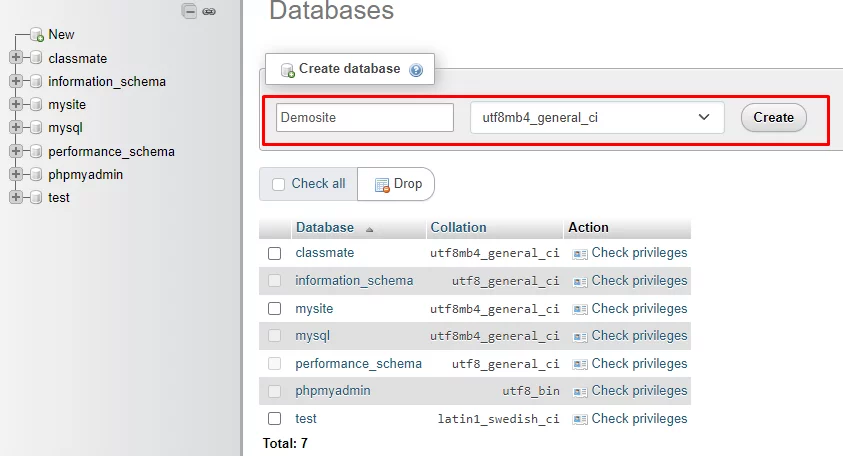
And then click Create after giving your database a name. Your name should be the same as the folder name.
Step 4 Install WordPress Locally
Now it’s time to Install WordPress, and to do so; Visit https://localhost/yourfoldername
(just change the name after ‘/Demosite’)
The only difference between this approach and a standard install is the database information. Enter it as follows:
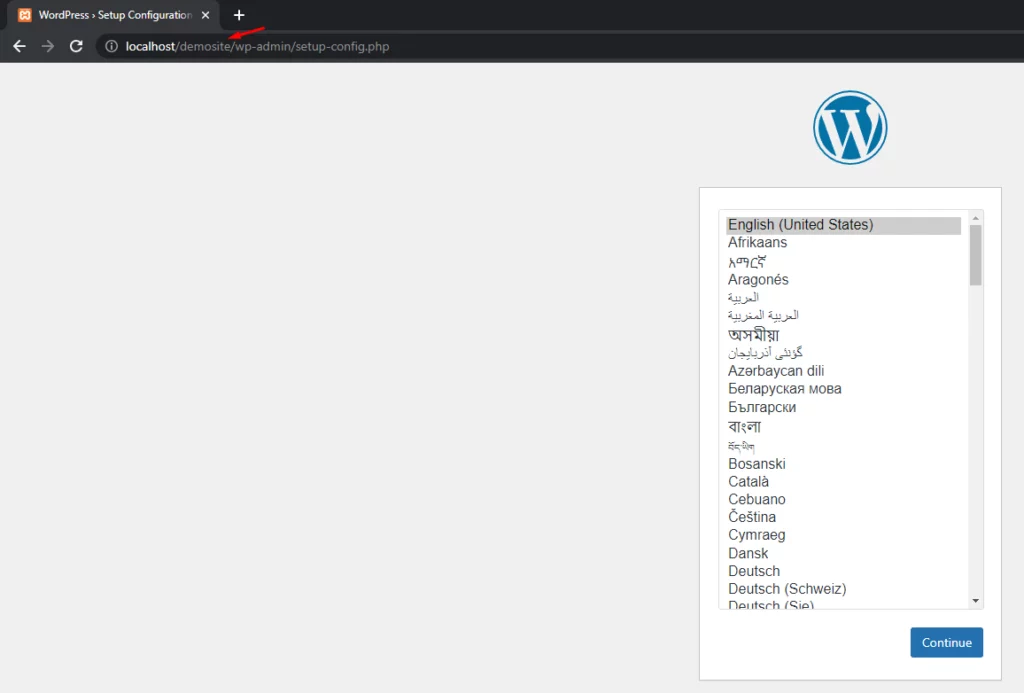
- Select Language (Default English)
After selecting the language, you will see the following options: name as you wish except Username, and leave the rest the same.
- Database Name: Demosite
- Username: root
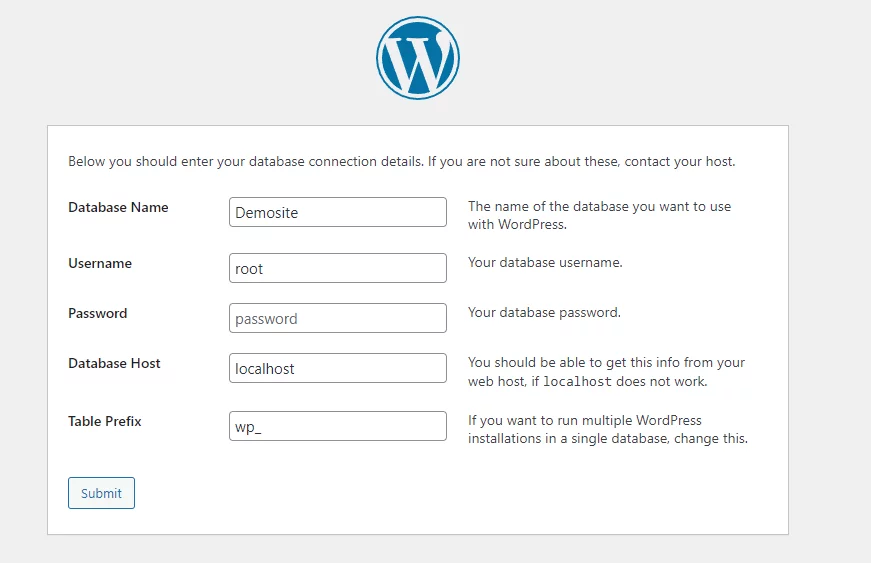
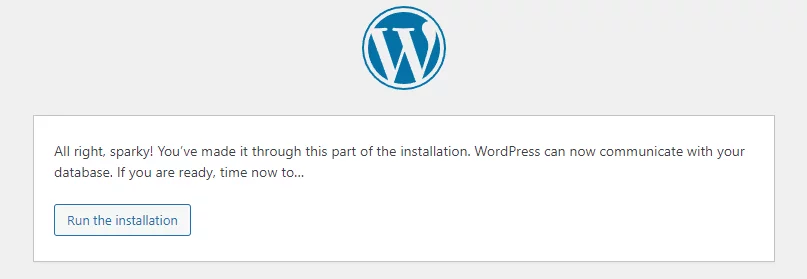
Now click on Submit and Run the installation.
After the installation is complete, give your site a name that suits you. For the username, enter “demosite” (you can change this to match the name of your file). Then, click on “Install WordPress” to get started.
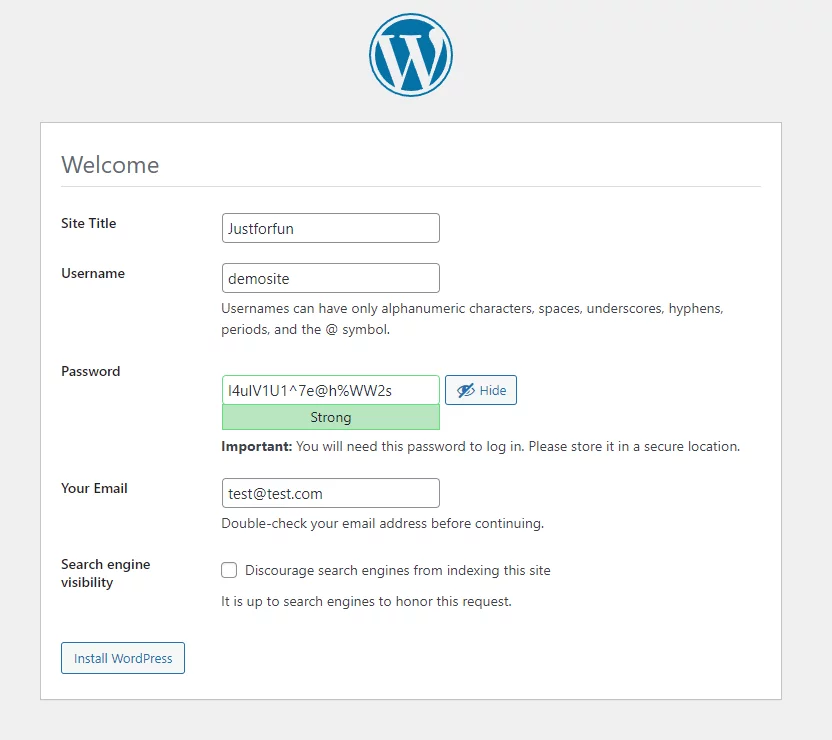
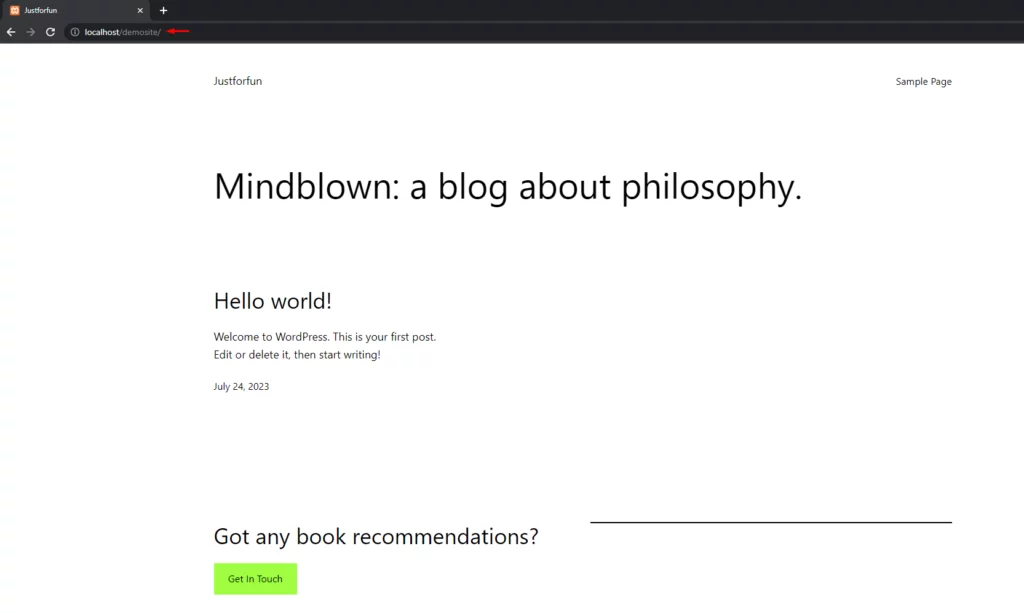
Hooray! You now have successfully created WordPress locally using XAMPP.
Conclusion
Finally, we have guided you through the procedure of setting up WordPress using XAMPP, an open-source software suite that facilitates the establishment of a local web server on your computer. This grants you the opportunity to experiment and develop WordPress websites without any concerns about impacting your live site.
We’ve created a comprehensive, sequential guide for installing XAMPP and WordPress. By adhering to these guidelines, you can build a completely operational WordPress website, which you can then personalize to suit your preferences.
We hope that this guide has been helpful to any inquiries, please don’t hesitate to drop a comment below.
Suggested Read: The Easy Guide To Install WordPress With WAMP
FAQ on XAMPP
What is XAMPP, and why do I need it for WordPress?
XAMPP is an open-source software that provides a local server environment, including Apache, MySQL, PHP, and Perl, essential for running WordPress locally. It allows developers to test and develop websites before deploying them to live servers.
Can I install XAMPP on Mac and Windows?
Yes, XAMPP is compatible with Windows, macOS, Linux, and Solaris, making it accessible for users across different operating systems.
How can I secure my XAMPP installation?
For local development, you can keep the default settings. However, if you want to enhance security, you can configure passwords and restrict external access.
Can I use XAMPP for live websites?
XAMPP is intended primarily for local development and testing. For live websites, it’s recommended to use a production-ready web hosting environment.
What is the difference between XAMPP and WAMP?
XAMPP and WAMP (Windows, Apache, MySQL, PHP) are both software stacks used for web development. The main difference lies in their platform compatibility, with XAMPP being cross-platform, whereas WAMP is designed specifically for Windows.
