
WordPress is a versatile CMS that lets you create and manage websites with ease. One of the key features of WordPress is its navigation structure, which enables you to organize your website’s pages in a hierarchical manner. This hierarchical structure allows for the creation of subpages, which are pages that are nested under a parent page.
Let’s dig more into the concept of subpages in WordPress and discuss why you might want to use it. Whether you are a beginner or an experienced WordPress user, understanding how to create and manage subpages can greatly enhance the organization and navigation of your website. So, let’s dive in and learn how to create a subpage in WordPress!
Introduction to WordPress and its Navigation Structure
WordPress is a popular CMS that powers millions of websites around the world. It presents a user-friendly interface and a great range of features to help you create and administer your website effectively. Understanding the navigation structure of WordPress is crucial to organizing your content and providing a seamless user experience.
In WordPress, the navigation structure is built on a hierarchical system, where pages are organized into parent and child relationships. This hierarchical structure allows you to create a logical and organized website, making it easier for visitors to navigate and find the information they need.
At the core of WordPress navigation is the concept of pages. Pages are static content that provides information about your website or business. They are typically used for important information such as the homepage, about page, services, contact page, landing page, and more. Pages are different from blog posts, which are dynamic and regularly updated.
WordPress allows you to create a hierarchy of pages by assigning a parent page to a subpage. This creates a nested structure where subpages are displayed under their parent page in the navigation menu. Visitors can access these subpages by hovering over or clicking on the parent page.
By utilizing the navigation structure in WordPress, you can effectively organize your website’s content, create intuitive menus, and provide a seamless browsing experience for your visitors. In the next section, we will delve deeper into the concept of a subpages in WordPress and explore its benefits.
Understanding the Concept of a Subpage in WordPress
In WordPress, a subpage refers to a page that is nested under a parent page within the navigation structure. It creates a hierarchical relationship between pages, allowing for a more organized and structured website.
What Are Subpages in WordPress?
A subpage in WordPress is a page that exists under a parent page in the website’s hierarchical structure. It is essentially a child page linked to a parent page, allowing for a more organized and user-friendly website.
Subpages are commonly used to offer additional, detailed information related to a broader topic covered by the parent page. For instance, if your parent page is titled “Services,” you could create subpages such as “Web Design,” “SEO Services,” and “Content Marketing,” each of which provides more specific details about those offerings.
Why Use Subpages in WordPress?
There are several advantages to using subpages on your WordPress site:
- Logical Structure: Subpages help create a clear, logical hierarchy, which makes it easier for users to navigate your site and find relevant information.
- Better Navigation: Grouping related content under a parent page allows visitors to quickly locate the specific information they are looking for, improving the overall user experience.
- Clearer Menus: By using subpages, you can streamline your website’s navigation menu, reducing clutter and creating a more organized and accessible layout.
- SEO Benefits: Search engines like Google value well-structured websites. A clear, hierarchical page setup makes it easier for search engines to crawl your site, which can improve your rankings.
Examples of Subpage Usage
Subpages can be used in a variety of ways, depending on your website’s purpose. Here are a few examples:
- Team Information: On a company site, you could create a parent page called “Our Team” and subpages for each team member, featuring their profiles and roles.ep-by-step process of creating a new subpage in WordPress.
- Business Services: For a service-based business, you might have a “Services” parent page and subpages for each individual service, such as “Web Design,” “SEO,” and “Content Creation.”
- Product Categories: On an e-commerce site, you can create parent pages for different product categories (e.g., “Electronics,” “Clothing,” “Home Goods”) and subpages for specific products under each category.
Creating Hierarchical Structures: How to Create a New Subpage in WordPress
Creating a new subpage in WordPress is a straightforward process that can be done within the WordPress dashboard. In this section, we will guide you through the step-by-step process of creating a new subpage.
Navigating to the Page Creation Section
- Log in to your WordPress admin dashboard. This is typically accessed by adding “/wp-admin” to the end of your website’s URL (e.g., www.yourwebsite.com/wp-admin).
- Once logged in, locate the left-hand menu and find the “Pages” tab. Click on it to access the Pages section.
Creating a New Page
- In the Pages section, click on “Add New” at the top of the page. This will take you to the page editor.

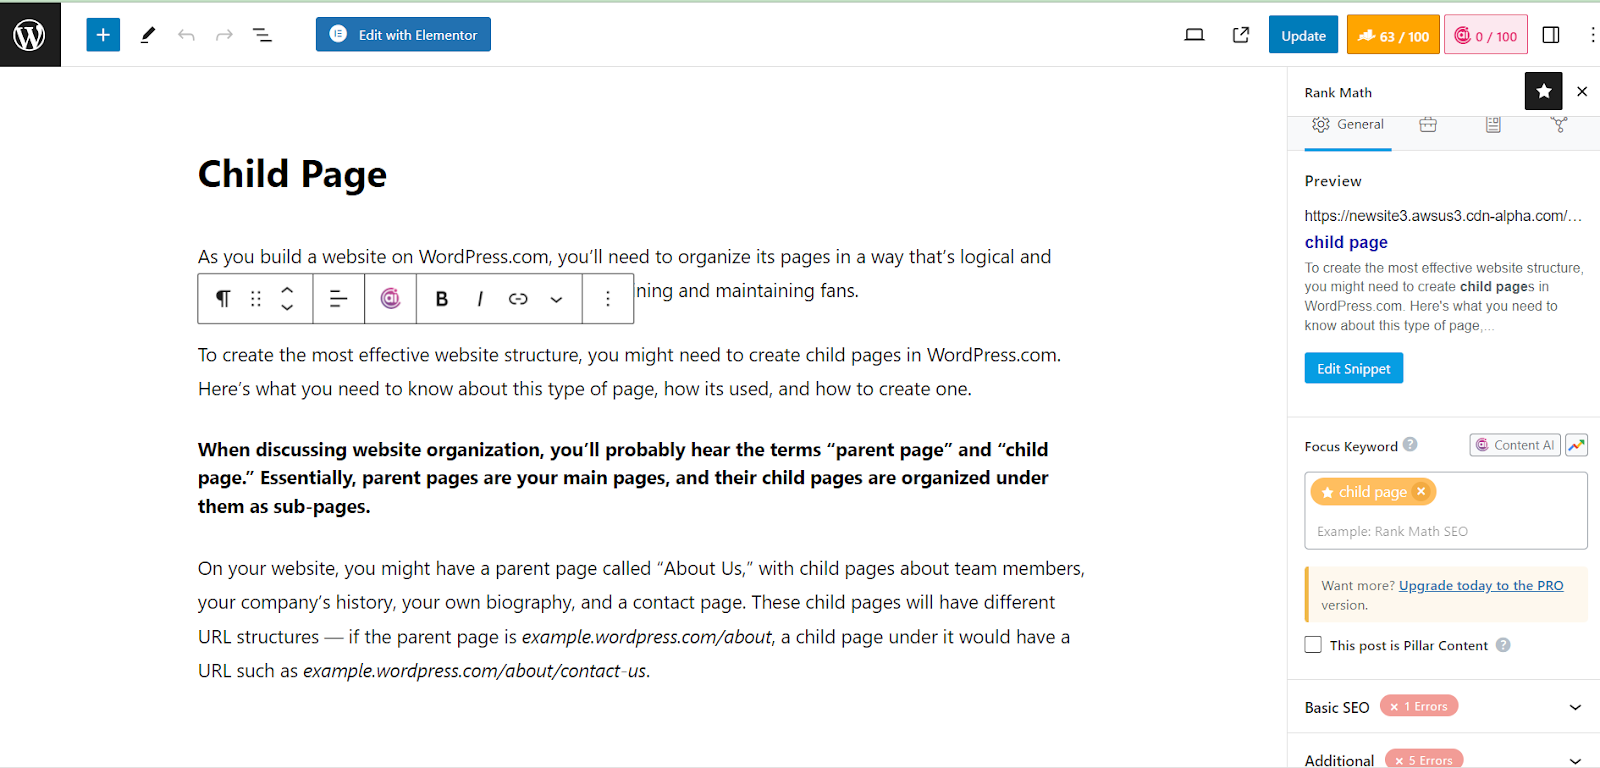
- Enter a title for your new subpage in the provided field. This title will be displayed in the navigation menu and as the heading of the subpage.
- Add content to your subpage using the WordPress editor. You can format text, add images, embed videos, and more. Take your time to create engaging and informative content for your subpage.
Setting the Subpages in WordPress
- On the right-hand side of the page editor, you will find a section titled “Page Attributes.” Within this section, locate the “Parent” dropdown menu.
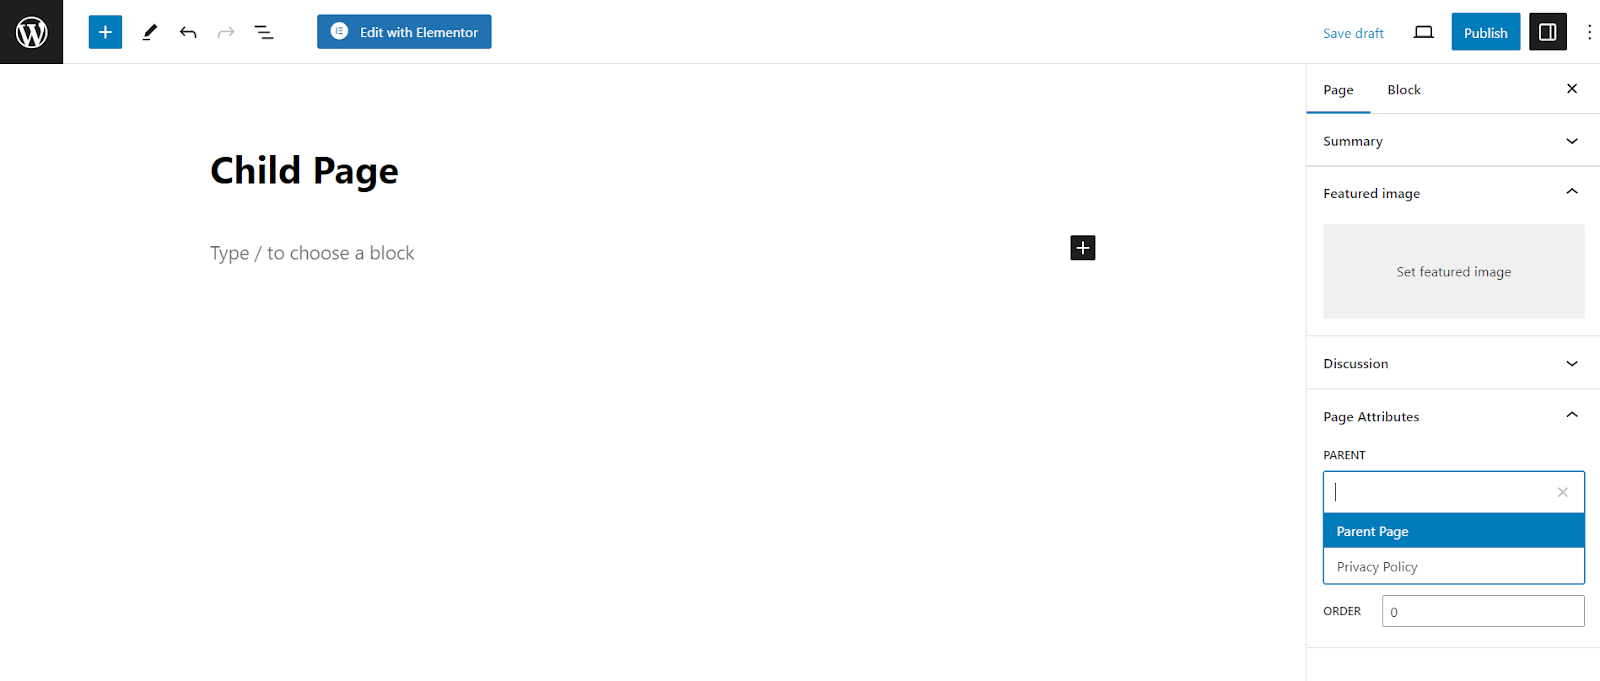
- Tap on the dropdown menu and pick the option of the parent page under which you want to nest your subpage. If you haven’t created a parent page yet, you can refer to our previous section on how to create a new page.
Adding Content to the Subpage in WordPress
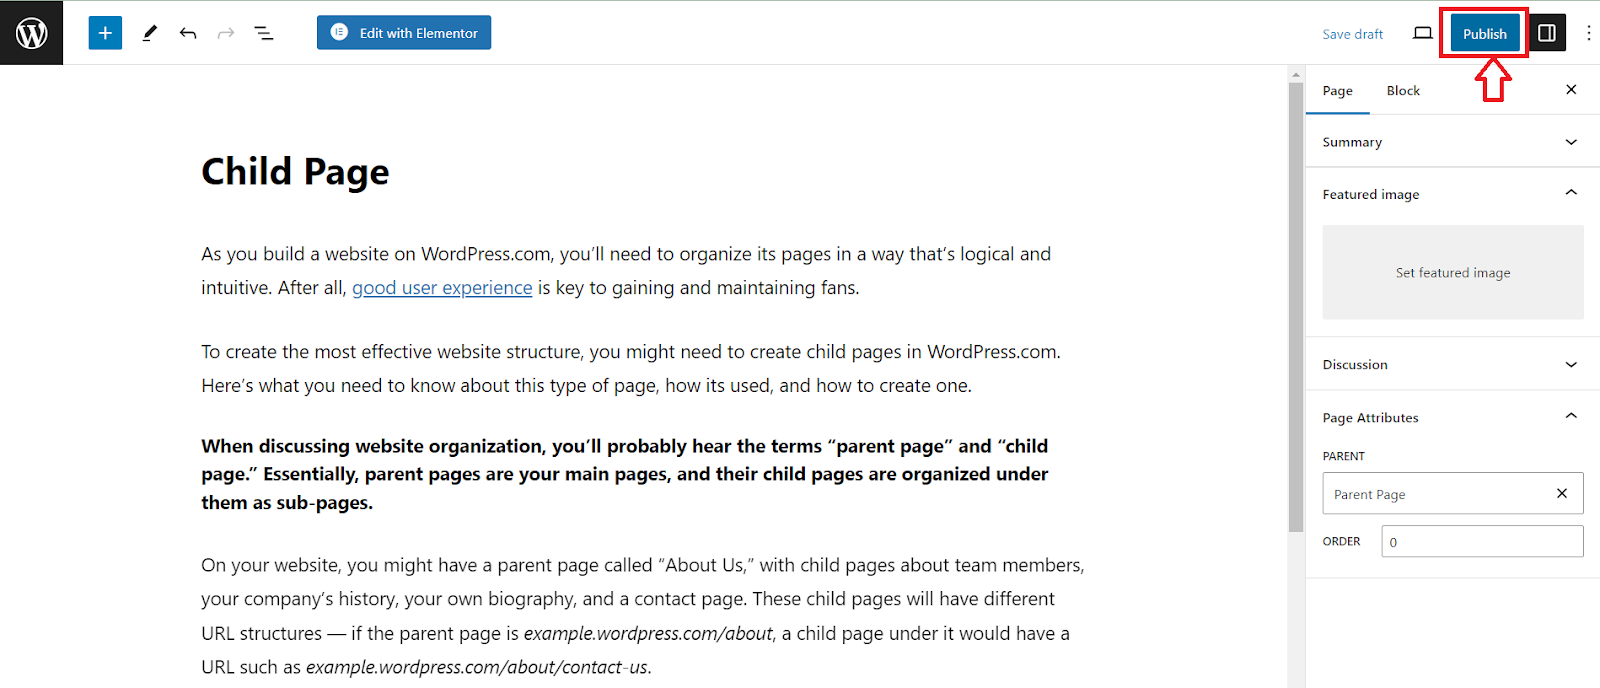
- Once you have set the parent page, you can continue adding content to your subpage. Use the editor to further customize the appearance and structure of your subpage.
- Take advantage of various formatting options, such as headings, bullet points, and blockquotes, to make your content visually appealing and easy to read.
- You can also add media elements like images, videos, and audio files to enhance the visual appeal of your subpage.
- Remember to save your progress regularly by clicking on the “Save Draft” or “Publish” button located in the top right corner of the page editor.
Congratulations! You have successfully created a new subpage in WordPress. In the next section, we will discuss the design and customization options available to make your subpage visually appealing and engaging.
Designing and Customizing Your Subpages in WordPress
Once you have created a subpage in WordPress, it’s time to design and customize it to match your website’s branding and aesthetics. In this section, we will explore various options and tools available in WordPress to help you design and customize your subpage.
Choosing the Right Template for Subpages in WordPress
WordPress presents a wide range of themes and templates that signify the design and layout of your website. To ensure consistency throughout your site, it’s important to choose a theme that provides a suitable template for your subpages in WordPress.
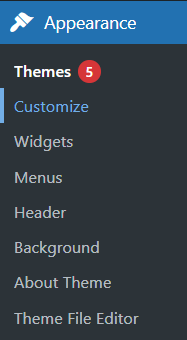
- Navigate to the “Appearance” section in your WordPress dashboard.
- Click on “Themes” to access the theme library.
- Browse through the available themes and select one that aligns with your website’s style and requirements. Pay attention to the templates provided by the theme, ensuring there is a suitable option for subpages.
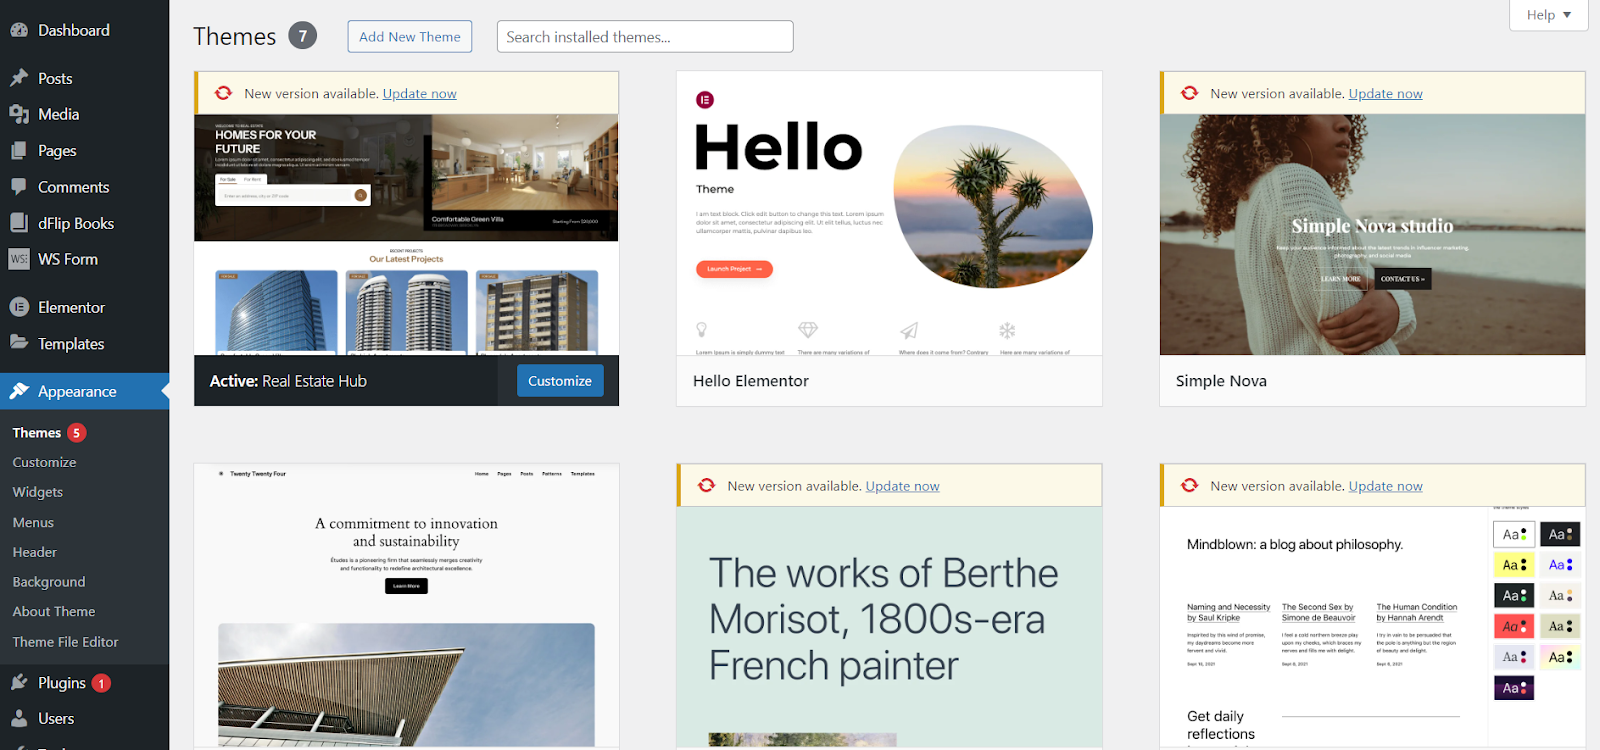
- Install and activate the chosen theme to apply it to your website, including your subpages.
Using WordPress Customizer
WordPress Customizer is a powerful tool that enables you to customize various aspects of your website’s appearance, including your subpages. Here’s how you can use it:
- In the WordPress dashboard, go to the “Appearance” section and click on “Customize.”
- The Customizer will open, displaying a live preview of your website.
- Explore the available customization options, which may vary depending on your chosen theme. Common customization options include colors, fonts, header and footer settings, and more.
- Make the desired changes to customize the appearance of your subpage. Use the live preview to see how the changes affect your subpage in real time.
- Once you are happy with the customization, click on the “Save & Publish” button to apply the changes to your subpage.
Adding Widgets and Plugins
Widgets and plugins widen the functionality of your WordPress website and can be utilized to enhance your subpages. Here are some ways you can utilize widgets and plugins:
- Sidebar Widgets: Many themes offer sidebar areas where you can add widgets. Utilize these widgets to display additional information, such as recent posts, social media icons, search bars, or custom content.
- Page Builder Plugins: Page builder plugins like Elementor or Beaver Builder provide drag-and-drop interfaces to design and customize your subpage layouts. They offer advanced customization options, allowing you to create visually stunning subpages without any coding knowledge.
- Custom Plugins: Depending on your website’s requirements, you may need specific functionality for your subpages. Explore the WordPress plugin repository to find plugins that can help you achieve your desired features.
Remember to regularly update your themes, widgets, and plugins to ensure compatibility and security. With the design and customization options in place, your subpage will now reflect your website’s branding and style.
Also read: How To Create WordPress Custom Widgets
Best Practices to Link Subpages to Parent Pages in WordPress
Managing your subpages effectively is essential for maintaining a well-organized and user-friendly website. In this section, we will discuss some best practices to help you manage your subpages in WordPress.
1. Keep Your Subpages in WordPress Organized
- Logical Hierarchy: Plan and create a clear hierarchy for your subpages. Ensure that each subpage is placed under the appropriate parent page, creating a logical structure that makes sense to your visitors.
- Clear Naming Conventions: Use descriptive and concise titles for your subpages. This helps visitors understand the content of each subpage and makes it easier for them to navigate.
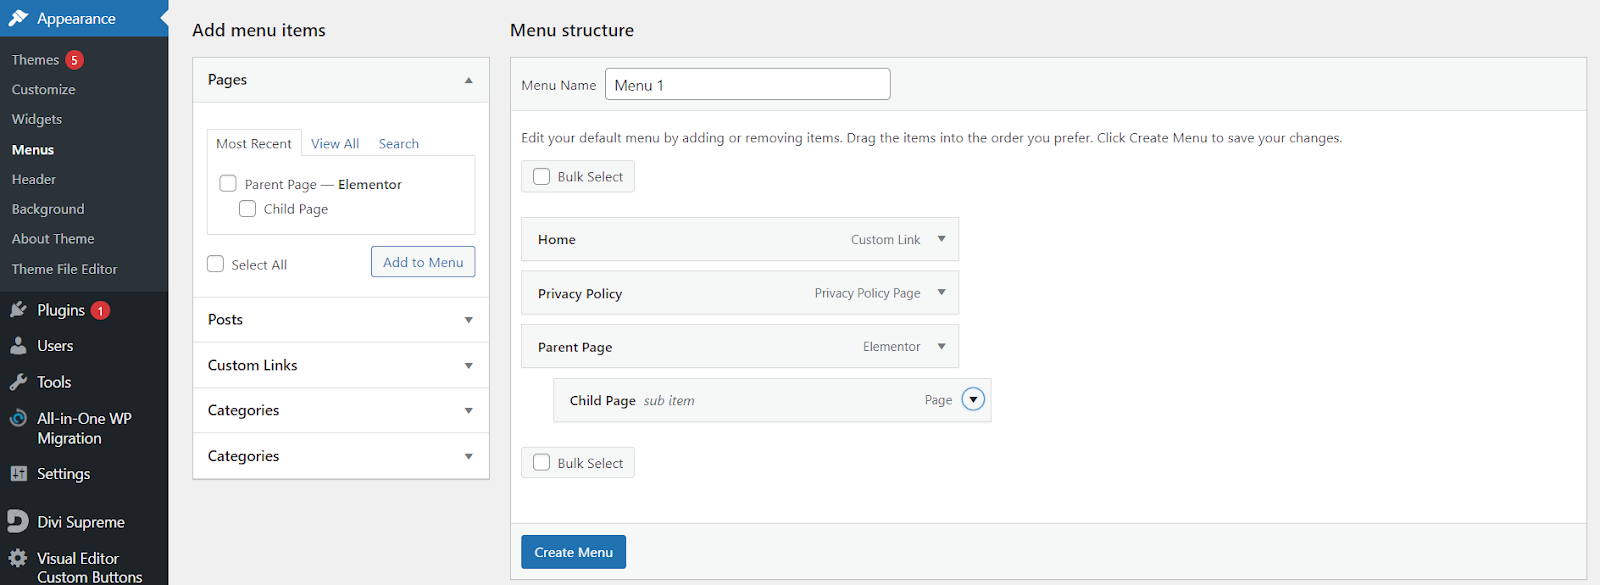
- Menu Navigation: Review and update your website’s navigation menu to include your subpages. Make sure that the menu structure is intuitive and simple to navigate, allowing visitors to find the information they need without confusion.
2. Update Your Subpages in WordPress Regularly
- Content Maintenance: Regularly review and update the content of your subpages to ensure accuracy and relevance. Make it gated content for optimized and structured data to be displayed on your website. Outdated information can negatively impact user experience and credibility.
- Add Fresh Content: Consider adding new content, such as blog posts or announcements, to your subpages to keep them engaging and informative. This helps to attract and retain visitors.
- Call-to-Action (CTA): Incorporate relevant CTAs within your subpages to guide visitors towards desired actions, such as signing up for a newsletter, contacting you for more information, or making a purchase.
3. Ensuring Subpages in WordPress are SEO Optimized
- Keyword Research: Conduct keyword research using specific tools to identify relevant keywords for your subpages. Incorporate these keywords naturally into the content, meta tags, headings, and URLs to improve search engine rankings and visibility.
- Meta Tags and Descriptions: Optimize the meta tags and descriptions of your subpages to accurately reflect the content and lure users to click on search engine results.
- Internal Linking: Utilize internal linking by linking your subpages to relevant parent pages or other related subpages. This improves website navigation and helps search engines understand the hierarchy and relationships between your pages.
- Page Speed Optimization: Ensure that your subpages load quickly by optimizing images, minimizing code, and utilizing caching plugins. Fast-loading subpages improve user experience and can positively impact search engine rankings.
Customizing Your WordPress Site: Using Subpages to Improve Structure
The ability to create subpages in WordPress is a powerful tool that enables you to establish a clear, hierarchical content structure. By organizing your pages into parent-child relationships, you can deliver a smoother and more intuitive navigation experience for your visitors.
Now that you are equipped with the skills to create and manage subpages, you’re on your way to building a well-organized and user-friendly site. If you need additional support or have any further questions as you work with WordPress, there are countless resources available within the WordPress community, from tutorials to forums and official documentation.
If you’re looking for reliable and high-performance hosting for your WordPress website, look no further than Nestify. With Nestify’s fast, secure, and scalable hosting services tailored specifically for WordPress, you can ensure your website runs smoothly, even as your traffic grows. Get started with Nestify today and experience the difference in speed and reliability.
Start with Nestify now and supercharge your WordPress website’s performance!
FAQs on Building an Easy-to-Navigate WordPress Website
Do subpages automatically show up in my navigation menu?
Subpages will appear under their parent page in the site’s navigation menu if the theme supports hierarchical page menus. In most themes, the subpages will automatically appear in a dropdown menu when you hover over the parent page in the navigation bar. If not, you may need to manually add them through the “Appearance” > “Menus” section of the WordPress dashboard.
Why should I use subpages instead of regular pages?
Subpages allow you to organize your content into a logical hierarchy, which helps both users and search engines find information more efficiently. This structure creates cleaner, more concise navigation menus and improves the overall user experience by grouping related content together.
Can I change the parent of a subpage later on?
Yes, you can change the parent of a subpage at any time. Simply edit the page, select a new parent from the “Parent” dropdown menu in the page editor, and save your changes. The page will then be reassigned under the new parent page in the navigation structure.
Are subpages useful for SEO?
Yes, subpages can be beneficial for SEO because they help create a logical content hierarchy that is easier for search engines to crawl. Well-organized pages with clear parent-child relationships make it simpler for search engines to index your content and understand the structure of your site, which can contribute to better search engine rankings.
