
Are you looking to improve the functionality and design of your WordPress website? Look no further than Divi theme, a comprehensive WordPress theme that offers endless customization possibilities. In this blog, we will guide you through the process of adding Divi to your WordPress site, from understanding the importance of choosing the right theme to customizing your site’s layout and design. We will also provide you with valuable tips on maintaining your Divi-powered site, including how to update Divi, back up your site, and optimize its performance. So, let’s dive in and discover how to add Divi to WordPress and take your website to the next level!
Understanding Divi: A Comprehensive WordPress Theme

Divi is not just your average WordPress theme. It is a powerful and versatile theme that allows you to create stunning websites without any coding knowledge. With its drag-and-drop functionality and an array of pre-designed templates, the Divi theme empowers you to unleash your creativity and build a website that truly reflects your brand.
Why Choose Divi Theme?
There are several reasons why Divi stands out among other WordPress themes:
- Intuitive Visual Builder: Divi comes with a visual builder that allows you to craft your website in real-time. You can simply drag and drop elements, customize their appearance, and see the changes instantly.
- Endless Customization Options: Divi offers a wide range of customization options, giving you control over every aspect of your website. From fonts and colors to layout and spacing, you can customize it all to match your vision.
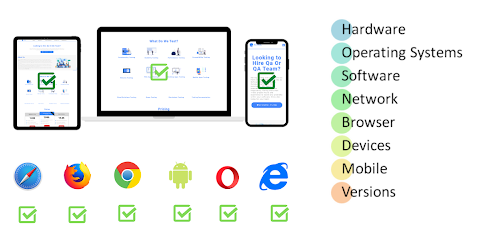
- Responsive Design: Divi ensures that your website looks great on any device. It automatically adjusts the layout and design elements to provide a seamless browsing experience for your visitors.
- Pre-designed Templates: Divi theme comes with a vast library of professionally designed templates for multiple industries and purposes. You can select a template that fulfills your demands and customize it further to make it your own.
- Active Community and Support: Divi has a large and active user community, which means you have access to a wealth of documents, tutorials, and support. If you ever run into any issues or need guidance, you can rely on the Divi community for assistance.
Exploring Divi Theme’s Key Features
To understand Divi better, let’s take a closer look at some of its key features:
- Divi Builder: The Divi Builder is the backbone of Divi’s customization capabilities. It lets you create complex page layouts by dragging and dropping elements like text, images, buttons, and more. You can easily arrange and customize these elements to build unique and visually appealing pages.
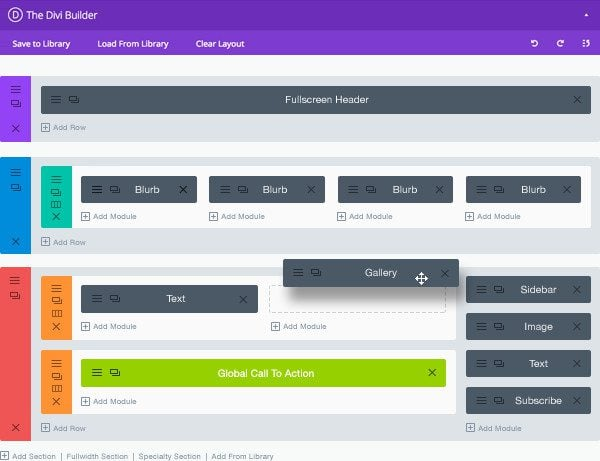
- Layout Library: Divi provides a vast collection of pre-designed design layouts that you can import and use as a starting point for your website. Whether you need a landing page, portfolio, blog, or e-commerce layout, the layout library has you covered.
- Module Options: Divi offers a wide range of modules that you can include in your website pages to add functionality and improvise the user experience. These modules include sliders, galleries, contact forms, testimonials, pricing tables, and more.
- Global Elements: With Divi, you can create global elements that can be reused across multiple pages. This feature allows you to update a single element, such as a header or footer, and have the changes reflected across your entire website.
- Theme Customizer: Divi provides a theme customizer that allows you to tweak various aspects of your website’s appearance. You can modify colors, fonts, header styles, background images, and more, giving your site a unique and cohesive look.
Now that we have a solid understanding of Divi and its features, let’s move on to the next section, where we will prepare your WordPress site for the installation of Divi.
Preparation: Setting Up Your WordPress Site
Before diving into the installation of Divi, it is crucial to make sure that your WordPress site is properly set up and ready to accommodate this powerful theme. This section will guide you through the necessary preparations to optimize your site for a seamless integration with Divi.
Why Choosing the Right Theme is Important
Cherry-picking the right WordPress theme for your website is a crucial decision that can greatly impact your website’s performance, design, and functionality. When it comes to Divi, it is essential to understand the benefits and considerations involved in choosing this theme.
Getting WordPress Ready for Divi
To ensure a smooth integration, there are a few steps you should take to prepare your WordPress site for Divi:
- WordPress Updates: Before installing Divi, make sure your WordPress installation is up to date. Check for any available updates by navigating to the dashboard and clicking on “Updates” in the sidebar. If there are updates available, proceed with the update process.
- Theme Compatibility: Verify that your current theme is compatible with Divi theme. Some themes may conflict with Divi’s functionalities or styling. If you are using a different theme, consider switching to a default WordPress theme temporarily or consult the Divi documentation to ensure compatibility.
- Plugin Compatibility: Review your active plugins and ensure they are compatible with Divi. Incompatible plugins can cause conflicts and affect the functionality of your website. It is recommended to disable any unnecessary plugins or reach out to the plugin developers for compatibility information.
- Backup Your Site: It is always wise to create a full-proof backup of your WordPress website before making any significant changes. This ensures that you have a restore point in case anything goes wrong during the installation process. There are various backup plugins available, such as UpdraftPlus or BackupBuddy, that can assist you in creating a complete backup of your site.
Requirements for Installing Divi
Before proceeding with the installation, it is important to ensure that your WordPress site meets the minimum requirements for running Divi:
- WordPress Version: Divi is compatible with the latest version of WordPress. Make sure your WordPress installation is up to date to ensure compatibility with Divi.
- Server Requirements: Divi does not have any specific server requirements beyond the standard requirements for running WordPress. However, it is recommended to have a reliable hosting provider that meets the recommended WordPress hosting environment.
- Browser Compatibility: Divi is designed to be compatible with modern web browsers like Chrome, Firefox, Safari, and Microsoft Edge. The pre-requisite is to use an up-to-date browser for the best Divi experience.
Now that you have prepared your WordPress site for Divi, it’s time to move on to the installation process. In the next section, we will guide you through the steps of downloading Divi and adding it to your WordPress site.
How to Install Divi on WordPress
Now that you have prepared your WordPress site for Divi, it’s time to install this powerful theme and unlock its full potential. In this section, we will walk you through the process of installing Divi on your WordPress site, ensuring seamless integration and a smooth transition to this versatile theme.
Where to Download Divi
To get started, you will need to download the Divi theme files. Follow these steps to upload the latest version of Divi:
- Visit the Elegant Themes website: Go to the official website of Elegant Themes, the creators of Divi.
- Navigate to the Divi product page: Once on the Elegant Themes website, navigate to the Divi product page. You can either search for “Divi” in the search bar or find it under the “Themes” section on the website.
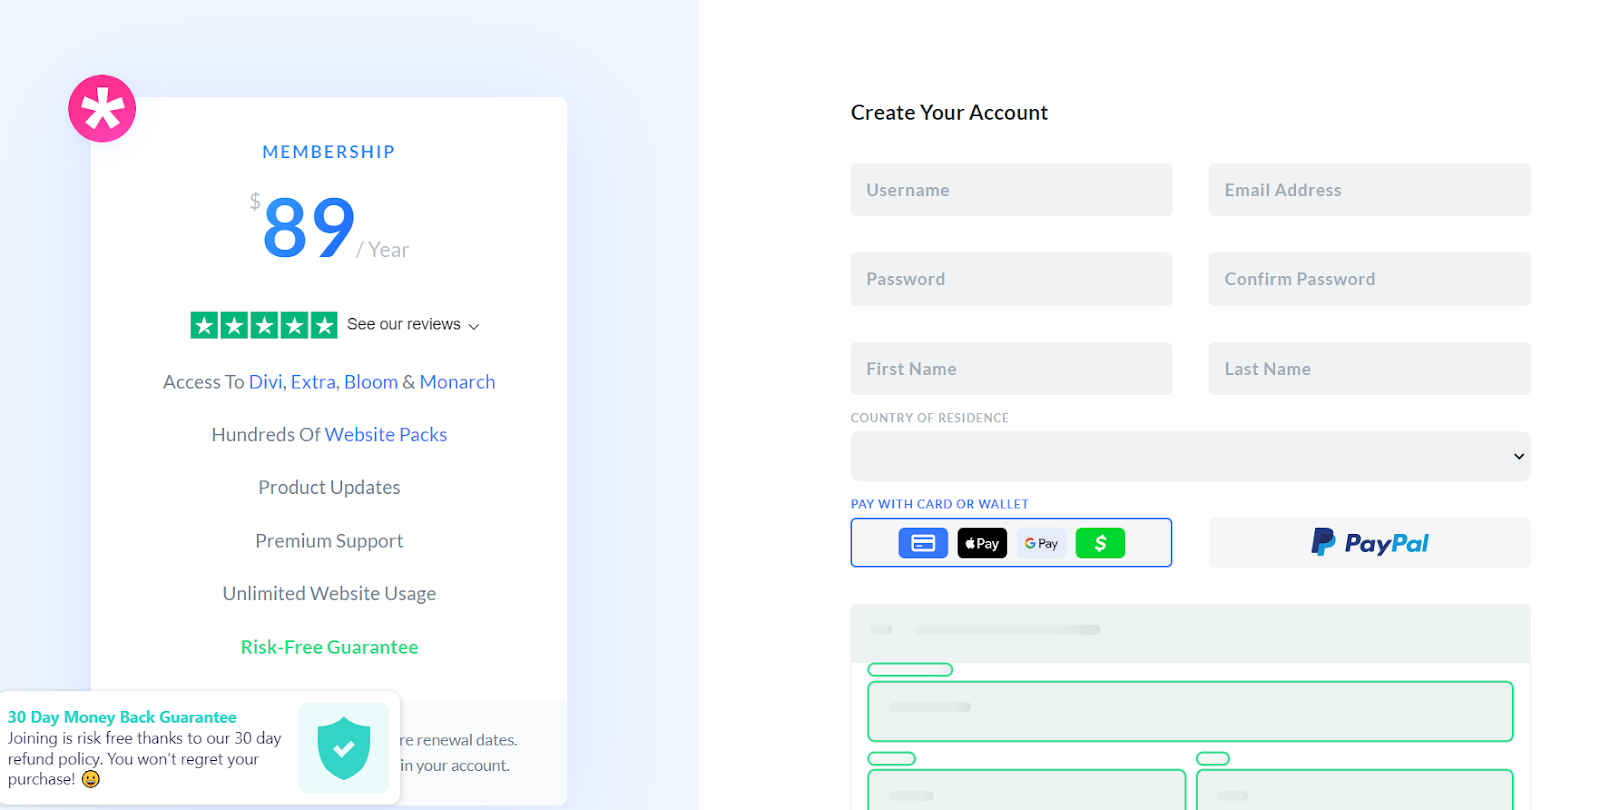
- Choose a subscription plan: Elegant Themes offers different subscription plans that provide access to Divi and its other themes and plugins. Select the plan that best suits your needs and proceed to create an account or log in if you already have one.
- Download the Divi theme: After completing the subscription process, you will gain access to the Elegant Themes members area. From there, locate the Divi theme and click on the download button to save the theme files to your computer.
Process of Installing Divi Theme
Now that you have downloaded the Divi theme files, it’s time to install Divi on your WordPress site. Follow these steps to complete the installation process:
- Enter your WordPress dashboard: Access the admin area of your WordPress site by entering your login credentials.
- Navigate to the Themes section: In the WordPress dashboard on the left, go to “Appearance” and click on “Themes” in the sidebar.
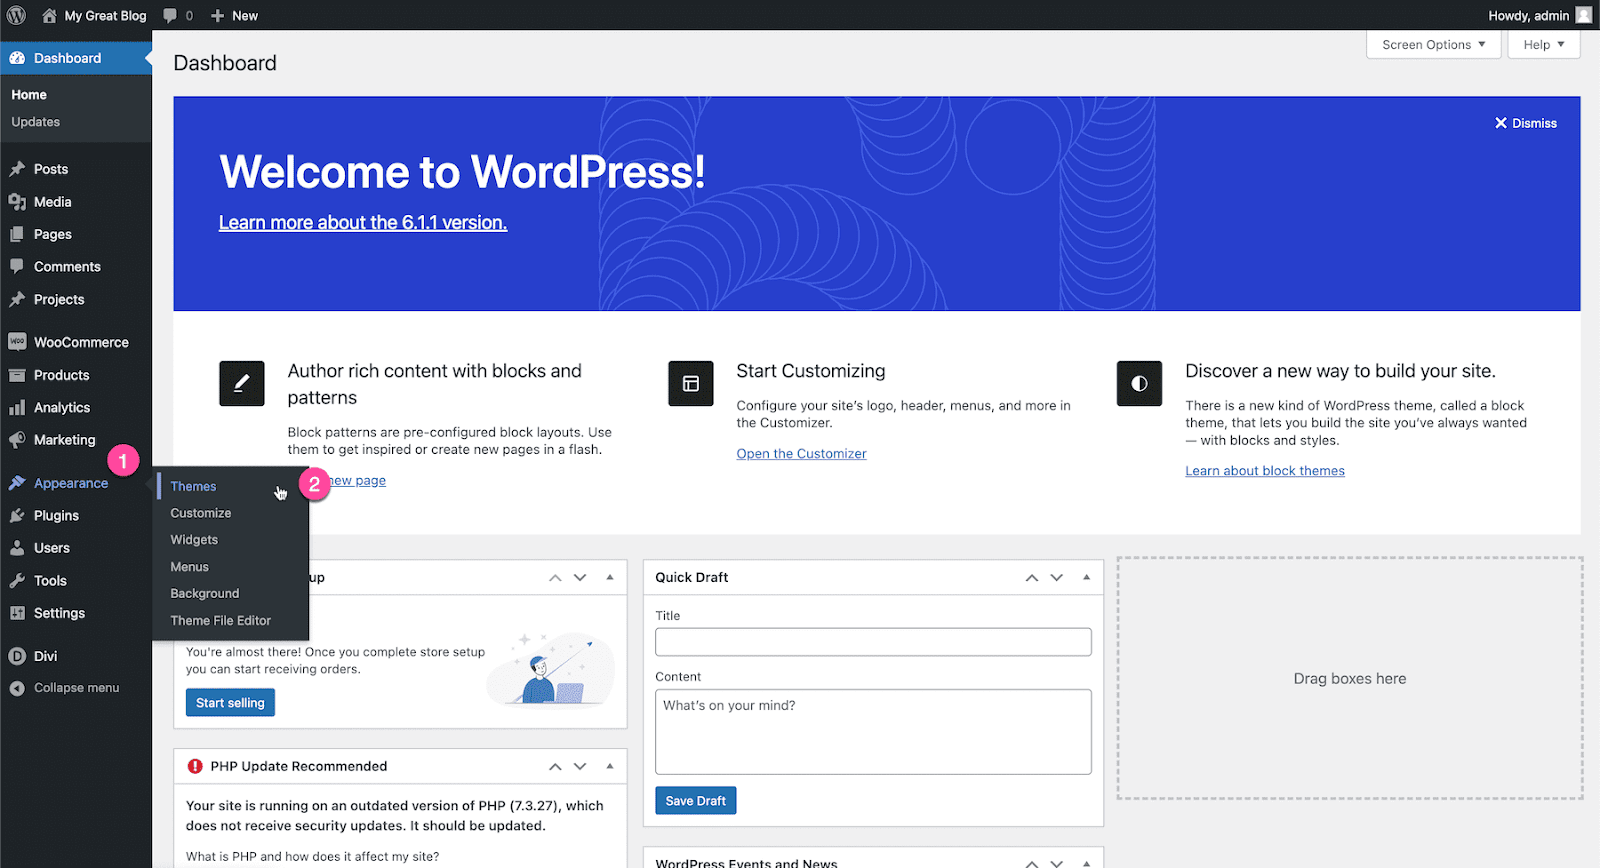
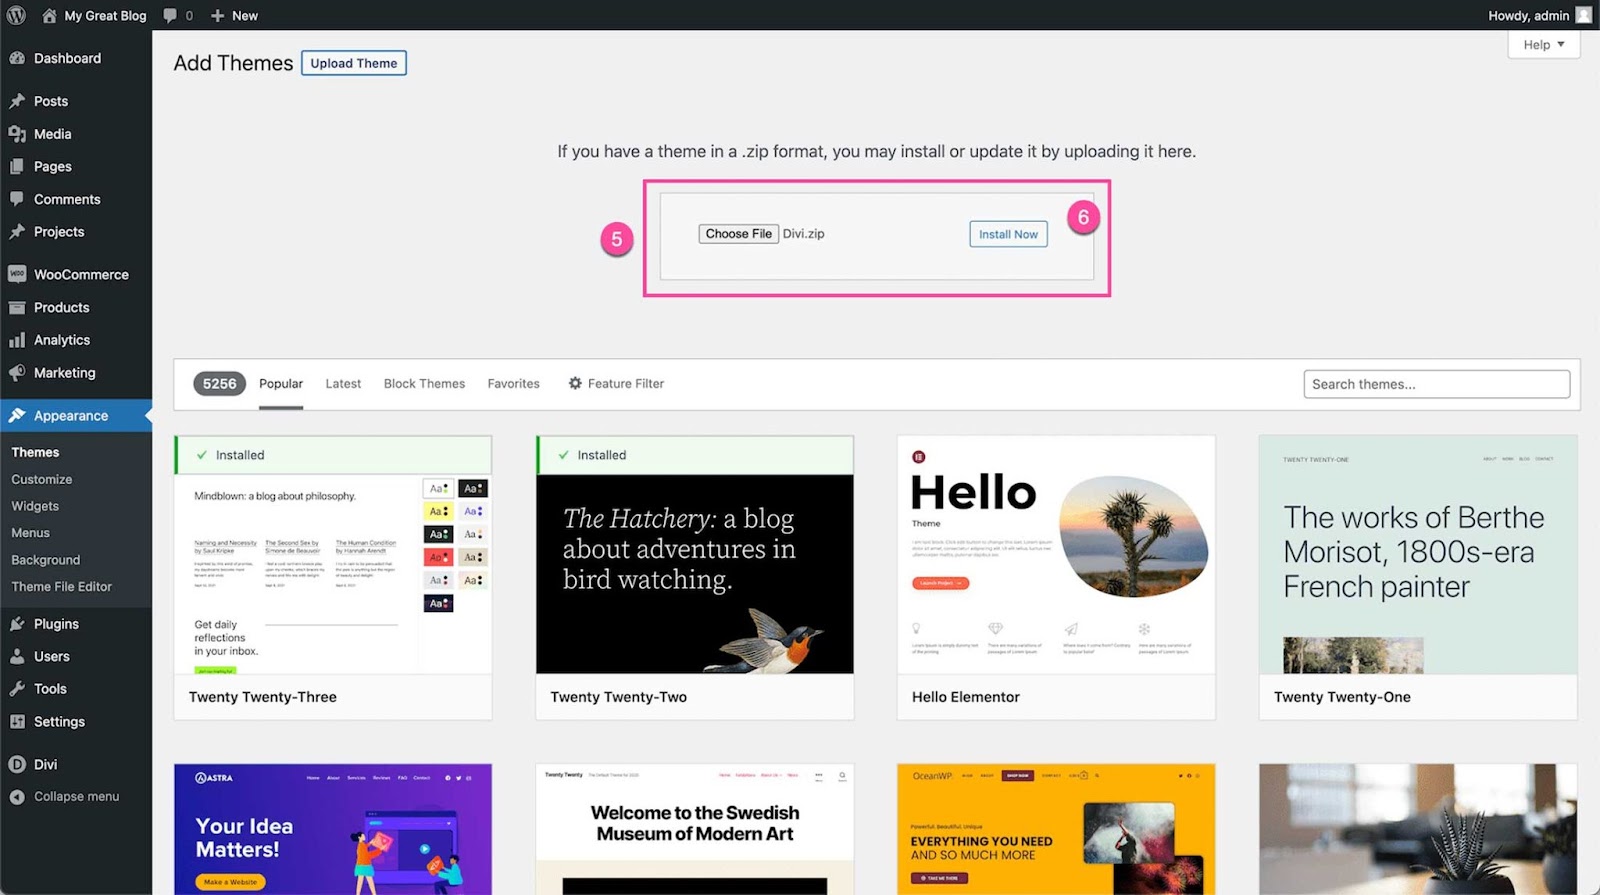
- Add New Theme: On the Themes page, search for the “Add New” button at the top of the screen.

- Upload the Divi theme: Click on the “Upload Theme” button and select the Divi theme files you downloaded earlier. Once chosen, click on the “Install Now” button.
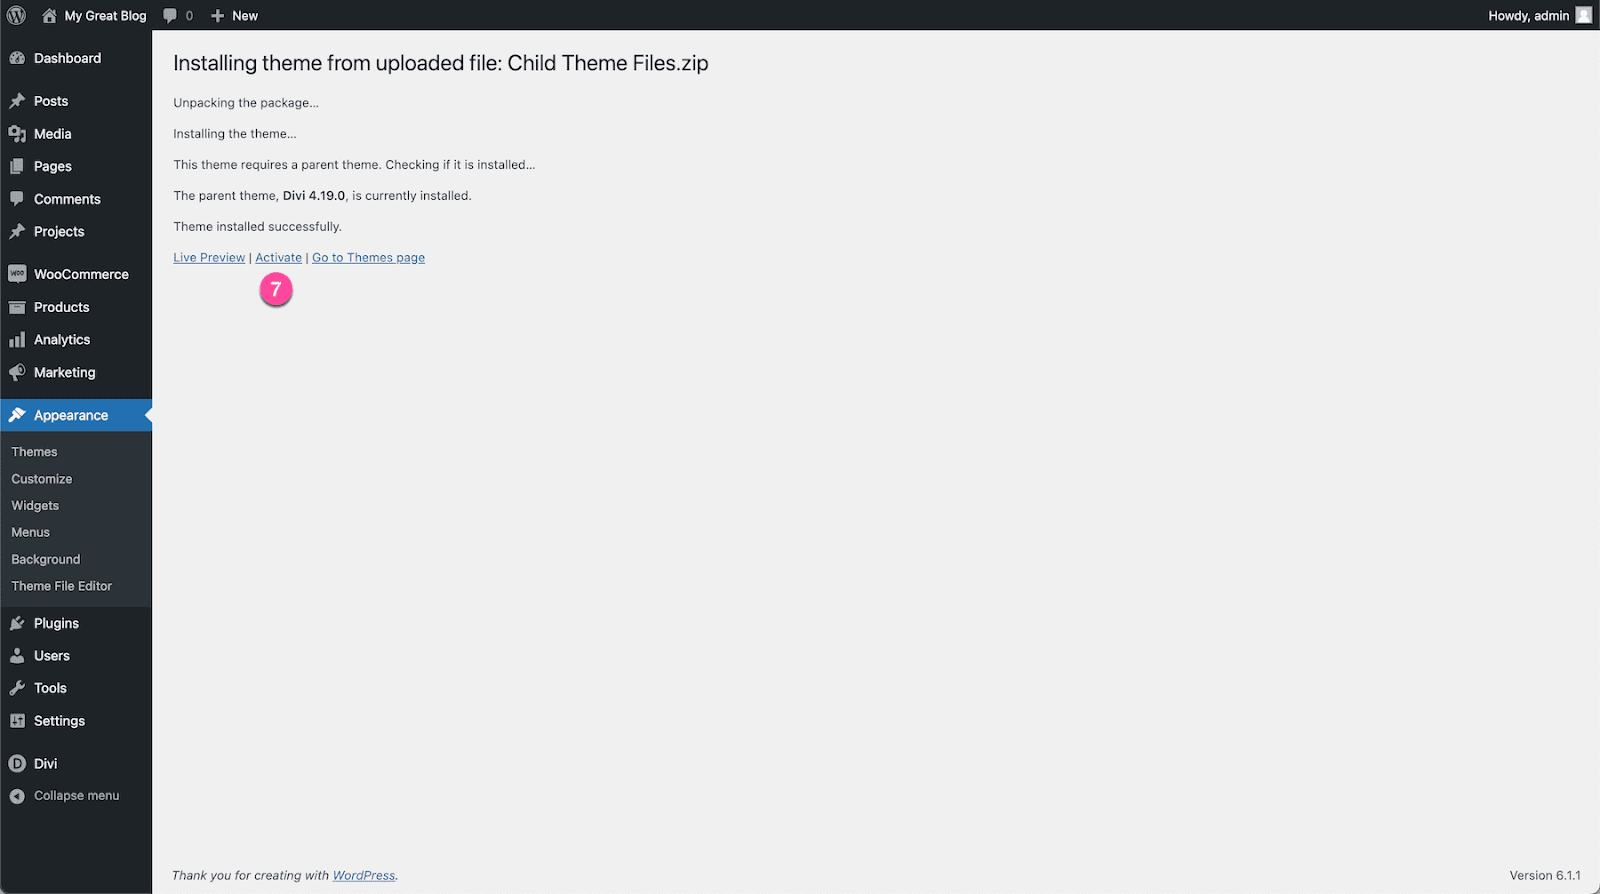
- Activate Divi: After the installation process is complete, click on “Activate” to activate the Divi theme on your WordPress site.
6. Download the plugin: You need to download the Divi builder plugin to customize your website.

Congratulations! You have successfully installed Divi on your WordPress site. Now, it’s time to explore the powerful customization options that Divi offers. In the next section, we will delve into the Divi Builder and guide you through the process of customizing your theme and layout.
Maintaining Your Divi-Powered Site
Once you have customized your website with Divi and launched it to the world, it’s important to maintain and optimize your site to ensure its smooth operation and optimal performance.
How to Update Divi Theme
Regularly updating Divi is crucial to benefit from the latest elements of design, bug fixes, and security enhancements. Follow these steps to update Divi:
- Backup Your Site: Before performing any updates, it is firstly recommended to create a backup of your website. This ensures that you have a restore point in case any wrongdoings happen during the update process.
- Check for Updates: In your WordPress dashboard, navigate to “Appearance” > “Themes” and locate the Divi theme. If an update is available, you will see a notification. Click on the update button to commence the update process.
- Update Divi: WordPress will begin downloading and installing the latest version of Divi. Once the update is complete, you will receive a notification confirming the successful update. Make sure to review your website after the update to ensure everything is functioning as expected.
Backing Up Your Site
Regularly backing up your Divi site is essential to safeguard your website’s data and content. In case of any unforeseen circumstances or website issues, having a recent backup gives you peace of mind. Here are some backup options:
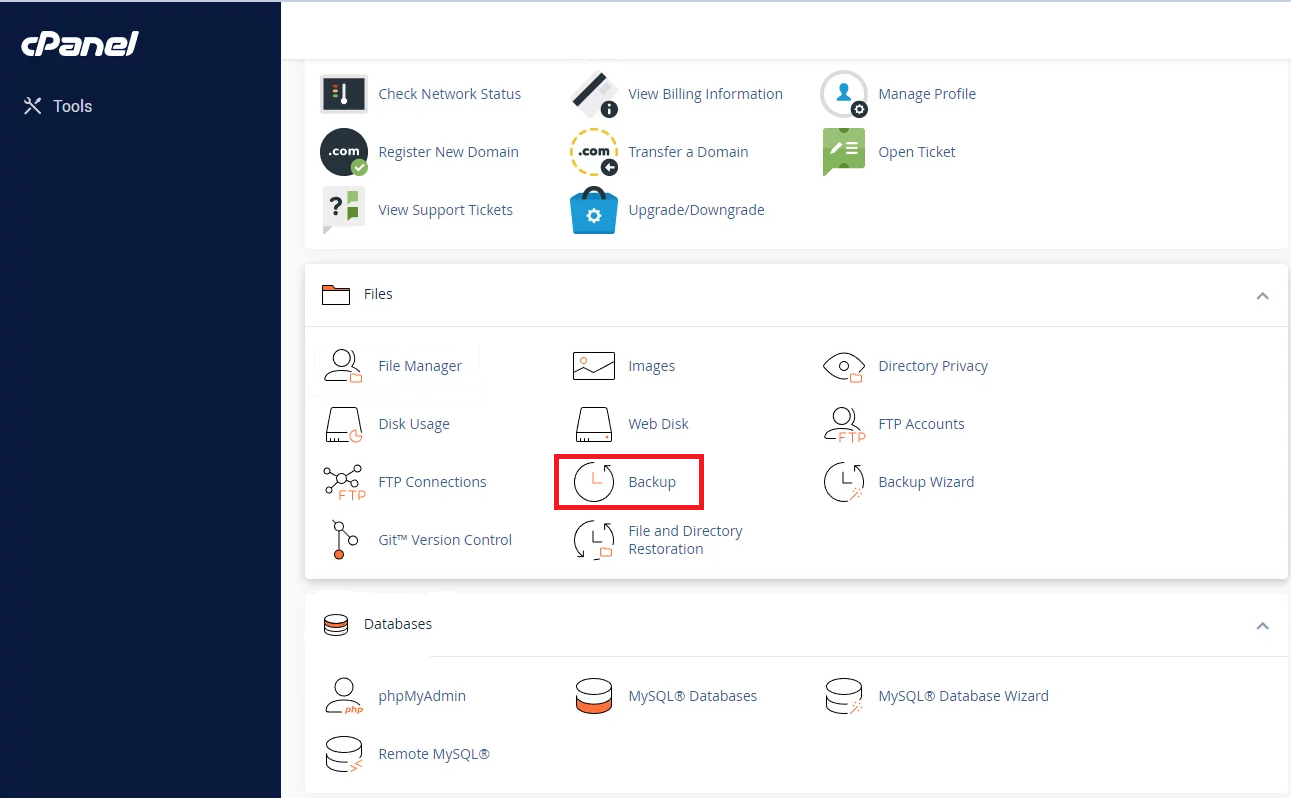
- Manual Backup: It is a tedious process to manually back up your website by exporting the WordPress database using a tool like phpMyAdmin and downloading all your site files using an FTP client. This process demands technical knowledge and can be time-consuming.
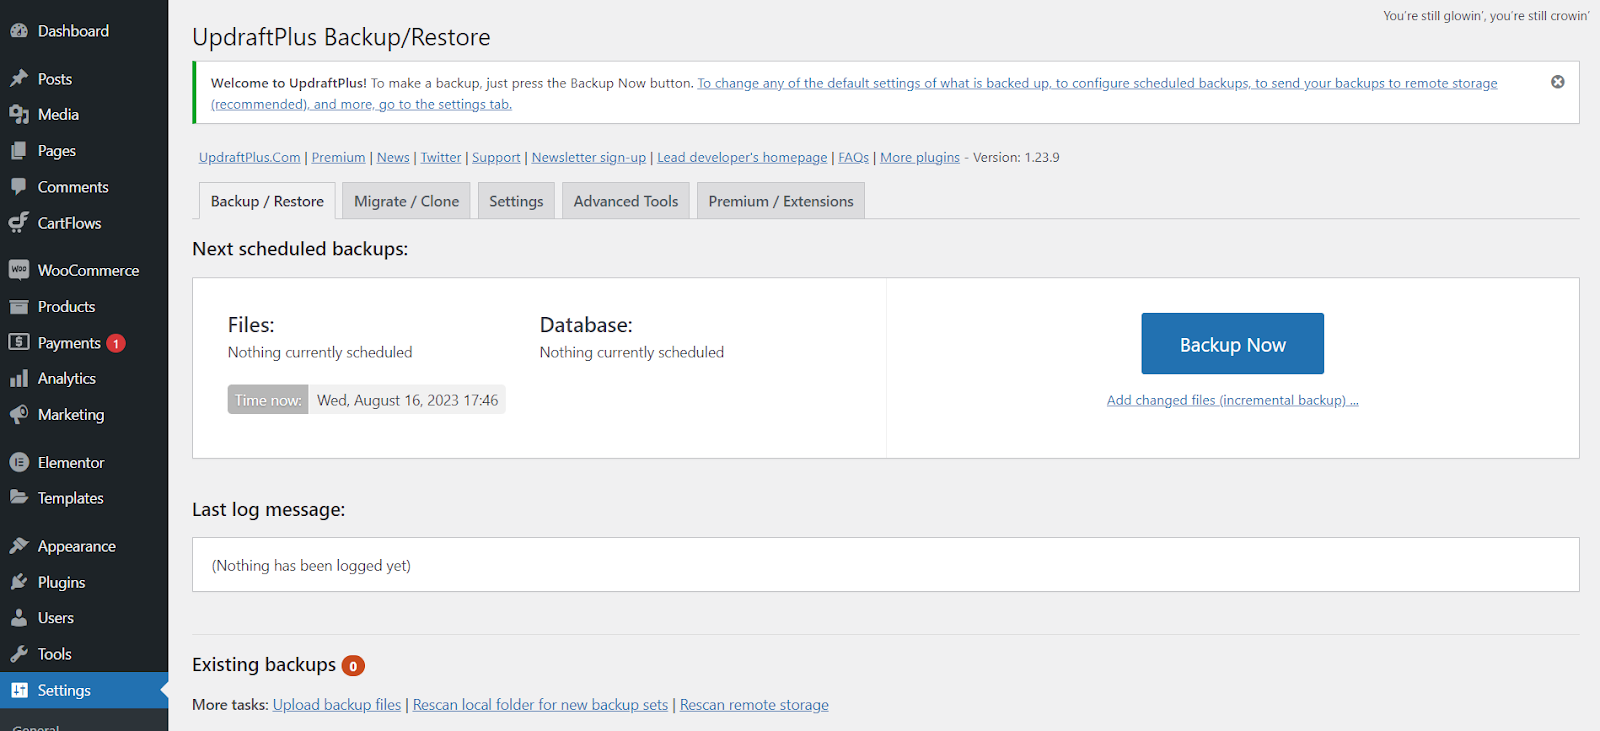
- Backup Plugins: There are several backup plugins available, such as UpdraftPlus, BackupBuddy, and VaultPress, that simplify the backup process. These plugins permit you to schedule automatic backups, store them in remote locations, and easily restore your site if needed.
- Managed WordPress Hosting: Some managed WordPress hosting providers offer built-in backup solutions. Check with your hosting provider to see if they offer automatic backups and what options are available for restoring your site.
Regardless of the method you opt for, make sure to store your backups in a safe location, such as an external hard drive or a cloud storage service.
Optimizing Your Site’s Performance
A fast-loading website is imperative for providing a positive user experience and improving your search engine rankings. Here are some performance optimization tips for your Divi site:
- Caching: Enable caching on your website using a caching plugin like WP Rocket or W3 Total Cache. Caching can significantly improve your site’s loading speed by serving static versions of your pages to visitors.
- Image Optimization: Compress and optimize your web images to lessen their file size without compromising on the quality of images. Use plugins like Smush or Optimole to optimize your images automatically on the fly.
- Minification: Minify your CSS and JavaScript files to reduce their size. This process removes unnecessary characters and spaces from the code, improving loading times. Plugins like Autoptimize or WP Super Minify can help with this task.
- Content Delivery Network (CDN): Consider using a CDN to deliver your website’s static content from servers located closer to your visitors. This can precisely improve the loading speed of your site, especially for visitors from geographically distant locations.
- Database Optimization: Regularly optimize your WordPress database by removing unnecessary data, such as spam comments, post revisions, and transient options. Plugins like WP-Optimize or WP-Sweep can automate this process for you.
By implementing these performance optimization techniques, you can ensure that your Divi site loads quickly and provides an excellent user experience.
Conclusion
Congratulations! You have reached the end of our comprehensive guide on how to add Divi to WordPress. By understanding Divi’s capabilities, preparing your site, customizing your design, and maintaining your website, you are well on your way to creating a stunning and functional website with Divi.
Remember to regularly update Divi, back up your site, and optimize its performance to keep your website running smoothly. Enjoy exploring the endless possibilities that Divi offers and creating a website that truly represents your brand and vision.
Happy Divi building!
