
In the dynamic world of website management, unforeseen mishaps can disrupt the functionality and design of your WordPress site. Whether it’s a critical error, a malicious attack, or accidental data loss, having a comprehensive backup and restoration strategy is essential to ensure the continuity of your online presence. In this guide, we will delve into the step-by-step process to restore WordPress site from a backup. By the end of this article, you’ll be armed with the knowledge and confidence to navigate through the restoration process, bringing your site back to life and minimizing downtime.
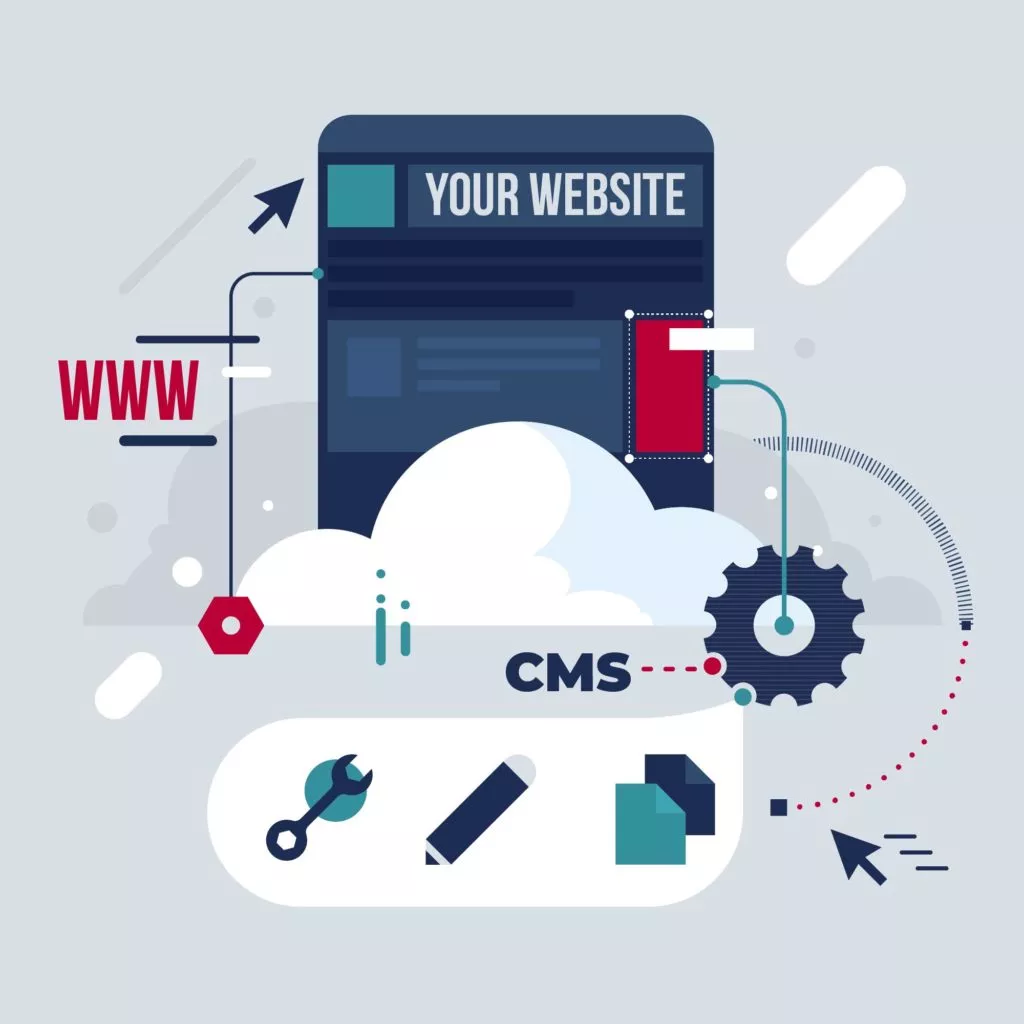
Why Backup WordPress Site?
Backups are like insurance for your WordPress website. They create copies of your site’s files, content, and database at a specific point in time. Here’s a more detailed breakdown of their role in WordPress security:
- Data Loss Prevention: Backups act as a safety net against accidental data loss. If you accidentally delete important files, experience a server crash, or encounter database corruption, you can restore your site to a previous state using the backup.
- Hacking and Malware Protection: In the unfortunate event when your website gets hacked or infected with malware, backups provide a way to undo the damage. One effective method to enhance WordPress security involves conducting regular security scans to identify known vulnerabilities. Addressing these issues promptly prevents hackers from exploiting them. Utilize WordPress security scanners to comprehensively scan for established vulnerabilities and apply the necessary fixes, thwarting potential hacker exploitation. You can restore the WordPress site to a clean state from before the security breach occurred.
- Plugin or Theme Issues: Sometimes, a faulty plugin or theme update can cause your website to malfunction. If you encounter such problems, you can roll back to a backup taken before the update to restore functionality.
- Content Recovery: If you accidentally delete or overwrite important content, a backup allows you to retrieve the lost data.
- Downtime Minimization: When a security incident occurs, your website might be taken offline to prevent further damage. With a backup, you can quickly restore the WordPress site, reducing downtime and ensuring your site’s availability to users.
- Easy Migration: Backups are useful when you’re shifting your WordPress site to a new host or domain. You can use the backup to replicate your site on the new location without the need to recreate everything from scratch.
- WordPress Errors and Glitches: WordPress websites can encounter various errors and glitches that affect their functionality or appearance. These errors could be caused by conflicts between plugins, theme updates, migration, or even changes to the core WordPress files. If such errors occur, having a recent backup allows you to restore the WordPress site to a point when it is working correctly, effectively undoing any unintended changes that led to the errors. This helps you quickly resolve issues without needing extensive troubleshooting.
Key Elements of a WordPress Site Database
A WordPress site is composed of essential building blocks, consisting of four key components that should always be backed up before you restore WordPress site:
- WordPress Core: This encompasses the core files of WordPress, including source code, functions, and site settings.
- WordPress Database: This houses the backend files that store critical website information, such as user credentials, articles, posts, and metadata.
- WordPress Plugins: These are third-party tools integrated into your WordPress setup to enhance functionality. They can be easily obtained from the WordPress repository, including our 2023 list of recommended security plugins.
- WordPress Themes: These third-party applications improve the website’s appearance and design. Similar to plugins, there are numerous secure and free WordPress themes available on the repository and other online marketplaces.
A typical WordPress backup includes these four components. Thus, the strenuous process to restore WordPress from a backup involves reinstating these components onto the website. Let’s now explore the process of performing a restoration.
Here are a few typical WordPress errors you might encounter while you restore WordPress site from backup:
- The issue with connecting to the database
- WordPress displays a blank screen, often referred to as the White Screen of Death
- Encountering a 500 Internal Server Error
- Seeing a 504 Gateway Timeout error in WordPress
- Receiving a notification about a critical error on your site
- WordPress posts leading to a 404 Error page
How to Restore WordPress Data Using phpMyAdmin?
In crucial situations where your website has experienced damage due to WordPress errors or attacks, you can restore data using the phpMyAdmin tool. Follow these steps to restore data from the last exported file:
Step 1: Access your hosting account and locate the phpMyAdmin tool. In the example below, we have taken Nestify’s hosting account.

Step 2: Hunt for the “Databases” section, where you’ll find a dropdown list containing all the tables.

Note: If your WordPress site has been compromised by a hack, it’s advisable to delete the hacked databases before you restore WordPress site from the backup. It’s also recommended to create a backup of the database before proceeding with any deletions.
If you need to delete a compromised database, follow these steps:
- Choose the targeted database from the left section.
- Upon selecting the database, all associated tables will be listed.
- Opt for the “Select all” option to choose all tables.
- Click on “Delete” to remove the selected tables.
Note: This step should only be taken if your website has been compromised by a hack and you intend to clean up the database. Otherwise, you can skip this step.
Step 3: Select the database containing the information you want to restore. Next, click on the “Import” tab located at the top of the page.
Step 4: Proceed by selecting the “Browse” button, which will initiate the opening of a fresh window.
Step 5: Within this new window, hunt for and click on the “Choose File” button. This action will prompt you to import the necessary MySQL database file from your stored files. By following these steps, you can effectively and successfully recover lost or compromised WordPress data using the phpMyAdmin interface.
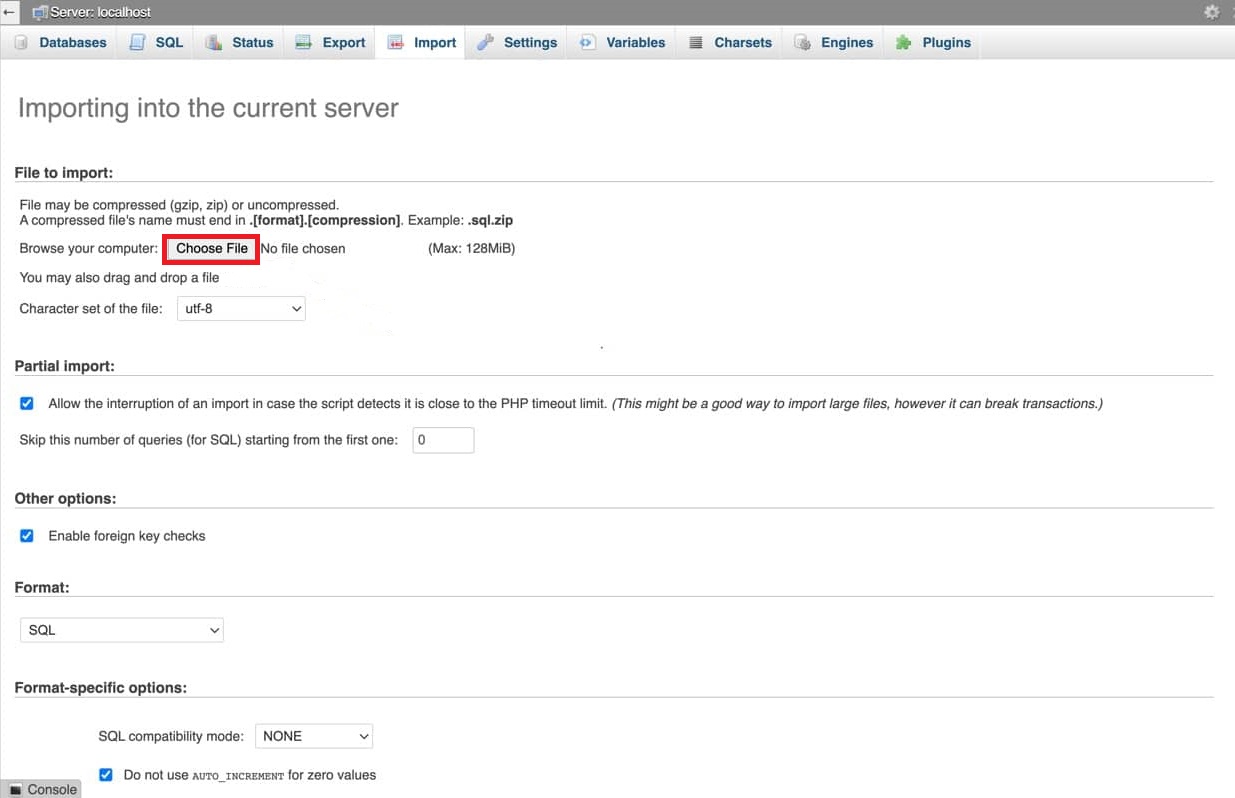
To confirm the successful execution of the import process, click on the “Execute” button positioned at the lower section of the screen. Upon a successful import, a confirmation message will be displayed. This serves as the location where your WordPress database backup has been stored.
Step 6: Moving forward, opt for the “format” feature and opt for the “SQL format” choice. Subsequently, press the “go” button situated at the page’s base. At the same time, the procedure to restore WordPress site involves only a few steps, though it might demand a significant duration. Once the procedure concludes, proceed to your website to verify the successful completion to restore WordPress site.
For reinstating your website’s files using a previously generated backup, the most straightforward method involves accessing your site’s files and overwriting all contents within the “public_html” folder with the backup that was safeguarded from an earlier date.
How to Restore WordPress Backup Using cPanel
For cPanel users, the manual creation of site backups can be accomplished using either the Backup tool or the Backup Wizard tool. Both of these tools serve the same purpose, but the Backup Wizard offers a more guided approach, leading you through the step by step process to restore WordPress site.
To restore WordPress backup using cPanel, follow these steps:
Step 1: Access your cPanel account provided by your hosting provider.
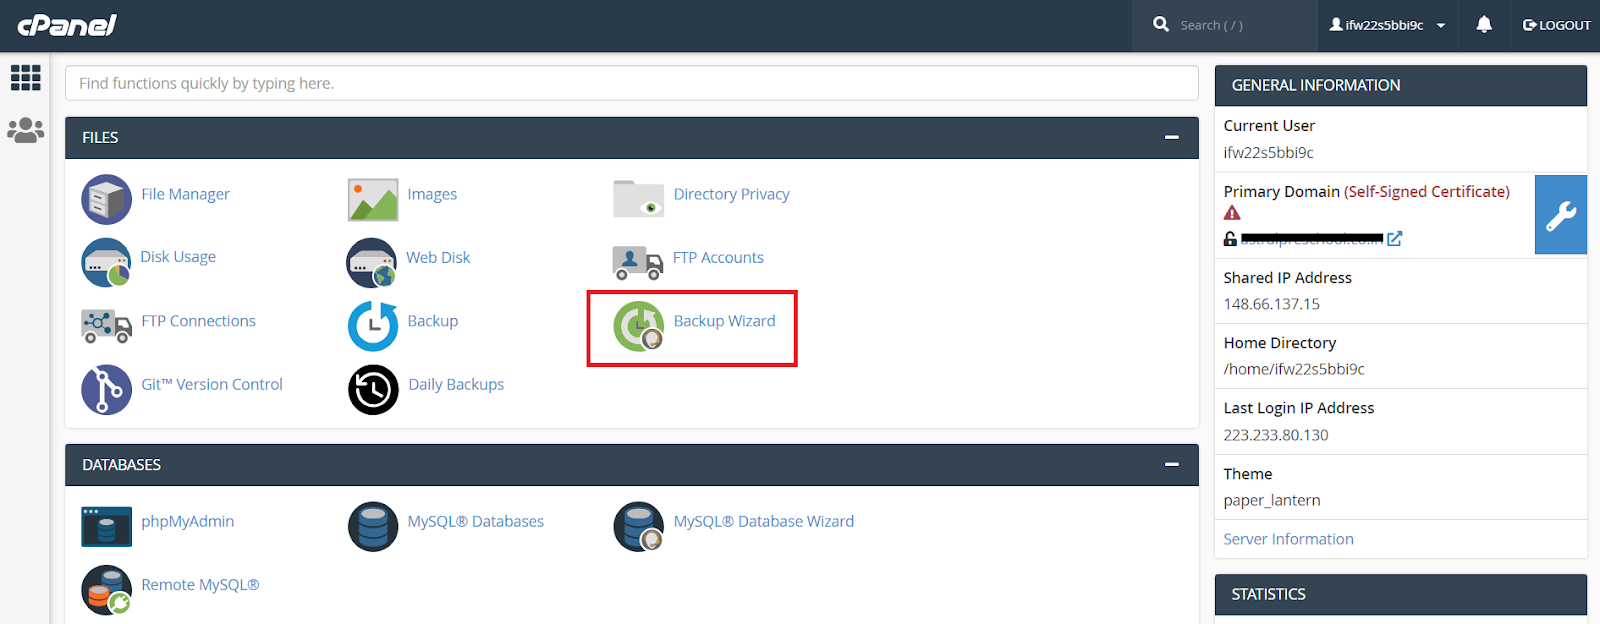
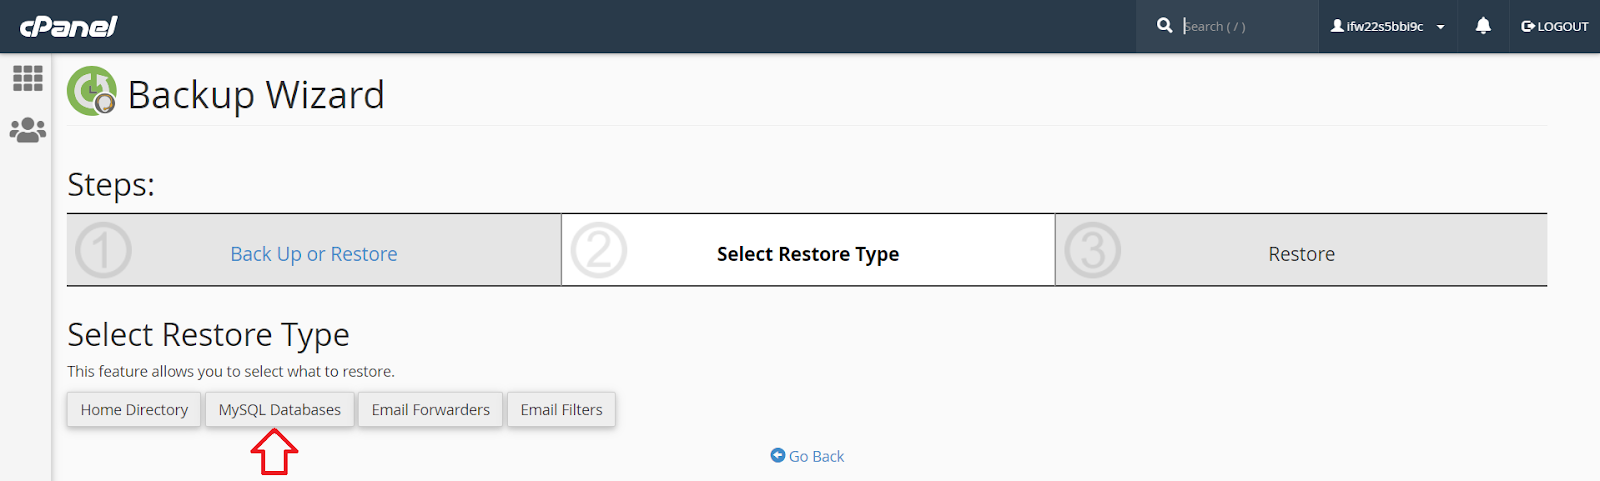
Step 2: Scroll down and locate the Backup Wizard. This tool is divided into three simple steps.
- In Step One, click on the “Restore” option.
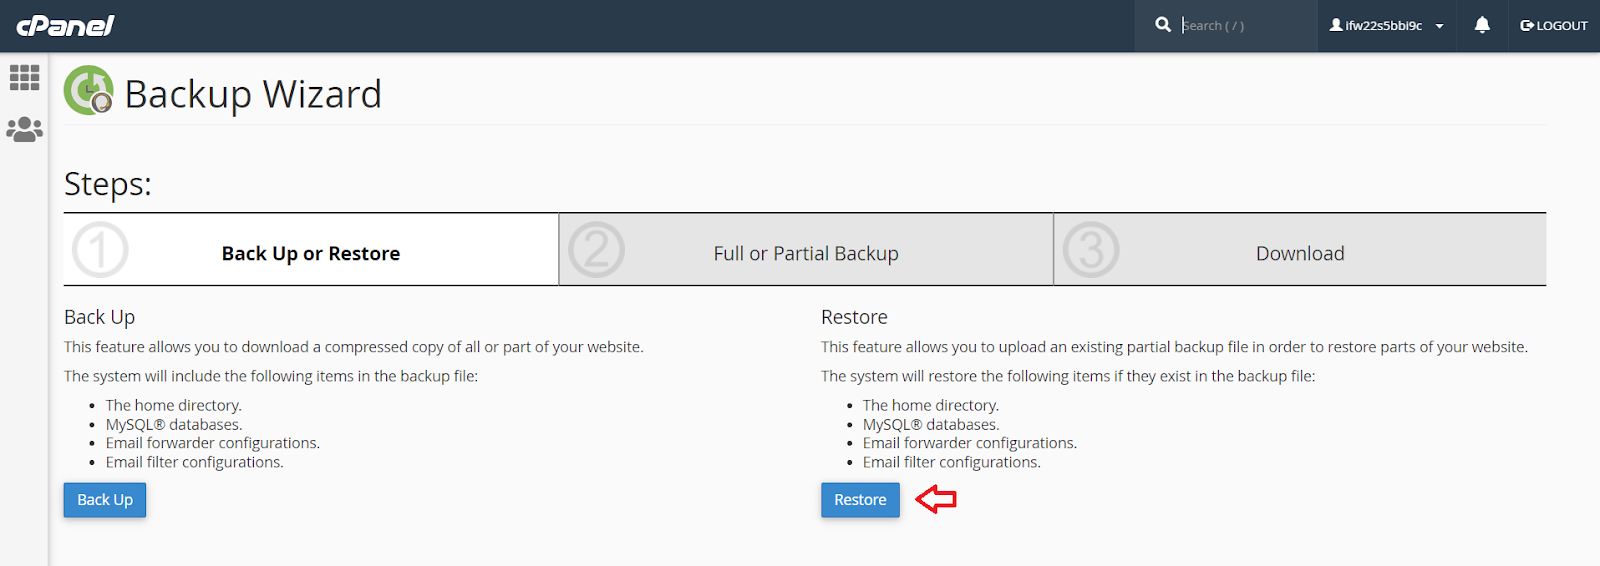
- Choose the specific component of your website that you wish to restore. For example, you might select “MySQL Databases.”
- Click the “Choose File” button and hunt for the downloaded zip file within its storage location. Once selected, click “Upload.”
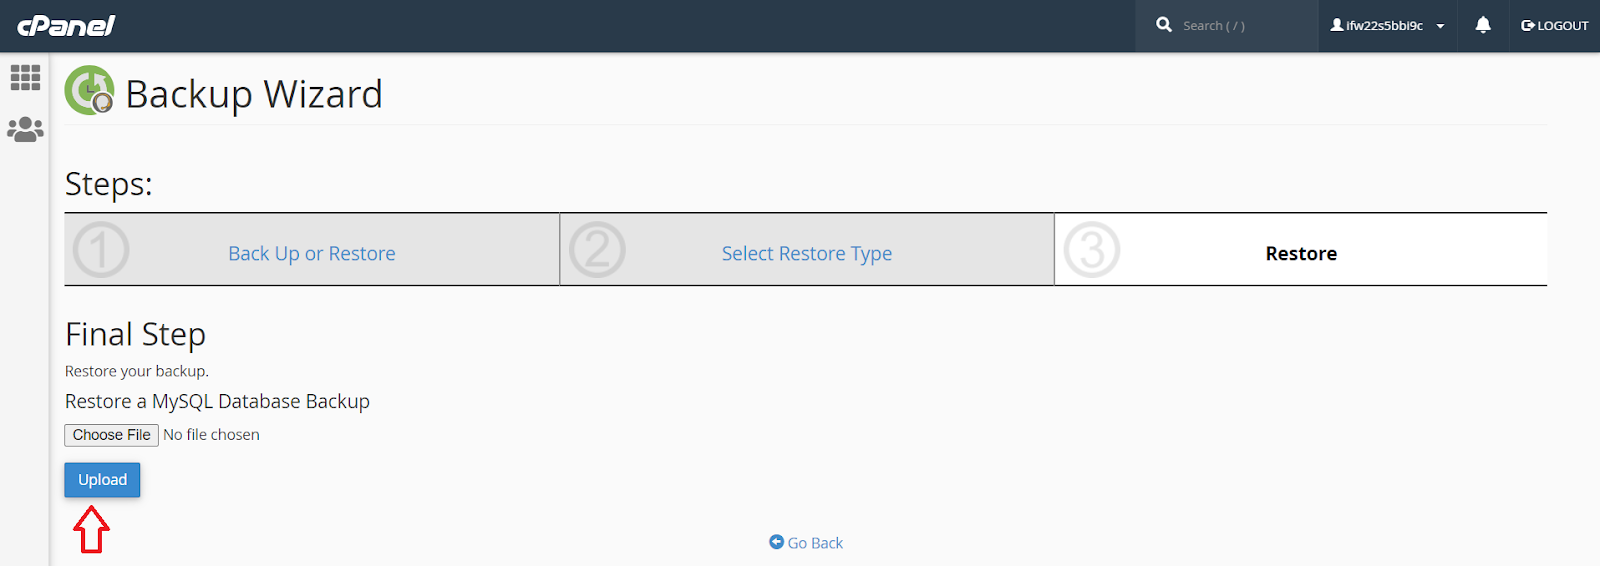
Step 3: cPanel will now initiate the restoration process for your database from the backup.
By following these steps, you can efficiently and successfully restore WordPress from backup using cPanel’s intuitive interface.
How to Restore WordPress Backup Using FTP
To initiate the process to restore WordPress from backup, you have two options: you can use your hosting provider’s file manager tool or employ an FTP client like FileZilla. If you opt for the latter, make sure to obtain your FTP credentials from your hosting account. The location of this information, much like the link to access phpMyAdmin, will differ depending on the layout of your provider’s control panel interface.
Step 1: For cPanel users, accessing your FTP credentials is simple. Just navigate to the “FTP Accounts” section under the “Files” category:

Step 2: After downloading and opening FileZilla, get access to your FTP account by entering your login details and then click on the “Quickconnect” button:
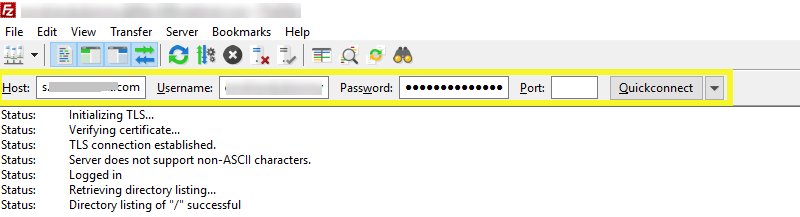
Input your login details in FileZilla. This action will establish a connection to your server. You’ll be certain of its success when the Status changes to “Directory listing of ‘/’ successful.”
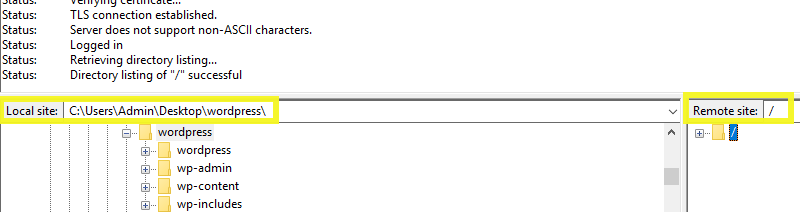
Within FileZilla, your local files will be displayed on the left side of the screen. It’s essential to ensure that your backup is in an uncompressed format and saved on your computer so that it’s accessible in this location. On the right side, you’ll find the ‘remote site,’ which represents your server:
Step 3: Now comes the step of removing old files from your server. Before proceeding, make certain that your backup includes any custom code you wish to retain. Failure to do so could result in the loss of this code without any possibility of recovery. In FileZilla, you can effortlessly delete old files by right-clicking on them and clicking the “Delete” option.
Step 4: Following this, it’s time to upload your backup. FileZilla simplifies this process by allowing you to drag and drop files from your computer/laptop directly onto your server. Other platforms should offer a noticeable “Upload” option.
For FileZilla users, you’ll find three tabs at the bottom of the page: “Queued files,” “Failed transfers,” and “Successful transfers.” The “Queued files” section lists the files currently in the process of uploading from your local computer to the server.
As soon as the uploads are completed, your backup files will be listed under the “Successful transfers” tab. Depending on the size of your website, this procedure might take some time. Once the count of “Queued files” reaches zero, your process to restore WordPress should be finalized.
How to Restore WordPress Backup Using Plugins
We recommend utilizing the WordPress Plugin: UpdraftPlus for generating backup copies. Here is a comprehensive, step-by-step manual for the procedure that leads to restore WordPress site:
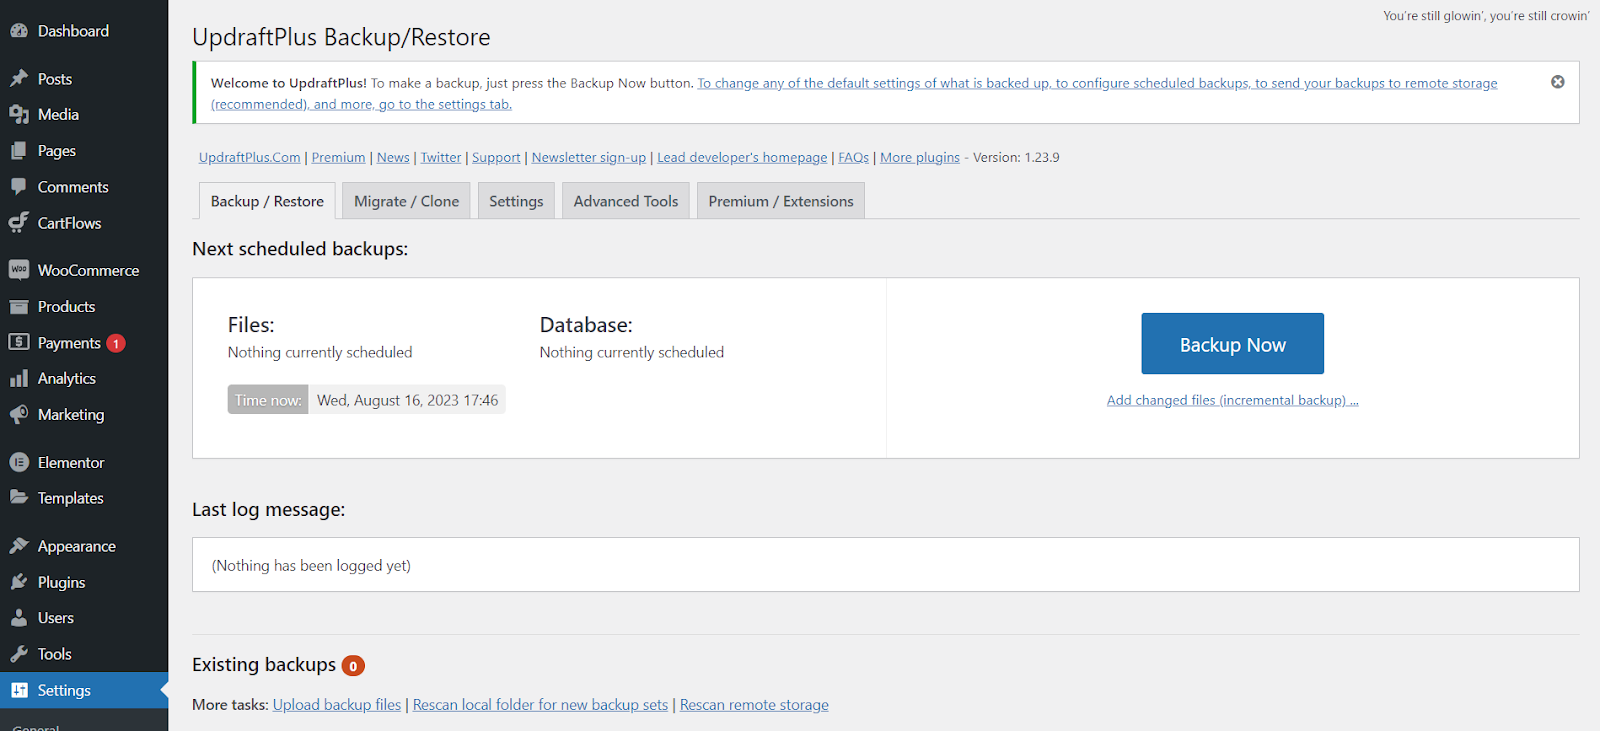
Step 1: Begin by downloading the UpdraftPlus plugin and then activating it.
Step 2: Proceed to upload your backup files. Your backups will be neatly categorized and displayed on the same page within your site’s settings. To restore a specific backup, simply locate it and click the “Restore” button.
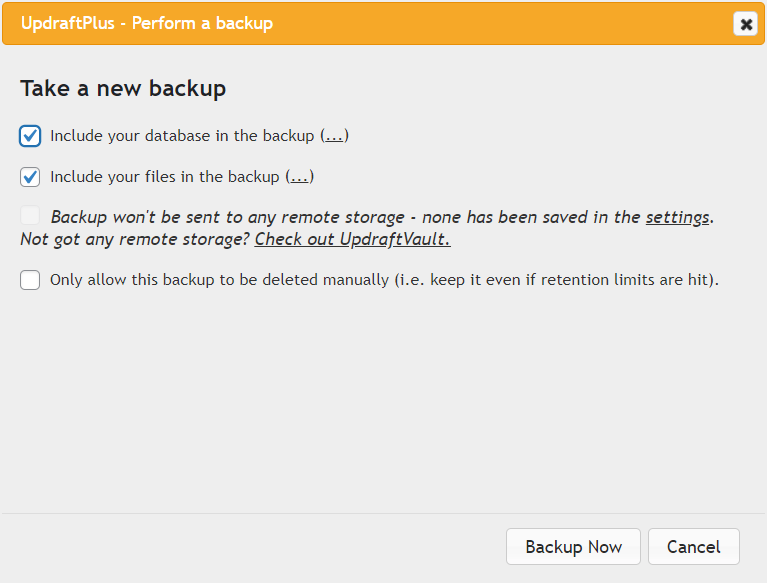
Step 3: Now, opt for the specific elements from the backup that you wish to reinstate. After finalizing your selections, initiate the restoration process for the chosen elements by clicking on the “Backup Now” button.
By diligently adhering to these instructions, you can proficiently bring back your WordPress backup by leveraging the capabilities of the UpdraftPlus plugin.
Steps to Take After Successfully Restoring Your WordPress Site
What Steps to Take After Successfully Restoring Your WordPress Site After successfully following the process to restore WordPress site, it’s crucial to address the following actions:
- Log into the WordPress admin panel to verify the proper functioning of your site. If you’ve experienced a security breach, review user permissions and ensure familiarity with all users.
- Activate the themes and plugins that are in use, and remove any inactive or outdated plugins.
- Thoroughly inspect the site’s “front-end” to confirm the accurate functionality of URLs.
- Generate a fresh backup of your recently restored WordPress site. To simplify this process, we suggest utilizing a suitable plugin.
- Replenish the cache to incorporate the updated data.
Additionally, prioritize both backup and security practices. We strongly recommend exploring our comprehensive WordPress Security Guide and adhering to our expert security recommendations to fortify your defense against potential hacking threats.
Also Read: WordPress Hacked: What To Do (And How To Fix It) 5 Easy Steps
Conclusion
In the realm of website administration, being prepared for the unexpected is a testament to your commitment to delivering a seamless online experience to your visitors. The ability to restore WordPress site from a backup is a vital skill that every website owner or administrator should possess. By following the carefully outlined steps in this guide to restore WordPress from backup, you’ve learned how to rescue your site from the brink of disaster, turning potential downtime into a mere blip on your online journey.
Remember, backups are your safety net, your fallback plan. Regularly backing up your website and familiarizing yourself with the process to restore WordPress can save you from the panic and frustration of lost data and functionality. Stay vigilant, stay prepared, and keep your WordPress site thriving even in the face of adversity. Your website’s resilience is a testament to your dedication and the embodiment of your online aspirations.
