
Are you looking to create a classified website? Whether you want to start a local classified platform, an online marketplace, or a niche-specific classified site, WordPress is a powerful and user-friendly platform to get you started. In this blog, we will guide you through the process of creating a classified website using WordPress.
Whether you’re a novice or an experienced WordPress user, this blog post will equip you with the knowledge and tools needed to create a successful classified website. So, let’s dive in and get started on building your own classified platform with WordPress!
Understanding the Basics: What is a Classified Website and Why Use WordPress
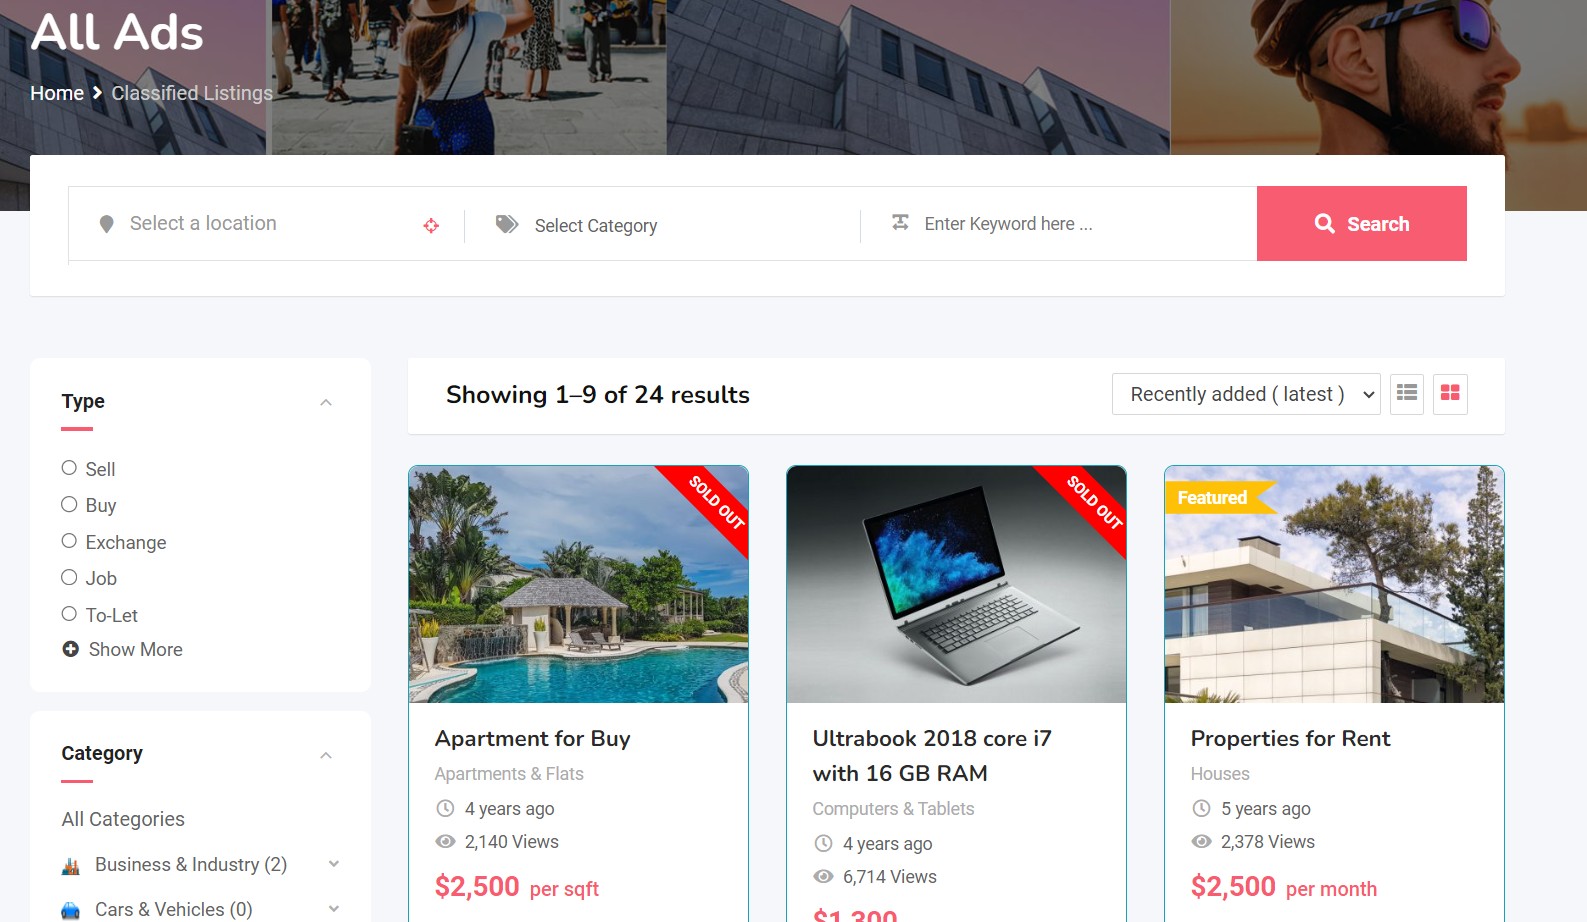
A classified website offers an online platform for users to post advertisements or listings for various products, services, jobs, or events. These ads are usually organized into different categories and subcategories to make it hassle-free for users to find what they are looking for.
Now, you might be wondering why you should choose WordPress to create your classified website. Well, here are a few reasons:
- Intuitive User Interface: WordPress is renowned for its user-friendly interface, making it accessible to users without extensive technical expertise. Creating and managing your classified website is hassle-free, thanks to its intuitive dashboard that permits you to swiftly configure your site and explore various functionalities.
- Diverse Themes and Plugins: WordPress provides an extensive collection of themes and plugins tailored for classified websites. These themes enhance the visual appeal and professionalism of your site, while plugins offer additional features like ad submission forms, payment gateways, and search filters. With the abundance of options, customizing your site to fit your unique needs is effortless.
- SEO-Friendly: This platform is built with search engine optimization (SEO) in mind. It provides various tools and plugins that help you optimize your classified website for better search engine rankings. This means that your site has a higher chance of being discovered by potential users, leading to increased traffic and visibility.
- Scalability and Flexibility: WordPress allows you to scale your classified website as your business grows. Whether you start small with a local classified platform or expand to a global marketplace, WordPress can handle the increasing demands of your site. It also offers flexibility in terms of design and functionality, allowing you to add new features or change the look of your site without much hassle.
- Community Support: This platform has a large and active community of developers, designers, and users who are always ready to help. If you encounter any issues or have questions while creating your classified website, you can easily find support through forums, documentation, or even hiring professionals who specialize in WordPress development.
By choosing WordPress as the platform for your classified website, you gain access to a robust and user-friendly system that offers customization, scalability, and support. Now that you understand the basics of this platform and the benefits of using WordPress, let’s move on to the next step: setting up your WordPress site.
Setting Up Your WordPress Site
Setting up your WordPress site is the first step in creating a classified website. In this section, we will guide you through the process of choosing a domain name, selecting a web hosting provider, and installing WordPress itself.
Domain Name and Web Hosting Provider
- The domain name serves as the exclusive web address for visitors to access your classified website. When picking a domain name, opt for something easy to recall, pertinent to your niche, and reflective of your brand identity. Registering a domain name is a straightforward process and can be done through different domain registrars like GoDaddy, Namecheap, or Bluehost.
- A web hosting provider is where your website’s files are stored and made accessible to users on the internet. It’s necessary to select a reliable hosting provider that offers good server performance, uptime, security, and customer support. Some popular web hosting providers for WordPress include Bluehost, SiteGround, and WP Engine.
Installing WordPress
Once you have a domain name and web hosting provider, you can proceed with installing WordPress.
- One-Click Installation: Many hosting providers offer one-click installation options for WordPress. This aspect allows you to install WordPress on your domain with just a few clicks. Check with your hosting provider for the step-wise guide on how to use their one-click installation feature.
- Manual Installation: If your hosting provider doesn’t have a one-click installation option, you can still install WordPress manually. This involves downloading the WordPress installation package from the official website, creating a database for your site, and uploading the WordPress files to your hosting server. Follow the step-by-step instructions provided by WordPress.org to complete the manual installation process.
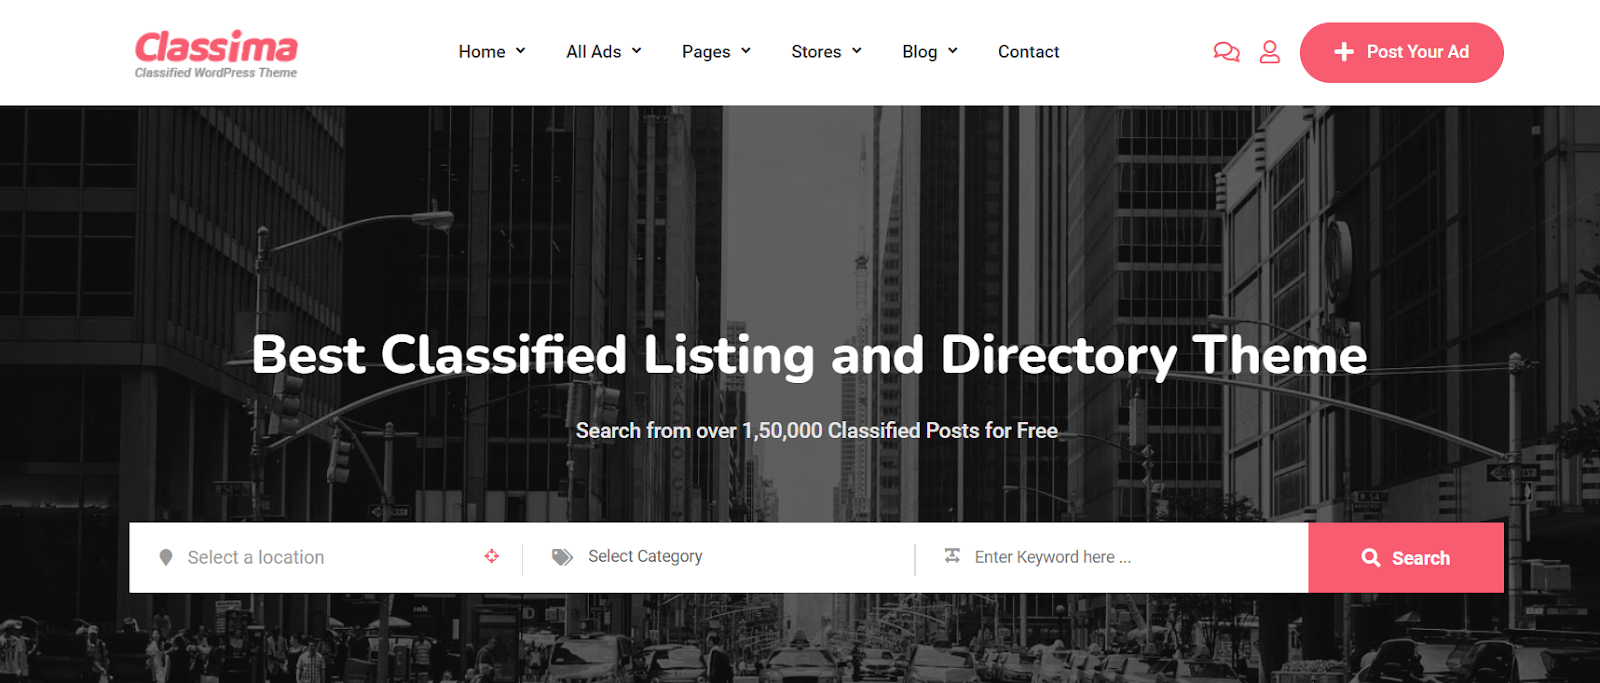
Selecting a Suitable Theme
After installing WordPress, it’s time to select a theme for your classified website. A theme determines the overall look and design of your site. Here are some key considerations when choosing a theme:
- Responsive Design: Make certain the theme you select is mobile-responsive and compatible with various devices. This ensures your classified website adjusts smoothly to diverse screen sizes, guaranteeing a seamless user experience.
- Customization Options: Look for themes that offer a great range of customization options, such as color schemes, typography, and layout settings. This allows you to personalize your site and make it unique to your brand.
- Compatibility with Classified Ads Plugins: Check if the theme is compatible with the classified ads plugin you plan to use. This ensures smooth integration and proper functionality of the plugin on your site.
- User Reviews and Ratings: Read user reviews and ratings of the theme to get an idea of its quality, performance, and customer support.
You can find themes in the WordPress Theme Directory or purchase premium themes from various theme marketplaces like ThemeForest or Elegant Themes.
With your WordPress site set up, domain registered, hosting in place, and a theme selected, you are now ready to move on to the next section: installing and configuring a classified ads plugin.
How to Install and Configure a Classified Ads Plugin
Installing and configuring a classified ads plugin is a crucial step in creating your classified website. In this section, we will guide you through the process of choosing the right plugin, installing it on your WordPress site, and configuring the plugin settings to meet your specific needs.
Choosing the Right Classified Ads Plugin
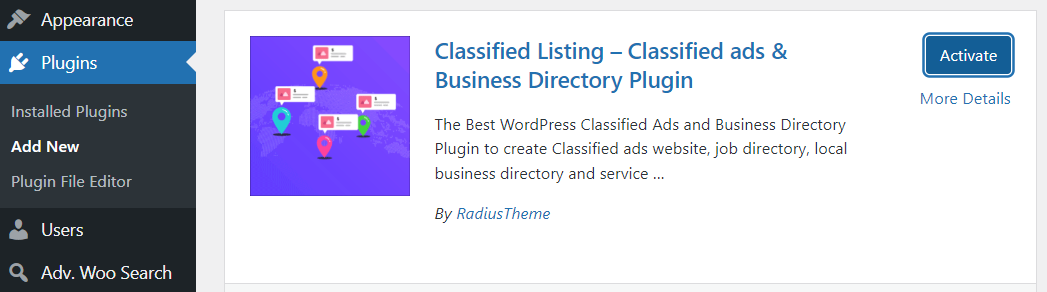
With numerous classified ad plugins available, it’s essential to choose one plugin that suits your website requirements. Consider the following aspects when selecting a plugin:
- Features: Look for a plugin that offers the necessary features for your classified website, such as ad submission forms, advanced search filters, payment integration, user profiles, and moderation capabilities.
- Ease of Use: Consider the plugin’s user interface and how easy it is to navigate and manage. A user-friendly WordPress plugin will save you time and effort in the long run.
- Compatibility: Make sure that the plugin is compatible with your WordPress version and theme to avoid any conflicts or functionality issues.
- Developer Support: Check if the plugin has an active support team or community forum where you can seek assistance if needed.
Configuring the Plugin Settings
Once you have chosen a classified ads plugin, install and activate it. After activating the plugin, it’s time to configure the settings according to your preferences. While the specific settings and options may vary depending on the plugin you choose, here are some common configuration steps:
- General Settings: Set up general settings such as the default currency, location options, and contact information.
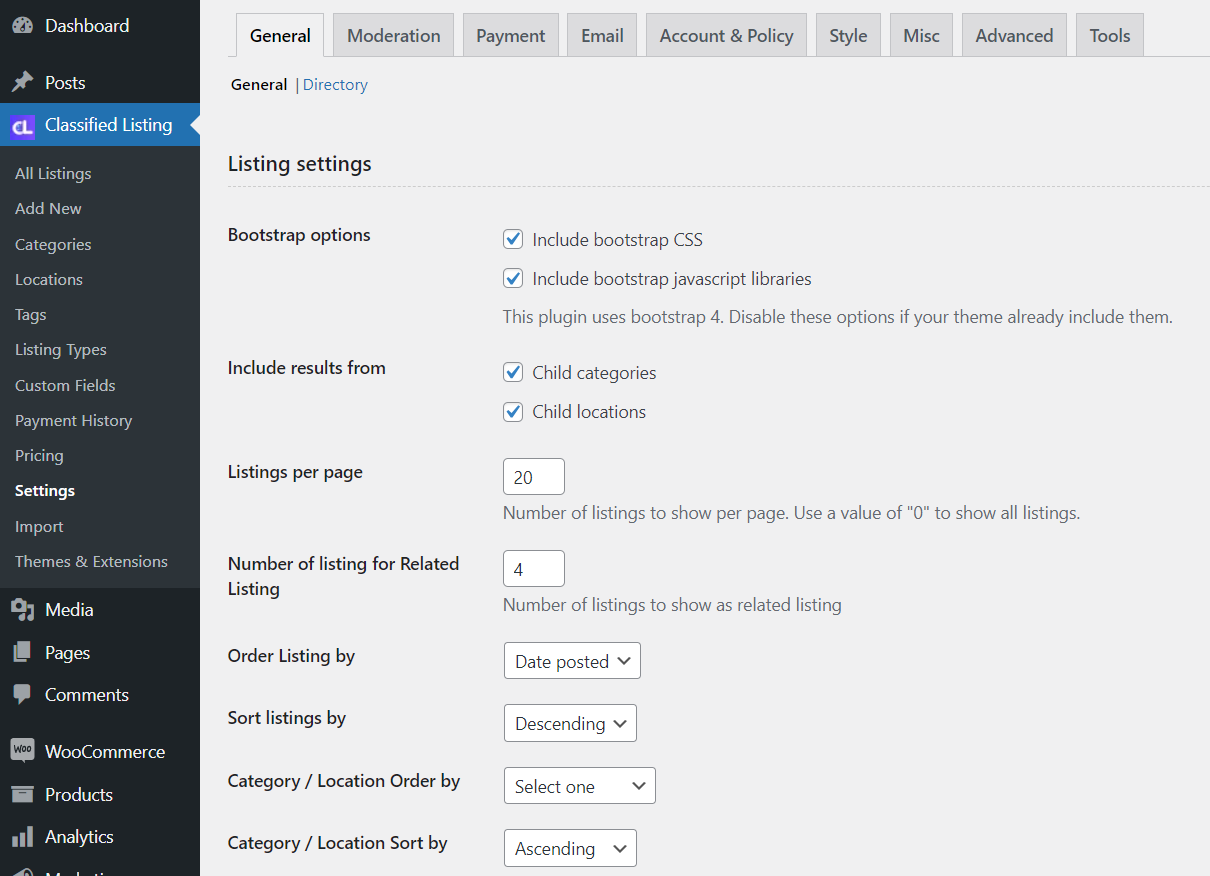
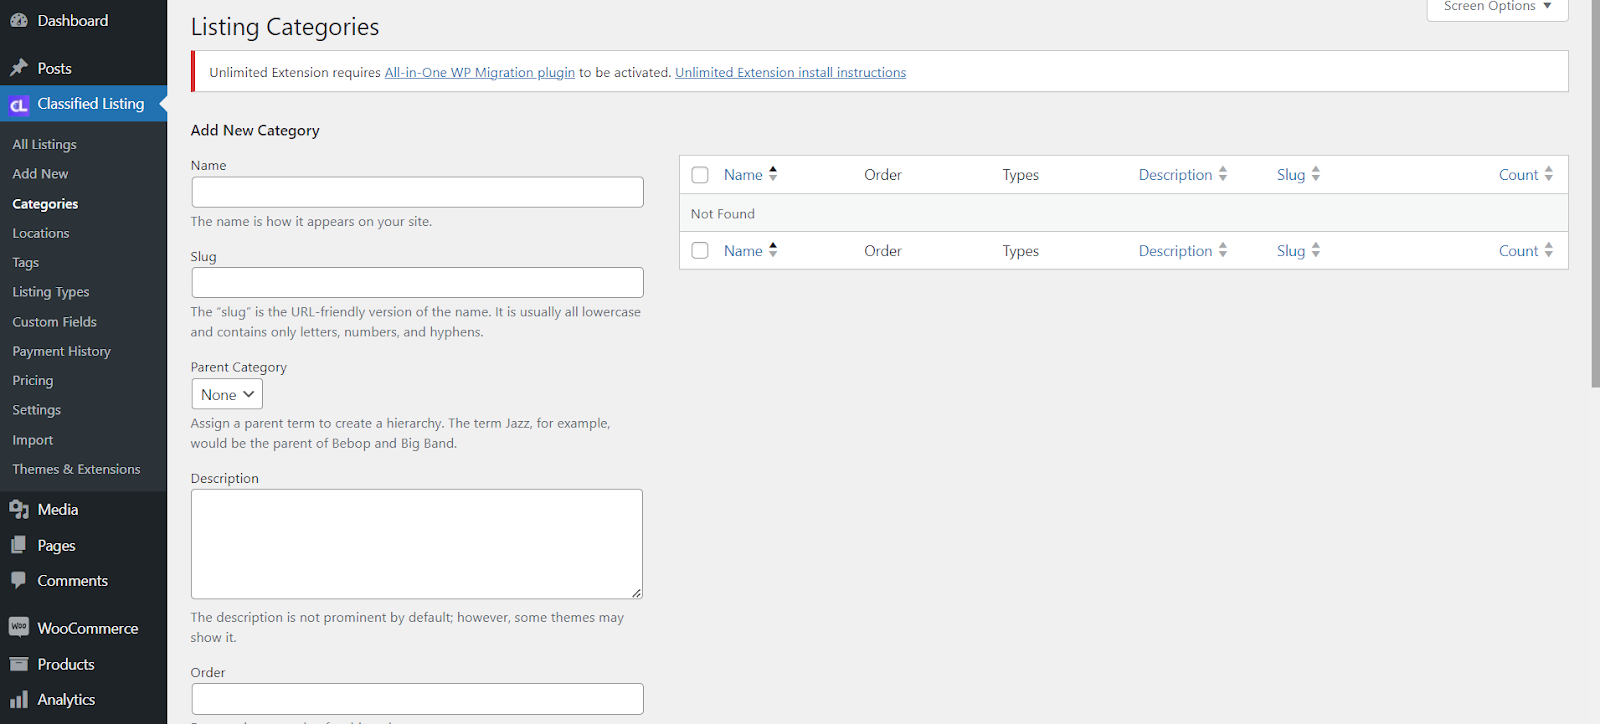
- Ad Categories: Create and manage categories and subcategories for your classified ads. These help users navigate and filter listings on your site.
- Ad Submission Form: Customize the ad submission form fields to collect the necessary information from users. You can include fields like title, description, price, contact details, and images.
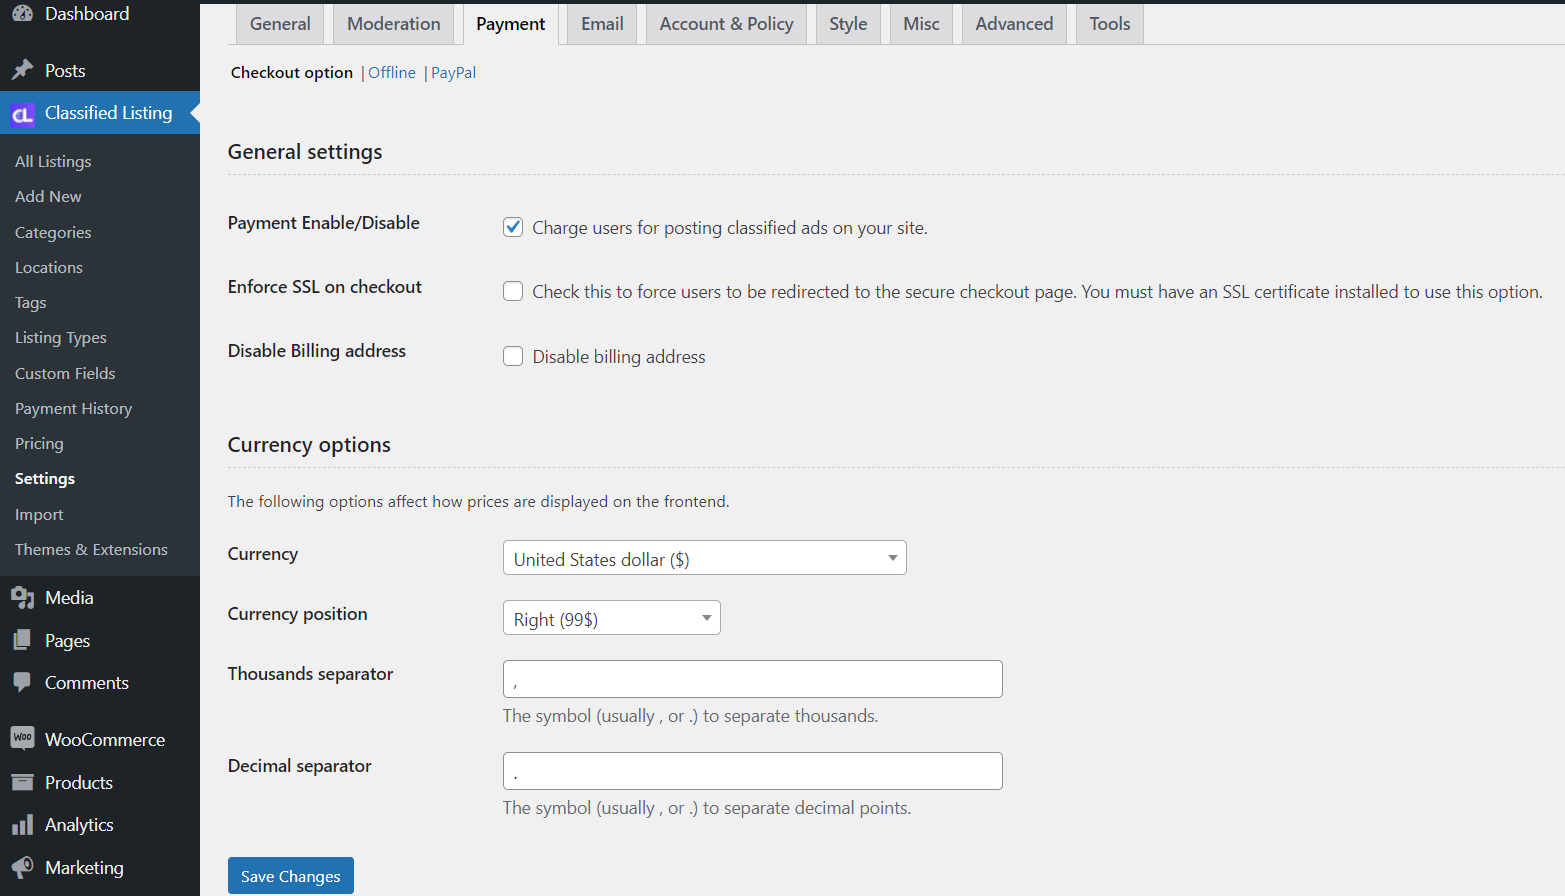
- Payment Integration: If you plan to monetize your classified website, configure payment options such as PayPal, Stripe, or other payment gateways to enable users to make payments for featured ads or premium listings.
- Moderation and User Permissions: Set up moderation rules to review and approve ads before they are published on your site. You can also configure user permissions to control who can submit ads, edit listings, or access certain features.
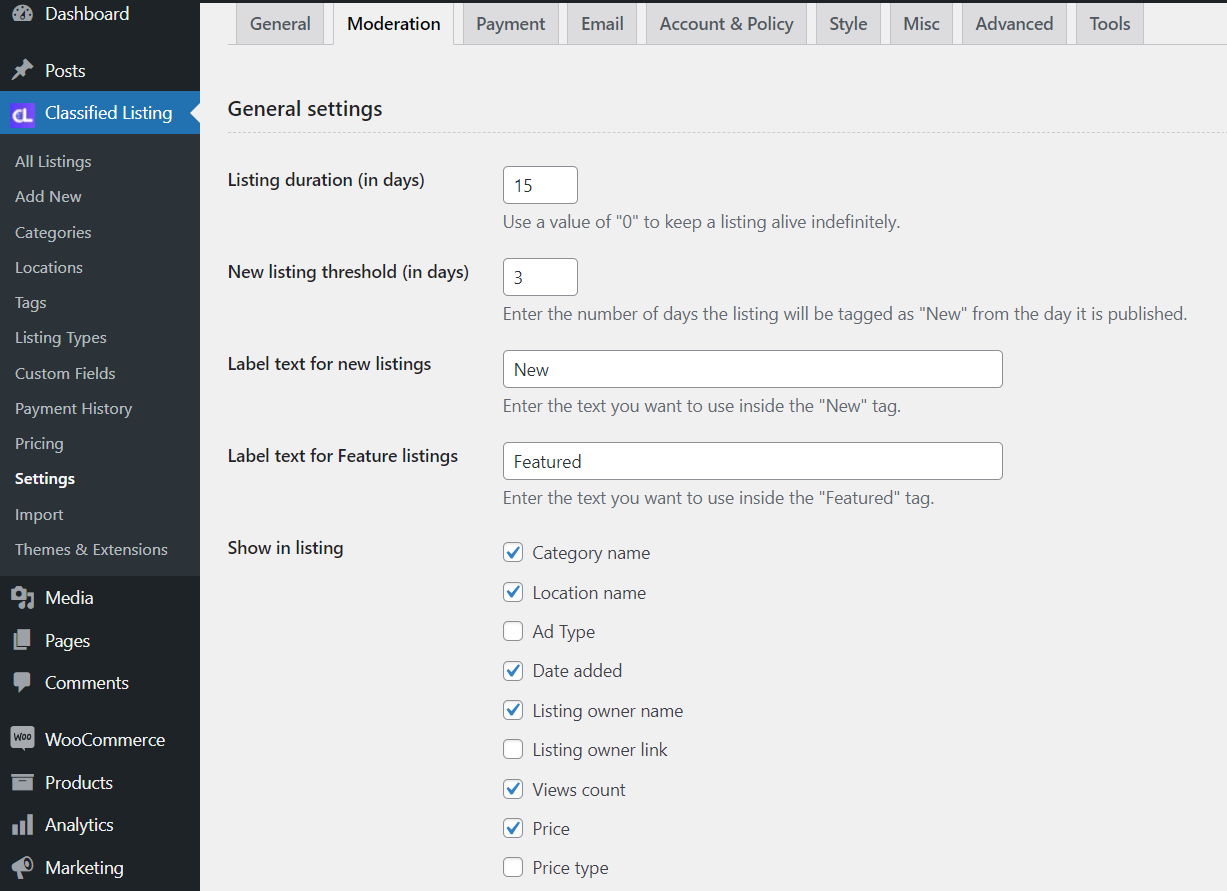
- Design and Layout: Customize the appearance of your classified ads pages by adjusting the layout, colors, and typography options provided by the plugin.
Remember to save your settings after making any changes to ensure they take effect on your classified website.
Congratulations! You have now successfully installed and configured a classified ads plugin for your WordPress site. In the next section, we will explore how to create and manage classified ads on your platform.
Creating and Managing Classified Ads
Once you have installed and configured a classified ads plugin on your WordPress site, it’s time to start creating and managing classified ads. In this section, we will guide you through the process of creating a classified ad, managing user submissions, and setting up payment methods to monetize your site.
How to Create a Classified Ad
To create a classified ad on your website, follow these steps:
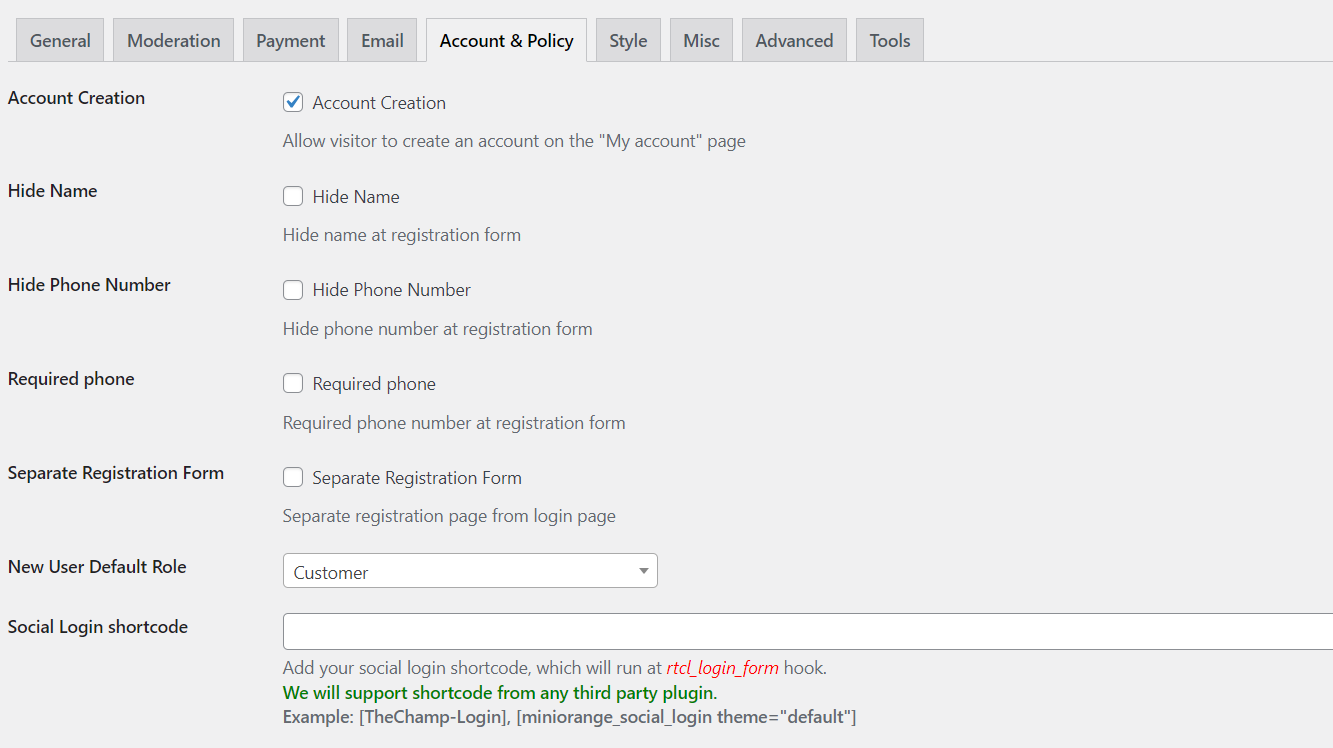
- User Registration: Set up user registration on your site to allow users to create accounts. This will enable them to submit and manage their classified ads.
- Submission Form: Create a user-friendly submission form that collects all the necessary information for the ad, such as title, description, category, price, contact details, and images. Ensure that the form is intuitive and easy to fill out.
- Featured Ads and Upgrades: Offer options for users to upgrade their ads to featured or premium listings for additional visibility. This can be done by implementing a pricing structure that allows users to select different ad packages.
- Ad Approval Process: Decide whether you want to manually review and approve each ad before it goes live on your site or if you prefer to automate the process. Manual approval gives you control over the quality of ads displayed on your platform, while automated approval allows ads to be published immediately.
Managing User Submissions
Once the classified ads start coming in, you need to manage and moderate them effectively. Here are some key aspects to consider:
- Moderation and Review: Regularly review and moderate the submitted ads to ensure they comply with your website’s guidelines and standards. Remove any inappropriate or fraudulent listings to maintain the integrity of your platform.
- Editing and Updating Ads: Allow users to edit and update their ads if needed. Provide a user-friendly dashboard where they can manage their listings, make changes, or mark ads as sold.
- Renewal and Expiration: Set expiration dates for ads to keep the content on your site fresh. You can give users the option to renew their ads for an additional period, either for free or at a discounted rate.
Setting Up Payment Methods
If you plan to monetize your classified website, you need to set up payment methods for visitors to make payments for featured ads or premium listings. Here’s how you can do it:
- Payment Gateways: Integrate reliable and famous payment gateways such as PayPal, Stripe, or other options that are suitable for your target audience.

- Pricing Structure: Define the pricing structure for featured ads or premium listings. Determine the duration, visibility, and additional benefits that come with each package.
- Secure Transactions: Ensure that your payment process is secure and encrypted to protect user information. Implement SSL certificates and follow best practices for online transactions.
Remember to regularly monitor your payment systems, resolve any issues promptly, and provide excellent customer support to maintain user trust and satisfaction.
With these steps, you can effectively create and manage classified ads on your WordPress site. In the next section, we will explore ways to optimize and promote your classified website for increased visibility and success.
Optimizing and Promoting Your Classified Website
Once your classified website is up and running, it’s important to optimize and promote it to increase visibility and attract more users. In this section, we will explore some key strategies and techniques to optimize your WordPress website for search engines, utilize social media for promotion, and monitor website analytics to make data-driven decisions.
Improving Website SEO
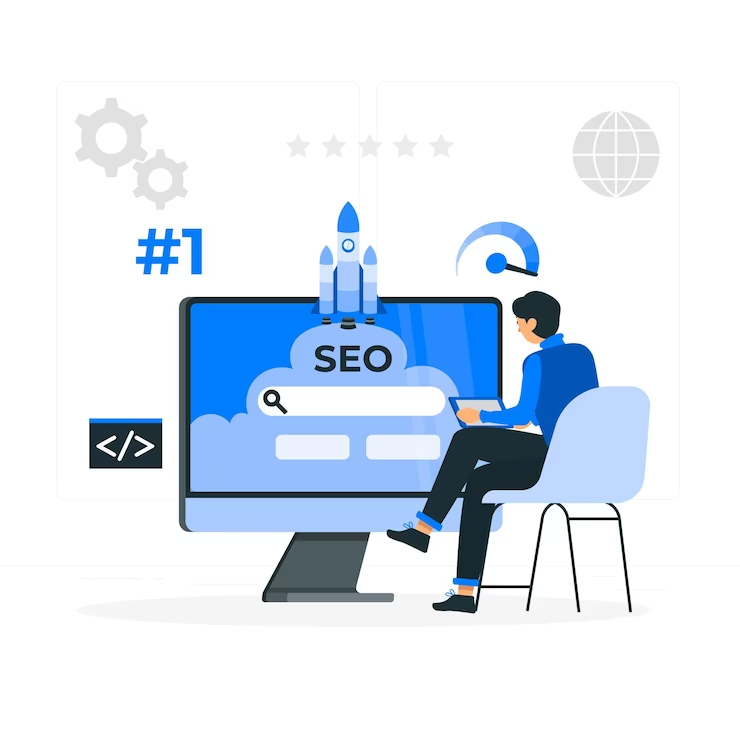
Search engine optimization (SEO) plays a crucial role in driving organic traffic to your classified website. Here are some SEO strategies to consider:
- Keyword Research: Conduct detailed keyword research to identify relevant and high-volume keywords associated with your classified niche. Use these keywords strategically in your ad titles, descriptions, and meta tags.
- Optimized Content: Create informative and engaging gated content that incorporates your target keywords naturally. Write compelling ad descriptions, category descriptions, and blog posts to attract both search engines and users.
- URL Structure: Ensure your website’s URL structure is clean, concise, and includes keywords where appropriate. Use categories and subcategories in your URLs to improve organization and search engine visibility.
- Meta Tags: Optimize meta titles and descriptions of your website with relevant keywords to improve click-through rates in search engine results.
- Image Optimization: Optimize images by using descriptive filenames and alt tags. Compress images to shorten page load times and improve overall user experience.
- Sitemap and Robots.txt: Create and submit a sitemap to all the search engines to ensure all your website pages are indexed. Use a robots.txt file to control search engine crawlers’ access to specific parts of your site.
Using Social Media for Promotion
Social media platforms can be tools for promoting your classified website. Consider the following strategies:
- Create Business Profiles: Set up business profiles on famous social media platforms like Twitter, LinkedIn, Facebook, and Instagram. Use consistent branding and provide links to your website.
- Share Engaging Content: Regularly share classified listings, blog posts, and other engaging content on your social media profiles. Motivate users to share and engage with your content to increase your reach.
- Engage with the Community: Participate in relevant social media groups, forums, and discussions related to your classified niche. Share valuable insights and interact with potential users to establish your brand as an authority in the industry.
- Paid Advertising: Run paid advertising campaigns on social media platforms to target specific demographics and drive traffic to your website. Experiment with various ad formats, like image ads, carousel ads, or video ads, to see what resonates with your audience.
Monitoring Website Analytics

Monitoring website analytics is crucial for understanding user behavior, analyzing areas for improvement, and making data-driven decisions. Here are some key analytics to track:
- Traffic Sources: Understand the sources of traffic to your website, such as organic search, social media, direct visits, or referral traffic. This information helps you determine which channels are driving the most visitors to your site.
- User Engagement: Monitor metrics like bounce rate, time on site, and page views per session to measure user engagement. Identify pages with high bounce rates and optimize them to improve user experience and encourage longer visit durations.
- Conversion Tracking: Set up conversion tracking to assess the effectiveness of your classified ads and promotional campaigns. Track how many users complete desired actions, such as submitting an ad, making a purchase, or signing up for a newsletter.
- A/B Testing: Conduct A/B tests to compare different elements of your website, such as ad layouts, call-to-action buttons, or landing page designs. Analyze the results to optimize your site and improve conversion rates.
Conclusion
Congratulations! You have reached the end of this comprehensive guide on how to create a classified website with WordPress. By following the steps and strategies outlined in this blog post, you have the knowledge and tools to build a successful and thriving classified platform. Good luck with your website, and may it bring you great success!
