
WordPress has revolutionized the way we create and manage websites, offering a user-friendly interface and a plethora of features. One of the standout features of WordPress is the block editor, which allows users to easily customize their website’s layout and design. However, as you navigate through the block editor, you may encounter situations where you need to remove or delete a block. Whether you want to reorganize your content, remove outdated information, or simply make a change, knowing how to delete a block in WordPress is essential.
In this blog, we will enlighten you on the process of deleting blocks in WordPress, providing step-by-step instructions and helpful tips. We will cover everything from deleting a single block to removing multiple blocks at once. Additionally, we will address common issues that may arise when deleting blocks and provide troubleshooting solutions. So, if you’re ready to master the art of deleting blocks in WordPress, let’s dive in and make your editing experience even smoother.
Understanding WordPress Blocks: An Introduction
Blocks are the fundamental building elements of the WordPress block editor. They are individual units of content that can be arranged and customized to create the layout of your web pages or posts. Each block serves a specific purpose, such as adding text, images, videos, buttons, or even custom code. One of the most famous block editors is Gutenberg.
The block editor interface provides a visual representation of your content, making it easier to create and edit web pages without any coding knowledge. With blocks, you can easily drag and drop elements, resize them, and rearrange them to achieve your desired layout and design.
WordPress comes with a variety of default block templates, including paragraphs, headings, images, galleries, lists, quotes, and more. Moreover, you can multi-use the functionality of your editor by installing plugins that add additional blocks to your arsenal.
Understanding how blocks work is crucial for efficient content management in WordPress. It allows you to have full control over the structure and appearance of your web pages, simplifying the process of creating visually appealing and engaging content.
Now that we have a clear understanding of what blocks are and their significance in WordPress let’s move on to exploring the WordPress editor interface and how to navigate it effectively.
Navigating the WordPress Editor
To effectively delete blocks in WordPress, it’s essential to have a good grasp of the WordPress editor interface and understand how to navigate through it. The editor interface is where you create, edit, and manage your website’s content.
When you log in to your WordPress dashboard and access the editor for a specific page or post, you’ll be presented with a screen that consists of several key components. Let’s explore these components to familiarize ourselves with the editor interface:
- Toolbar: Located at the top of the editor, the toolbar provides various formatting options for your content. It includes options to change text styles, create lists, add links, and more. The toolbar also contains the block navigation menu, which allows you to jump between blocks quickly.

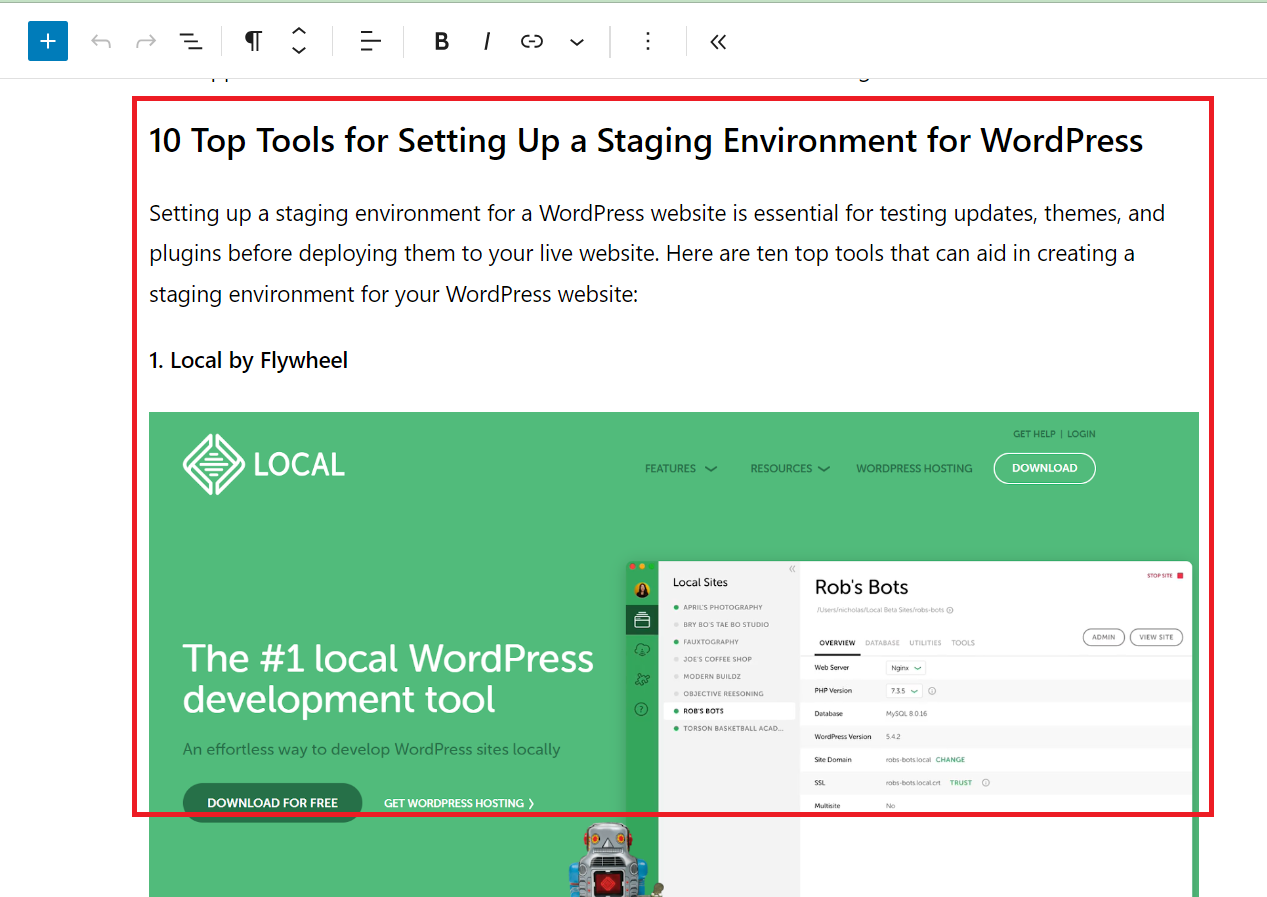
- Content Area: The main content area is where you will find your blocks. It displays a visual representation of the content you are editing. Each block is displayed as a separate unit, allowing you to easily identify and work with individual blocks.
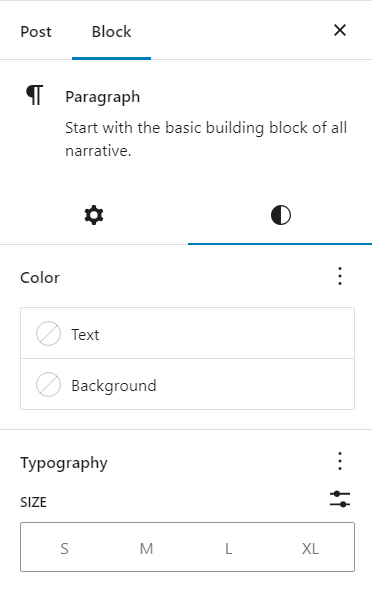
- Block Settings: On the right-hand side of the editor, you’ll find the block settings panel. This panel provides specific settings and options for the selected block, such as alignment, color settings, and advanced options. It allows you to customize the appearance and functionality of each block.
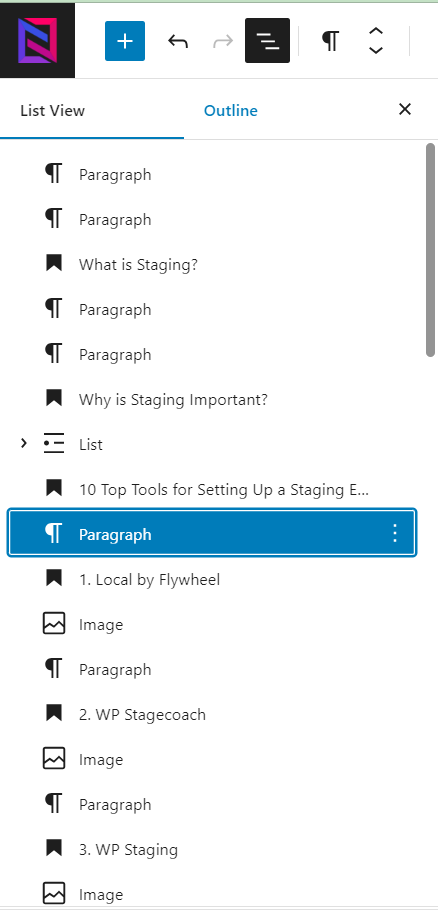
- Block Navigation: As mentioned earlier, the block navigation menu is located in the toolbar. It provides an overview of all the blocks present in your content. You can use it to navigate between blocks and easily locate the block you want to delete.
Now that we have a basic understanding of the WordPress editor interface, let’s move on to the next section, where we will explore how to locate the block you want to delete within the editor.
How to Delete a Block in WordPress
Deleting a single block in WordPress is a straightforward process that can be processed in a few simple steps. In this section, we will guide you through the process of deleting a single block and provide different methods to achieve it.
1. Selecting the Block
The first step in deleting a single block is to select the block you want to remove. To do this, follow these steps:
- Hover over the block you wish to delete with your mouse cursor. You will notice that the block becomes highlighted, indicating that it is selected.
- Alternatively, you can click anywhere within the block to activate it. The block will be surrounded by a blue outline, indicating that it is selected.
2. Using the Block Toolbar to Delete A Block
Once you have selected the block, you can use the block toolbar to delete it. The block toolbar is a set of options that appear above the selected block. To delete a block using the toolbar, follow these steps:
- Locate the block toolbar, which appears above the selected block. It contains various options and controls for the block.
- Look for the “More Options” icon, represented by three vertical dots. Click on this icon to check out the toolbar options.
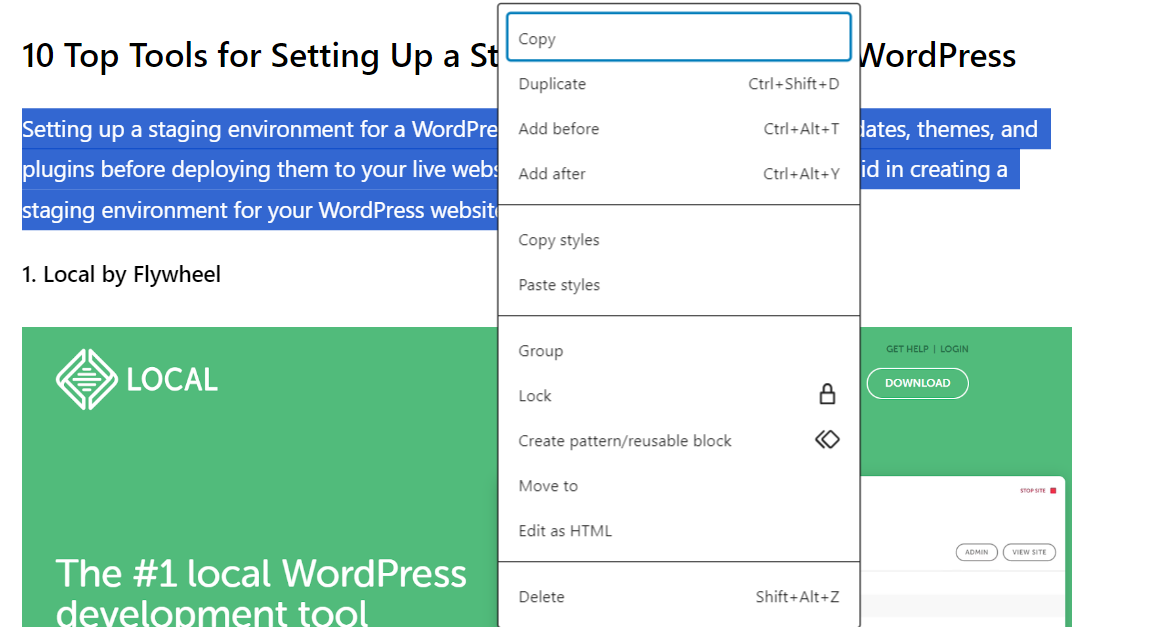
- Within the expanded options, you will find a “Remove Block” option. Click on it to delete the selected block.
3. Using Keyboard Shortcuts
If you prefer using keyboard shortcuts, WordPress provides a quick and efficient way to delete a block. Follow these steps to delete a block using keyboard shortcuts:
- Ensure that the block you want to delete is selected.
- Press “Delete” or the “Backspace” key on your keyboard. This will instantly remove the selected block from your content.
By following these methods, you can easily delete a single block in WordPress. However, if you need to delete multiple blocks simultaneously, continue reading the next section for detailed instructions.
How to Delete Multiple Blocks in WordPress
In some cases, you may need to delete multiple blocks at once to reorganize your content or make significant changes to your web page or post. WordPress provides various methods to select and delete multiple blocks efficiently. In this section, we will explore these methods step by step.
1. How to Select Multiple Blocks
Before you can delete multiple blocks, you need to select them. WordPress offers several ways to select multiple blocks simultaneously. Here are two common methods:
Using the Shift key:
- Start by selecting the first block you want to delete using one of the methods mentioned in the previous section.
- Hold down the “Shift” key on your keyboard and drag the cursor till the last block you want to delete. This will select all the blocks between the first and last block, including the first and last block themselves.
- Release the “Shift” key to finalize the selection.
Using the Ctrl key (or Command key for Mac users):
- Start by selecting the first block you want to delete using one of the methods mentioned in the previous section.
- Hold down continuously the “Ctrl” key (or “Command” key for Mac users) on your keyboard and click on each additional block you want to delete. Each click will add the selected block to the existing selection.
- Release the “Ctrl” key (or “Command” key) to finalize the selection.
2. Deleting the Selected Blocks
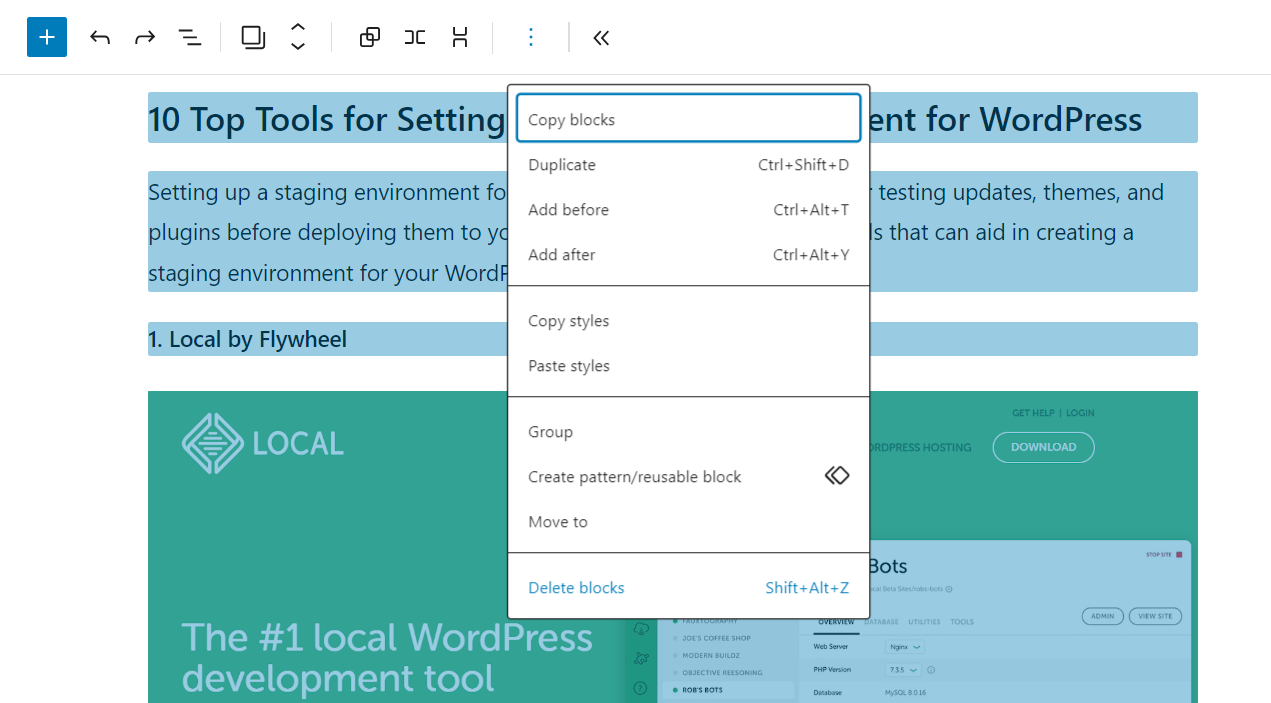
Once you have selected the desired blocks, you can proceed to delete them. Follow these steps to delete the selected blocks:
- With the selected blocks still highlighted, locate the block toolbar that appears above the selected blocks.
- Expand the toolbar options by clicking on the “More Options” icon (showcased by three vertical dots).
- Within the expanded options, you will find the “Delete blocks” option. Click on it to delete all the selected blocks simultaneously.
Follow these above-mentioned steps to easily delete multiple blocks in WordPress. However, it’s important to exercise caution when deleting multiple blocks, as it can impact the overall structure and layout of your content. Always double-check your selection before proceeding with the deletion.
Troubleshooting Common Issues When Deleting Blocks
While deleting blocks in WordPress is usually a straightforward process, there may be instances where you encounter certain issues or face challenges. In this section, we will address some common problems that may arise when deleting blocks and provide troubleshooting solutions to help you overcome them.
What to Do if a Block Won’t Delete
If you find that a block is not deleting despite following the steps mentioned earlier, try the following troubleshooting solutions:
- Check Block Permissions: Ensure that you have the necessary permissions to delete blocks. If you are working on a website with multiple users or if you have restricted access, make sure you have the appropriate user role and permissions to delete blocks.
- Disable Conflicting Plugins: Certain plugins can interfere with the block deletion process. Temporarily deactivate any recently installed or updated plugins to see if the issue persists. If the block can be deleted after deactivating a specific plugin, consider reaching out to the plugin developer for assistance or finding an alternative plugin.
- Switch to a Default Theme: Your current theme may have custom functionality or code that conflicts with block deletion. One way is to switch to a default WordPress theme, like Twenty Twenty-One, to determine if the issue is theme-related. If the block deletes successfully with the default theme, you may need to troubleshoot or contact the developer of your current theme.
How to Recover a Deleted Block
Accidentally deleting a block can happen, but fortunately, WordPress provides options to recover deleted blocks. Here’s what you can do:
- Undo the Deletion: Immediately after deleting a block, you can use the “Undo” option provided in the WordPress editor. Look for the “Undo” icon (usually an arrow pointing left) in the toolbar, or use the keyboard shortcut “Ctrl + Z” (or “Command + Z” for Mac users) to undo the deletion.

- Use Revision History: If you can’t undo the deletion or if you want to recover a deleted block from a previous version of your content, WordPress offers a revision history feature. Within the editor, look for the “Document” tab in the sidebar. Under the “Status & Visibility” section, click on “Browse” next to “Revisions” to access previous versions of your content. From there, you can restore the deleted block.

Common Errors and How to Resolve Them
In some cases, you may encounter specific errors or issues when deleting blocks. Here are a few common errors and their possible resolutions:
- “Block Cannot Be Deleted”: This error message may occur if the block is part of a template or if it is a core block that cannot be removed. In such cases, you may need to edit the template or use custom CSS to hide the block instead of deleting it.
- “Block Deletion Causes Layout Issues”: Occasionally, deleting a block can disrupt the layout of your content. To resolve this, consider adjusting the surrounding blocks or using other layout options, such as columns or containers, to maintain the desired structure.
By following these troubleshooting solutions, you can overcome common issues that may arise when deleting blocks in WordPress. Remember to save your changes regularly and keep backups of your content to ensure you can revert back if needed.
Conclusion
With these easy-to-do tips and techniques, you are now equipped to confidently delete blocks in WordPress, whether it’s a single block or multiple blocks. Enjoy the flexibility and control that the block editor provides as you create and manage your website’s content.
