
If you’re a WordPress user looking to customize the appearance of your website, you may have come across the term “Styles Tab.” But where exactly can you find this elusive feature? In this blog, we will explore the location of the Styles Tab in WordPress and how you can utilize it to enhance the look and feel of your website. Whether you’re a beginner or an experienced user, understanding where to find the Styles Tab is essential for taking control of your website’s design. So, let’s dive in and uncover the mystery of the Styles Tab in WordPress.
Introduction to WordPress User Interface
WordPress is a renowned and user-friendly content management system (CMS) that powers millions of websites worldwide. Before we delve into the location of the Styles Tab, it’s important to familiarize ourselves with the WordPress user interface. Understanding how WordPress is structured and navigating its dashboard will enable us to easily locate and utilize the Styles Tab.
The WordPress user interface consists of various elements that allow you to manage your website’s content, appearance, and functionality. The primary element of the user interface is the WordPress dashboard. This is the control panel where you can access all the essential settings, features, and tools to customize your website.
By logging into your WordPress account and accessing the dashboard, you gain access to a wide range of options and functionalities that empower you to create, edit, and manage your website with ease. From the dashboard, you can design the layout, install plugins, create and edit pages and posts, manage user roles, and much more.
To navigate through the WordPress dashboard, you’ll find a menu on the left-hand side with various options, such as Posts, Pages, Media, Appearance, Plugins, and Settings. Each of these options represents a different aspect of managing your website.
Understanding the layout and functionality of the WordPress user interface will set the foundation for locating the Styles Tab and effectively customizing your website’s appearance. Now that we have a basic understanding of the WordPress user interface, let’s move on to exploring the dashboard in more detail.
Understanding WordPress Dashboard
The WordPress dashboard is the central hub where you can manage and control various aspects of your website. It presents a user-friendly interface that easily helps you navigate through different settings, options, and features. In this section, we will explore the WordPress dashboard in detail to understand its key components and how to navigate through its options efficiently.
Exploring the WordPress Dashboard
When you log in to your WordPress account, the first page you will land upon is the dashboard. The dashboard serves as the control panel for your website, providing you with an overview of your site’s activity and important information at a glance. It displays widgets that can be customized to show specific data, such as recent posts, comments, site statistics, and more.
Key Components of the Dashboard
- Admin Toolbar: Located at the top of the screen, the admin toolbar provides quick access to essential features, including creating new posts, managing comments, accessing your site’s front end, and accessing your user profile.
- Main Navigation Menu: The main navigation menu is situated on the left-hand side of the dashboard. It consists of various options, including Dashboard, Pages, Posts, Media, Comments, Appearance, Plugins, Users, Tools, and Settings. These options allow you to manage different aspects of your website.
- Dashboard Widgets: The dashboard is organized into different sections called widgets. These widgets provide you with information and shortcuts to perform common tasks. You can customize the dashboard by adding, removing, or rearranging widgets according to your preferences.
- Quick Draft: The Quick Draft widget allows you to quickly write and save drafts of new posts right from the dashboard without having to navigate to the Posts section.
- Activity: The Activity widget displays a summary of recent activity on your website, including new comments, published posts, and other relevant updates.
Navigating through Dashboard Options
To access different options in the WordPress dashboard, simply click on the corresponding menu item on the left-hand side. Each menu item represents a different section of your website that you can manage. For example, clicking on “Posts” will take you to the section where you can create, edit, and manage your blog posts.
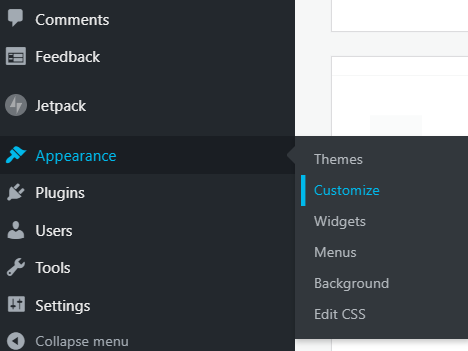
Within each section, you’ll find additional submenus and settings that allow you to perform specific tasks. For instance, under the “Appearance” menu, you can customize your website’s theme, access the customizer, manage widgets, and more.
Understanding how to navigate through the WordPress dashboard is crucial for efficiently managing your website and ultimately locating the Styles Tab. In the next section, we will specifically focus on the Styles Tab and explore its purpose and functionality in WordPress.
Introduction to WordPress Styles Tab
The Styles Tab in WordPress is a powerful tool that permits you to customize the appearance of your website. It provides you with the ability to modify various elements of your site’s design, such as colors, fonts, spacing, and more. In this section, we will delve into the concept of the Styles Tab, understand its purpose, and explore the range of customization options it offers.
What is the Styles Tab?
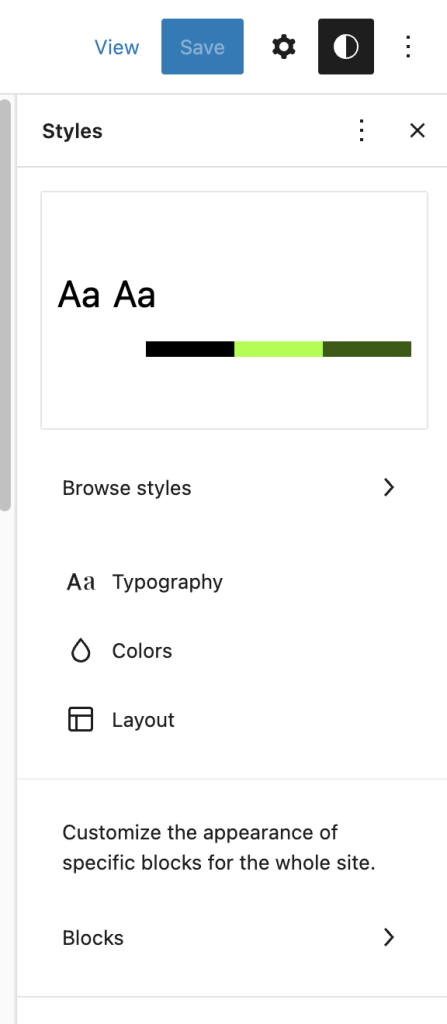
The Styles Tab is a feature within WordPress that is typically found within the theme customization settings. It acts as a central hub for managing the visual aspects of your website. With the Styles Tab, you can easily make changes to the overall look and feel of your site without needing to have advanced coding skills. It provides a user-friendly interface that streamlines the process of customizing your website’s design elements.
What Can You Do with the Styles Tab?
The Styles Tab offers a plethora of customization options to help you develop a unique and visually appealing website. Some of the main features and functionalities you can expect to find within the Styles Tab include:
- Color Customization: You can select and modify the color scheme of various elements on your website, such as headings, fonts, backgrounds, buttons, and links. This allows you to develop a cohesive and visually attractive color palette that aligns with your brand or personal preferences.
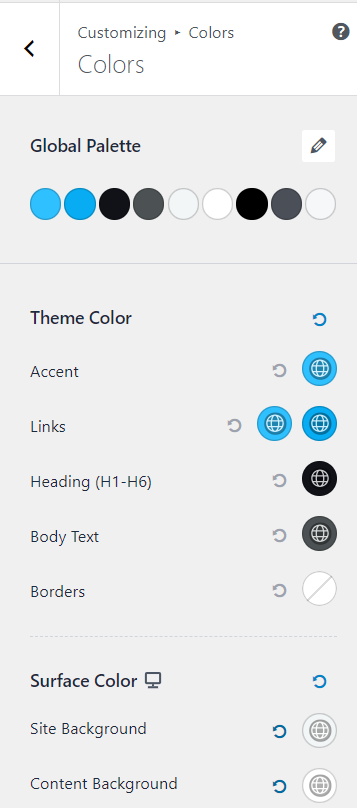
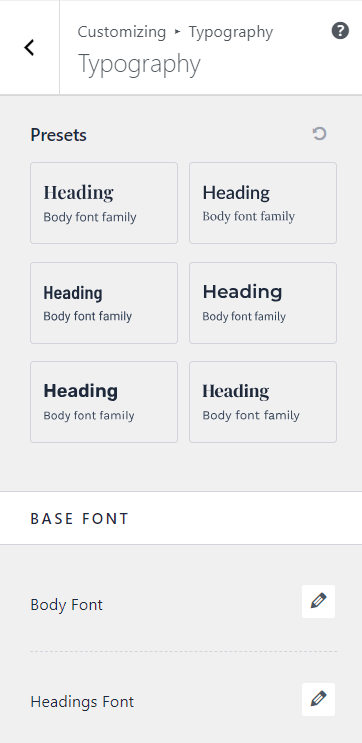
- Typography Customization: The Styles Tab gives you control over the fonts used across your website. You can choose from a great range of font styles, weights, and sizes to create a typography hierarchy that enhances readability and complements your overall design.
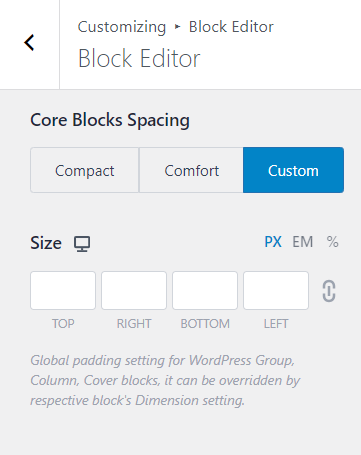
- Spacing and Layout Adjustments: With the Styles Tab, you can tweak the spacing and layout of different elements on your site. This includes adjusting margins, padding, and positioning to achieve the desired visual balance and structure.
- Background Images: The Styles Tab allows you to add background images to specific sections or elements of your website. This can help add visual interest and personality to your site’s design.
- Custom CSS: For more advanced users, the Styles Tab often provides an option to add custom CSS code. This opens up endless possibilities for fine-tuning the design of your website and implementing unique styling elements.
How to Access the Styles Tab
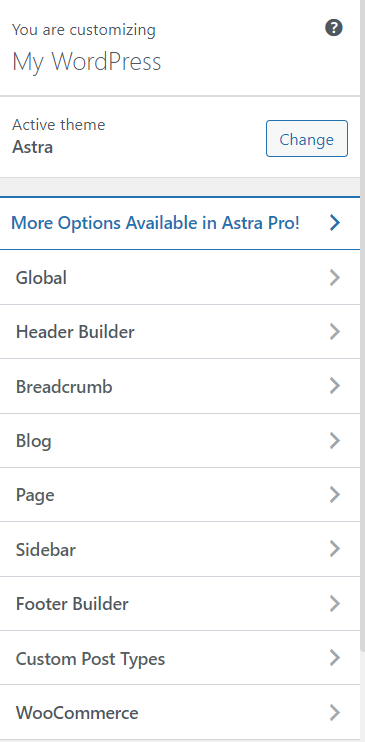
To access the Styles Tab in WordPress, you typically need to navigate to the theme customization settings. The exact location may change depending on the theme you are using, but it is commonly found within the Appearance section of the WordPress dashboard.
Once you have located the Styles Tab, you can begin exploring the various customization options and making changes to your website’s design. It’s important to note that the availability and functionality of the Styles Tab may depend on the theme you are using. Some themes offer more robust customization features, while others may have limited options.
In the next section, we will provide a detailed guide on using the Styles Tab to make changes to the appearance of your website.
Detailed Guide on Using the Styles Tab
Using the Styles Tab in WordPress gives you the ability to customize the appearance of your website in a detailed and specific manner. In this section, we will provide a step-by-step guide on how to utilize the Styles Tab effectively to make changes to your website’s design.
Changing the Appearance of Your Website
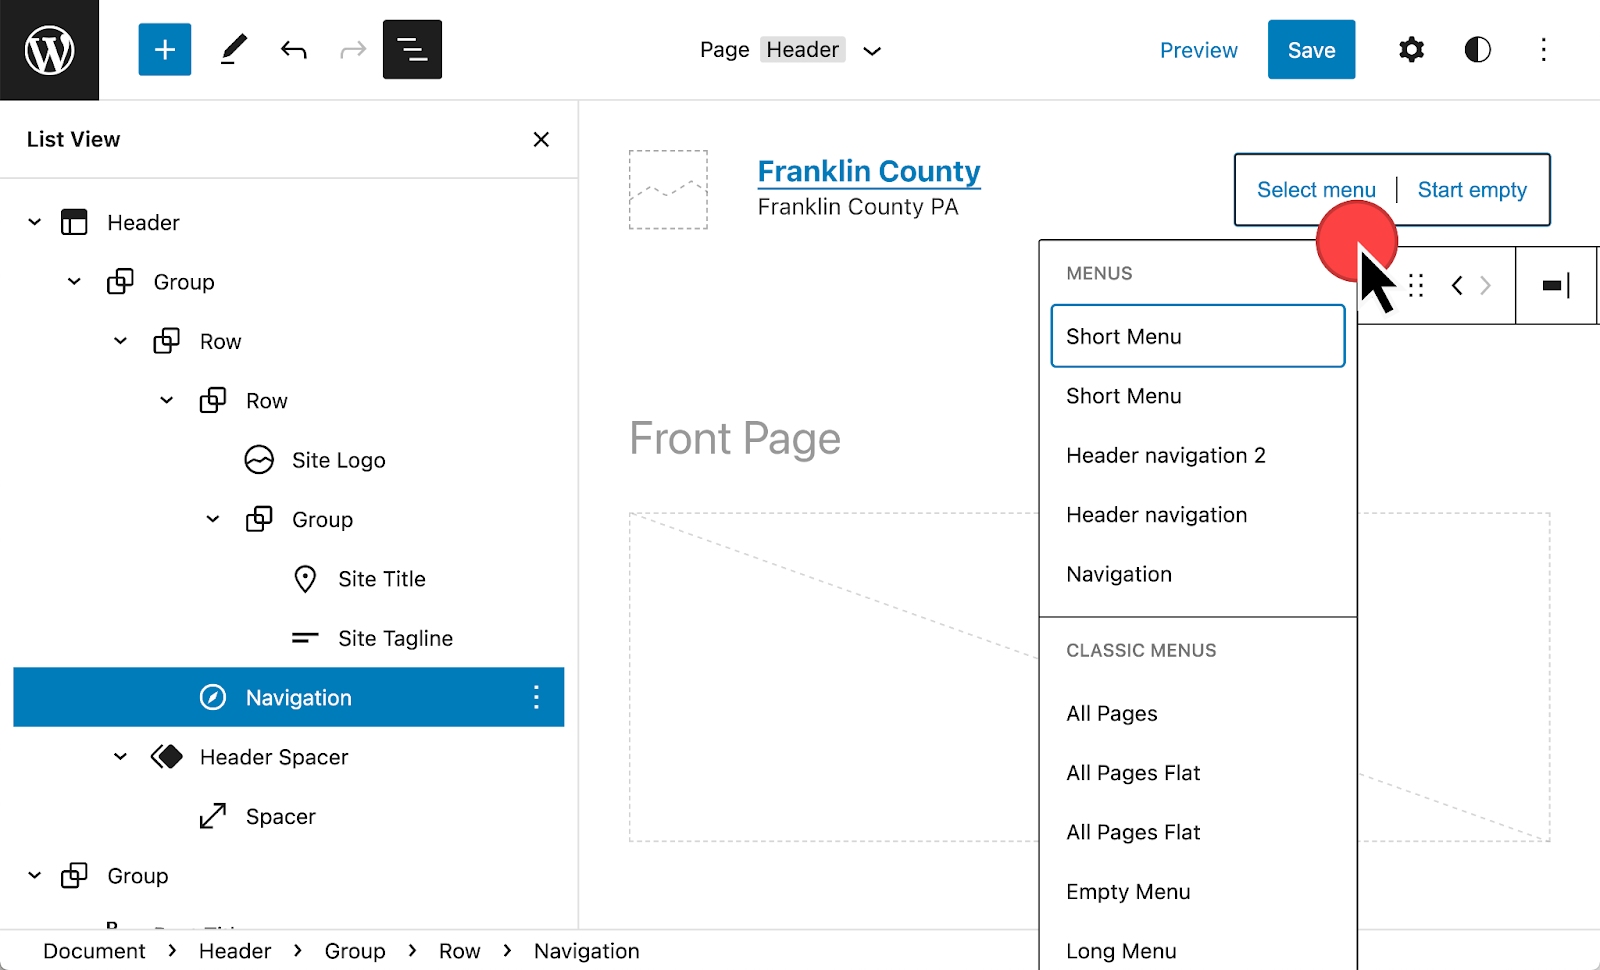
- Access the Styles Tab: Log in to your WordPress dashboard and navigate to the Appearance segment. Look for the theme customization settings or the option to customize your theme. This is where you will find the Styles Tab.
- Select the Element to Customize: Within the Styles Tab, you will see a list of different elements that you can customize, such as headers, body text, links, and more. Choose the element you want to modify.
- Modify Colors and Fonts: Once you have selected an element, you will have options to change its color, font, size, and other related attributes. For instance, in the above Astra theme, there is an option of global where you can change colors and fonts. Use the available tools or dropdown menus to make the desired changes.
- Preview the Changes: Most theme customization settings provide a live preview element that allows you to see the changes in real time. Take advantage of this feature to review how your modifications affect the appearance of your website.
- Save and Publish: Once you are satisfied with the changes, save your modifications and publish them to make them visible on your live website. Be sure to test your website on different devices to ensure that the design changes are responsive and look consistent.
Adding Custom CSS

- Locate the Custom CSS Option: In some theme customization setting, you will find an option to add custom CSS code. If you can’t find it, install and activate the plugin “Custom & JS.” This allows you to add your own styling rules to further customize the appearance of your website.
- Write or Paste CSS Code: Use a text editor or CSS editor to write or paste the custom CSS code that you want to add. This can include advanced styling rules, overrides, or specific modifications for certain elements.
- Apply the Custom CSS: After adding the custom CSS code, save your changes and preview the effects on your website. Make sure to test your website in a detailed to ensure that the custom CSS behaves as expected and doesn’t cause any conflicts or issues.
Previewing and Publishing Changes
- Utilize the Live Preview Feature: As mentioned earlier, many theme customization settings provide a live preview feature. Take advantage of this functionality to see how your design changes will look before making them live on your website.
- Preview on Different Devices: It’s important to test your website’s design changes on various devices, such as desktops, tablets, and mobile devices. This ensures that your website appears consistent and visually appealing across different screen sizes.
- Save and Publish: Once you have finalized your design changes and are satisfied with the preview, save your modifications and publish them to make them visible on your live website. Remember to regularly save your progress as you make changes to avoid losing any work.
By following this detailed guide, you can confidently use the Styles Tab in WordPress to customize the appearance of your website. In the next section, we will address some common issues that you may encounter when working with the Styles Tab and provide troubleshooting solutions.
Troubleshooting Common Issues with Styles Tab
While using the Styles Tab in WordPress, you may encounter some common issues that can hinder your customization efforts. In this section, we will address these issues and provide troubleshooting solutions to help you overcome them.
Styles Tab Not Visible
- Check Theme Compatibility: Ensure that the theme you are using supports the Styles Tab feature. Some older or customized themes may not have this functionality. Consider switching to a different theme or consulting with the theme developer for assistance.
- Verify User Permissions: Make sure that you have sufficient user permissions to access and modify the Styles Tab. If you are using a multisite installation, check if the network administrator has added restrictions to certain features.
- Clear Cache: It is important to clear your browser cache and refresh the page. Sometimes, caching plugins or browser cache can interfere with the visibility of the Styles Tab.
Unable to Save Changes
- Insufficient User Permissions: Ensure that you have the necessary permissions to save changes. Check your user role and privileges to make sure you have the ability to modify theme settings.
2. Plugin Conflict: Deactivate any recently installed plugins and try saving the changes again. A conflicting plugin may be causing issues with the Styles Tab functionality. Activate the plugins one by one to identify the problematic ones.
3. Theme Update: Verify if there are any available updates for your theme. Outdated themes can sometimes cause conflicts and prevent changes from being saved. Update your WordPress theme to the recent version and try saving the changes again. Check for these updates on the official site of theme providers.
Changes Not Reflecting on the Website
- Browser Cache: Clear your browser cache and refresh your website. Cached files may prevent the updated styles from being displayed on the live site.
- CDN Caching: If you are using a Content Delivery Network (CDN), purge the cache to make sure that the latest version of your website is being served to visitors.
- Server Cache: Some hosting providers implement server-side caching. Get in touch with your hosting provider and tell them to clear the cache for your website.
- CSS Specificity: Check the CSS specificity of your custom styles. Sometimes, conflicting CSS rules or selectors with higher specificity can override your changes. Inspect the element using browser developer tools and ensure that your CSS rules are being applied correctly.
By troubleshooting these common issues, you can overcome any obstacles you encounter when using the Styles Tab in WordPress. Remember to always keep backups of your website and consult with theme developers or support forums for specific theme-related issues.
Conclusion
In conclusion, the Styles Tab in WordPress is an essential tool for customizing the appearance of your website. It allows you to make changes to various design elements, such as colors, fonts, spacing, and more, without the need for advanced coding skills. By accessing the Styles Tab within the theme customization settings, you can easily modify the visual aspects of your website to align with your brand or personal preferences.
By utilizing the Styles Tab effectively, you have the power to transform the look and feel of your website, creating a visually appealing and unique online presence. Remember to regularly save your progress, preview your changes, and test your website on different devices to ensure a consistent and responsive design.
With this comprehensive understanding of the Styles Tab in WordPress, you are well-equipped to take control of your website’s design and make it truly your own. So, go ahead and unleash your creativity, try out different styles, and create a website that stands out from the crowd.
Happy customizing!
