
Are you looking to add professional and user-friendly forms to your WordPress website? Look no further than WordPress Forms Lite! WordPress Forms Lite is a powerful and versatile form builder plugin that lets you fabulously create and customize forms with ease. Whether you need a simple contact form or a complex multi-page survey, WordPress Forms Lite has got you covered. With its intuitive interface and extensive features, you can create forms that not only look great but also serve their purpose effectively.
Creating a form involves a few important steps, and we will guide you through each one. From identifying the purpose of your form to choosing the right template, adding and customizing fields, and setting up form notifications and confirmations, you will learn everything you need to know to create a form that meets your specific requirements. So, let’s dive in and get started on harnessing the power of WordPress Forms Lite!
Understanding WordPress Forms Lite: An Overview
WordPress Forms Lite is a popular form builder plugin that presents a user-friendly interface for creating and managing forms on your WordPress website. Whether you need a simple contact form, a registration form, or even a complex survey, WordPress Forms Lite offers a wide range of features and customization options to meet your specific needs.
Why Use WordPress Forms Lite?
WordPress Forms Lite offers several benefits that make it a preferred choice for website owners:
- Ease of Use: The plugin is designed to be beginner-friendly, with a user-friendly interface that lets you create forms without any need for coding.
- Drag-and-Drop Builder: WordPress Forms Lite provides a drag-and-drop form builder, allowing you to easily add and arrange form fields, customize their appearance, and create visually appealing forms.
- Form Templates: The plugin offers a good variety of pre-built form templates that you can cherry-pick from, saving you time and effort in designing your forms from scratch.
- Advanced Field Types: WordPress Forms Lite supports a great range of field types, including text fields, checkboxes, radio buttons, dropdown menus, file uploads, and more. This flexibility allows you to create forms that capture the information you need.
- Conditional Logic: With conditional logic, you can set up rules that determine when certain form fields are displayed based on user responses. This feature entitles you to create dynamic and interactive forms that adapt to user input.
- Form Notifications: WordPress Forms Lite allows you to set up email notifications to receive instant alerts whenever a form is submitted. This ensures that you can promptly respond to form submissions and stay updated on user interactions.
- Data Analytics: The plugin provides built-in analytics and reporting features, allowing you to track form submissions, gain insights into user behavior, and analyze data.
- Integration Possibilities: WordPress Forms Lite seamlessly integrates with popular email marketing services, CRM systems, payment gateways, and other third-party applications, enabling you to automate processes and streamline your workflow.
prerequisites for Using WordPress Forms Lite
Before you start using WordPress Forms Lite, there are a few prerequisites that you need to have in place:
- WordPress: You should have a self-hosted WordPress website or a WordPress.com website with the Business plan. WordPress Forms Lite is not compatible with WordPress.com free accounts.
- WordPress Version: Ensure that you are using the latest version of WordPress or a compatible version specified by the plugin.
- Theme Compatibility: While WordPress Forms Lite is designed to work with most WordPress themes, it’s advisable to check for compatibility issues with your specific theme.
- Active Plugins: Make sure that you do not have any conflicting plugins that may interfere with the functionality of WordPress Forms Lite. It’s always a good practice to deactivate unnecessary plugins and perform compatibility tests if needed.
By meeting these prerequisites, you will be ready to install and unleash the full potential of WordPress Forms Lite on your website. In the next section, we will guide you through the installation process, ensuring a smooth setup for using this powerful form builder plugin.
How to Install WordPress Forms Lite on Your Website
Installing WordPress Forms Lite on your website is a straightforward process. In this section, we will guide you through the necessary steps to get the plugin up and running.
Step 1: Install WordPress Forms Lite
Once you are logged in to your WordPress admin dashboard, follow these steps to install WordPress Forms Lite:
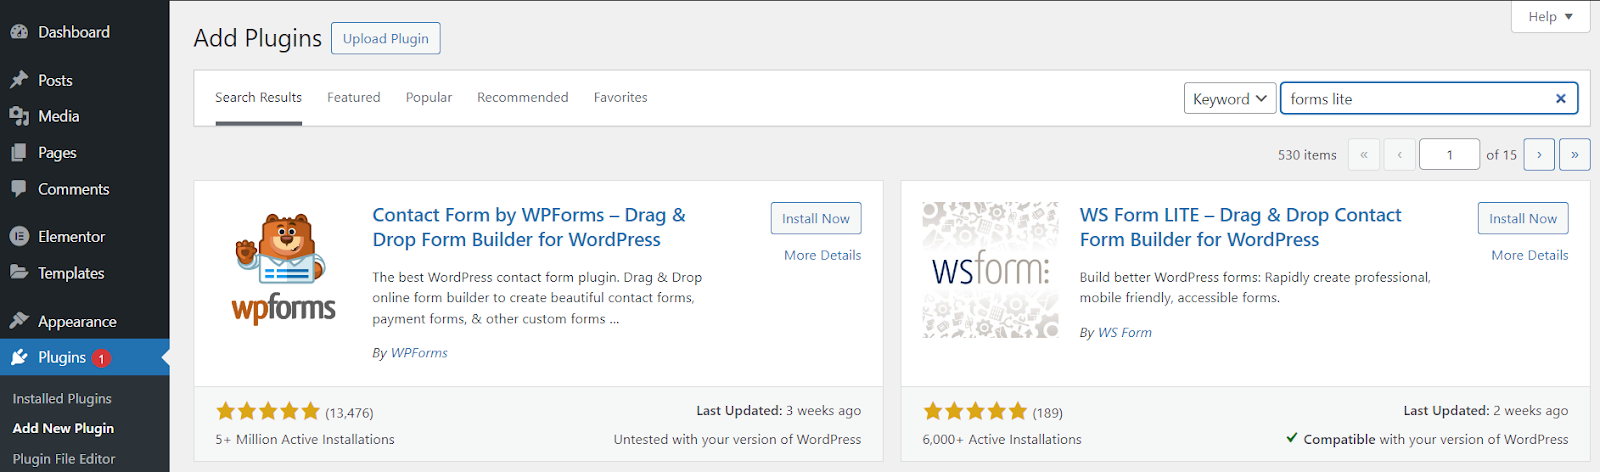
- Navigate to the left-hand menu, locate “Plugins,” and choose “Add New.” Within the “Add Plugins” page, utilize the search bar to find the WS Forms Lite Plugin.
- Opt for the plugin and initiate the installation process by clicking the “Install Now” button.
- WordPress will proceed to upload and install the plugin. After the installation is finished, activate the WordPress Forms Lite on your website by clicking the “Activate Plugin” button.
Step 2: Configure Basic Settings
After activating the plugin, you may need to configure some basic settings to ensure that WordPress Forms Lite functions optimally. Follow these steps:
- Within your WordPress admin dashboard, access the left-hand menu and select “WPForms,” then choose “Settings.”
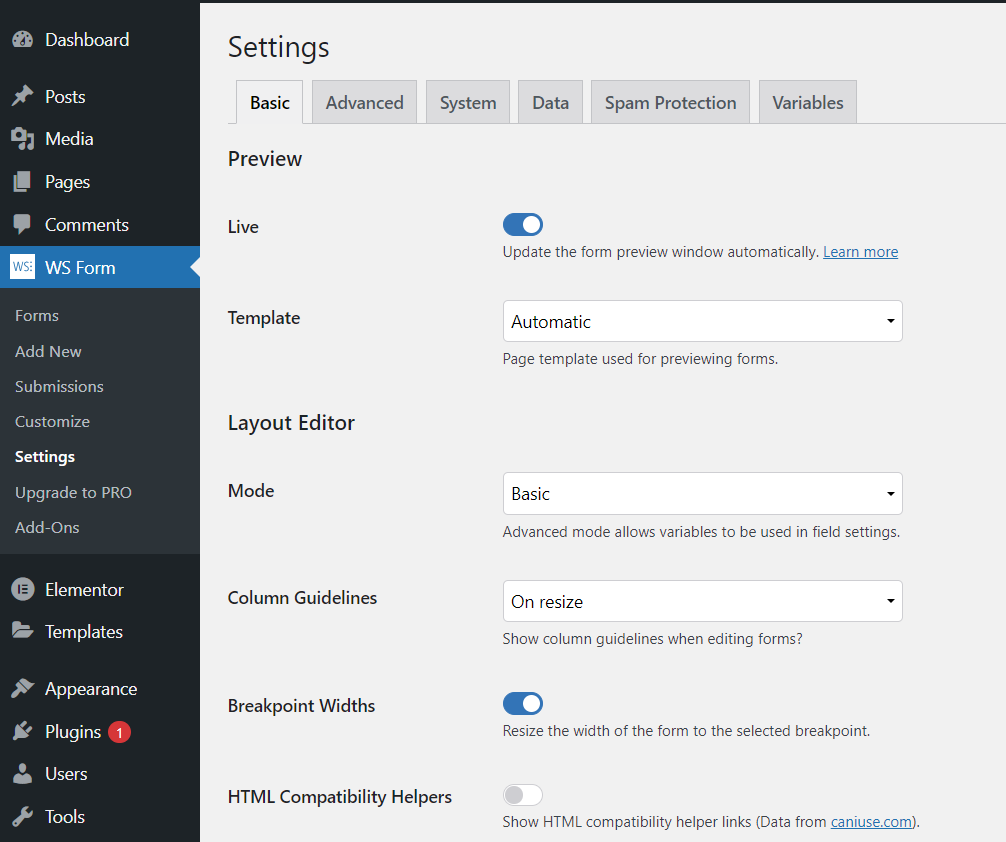
- On the ensuing “Settings” page, customize general settings and utilize the layout editor as per your requirements.
- Save your adjustments by clicking the “Save Settings” button.
Congratulations! You have successfully installed WordPress Forms Lite on your website. In the next section, we will explore how to create a form using this powerful plugin.
How to Create a Form Using WordPress Forms Lite
Creating a form using WordPress Forms Lite is a breeze, thanks to its seamless and user-friendly interface. In this section, we will walk you through the step-by-step process of creating a form that suits your specific needs.
Step 1: Identify the Purpose of Your Form
Before diving into the form creation process, it’s essential to determine the purpose of your form. Are you creating a contact form, a registration form, a survey, or something else? Understanding the purpose will help you choose the appropriate form template and customize it accordingly.
Step 2: Choose the Right Form Template
WordPress Forms Lite provides a wide range of pre-built form templates to choose from. These templates serve as a great starting point and can save you time and effort in designing your form from scratch. To choose a form template:
- In your WordPress admin dashboard, click on “WPForms” in the left-hand menu panel and select “Add New”.
- On the form builder page, you will see a list of form templates. Browse through the available options or use the search bar to find a template that aligns with your form’s purpose.
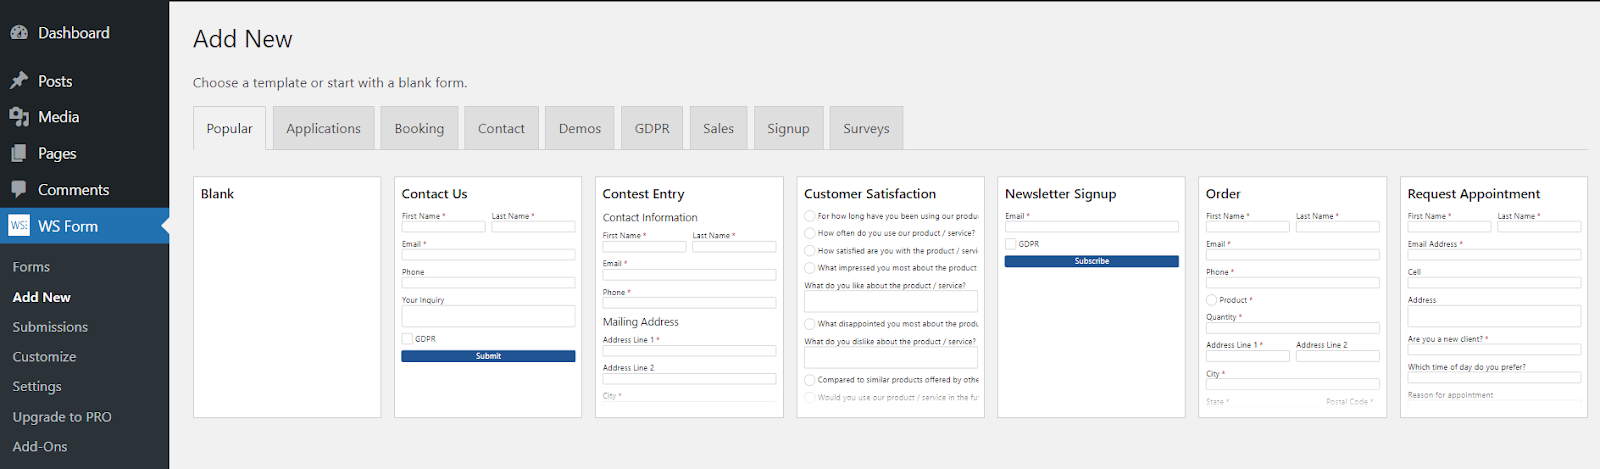
- Once you have selected a template, click on it to load the form builder.
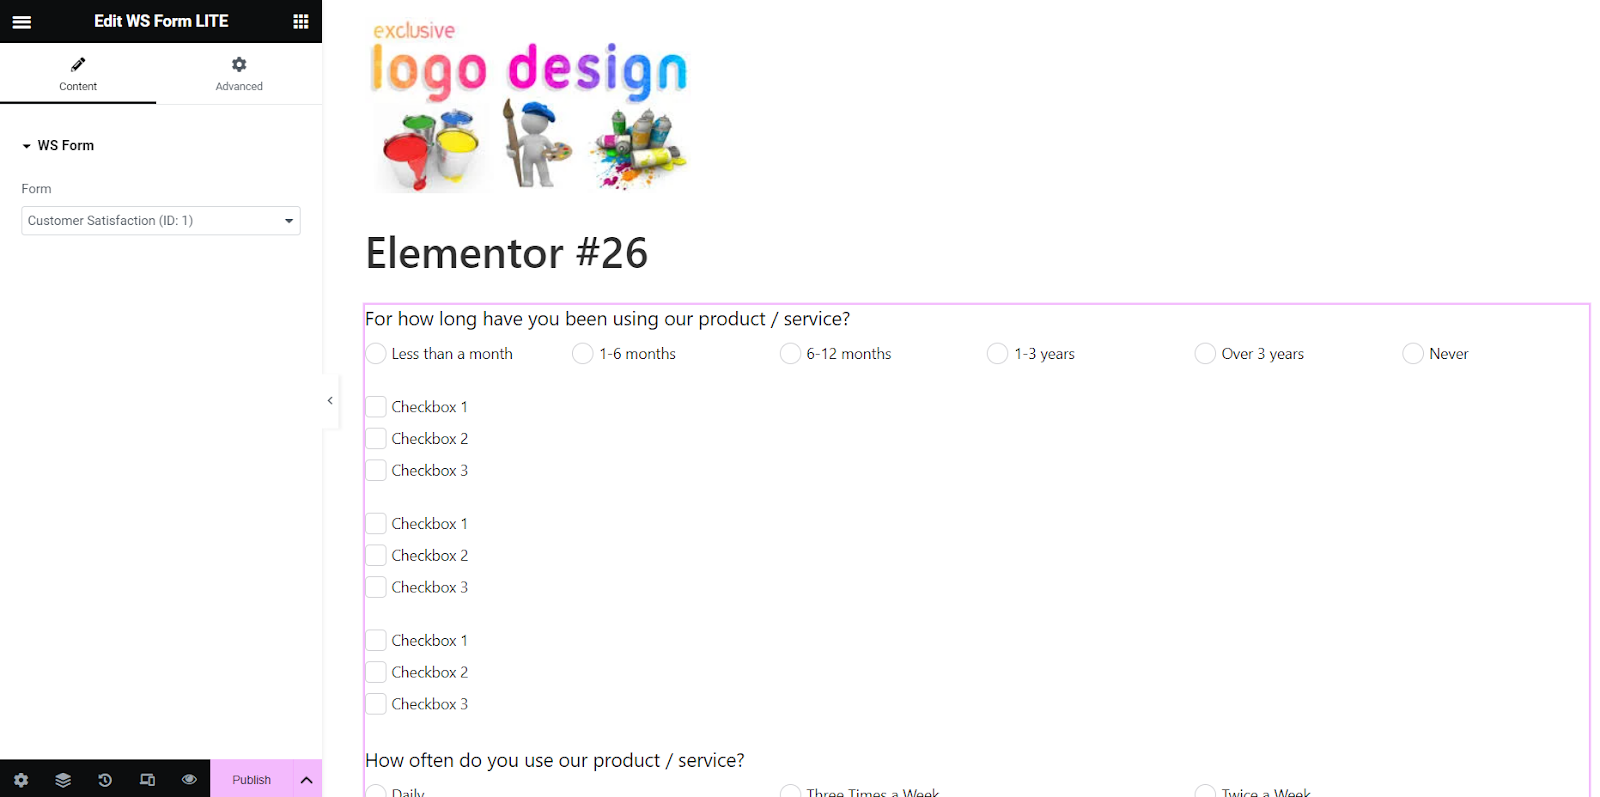
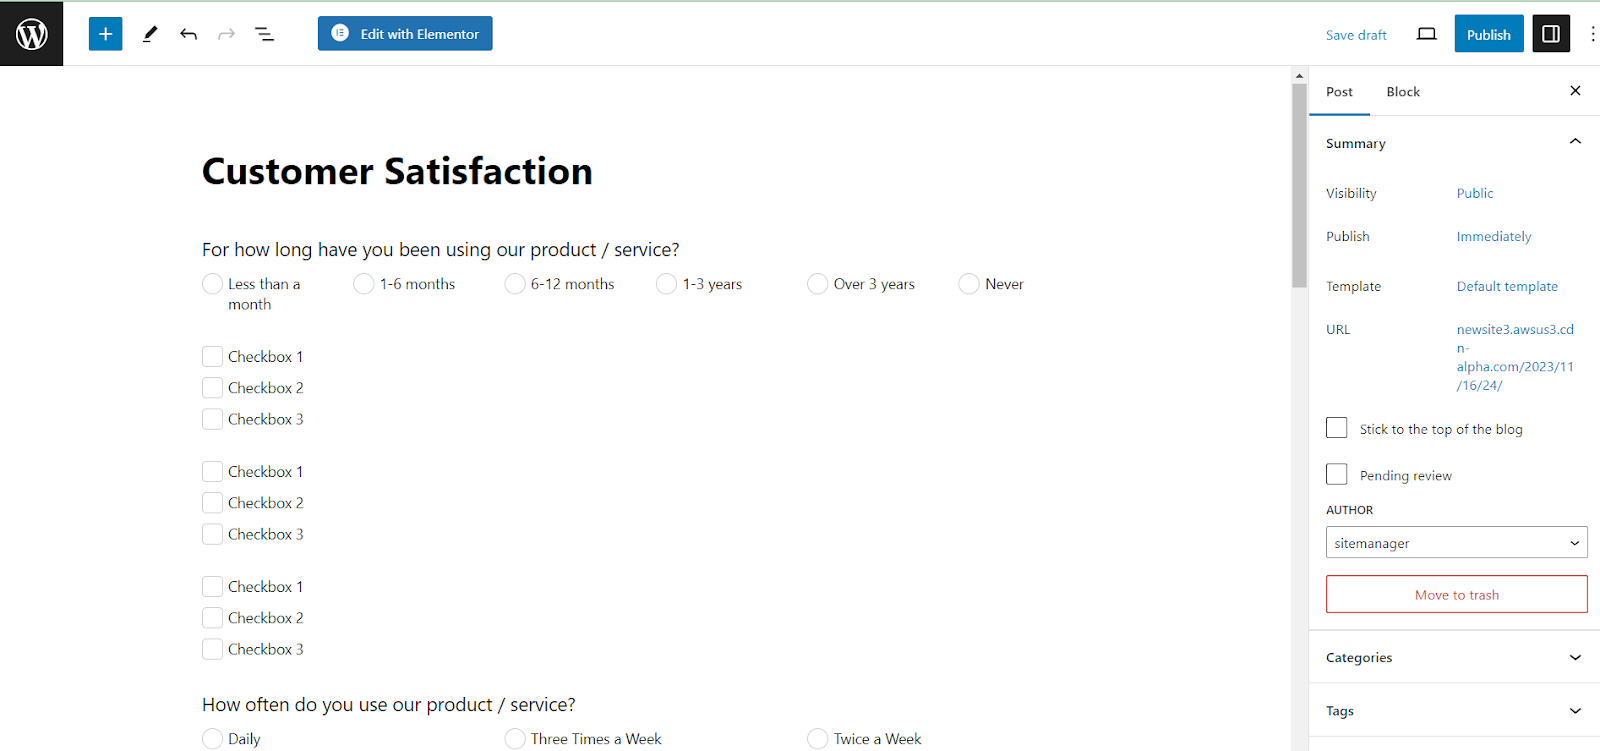
Step 3: Add and Customize Fields
With the form builder loaded, you can now start adding and customizing form fields. WordPress Forms Lite offers a variety of field types to choose from, including text fields, checkboxes, radio buttons, dropdown menus, file uploads, and more. To add and customize fields:
- Click on the form field you want to add from the “Fields” section on the right-hand side of the form builder.
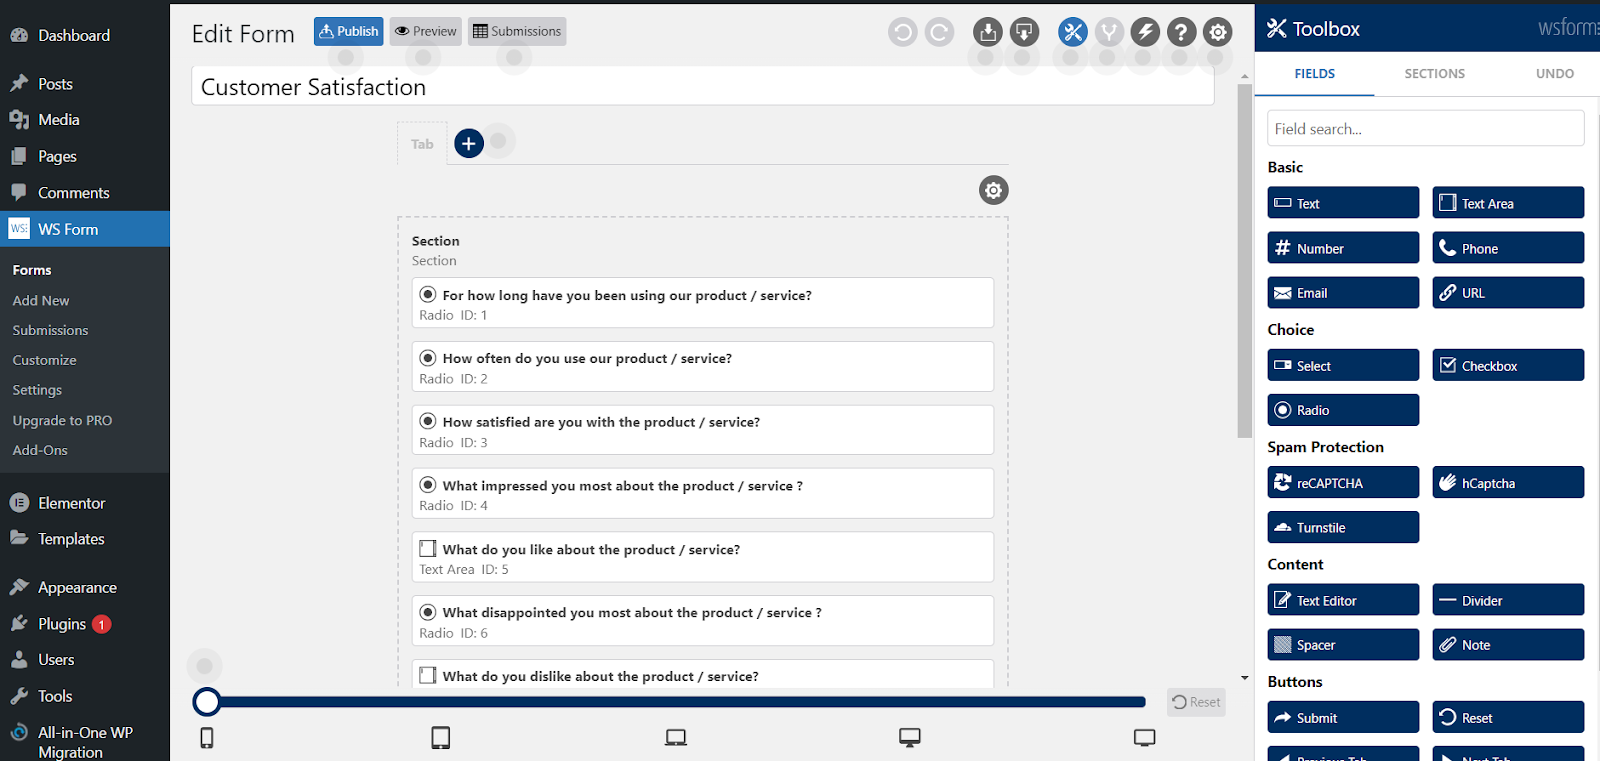
- Drag and drop the field onto your form where you want it to appear.
- Customize the field by clicking on it. For instance, we added the checkbox to the template. You can edit the checkbox settings, label, layout, accessibility, and more.

- Repeat these steps to add and customize additional fields as needed for your form.
Step 4: Set Up Form Notifications and Confirmations
Form notifications and confirmations play a crucial role in ensuring proper communication and user experience. To set up form notifications and confirmations:
- Within the form builder, select the “Settings” tab located at the top.

- In the “Actions” section, customize email notifications to receive data from form submissions.
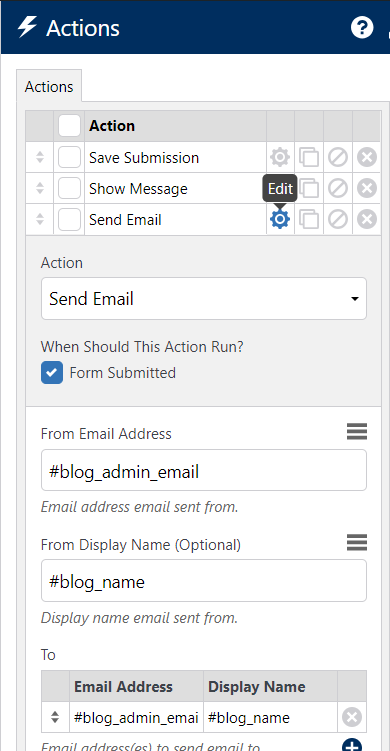
- In the “Confirmation” section, establish either a confirmation message or a redirection for users after submitting the form. Choose the option that best suits your preferred user experience.
Step 5: Save and Publish Your Form
Once you have added and customized all the necessary fields, notifications, and confirmations, it’s time to save and publish your form. To save and publish your form:
- Click on “Publish,” situated at the top right corner of the form builder.
- Give your form a name and click on the “Save” button again.
- After saving, click on the “Embed” button at the top of the form builder to get the shortcode or the form’s embed code.
- Use the shortcode or embed code to add your form to a page or post on your website.
Congratulations! You have successfully created a form using WordPress Forms Lite. In the next section, we will explore different methods to add your form to a page or post.
How to Add Your Form to a Page or Post
Once you have created a form using WordPress Forms Lite, the next step is to add it to a page or post on your website. In this section, we will explore different methods to accomplish this.
Method 1: Using the WordPress Editor to Add a Form
One of the simplest ways to add your form to a page or post is by using the WordPress Editor. Follow these steps:
- In your WordPress admin dashboard, navigate to “Pages” or “Posts” and click on “Add New” or edit an existing page/post.
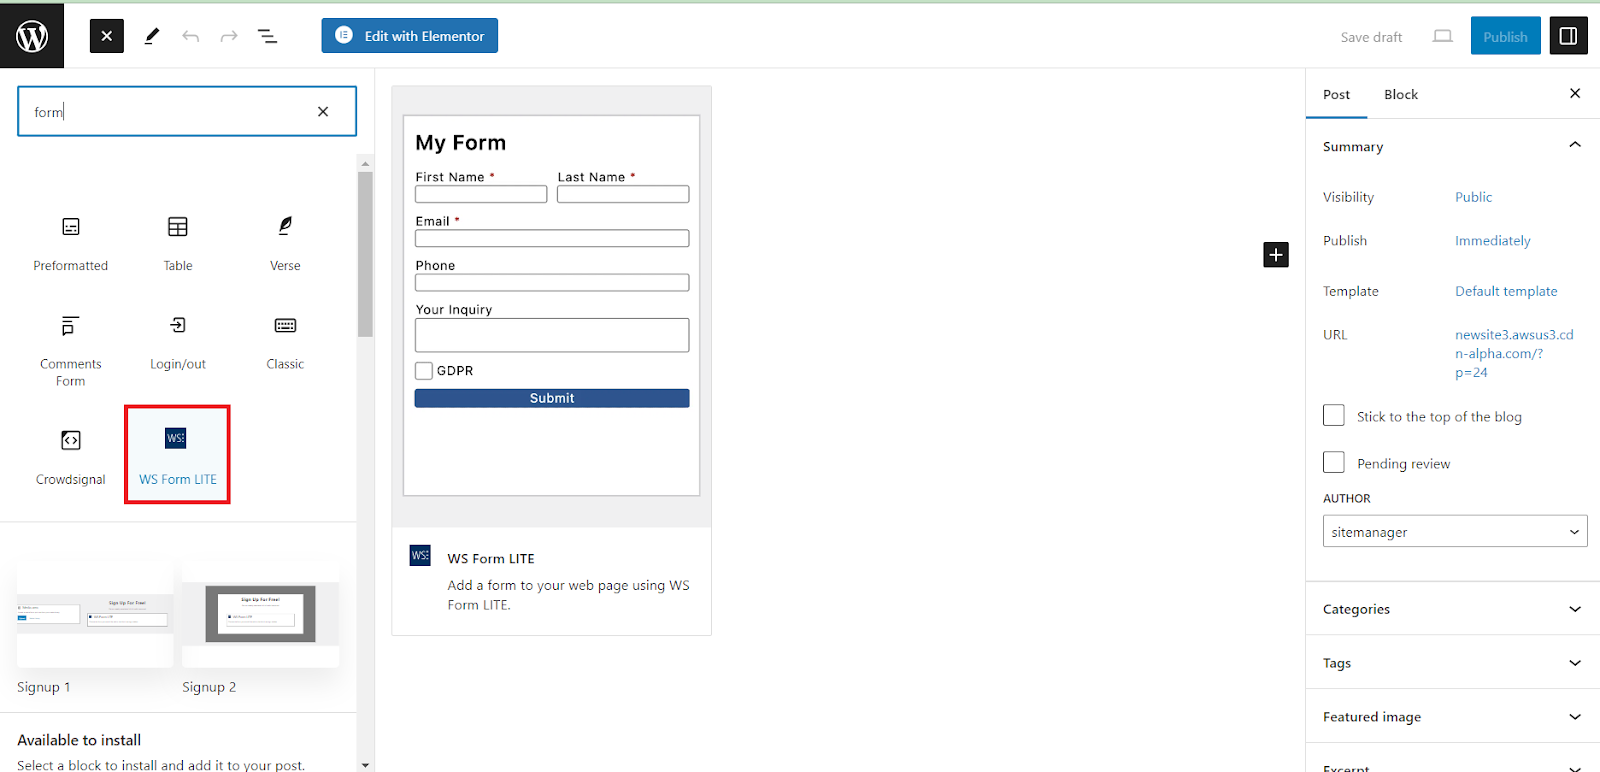
- In the WordPress Editor, place your cursor at the location where you want to insert the form.
- Click on the “Form” button in the toolbar of the WordPress Editor. It will display the “WPForms” icon.
- Clicking on the “WPForms” icon will open a popup window showing a list of available forms. Choose the form you want to add and click on the “Select Form” button.

- The form will be inserted into your page/post. You can preview the page/post to ensure that the form is displayed correctly.
Method 2: Using Gutenberg Blocks (If Applicable)
If you are making use of the Gutenberg editor in WordPress, you can also add your form using Gutenberg blocks. Follow these steps:
- In your WordPress admin dashboard, navigate to “Pages” or “Posts” and click on “Add New” or edit an existing page/post.
- Click on the “+” icon to add a new block.
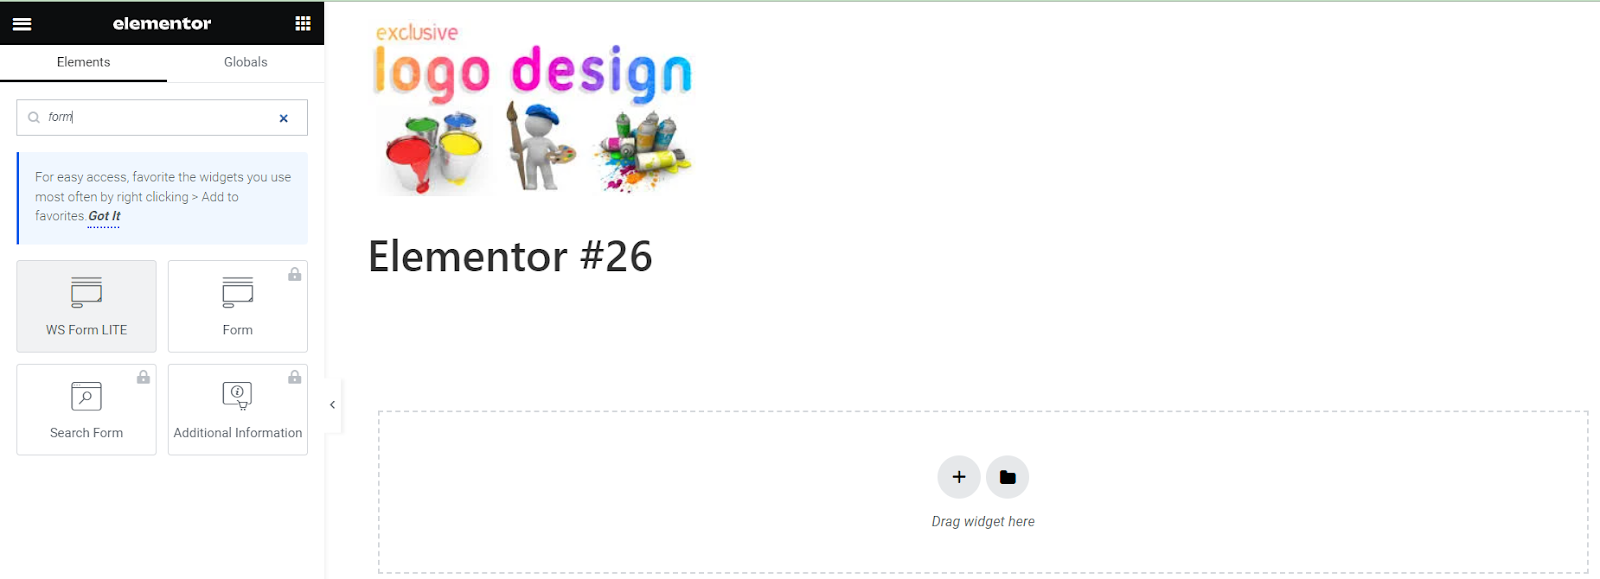
- Search for “WPForms” in the block search bar or look for the WPForms block category.
- Select the WPForms block and choose the form you want to add from the dropdown menu.
- Customize the block settings if necessary.
- Save or update the page/post, and the form will be displayed when you view the page.
Using any of these procedures, you can easily add your WordPress Forms Lite form to a page or post on your website. In the next section, we will discuss how to preview and test your form to ensure it functions correctly.
Tips for Managing Form Submissions
Managing form submissions is an important aspect of using WordPress Forms Lite effectively. In this section, we will provide you with some valuable tips and techniques for managing and handling form submissions.
Viewing and Responding to Submissions
- Form Entries: In your WordPress admin dashboard, go to “WPForms” and click on “Entries” to view all the form submissions. Here, you can see a list of all the submissions received, along with the date and time of submission.
- Submission Details: Clicking on an individual form entry will display the submission details, including all the information submitted by the user. You can review the data and take any necessary actions based on the information provided.
- Email Notifications: Set up email notifications in the form settings to receive instant alerts whenever a form is submitted. This ensures that you can promptly respond to form submissions and stay updated on user interactions.
- Replying to Submissions: If a user provides contact information and requests a response, you can reply to their submission directly from your email client or by using the email address provided in the form submission.
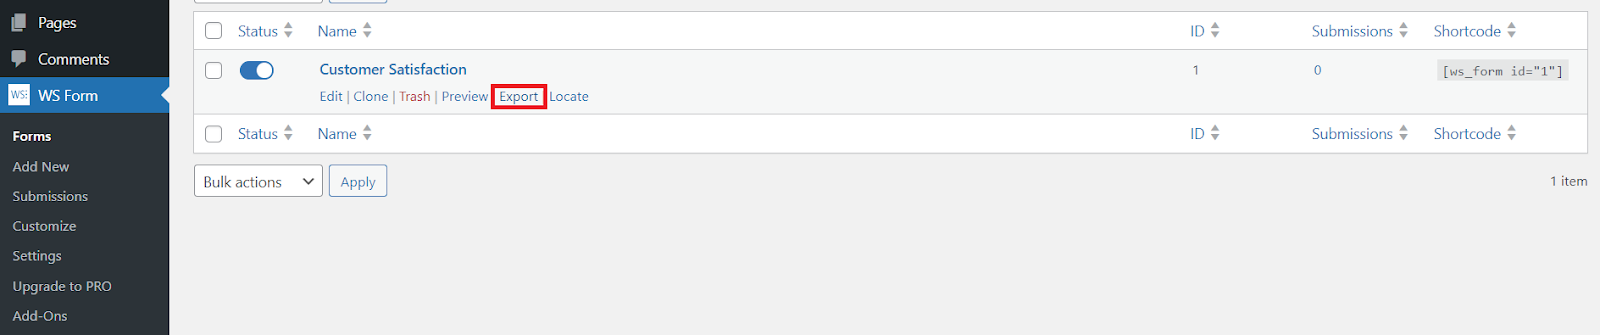
Exporting Submission Data
Export to CSV: WordPress Forms Lite allows you to export form submission data to a CSV file. This is useful for further analysis, reporting, or importing data into other applications. In the “Entries” section, select the desired form entries and click on the “Export” button.
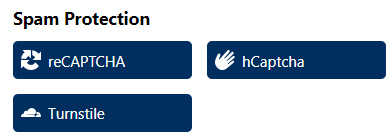
Managing Spam and Security
- Spam Protection: WordPress Forms Lite provides built-in spam protection features, such as Google reCAPTCHA and honeypot fields. Enable these features in the form settings to prevent spam submissions and ensure the security of your forms.
- Form Security: Regularly update WordPress Forms Lite and other plugins to the latest versions to ensure you have the most secure and up-to-date features. Additionally, consider using a security plugin for your WordPress website to enhance overall security.
- Privacy and Data Protection: Ensure that your form complies with privacy regulations, such as GDPR or CCPA, if applicable. Implement measures to protect user data and clearly communicate your data handling practices in your privacy policy.
Regular Backup and Maintenance
- Regular Backups: It is always a good practice to regularly backup your WordPress website, including form submissions. This ensures that you have a copy of important data in case of any unforeseen events. You can do this with the help of an in-built backup service provided by the hosting providers or by backup plugins.
- Form Cleanup: Periodically review and clean up old form submissions to keep your database optimized and organized. This can help maintain the performance of your website.
Conclusion
By following these tips for managing form submissions, you can effectively handle user interactions, maintain data integrity, and ensure the smooth functioning of your WordPress Forms Lite forms. With these insights, you are now equipped to harness the full potential of WordPress Forms Lite on your website.
