
Of all the ground-breaking errors ever found in WordPress, 404 error “Page Not Found” is the most common one, and easy to solve one too. But it’s a rather unwelcome error for first-time visitors and can cause a high bounce rate and low conversion.
Moreover, a 404 Error indicates that you have made some changes to the site and that you should add “redirect 301” to pages for better SEO purposes.
In this article, we will share 7 easy steps to solve 404 “Page Not Found” errors. But first let’s make something clear about 404 Error and what causes them to appear.
What is 404 Error “Not Found”?
A 404 error typically appears when a user tries to access a particular page or URL that does not exist on the website. 404 error is an HTTP status code that appears when the server tries to find the requested page or resource. As a result, the web hosting server delivers the user a “404 Not Found” error message.
The 404 error can occur due to a number of factors, including a broken link, a removed page, or a mistyped URL. This issue can degrade the user experience and increase the bounce rate since users may abandon the website if they receive a 404-error page.
There are many common causes, such as:
- Broken Links
- The user attempts to access a page that does not exist.
- outdated or badly coded plugins and themes.
You can attempt many options to address the 404 problems in WordPress, such as updating broken links, utilizing a 404 error plugin, or creating a custom 404 page to direct readers to the other relevant pages on your website.
Variations of 404 error – Not Found
Different browsers, sites, and apps show different 404 Not Found errors; here are some examples you may have encountered.
- 404 Not Found
- Not Found
- 404 “Error 404”
- HTTP Error 404″
- Page Not Found
- The requested URL was not found on this server.
- The page you requested no longer exists.
- The page cannot be found.
- We can’t find the page you’re looking for.
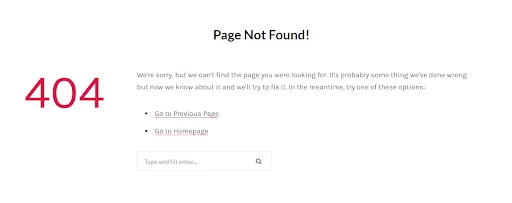
The error message is unique to every website and browser, and it can also be customized by the developer. Add a little vibrant detail to the 404 error, so users don’t get frustrated.
Like with these ones…
When Does a 404 – Page Not Found Error Occur in WordPress?
Page not found can happen for several reasons, including:
- The requested URL was mistyped or misspelled.
- The page or file was deleted or moved to a different location on the server.
- There is an error in the website’s permalink structure.
- There is an issue with the server configuration or settings.
- The website or webpage has been removed or taken down.
What is the Impact of 404 Errors?
404 errors can have a negative impact on your website’s user experience, search engine rankings, and overall performance. Listed below are some of the potential impacts of 404 errors:
- Poor user experience: When a visitor encounters a 404 error, it can be frustrating and confusing. If visitors repeatedly encounter 404 errors on your website, they may become frustrated and leave your site, leading to a high bounce rate and low engagement.
- Negative impact on search engine rankings: Search engines like Google prioritize websites with good user experiences and may penalize sites with a high number of 404 errors. This can result in lower search engine rankings and less traffic to your website.
- Lost traffic and revenue: If a visitor is unable to find the content they are looking for on your website due to a 404 error, they may leave your site and look for the information elsewhere. This can result in lost traffic and potential revenue.
- Broken links: If a page or file that is linked to another website returns a 404 error, it can create a broken link. Broken links can negatively impact your website’s reputation and authority and may lead to a loss of referral traffic.
To minimize the impact of 404 errors, it is important to regularly monitor your website for broken links and update your content and links as needed.
How to Monitor WordPress Websites for 404 Errors?
Monitoring your WordPress website for 404 errors is important to maintain a positive user experience and avoid potential negative impacts on search engine rankings and website performance. Following are the ways to monitor your WordPress website for 404 errors:
- Use Google Search Console: Google Search Console is a free tool that allows you to monitor the performance of your website in search engine results pages (SERPs). It also provides a report on crawl errors, including 404 errors, that can help you identify pages or files that need to be fixed.
- Install a plugin: There are several WordPress plugins, such as Broken Link Checker and SEO Plugins, that can help you monitor your website for broken links and 404 errors. These plugins can automatically scan your website for broken links and redirect visitors to the correct page or file.
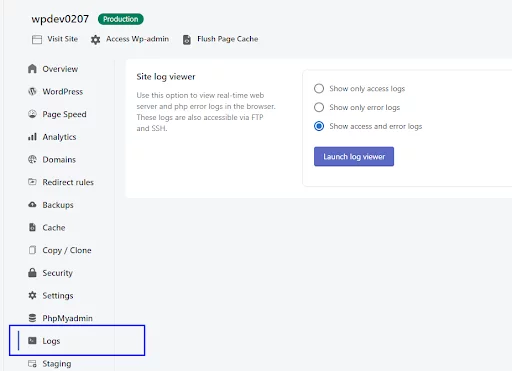
- Use server logs: Your website’s server logs can provide information on 404 errors, including the URL of the requested page or file and the source of the request. Reviewing your server logs regularly can help you identify 404 errors and take action to fix them. At Nestify, you can access logs anytime from the Nestify dashboard. You can access logs in Manage Sites > Sites > Logs.
Manually check your website: Periodically checking your website can help you identify broken links and 404 errors that automated tools may not detect. You can use a web browser or a tool like Screaming Frog to crawl your website and identify broken links.
By monitoring your WordPress website for 404 errors and taking action to fix them, you can improve the user experience, maintain positive search engine rankings, and maximize your website’s performance.
How to Fix 404 Error “Page Not Found” in 7 Easy Steps
This article will show a detailed, step-by-step guide to solving 404 errors. So, let’s dive right in.
- Check the URLs
Check your typos: We all make typo mistakes; well, it’s not common to enter an URL, but do double check the spelling, numbers, and capitalization of the URL.
Check for redirects: Check whether the page has been moved or redirected to another URL.
Check for broken links: If you get a 404 error from a link on another website, the link is probably broken. Instead of using the broken link, try going straight to the page.
- Delete Cookies & Browser History
Clearing your browser history and deleting cookies gives your browsing a fresh start (like you’re visiting the site for the first time) and can clear any 404 errors, if there are any.
Moreover, you can try visiting your site in incognito mode. You can find the setting for clearing browser data here:
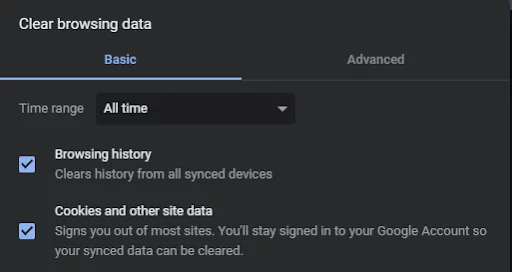
Just paste the URL in the search bar: chrome://settings/clearBrowserData
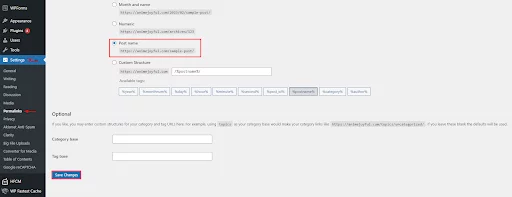
- Update your Permalinks
Simply saving new permalinks can resolve 404 errors. The simplest solution is to update your permalink settings using the WordPress Dashboard. This will update your .htaccess file with the necessary WordPress website settings.
- Login to your WordPress dashboard
- Click on Setting to Permalinks
- Select the default configuration, you had previously (in my case it’s Post name), if it’s Custom structure for you then select one.
- Lastly click on “Save Changes”
This solution can fix 404 “Not Found” or permalinks not working errors on your site, if not.
If it doesn’t work, then you’ll need to edit the .htaccess file in the directory where the WordPress is installed (basically you need to update the .htaccess file manually).
For this solution to work, keep on reading step no 4.
- Update .htaccess file using FPT
To update a .htaccess file you’ll need to use your FPT (File Transfer Protocol), You can use FileZilla a free FPT solution to edit/view.
Note: Make sure to back-up your site before making any changes.
- Login to server using FTP client.
- Locate the .htaccess file in /wp-content/ and /wp-includes/
- Click on Public_html folder
- Right click on View/Edit to edit the file
- Copy and paste this code and save the file
# BEGIN WordPress

RewriteEngine On

RewriteRule .* - [E=HTTP_AUTHORIZATION:%{HTTP:Authorization}]

RewriteBase /

RewriteRule ^index\.php$ - [L]

RewriteCond %{REQUEST_FILENAME} !-f

RewriteCond %{REQUEST_FILENAME} !-d

RewriteRule . /index.php [L]

# END WordPress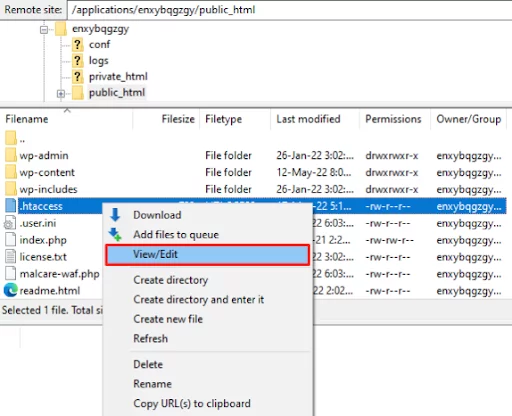
If this code does not work or it is not a compatible website then, visit the WordPress .htaccess support page and copy/paste the code version that is best appropriate for your website.
- Use a 301 Redirect
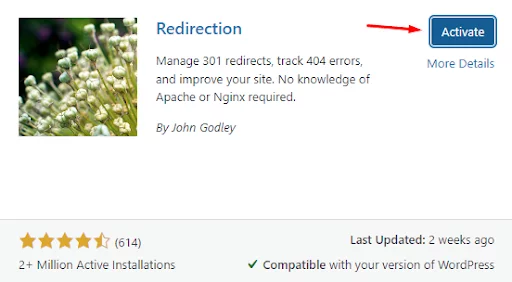
If the 404 error still exists then try using the 301 redirect plugin. There are many Redirects plugins available on WordPress for free. Here is one of my favorite plugins and it’s free – Redirection. It’s simple to use and easy to implement 301 redirects, just follow the steps.
- Click on Install & Activate plugin
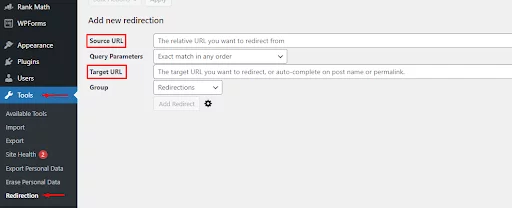
- Click on Tools to Redirection
- Copy the URL that you want to redirect & paste it in Source URL.
- Use Target URL to specify where you want your URL to redirect
- Set the Group to Redirections
- Lastly click on Add Redirect
Hooray, it’s done!
If you wish to utilize the .htaccess file as a redirect, add the following code to it. Make sure to replace the URLs with those from your own website.
Redirect 301/oldpage.html https://www.mywebsite.com/newpage.html
- Try Disabling Theme and Plugin
A 404 error on your WordPress site might be caused by an old or badly built plugin. To test this, disable all plugins and switch to a different theme.
Note: It’s recommended to take backup before making any changes.
You may access your WordPress files with an FTP client such as FileZilla. Change the name of the plugins folder to something like myplugins in public_html > wp-content.
Note: While all WordPress themes include 404.php files, not all have a custom 404 error template file. If a 404 problem occurs, WordPress will automatically redirect to the 404.php page.
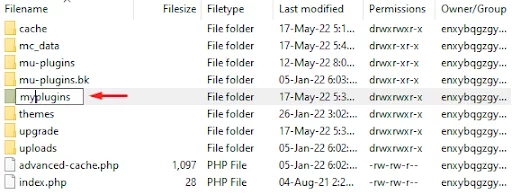
Return to your browser to see if the webpage is still operational. If the error has been fixed, one of your plugins might be to blame. If the 404 error still remains then simply change myplugins folder name to plugins.
However, if the error is resolved, then change the name of the myplugins folder to plugins and then proceed with the steps below to determine which of your plugins is generating the problem.
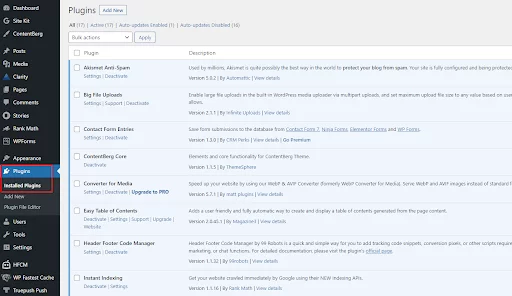
- Open WordPress and go to Dashboard
- Click on Plugins
- Activate each plugin one by one to test if the site is functional.
- You’d know which plugin caused the 404 problems if you encountered it.
- To resolve the problem, either update or delete the plugin.
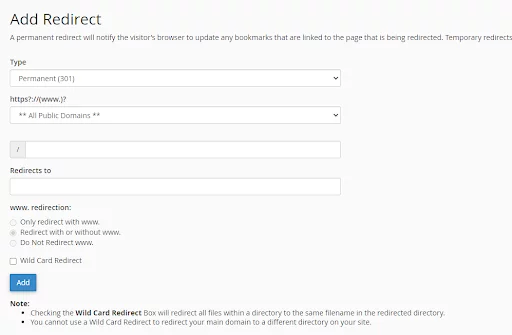
- Set up a 301 redirect using cPanel
cPanel is a well-known web hosting control panel that offers a simple interface for controlling many parts of your website, such as URL redirects. Here are the steps for creating a 301 redirect in cPanel:
- Log into cPanel.
- Find the Redirects tool.
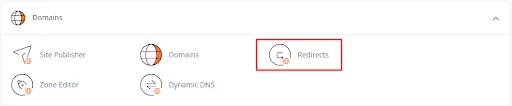
- Choose “Permanent 301” from the type drop down menu.
- Enter the source URL in the Source URL field.
- Enter the destination URL in the Destination URL field.
- Choose the redirection settings.
- Click the “Add” button to create the redirect.
That’s all! Your cPanel account is now configured to use a permanent 301 redirect to send users from the old URL to the new URL. This will assist retain the original URL’s search engine rankings and traffic, as well as give a consistent user experience for your visitors.
How to Customize a 404 Error Page?
A good 404 page should provide helpful information to visitors who encounter a 404 error on your website. Here are some components that can be included on a 404 page:
- Heading: A clear and concise heading that informs visitors that they’ve reached a 404 error page.
- Message: A brief message explaining the error and offering the visitor helpful information. This could include suggestions for other pages to visit or instructions on how to search for content on your website.
- Search bar: A search bar can be helpful for visitors who are looking for specific content on your website. Make sure the search bar is prominent and easy to use.
- Links to popular pages: Including links to popular pages on your website can help visitors find relevant content quickly.
- Contact information: If visitors are unable to find the information they’re looking for, providing contact information such as an email address or phone number can be helpful.
- Branding: Including your website’s branding elements, such as your logo, color scheme, and font, can help visitors feel more familiar and comfortable on your 404 page.
- Humor: If appropriate for your website’s tone and audience, incorporating humor into your 404 page can make the experience more lighthearted and less frustrating for visitors.
By including these components on your 404 page, you can improve the user experience and reduce the impact of 404 errors on your website.
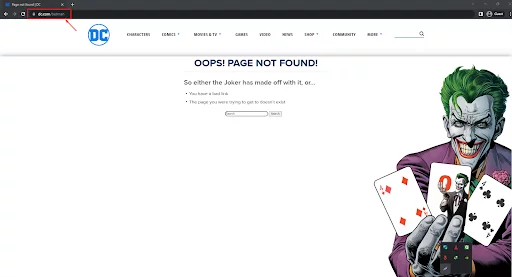
Examples of Some Innovative 404 Pages
You can get creative while designing the 404 page for your website. Following are some good examples of creative 404 pages:
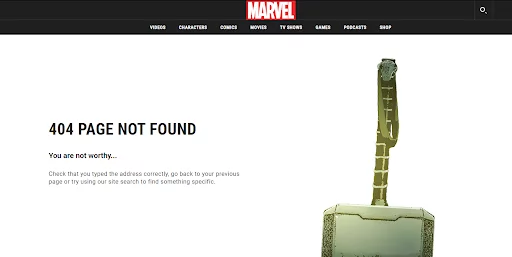
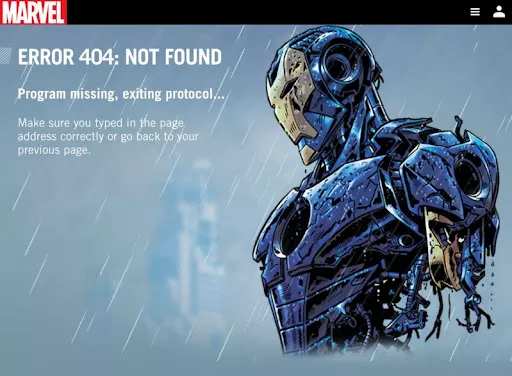
- Marvel
The 404 page for Marvel is very interesting as it gives movie characters every time you refresh it. The smart use of animation and references to movies gives it a fresh look.
- PIXAR
Not reaching your desired web page is always sad. PIXAR Studios 404 page brilliantly used their character Sadness from the immensely popular movie Inside Out (2015).

Every WordPress theme comes with a 404 Template. If you look forward to customizing it, check for 404.php in the themes folder.
Final Say
I hope these “WordPress 404 Page Not Found” errors help you solve your problem. Please let us know in the comments which solution works best for you.
Do you have any recommendations that we did not include? We’d love to hear your ideas in the comments box below.
