
Are you experiencing limitations when it comes to submitting forms or saving large amounts of data on your WordPress website? If so, you may be encountering an issue related to the “Max Input Vars” setting in WordPress. Max Input Vars determines the maximum number of variables that can be sent in an HTTP request, and if this limit is exceeded, it can lead to server errors, hinder website performance, and negatively impact user experience.
So, let’s explore the concept of Max Input Vars in WordPress, understand the reasons why you should consider increasing it, and discuss various methods to do so. Let’s dive in and explore this important topic together!
Boost WordPress Performance: Why and How to Increase Max Input Vars
The max_input_vars setting in PHP determines how many variables (like GET, POST, and COOKIE variables) the server can process in a single request. This limit is particularly important for WordPress websites that use many form fields, complex theme settings, or plugins with large configurations. If the limit is too low, it can cause incomplete submissions or missing data in forms, especially in large websites with many inputs (like custom fields, WooCommerce products, or theme options).
For example, if you have a large form with many options, or you’re using a theme or plugin that adds many input variables, you might run into an issue where not all your data gets processed or saved properly. Increasing the max_input_vars setting can help prevent these issues.
1. Preventing Server Errors
When the max_input_vars limit is reached, your server might encounter errors such as the “HTTP 400 Bad Request” or “Request Entity Too Large” error. These errors typically arise when the number of input variables in a request exceeds the server’s capacity to process them. In WordPress, this can happen when a form has too many fields or when a plugin or theme requires a large number of configuration options to be saved.
If these errors occur, it can result in incomplete form submissions, unsaved data, or even loss of critical content. By increasing the max_input_vars limit, you can prevent these server errors from happening and ensure that all data is correctly processed and saved, keeping your website functioning smoothly.
2. Improving Website Performance
Websites with large forms, membership systems, or e-commerce platforms require handling significant amounts of data. For example, complex forms that involve many custom fields, product options in WooCommerce, or user profile fields can generate a large number of input variables. If the server’s max_input_vars setting is too low, the website may fail to process all the data, leading to incomplete form submissions or missing data.
Increasing the max_input_vars value allows your website to handle more data in a single request, which can significantly improve performance. This is especially important for dynamic websites where real-time updates or extensive user interactions are common. A higher limit ensures that your website can process more complex data sets efficiently, leading to a faster and more responsive experience for visitors.
3. Enhancing User Experience
A critical aspect of a successful website is providing a seamless user experience. When visitors encounter issues like missing form submissions or data not saving properly, it can lead to frustration, increased bounce rates, and decreased engagement. Users may feel like they are hitting a roadblock, which can damage their perception of your website.
By increasing the max_input_vars limit, you remove these obstacles. Users will be able to submit larger forms, save more extensive sets of data, and interact with your website without limitations. Whether they are filling out long forms, configuring product options in an e-commerce store, or customizing their profile, increasing this limit ensures a smooth and frustration-free experience. A positive user experience leads to higher satisfaction, improved customer retention, and, ultimately, better site performance in terms of conversions and engagement.
4. Supporting Complex Websites with Customizations
For websites that rely heavily on custom fields, advanced theme settings, or multiple plugins, the need to increase the max_input_vars setting becomes more pronounced. Websites with custom post types, extensive metadata, or intricate settings in plugins like page builders or WooCommerce may have hundreds of input variables in a single request. If the limit isn’t adjusted, these customizations may fail to save or not appear correctly on the front end of your site.
Increasing the max_input_vars setting ensures that your site can handle the extensive data associated with customizations, allowing your website to scale without running into functional issues. This is especially important for large, dynamic sites with complex configurations or those that require extensive interaction from users.
5. Ensuring Data Integrity
When the max_input_vars limit is set too low, important form data may not get submitted, resulting in incomplete or incorrect information being saved. This is particularly critical on websites that rely on accurate data, such as user registrations, WooCommerce orders, or subscription forms. For example, if you have a long registration form with many fields, a low max_input_vars limit may prevent some fields from being processed, leading to incomplete user profiles.
Also Read: How To Use WordPress Forms Lite On Website
Increase Max Input Vars in WordPress: The Solution to Form and Plugin Issues
There are multiple methods available to increase the Max Input Vars setting in WordPress. Depending on your technical expertise and the level of control you have over your server environment, you can go with the most suitable method for your requirements. Let’s explore each of these methods in detail:
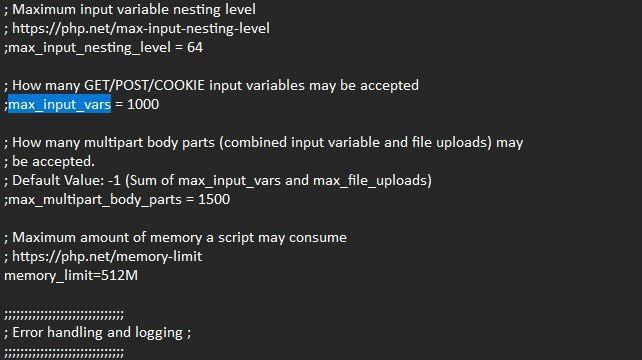
1. Increasing through php.ini File

The php.ini file is the most direct way to increase the max_input_vars setting. This method affects all websites hosted on the server, making it a global change. If you have access to the php.ini file, you can modify the max_input_vars directive directly to your desired value. This method is ideal if you manage your server or have access to server-side settings.
Steps:
- Locate the
php.inifile on your server. This file is usually found in the root directory or a specific folder like/etc/php/7.x/apache2/for Apache-based servers or/usr/local/lib/php.inion others.
- Open the
php.inifile in a text editor.
- Search for the
max_input_varsdirective. If it’s not already there, add the following line:
max_input_vars = 3000
You can change the value to any number that suits your needs.
- Save the file and restart your web server to apply the changes.
Note: Not all hosting environments allow direct access to the php.ini file, especially shared hosting accounts.
2. Increasing through .htaccess File
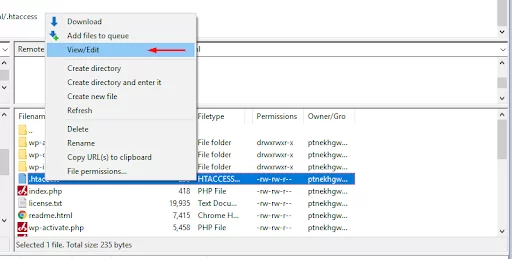
If you don’t have access to the php.ini file but can edit the .htaccess file, you can use this method to increase the max_input_vars limit. This approach allows you to modify settings specific to your WordPress site, without affecting other websites on the same server.
Steps:
- Access your WordPress root directory, where the
.htaccessfile is located (usually public_html or www).
- Open the
.htaccessfile in a text editor.
- Add the following line at the end of the file:
php_value max_input_vars 3000 Change 3000 to the value that fits your needs.
- Save the changes and close the file.
Note: This method only works if your server is configured to allow overrides via .htaccess. Some shared hosting environments may not support this method, or your hosting provider may disable it for security reasons.
3. Increasing through PHP functions file

If you don’t have access to server files but are comfortable editing theme files, you can increase the max_input_vars setting directly through your theme’s functions.php file. This method allows you to make changes that affect only the specific WordPress site, not others on the same server.
Steps:
- In your WordPress dashboard, navigate to Appearance > Theme Editor.
- Select the
functions.phpfile from the right sidebar.
- Add the following code snippet at the end of the file:
@ini_set('max_input_vars', 3000);
This will set the max_input_vars value to 3000. You can adjust the number to meet your needs.
- Save the changes to the
functions.phpfile.
Note: Always create a backup of your theme’s functions.php file before making any changes. Incorrect modifications could cause issues with your site.
4. Increasing through a Plugin:
For users who prefer an easier, more user-friendly way to increase the max_input_vars limit, using a plugin is an excellent option. Several plugins in the WordPress repository allow you to adjust server-side settings without needing to touch any code. These plugins typically offer an interface where you can easily modify server settings like max_input_vars.
Popular Plugins:
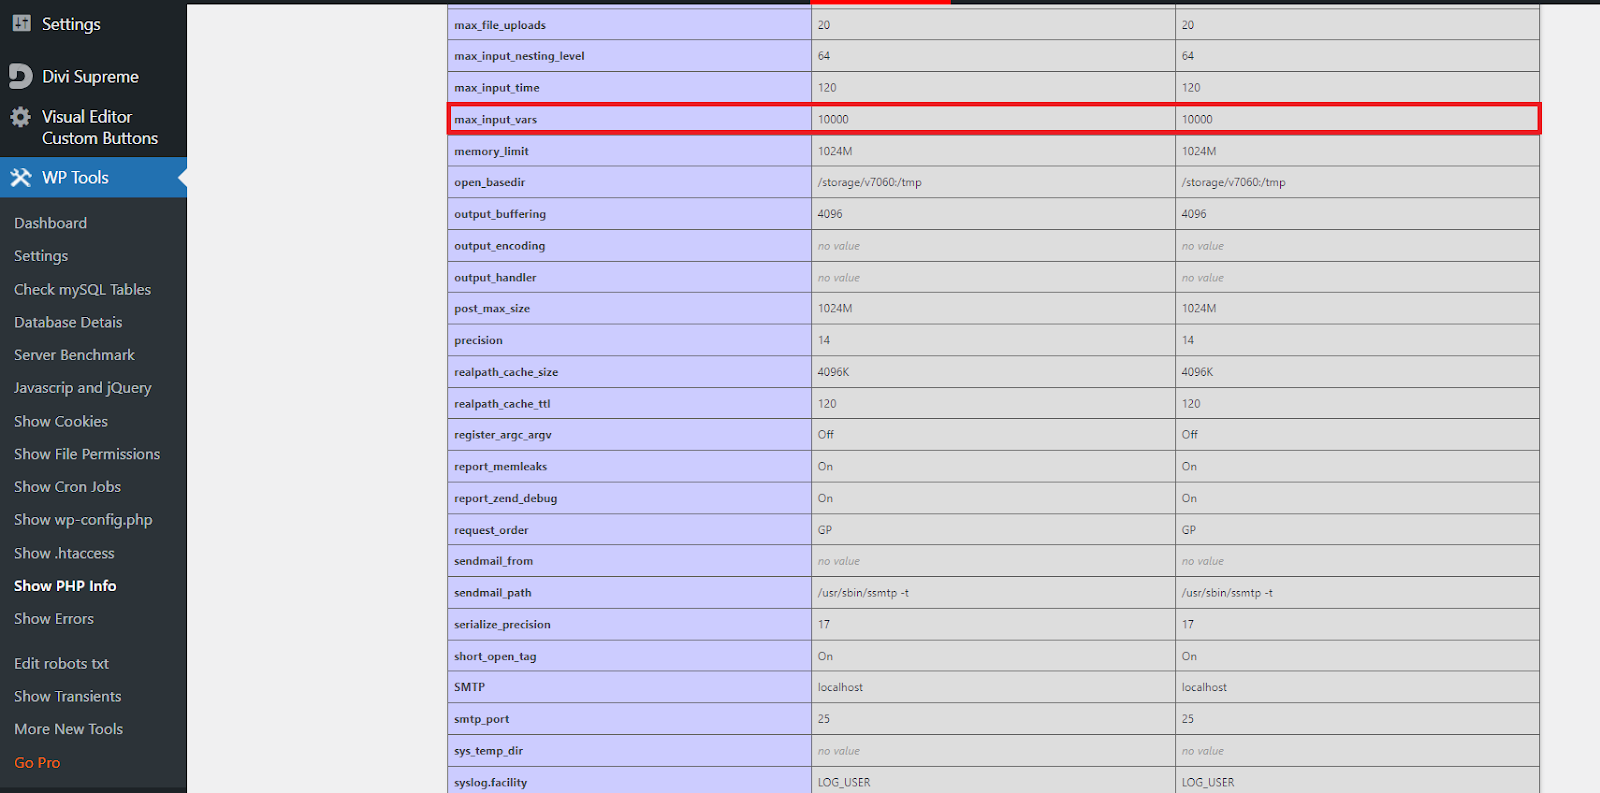
- WP Tools: This plugin offers a simple interface to change PHP configuration settings, including
max_input_vars. - PHP Settings: A plugin that allows you to modify PHP directives directly from your WordPress dashboard.
Steps:
- Go to your WordPress dashboard and navigate to Plugins > Add New.
- Search for a plugin like “WP Tools” or “PHP Settings.”
- Install and activate the plugin.
- After activation, follow the plugin’s instructions to increase the
max_input_varslimit. Most plugins will provide an easy-to-use settings page for this purpose.
Note: Always choose reputable plugins that are actively maintained and updated to ensure compatibility with your version of WordPress and to avoid potential security risks.
Troubleshooting Common Issues
While increasing the Max Input Vars setting in WordPress can greatly enhance your website’s functionality, it’s possible to encounter certain issues during or after the process. In this section, we will discuss common problems that may arise and provide troubleshooting tips to help you resolve them effectively.
1. Dealing with Errors after Increasing Max Input Vars:
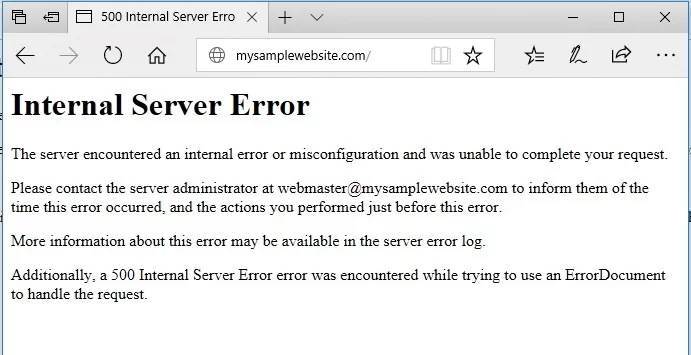
If you encounter errors or issues after increasing the Max Input Vars setting, it’s important to identify the cause and resolve them promptly. Common errors include “HTTP 500 Internal Server Error” or a blank white screen, indicating a PHP error. In such cases, check your server logs for specific error messages that can help pinpoint the problem. It could be caused by a conflict with a plugin or theme, an incompatible server configuration, or an insufficient server resource allocation.
To troubleshoot these errors, start by disabling recently installed plugins or reverting to the default theme to see if the issue persists. If the problem goes away, it indicates a conflict with the plugin or theme. You can then narrow down the culprit by reactivating them one by one. Additionally, ensure that your server meets the minimum requirements for the increased Max Input Vars limit and consider upgrading server resources if necessary.
2. Restoring to the Default Value:
If you encounter major issues or conflicts after increasing the Max Input Vars limit, it may be necessary to revert to the default value. You can do this by removing any modifications made to the php.ini file, .htaccess file, or the functions.php file. Alternatively, if you used a plugin to increase the limit, you can revert the settings within the plugin’s interface. After restoring to the default value, monitor your website thoroughly to ensure that the issues have been resolved.
3. Seeking Professional Help:
If you are unable to troubleshoot or resolve the issues on your own, don’t hesitate to seek professional help. Reach out to your hosting provider or hire a WordPress developer who can analyze the problem and provide specialized assistance. They can help diagnose and resolve complex conflicts, optimize server configurations, and ensure that your website functions smoothly with the increased Max Input Vars limit.
Boost Your WordPress Site’s Functionality
Increasing the max_input_vars value in WordPress is essential for smooth data handling, error prevention, and an overall improved user experience. By adjusting this setting—whether through your php.ini file, .htaccess file, functions.php, or a plugin—you can avoid issues with form submissions, plugin settings, and overall site functionality. Don’t let these limitations slow down your site. Take control now to ensure your WordPress site runs seamlessly.
If you’re looking for a reliable and high-performance hosting provider to support your growing WordPress site, Nestify Hosting offers top-notch infrastructure and dedicated support to keep your website performing at its best. Let us help you take your site to the next level.
Solving WordPress Server Errors: Increase Max Input Vars to Prevent Issues
What’s the recommended value for max_input_vars?
The default value for max_input_vars is usually 1000. If you have large forms or multiple plugin configurations, increasing the limit to 3000 or more may be necessary. However, it’s best to adjust based on your site’s specific needs.
Can increasing max_input_vars affect my website’s performance?
Increasing max_input_vars will not negatively impact your site’s performance if done correctly. In fact, it may improve performance by preventing errors that would otherwise slow down or disrupt the user experience. Just ensure you set the limit appropriately for your site’s needs.
What happens if I don’t increase max_input_vars?
If you don’t increase max_input_vars, you may run into problems where form data or plugin settings don’t save properly, or users may encounter errors when submitting forms. This can lead to a poor user experience and even potential loss of business.
