
WordPress is a renowned CMS that allows users to develop and manage websites easily. One of the important features of WordPress is its ability to create forms, which are essential for collecting information from website visitors. In contrast, there are many plugins like Forms Lite that can help you create forms with ease. However, you may prefer to create a form in WordPress without relying on additional plugins.
Whether you are a beginner or an experienced WordPress user, this guide will empower you to take control of your website’s forms and tailor them to your specific needs. So, let’s dive in and learn how to create a form in WordPress without a plugin!
The Importance of a Form in WordPress
Forms play a crucial role in WordPress websites as they serve as a means of communication and interaction between website owners and their visitors. Whether you are running an online store, a blog, or a business website, forms allow you to collect valuable information, feedback, inquiries, and even process transactions.
Here are some key reasons why forms are important in WordPress:
- Collecting User Data: Forms enable you to collect vital user data such as name, email address, phone number, and other relevant information. This data can be used for various purposes, including building a mailing list, understanding your audience demographics, and personalizing user experiences.
- Contact and Support: These forms provide a convenient way for visitors to contact you. By including a contact form on your website, users can reach out with inquiries, feedback, or support requests. This improves customer service and allows you to address their needs promptly.
- Lead Generation: These forms are effective tools for lead generation. By offering valuable resources or incentives in exchange for user information, such as ebooks, newsletters, or discounts, you can capture potential leads and grow your email list.
- Feedback and Surveys: Forms allow you to gather feedback and opinions from your website visitors. By creating surveys or feedback forms, you can gain insights into user satisfaction, identify areas for improvement, and make smart decisions about your website or business.
- Event Registrations and Booking: If you organize events or offer services that require appointments or reservations, forms can simplify the registration or booking process. Visitors can fill out event registration forms or appointment booking forms, providing all the necessary details to ensure a smooth and organized process.
- E-commerce Transactions: For online stores, forms are essential for processing transactions. By integrating payment gateways and creating order forms, customers can securely make purchases, select products, and provide shipping details.
Now that we understand the importance of forms, it’s time to explore how to create them in WordPress without relying on plugins. By following the steps and techniques in this guide, you will have full control over your forms and be able to customize them according to your specific requirements.
Understanding the Basics of WordPress Forms

In simple terms, a form in WordPress is a digital tool that allows website visitors to input and submit information. It typically consists of various fields, such as text fields, checkboxes, radio buttons, dropdown menus, and submit buttons. When a visitor fills out the form and clicks the submit button, the information they entered is sent to the website owner or administrator.
WordPress offers built-in functionality for creating forms, allowing you to easily collect data without the need for additional plugins. By utilizing HTML, CSS, and PHP, you can create and customize forms to fulfill your specific requirements.
Why is it Possible to Create a Form without a Plugin?
WordPress is a flexible platform that provides developers and website owners with the ability to customize and extend its functionality. The core WordPress software includes features and tools that enable the creation of forms without relying on plugins.
By leveraging HTML, CSS, and PHP, you can build a form in WordPress from scratch and process form submissions using WordPress’s native capabilities. This allows for greater control over the form’s design, functionality, and data handling.
Scenarios Where You Need to Create a Form without Using a Plugin

While there are numerous form builder plugins available for WordPress, there are situations where creating a form without a plugin may be preferred. Here are a few scenarios where opting for a plugin-free approach can be advantageous:
- Simplicity: If you only require a basic form with a few fields and don’t want to install an additional plugin for such a simple task, creating a form without a plugin can be a more straightforward solution.
- Customization: When you need full control over the form’s design and functionality, creating a form without a plugin allows you to customize every aspect according to your particular requirements without being limited by the plugin’s options.
- Performance: Some form plugins can add unnecessary code and functionality to your website, potentially affecting its performance. By creating a form without a plugin, you can ensure a leaner and optimized form that doesn’t impact your site’s speed.
- Security: While most form plugins are secure, some website owners prefer to minimize the risk of vulnerabilities by reducing the number of installed plugins. Creating a form without a plugin eliminates any potential security risks associated with third-party plugins.
In the following sections, we will explore the step-by-step process of creating a form in WordPress without a plugin, empowering you to take control of your forms and tailor them to your specific needs.
Step-by-Step Guide to Creating a Form in WordPress Without a Plugin
Creating a form in WordPress without a plugin is a straightforward process that involves a few significant steps listed below. By following these instructions, you will be able to create a fully functional form tailored to your specific needs.
Step 1: Create a Page for the Form
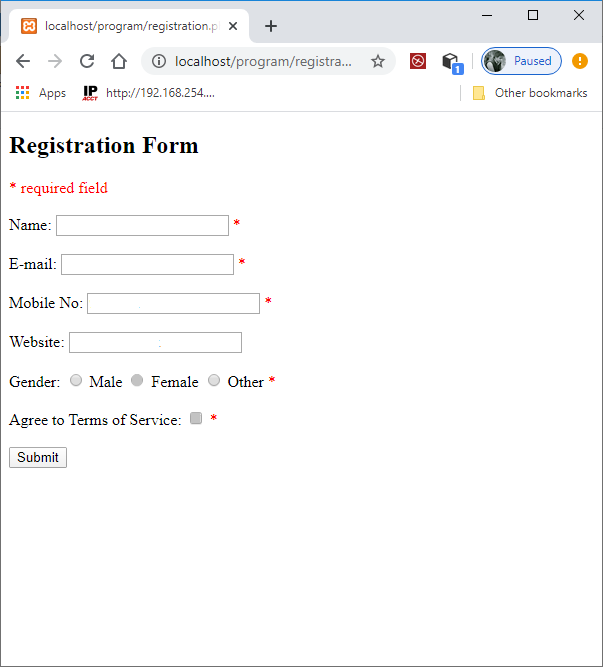
The first step is to create a new page in WordPress where you will add your form. To do this, navigate to the WordPress dashboard and click on “Pages” in the left-hand panel. Then click on “Add New” to create a new page. Give your page a suitable title, such as “Contact” or “Registration Form.”
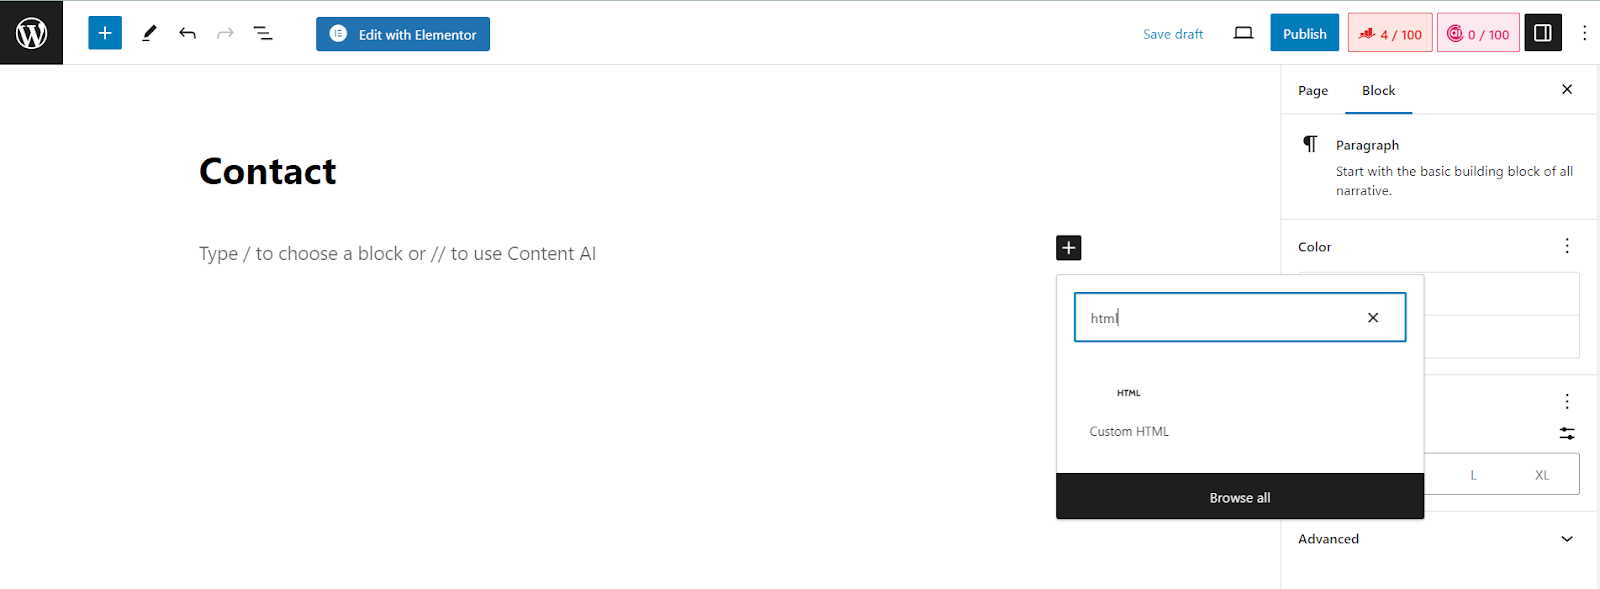
Step 2: Adding Form Fields using HTML
Once you have created the page, you need to add the necessary form fields using HTML. HTML provides a wide range of form elements, including text fields, checkboxes, radio buttons, dropdown menus, and more. Determine the fields required for your form and add the corresponding HTML code to the block.
<!DOCTYPE html>
<html lang="en">
<head>
<meta charset="UTF-8">
<meta name="viewport" content="width=device-width, initial-scale=1.0">
<title>Sample Form</title>
</head>
<body>
<form action="/submit" method="post">
<label for="name">Name:</label>
<input type="text" id="name" name="name" required>
<br>
<label for="email">Email:</label>
<input type="email" id="email" name="email" required>
<br>
<label for="message">Message:</label>
<textarea id="message" name="message" rows="4" required></textarea>
<br>
<input type="submit" value="Submit">
</form>
</body>
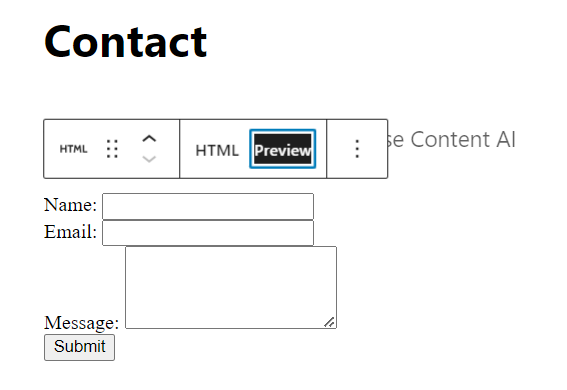
</html>This code creates a simple form with fields for name, email, and a message. The label tags provide a description for each input field and the required attribute guarantees that users must add info in these fields before submitting the form. The form uses the HTTP POST method to send data to the “/submit” endpoint. Feel free to customize it based on your specific needs.

Click on the preview to see how the form looks.
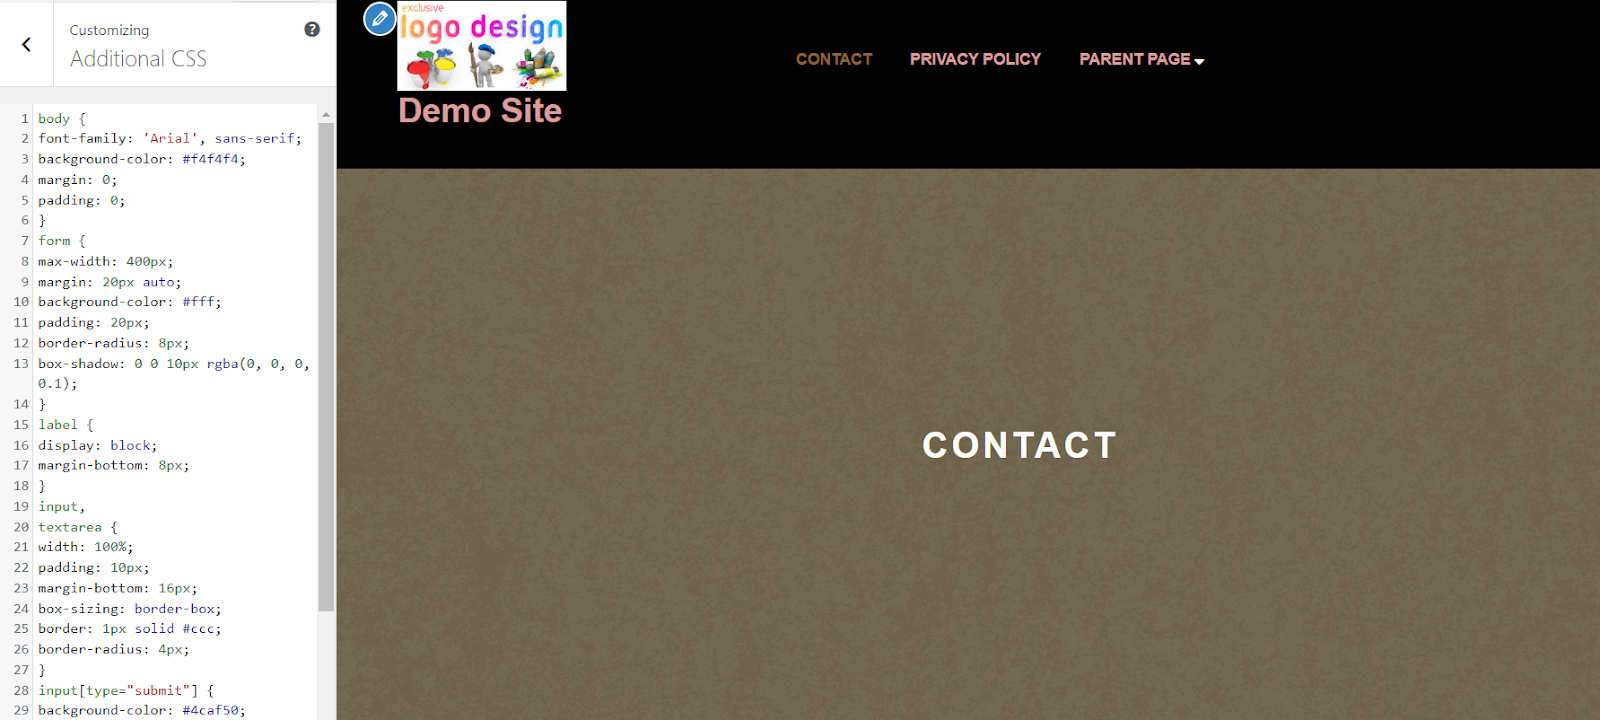
Step 3: Styling the Form with CSS
After adding the form fields, you may want to style your form to make it visually appealing to match your website’s design. This can be achieved using CSS (Cascading Style Sheets). Either add the CSS code directly to the page editor or create a separate CSS file and link it to your page. Go to Appearance >> Customize >> Additional CSS

Use CSS to customize the form’s layout, colors, fonts, and other visual aspects to your liking.
For instance,
body {

font-family: 'Arial', sans-serif;

background-color: #f4f4f4;

margin: 0;

padding: 0;

}

form {

max-width: 400px;

margin: 20px auto;

background-color: #fff;

padding: 20px;

border-radius: 8px;

box-shadow: 0 0 10px rgba(0, 0, 0, 0.1);

}

label {

display: block;

margin-bottom: 8px;

}

input,

textarea {

width: 100%;

padding: 10px;

margin-bottom: 16px;

box-sizing: border-box;

border: 1px solid #ccc;

border-radius: 4px;

}

input[type="submit"] {

background-color: #4caf50;

color: #fff;

cursor: pointer;

}

input[type="submit"]:hover {

background-color: #45a049;

}
This CSS code sets the background color, font family, and styling for the form, labels, and input fields. It also provides a subtle box-shadow for the form and a hover effect for the submit button. You can change the colors, fonts, and other styles to match your desired look and feel.
Step 4: Processing Form Submissions with PHP
To make your form functional, you need to process the form submissions and handle the data. This is done using PHP, a server-side scripting language. In this step, you will write PHP code to handle the form submission, validate the data, and perform any necessary actions, such as sending emails or storing the data in a database.
For instance,
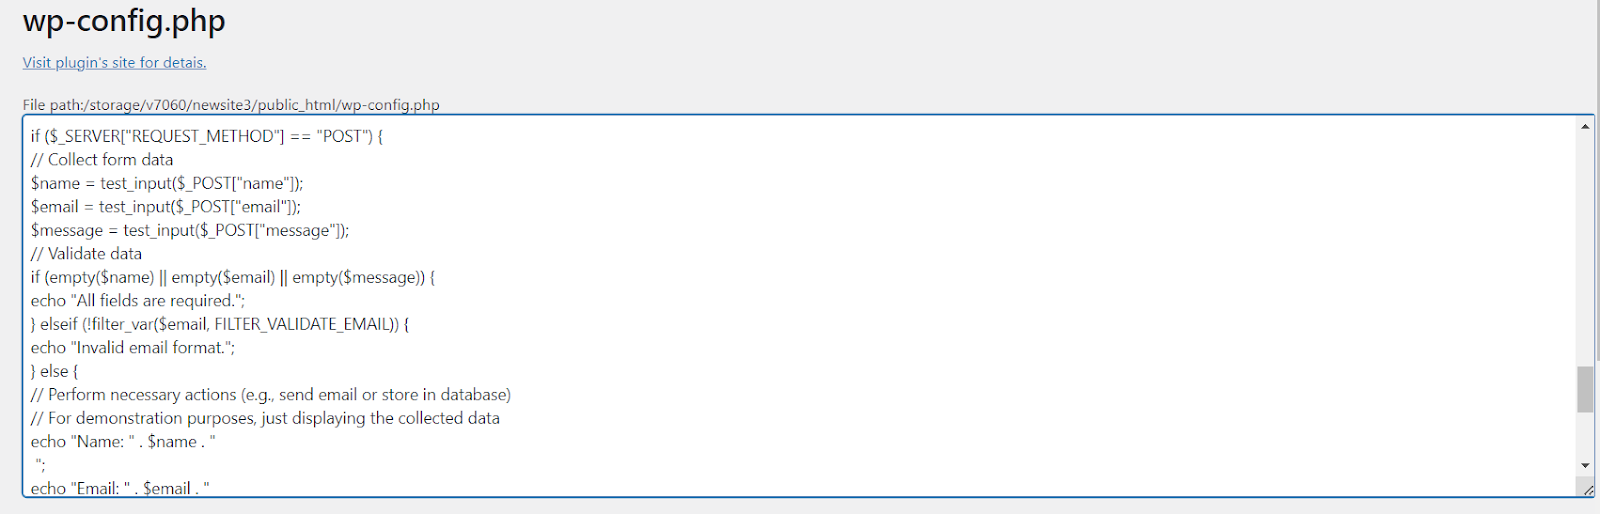
if ($_SERVER["REQUEST_METHOD"] == "POST") {

// Collect form data

$name = test_input($_POST["name"]);

$email = test_input($_POST["email"]);

$message = test_input($_POST["message"]);

// Validate data

if (empty($name) || empty($email) || empty($message)) {

echo "All fields are required.";

} elseif (!filter_var($email, FILTER_VALIDATE_EMAIL)) {

echo "Invalid email format.";

} else {

// Perform necessary actions (e.g., send email or store in database)

// For demonstration purposes, just displaying the collected data

echo "Name: " . $name . "
";

echo "Email: " . $email . "
";

echo "Message: " . $message . "
";

// You can add more complex logic, like sending emails or database operations, here.

}

}

// Function to sanitize and validate input data

function test_input($data) {

$data = trim($data);

$data = stripslashes($data);

$data = htmlspecialchars($data);

return $data;

}

?>
This PHP code checks if the form has been submitted using the POST method. It then collects, sanitizes, and validates the form data. If the data is valid, it can perform additional actions, such as sending emails or storing the data in a database. In this example, it just echoes the collected data for demonstration purposes. Ensure you add appropriate security measures, especially when dealing with user input, like prepared statements when interacting with databases.
Step 5: Testing the Form
Before making your form live, it’s crucial to thoroughly test it to make sure that it functions correctly. Fill out the form with different inputs, submit it, and verify that the data is processed and handled as intended. Test for any potential errors, such as validation issues or form submission failures. Make any necessary adjustments and retest until the form is working seamlessly.
By following these five steps, you will be able to create a form in WordPress without the need for any plugins. In the next section, we will explore ways to enhance your form’s functionality without relying on plugins, such as adding form validation, creating a thank you page, handling form errors, securing your form, and collecting and storing form submissions.
Enhancing Your Form’s Functionality Without a Plugin
Once you have created a basic form in WordPress without using a plugin, you may want to enhance its functionality to provide a better user experience and streamline the form submission process. In this section, we will explore various ways to enhance your form’s functionality without relying on plugins.
Adding Form Validation
Source: www.javatpoint.com
Form validation is essential to ensure that users provide valid and accurate information. By implementing form validation, you can validate user input information and display error messages if any fields are incomplete or contain invalid data. This can be achieved using HTML5 form validation attributes or by adding custom JavaScript validation.
Creating a Thank You Page
After a user submits a form, it’s a good practice to display a thank you page to acknowledge their submission and provide any additional information or instructions. You can create a separate page in WordPress that serves as the thank you page and redirect users to this page after form submission.
Handling Form Errors
In addition to form validation, it’s crucial to handle form errors properly. If errors occur during the form submission process, you should display clear and informative error messages to guide users on how to correct their input. This can be accomplished by adding error handling logic in your PHP code and displaying error messages on the form page.
Securing Your Form
Security is a paramount concern when handling form submissions. To protect your form from spam submissions and potential malicious attacks, you can implement various security measures. This includes adding a CAPTCHA or reCAPTCHA to prevent automated form submissions, implementing CSRF (Cross-Site Request Forgery) protection, and sanitizing and validating user input to prevent SQL injection attacks.
Collecting & Storing Form Submissions
To keep track of form submissions and ensure data integrity, you may want to collect and store the form submissions in a database. This allows you to access and analyze the data at a later time. Implementing this functionality requires creating a database table, modifying the PHP code to insert form data into the table, and setting up a secure connection to the database.
By enhancing your form’s functionality with features like form validation, thank you pages, error handling, security measures, and data storage, you can create a more robust and user-friendly form experience for your website visitors. These enhancements will help streamline the form submission process, enhance data accuracy, and enhance the overall user experience.
In the next section, we will address common troubleshooting issues that you may encounter when creating a form without a plugin. This will help you overcome any challenges and ensure that your form works seamlessly on your WordPress website.
Troubleshooting Common Issues When Creating a Form Without a Plugin

While creating a form in WordPress without a plugin can be a rewarding experience, you may encounter common issues along the way. Lets address some of the most common troubleshooting problems and provide solutions in this section to help you overcome them.
Form Not Displaying Correctly
If your form is not displaying correctly on your WordPress website, there are a few potential causes and solutions to consider:
- HTML Markup: Double-check your HTML code for any syntax errors or missing tags that may be causing the form to render improperly. Make sure that all opening and closing tags are properly matched.
- CSS Styling: Review your CSS code to ensure proper styling of the form elements. Check for any conflicting styles or missing declarations that may be affecting the form’s appearance.
- Theme Compatibility: Some WordPress themes may have their own CSS styles that could interfere with your form’s layout. Try momentarily switching to a default WordPress theme to observe if the form displays correctly. If it does, you may need to modify your CSS to accommodate your chosen theme.
- Plugin Conflicts: If you have other plugins installed on your WordPress site, they may conflict with the form’s display. Temporarily deactivate other plugins one by one to identify if any of them are causing the issue.
Form Submissions Not Being Received
If you are not receiving form submissions or notifications, consider the following troubleshooting steps:
- Email Configuration: Verify that your WordPress site’s email settings are properly configured. Ensure that the correct email address is specified to receive form submissions and check your spam folder to acknowledge if the notifications are being filtered as spam.
- PHP Mail Function: Check if your server supports the PHP mail function. If not, you may need to configure an SMTP (Simple Mail Transfer Protocol) plugin or use a third-party email service like Gmail SMTP to handle email delivery.
- Form Processing Logic: Review your PHP code responsible for processing form submissions. Ensure that you have included the necessary code to send email notifications and that the email recipient is properly specified.
Form Validation Not Working
If your form validation is not functioning as expected, consider the following troubleshooting tips:
- HTML5 Validation Attributes: Ensure that you have included the appropriate HTML5 validation attributes (e.g., required, pattern, minlength, etc.) for your form fields. Double-check your attribute values and patterns to ensure they are correctly defined.
- JavaScript Validation: If you are using custom JavaScript validation, review your code for any syntax errors or logic issues. Make sure your JavaScript code is targeting the correct form fields and triggering the validation appropriately.
- Error Message Display: Check that you have implemented the error message display functionality correctly. Ensure that error messages are being shown next to the corresponding form fields and that they are styled appropriately for easy visibility.
Unable to Customize Form Style
If you are having difficulty customizing the style of your form, consider the following troubleshooting steps:
- CSS Specificity: Check if your CSS styles are being overridden by more specific CSS rules. Inspect the form elements using your browser’s developer tools to identify any conflicting styles and adjust your CSS accordingly.
- CSS Selector Targeting: Ensure that you are targeting the correct CSS selectors for your form elements. Double-check your selectors to make sure they match the HTML structure of your form.
- Caching: If you have installed and enabled a caching plugin on your WordPress site, clear the cache to ensure that any changes made to your CSS are reflected on the front end.
By troubleshooting these common issues, you can overcome challenges and ensure that your form works seamlessly on your WordPress website. Remember to test your form thoroughly after making any changes to ensure that it functions as intended.
Conclusion
Creating a form in WordPress without a plugin provides you with greater control and customization options. By following the steps outlined in this guide and addressing any troubleshooting issues, you can create a fully functional and tailored form that meets your specific needs.
