
PHP has stood the test of time as one of the most reliable and widely used programming languages for web development. Even in 2023, its dominance continues, with a W3Techs report revealing that approximately 77.9% of websites globally still rely on PHP. While PHP is traditionally known for powering the server-side logic of web applications, one of its underrated yet highly effective capabilities is email handling through the built-in mail() function.
This functionality allows developers—whether beginners or seasoned professionals—to send emails directly from a server with minimal setup. Whether you’re building a contact form, automating notifications, or managing bulk email tasks, PHP’s mail() function offers a lightweight, code-driven solution without the need for third-party services or APIs.
Since time immemorial, PHP has been a language popularly known for web development, and its popularity persists even today. According to W3Techs’s survey conducted in 2023, 77.9% of websites used worldwide employ PHP as a programming language. This clearly indicates the high demand for PHP as a programming language. PHP is not only used for coding but is also implemented for mailing. This feature is called PHP mail.
📩 Understanding the PHP mail() Function
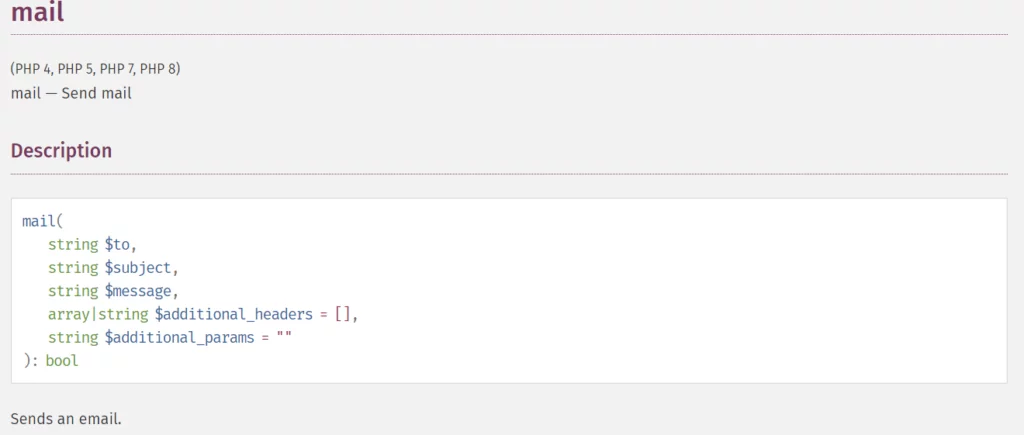
The mail() function in PHP is a core utility designed to send email messages straight from the server to specified email addresses. Its minimalist syntax makes it incredibly easy to implement, yet it offers flexibility to handle more sophisticated tasks when needed.
Basic Syntax:
phpCopyEditmail(to, subject, message, headers, parameters);
Parameters Explained:
to: Recipient’s email address.subject: Subject line of the email.message: Main body of the email (plain text or HTML).headers(optional): Additional information such as sender’s address, CC/BCC, content type, and MIME version.parameters(optional): Additional command-line parameters for more advanced mail server configurations.
🔍 Why Use PHP’s mail() Function?
Despite the rise of cloud-based email APIs and modern SMTP tools, the mail() function remains a valid choice for many use cases—especially when simplicity and speed are priorities.
✅ Key Advantages
- No Third-Party Libraries Needed
The function is native to PHP and doesn’t require any additional installation or setup. - Quick and Easy to Implement
A single line of code can send a functioning email—ideal for contact forms and simple automation. - Lightweight and Fast
Because it bypasses external services, it can send emails with minimal latency (though delivery isn’t always guaranteed). - Ideal for Small Projects
Perfect for low-volume email tasks like alerts, feedback forms, or user notifications.
⚠️ Limitations and Considerations
While the mail() function is accessible and efficient, it comes with some caveats that developers should be aware of:
- Spam Risk
Emails sent viamail()are often flagged as spam if proper headers (likeFrom,Reply-To, andContent-Type) aren’t included or if the server lacks proper DNS records (SPF, DKIM, etc.). - Limited Features
It lacks built-in support for advanced email features like encryption, attachment handling, or HTML templating unless manually configured. - No Delivery Tracking
Unlike services such as SendGrid or Mailgun,mail()does not offer any built-in analytics or bounce tracking.
Options to send emails in PHP
1. mail() function
Source: php.net
The mail() function is a built-in PHP function that can be accommodated to send email messages from a web server to a recipient’s email address.
Pros:
- Built-in PHP function, so there is no need to install any additional libraries or services
- Simple and easy to use
Cons:
- Limited features and flexibility
- Emails can be flagged as spam if not configured correctly
2. PHPMailer
Source: Sucuri
PHPMailer is a popular third-party library that provides a more advanced interface for sending emails in PHP. It supports features such as SMTP authentication, HTML email formatting, file attachments, and more.
Pros:
- Provides a more advanced interface for sending emails in PHP
- Supports SMTP authentication, HTML email formatting, file attachments, and more
- Well-documented and actively maintained library
Cons:
- Requires installation and configuration of the PHPMailer library
- It may be more complex for beginners
3. SwiftMailer
SwiftMailer is another well-known third-party library that provides a powerful and flexible interface for sending emails in PHP.
Pros:
- Provides a user-friendly interface for sending emails in PHP
- Supports authentication and encryption for emails
- Well-documented and actively maintained email service and library
Cons:
- Requires installation and configuration of the SwiftMailer library
- Not for beginners
4. SendGrid
SendGrid is an excellent cloud-based email service provider that allows a user to send emails from your PHP application using their API only. It offers additional features such as email tracking, delivery optimization, etc.
Pros:
- A cloud-based email service provider with a simple and easy-to-use API
- Offers a free plan with a limited number of emails per month
Cons:
- Requires registration and configuration of the SendGrid service
- It can be more expensive than other available options for high email volumes
5. Mailgun
Mailgun is known to be an excellent cloud-based email service provider that allows a user to send emails from your PHP application using their API. It offers features such as spam filtering, email validation, etc.
Pros:
- Quick Cloud-based email service
- Simple and easy-to-use API
- Offers a free plan with a limited number of emails per month
Cons:
- Registration and configuration of the Mailgun service is a compulsion
- Becomes an expensive option for high email volumes
6. Amazon SES
Amazon SES (Simple Email Service) is a world-famous cloud-based email service provider of Amazon Web Services that let’s a user to send emails from your PHP application. One of the prerequisites for using their service is to only use their API. It offers advanced features such as bounce handling, email tracking, etc.
Pros:
- Technologically advanced Cloud-based email service
- Simple approach and easy-to-use API
- It can be a cost-effective option for high email volumes
Cons:
- Registration and configuration of the Amazon SES service is a compulsory rule
- Not recommended for beginners
Send Emails Using Mail() Function
To send emails in PHP using the mail() function, you can follow these steps:
- Set the variables as the recipient’s email address, subject, and message body.
$to = '[email protected]';

$subject = 'Test email';

$message = 'It’s a test email sent using the PHP mail() function.';
- Write the headers of the email and the content type of the message in the code.
$headers = 'From: [email protected]' . "\r\n" .

           'Reply-To: [email protected]'. "\r\n" .

           'Content-type: text/html; charset=UTF-8'. "\r\n";
- Make use of the mail() function to send the email. The mail() function takes the recipient’s email address, subject, message, and headers as parameters.
mail($to, $subject, $message, $headersExample of how to use the PHP mail function to send an email
$to = '[email protected]';

$subject = 'Test Email';

$message = 'This is a test email.';

$headers = 'From: [email protected]' . "\r\n" .

    'Reply-To: [email protected]'. "\r\n" .

    'X-Mailer: PHP/'. phpversion();

mail($to, $subject, $message, $headers);
After these steps are followed, an email with the subject “Test Email” and the body “It’s is a test email” will be sent to the recipient ([email protected]) from the sender’s address ([email protected]). The headers then include a ‘reply to’ address and send an indication to PHP to send the email. That’s how it all works!
Learn about securing your login page here.
Create an Email Sending Form
The PHP mail form builder requires an HTML form to be created to collect the sender’s and recipient’s email addresses, subject lines, and email bodies from the user. The PHP script will use the submitted data to compose and send an email through the PHP mail function after a user fills out the form and clicks submit.
Here’s an example of an email sending form in HTML:
<form method="post" action="send-email.php">

    <label for="recipient">Recipient:</label>

    <input type="email" id="recipient" name="recipient" required>

    <label for="subject">Subject:</label>

    <input type="text" id="subject" name="subject" required>

    <label for="message">Message:</label>

    <textarea id="message" name="message" required></textarea>

    <input type="submit" value="Send">

</form>
The email user must fill in the email address of the receiver, the subject line, and the content of the email itself in this form. With “post” selected for the form’s method attribute and “send-email.php” specified for the action attribute, the form submission will be processed by the specified PHP script.
Here’s an example of the PHP script that handles the form submission and sends the email:
<?php

if ($_SERVER['REQUEST_METHOD'] == 'POST') {

    $recipient = $_POST['recipient'];

    $subject = $_POST['subject'];

    $message = $_POST['message'];

    $headers = 'From: [email protected]' . "\r\n" .

        'Reply-To: [email protected]'. "\r\n" .

        'X-Mailer: PHP/'. phpversion();

    mail($recipient, $subject, $message, $headers);

    echo 'Email sent!';

}

?>
Using the $_SERVER[‘REQUEST METHOD’] variable, this PHP script checks if the form has been submitted. If the form has been submitted, the $_POST variable is used to access the values of the recipient, topic, and message fields. The mail function is then used to send the email after the headers have been set. The system then shows a notification informing the user that the email has been sent.
Summary: When to Use PHP mail()
| Use Case | Suitable with mail()? | Recommendation |
|---|---|---|
| Basic contact forms | ✅ Yes | Use mail() |
| Feedback forms on small websites | ✅ Yes | Use mail() |
| Server-side alerts and notifications | ✅ Yes | Use mail() |
| Registration confirmation (basic) | ✅ Yes (with caution) | Use mail() |
| Advanced transactional messaging | ❌ No | Use PHPMailer / API |
| HTML-rich newsletters or campaigns | ❌ No | Use Mailgun / SendGrid |
| Email tracking and analytics | ❌ No | Use cloud email platforms |
| Secure SMTP delivery | ❌ No | Use PHPMailer / SwiftMailer |
| High-volume batch email sending | ❌ No | Use Amazon SES / Mailgun |
Conclusion
Choosing the Right Email Method—and the Right Hosting Partner
PHP offers multiple ways to send emails, ranging from the simple built-in mail() function to full-featured libraries like PHPMailer and enterprise-grade cloud services such as SendGrid or Amazon SES. While mail() is a convenient tool for small-scale or server-level messages, advanced use cases like bulk campaigns, SMTP authentication, and delivery tracking require more robust solutions.
However, even the best email logic can fail if your hosting environment isn’t optimized. That’s where Nestify steps in.
Whether you’re running a simple blog with contact forms or a large-scale eCommerce site that sends thousands of transactional emails, Nestify Hosting provides a reliable, secure, and performance-optimized environment tailored for PHP applications. With features like built-in caching, automatic backups, and server-level email optimizations, you can trust your emails will send faster, land reliably, and keep your reputation intact.
👉 Ready to build faster, send smarter, and grow confidently? Choose Nestify Hosting and experience PHP performance without compromise.
FAQs on PHP Mail () Function
What parameters does the PHP mail() function accept?
The PHP mail() function’s parameters are as follows:
To: The recipient’s address for electronic mail (s).
Subject: The email’s subject.
The message contained in the email.
Other titles: Email headers that are optional to include, such as From, Cc, and Bcc.
Can HTML emails be sent using PHP’s mail() function?
You can send HTML emails with PHP’s mail() function by adding the proper headers and formatting the message body as HTML.
Can file attachments be included in PHP’s mail() function-sent emails?
Yes, file attachments can be included in emails sent with PHP’s mail() function by utilizing MIME encoding and sending the file as an attachment in the email headers.
