

Are you looking to integrate Mailchimp with your WooCommerce store? Connecting these two powerful platforms can help you streamline your email marketing endeavors and maximize your store’s potential. In this blog, we will take you through the process of connecting Mailchimp to WooCommerce.
Understanding the Basics: The Importance of Connecting Mailchimp and WooCommerce

Connecting Mailchimp and WooCommerce offers numerous benefits for your e-commerce business. In this section, we will delve into the fundamental reasons why integrating these two platforms is essential for your marketing strategy.
- Streamlined Customer Management: When you connect Mailchimp and WooCommerce, you can sync your customer data seamlessly. This integration allows you to automatically capture customer information from your WooCommerce store and update it in your Mailchimp email list. By having a centralized customer database, you can easily segment your audience, personalize your marketing campaigns, and provide a tailored experience for your customers.
- Targeted Email Marketing: One of the significant advantages of connecting Mailchimp and WooCommerce is the ability to leverage targeted email marketing. With Mailchimp’s robust segmentation capabilities, you can create specific customer segments based on purchase history, product preferences, or other relevant data. By sending targeted emails to specific customer groups, you can increase engagement, drive conversions, and ultimately boost your sales.
- Automated Follow-ups and Abandoned Cart Recovery: Integrating Mailchimp with WooCommerce enables you to automate follow-up emails and recover abandoned carts. With Mailchimp’s automation features, you can set up email sequences to engage with customers after specific actions, such as making a purchase or abandoning their carts. These automated follow-ups help nurture customer relationships, encourage repeat purchases, and recover potentially lost sales.
- Personalized Product Recommendations: By combining Mailchimp’s powerful automation features and WooCommerce’s product data, you can deliver personalized product recommendations to your customers. With the integration, Mailchimp can analyze customer purchase history and behavior to suggest relevant products that align with their interests and preferences. Personalized recommendations enhance the customer experience, increase cross-selling opportunities, and drive more conversions.
- Efficient Campaign Tracking and Analytics: When you connect Mailchimp and WooCommerce, you gain access to comprehensive campaign tracking and analytics. Mailchimp provides detailed insights into email open rates, conversion rates, and click-through rates, letting you manage your email marketing campaigns. By analyzing the performance of these marketing campaigns, you can refine your strategies, optimize your marketing efforts, and achieve better results.
Connecting Mailchimp and WooCommerce is crucial for enhancing your e-commerce marketing strategy. By streamlining customer management, enabling targeted email marketing, automating follow-ups, providing personalized product recommendations, and gaining access to campaign analytics, you can elevate your marketing efforts and drive significant growth for your business. Now that we understand the importance of this connection, let’s move on to setting up your Mailchimp account in the next section.
Setting Up Your Mailchimp Account
To connect Mailchimp with WooCommerce, you need to have a Mailchimp account. In this section, we will guide you through the process of setting up your Mailchimp account and getting it ready for integration with WooCommerce.
- Creating a Mailchimp Account
If you don’t already have a Mailchimp account, you can create one by following these steps:
- Go to the Mailchimp website and click on the button “Sign Up Free”.
- Fill in the required information, including your email address, username, and password.
- Click on the “Get Started” button.
- On the next screen, provide your organization’s information, such as your company name and website URL.
- Choose the type of emails you plan to send from your account (e.g., marketing emails, transactional emails).
- Click on the “Continue” button.
- Mailchimp will send you a confirmation email. Open this official email and click on the verification link to verify your account.
Congratulations! You have successfully created your Mailchimp account. Now, let’s explore the Mailchimp dashboard and get familiar with its features.
2. Understanding Mailchimp’s Dashboard
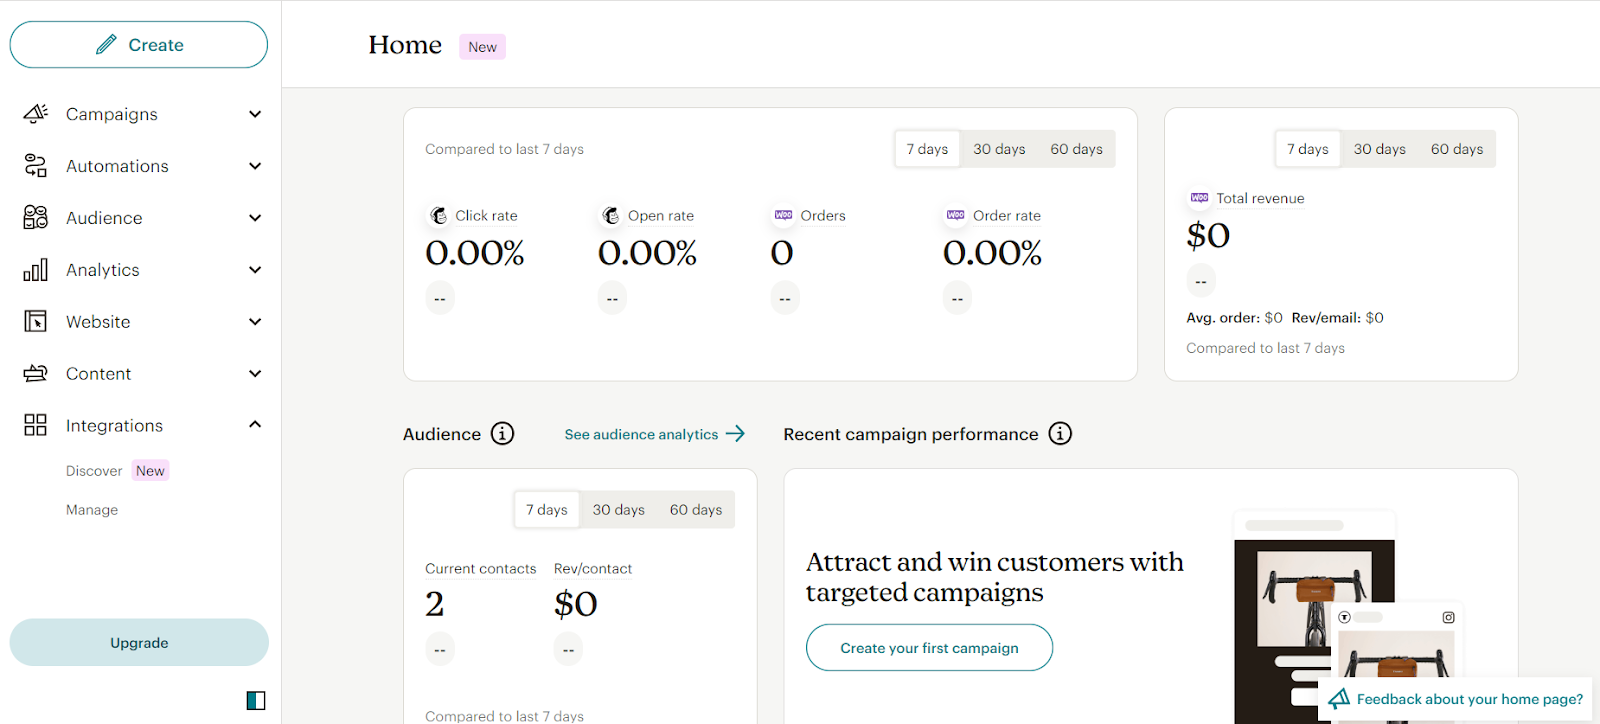
Once you log in to your Mailchimp account, you will be taken to the dashboard where you can access various features and manage your email marketing campaigns. Here are some key components of the Mailchimp dashboard:
- Audience: This section allows you to manage your email lists and subscribers. You can create different lists, import existing contacts, and segment your audience based on specific criteria.
- Campaigns: In this section, you can create and manage your email campaigns. You can design beautiful email templates, schedule and send campaigns to your subscribers, and analyze the performance of your campaigns.
- Templates: Mailchimp offers a wide range of pre-designed email templates that you can personalize to match your brand. This section allows you to choose and edit templates for your email campaigns.
- Reports: Here, you can track the performance of your email campaigns. Mailchimp provides detailed reports on metrics such as open rates, click-through rates, and subscriber engagement.
- Automation: The automation section allows you to set up automated email sequences, such as welcome emails, abandoned cart reminders, or birthday greetings. You can create personalized workflows to engage with your subscribers at different stages of their customer journey.
- Integrations: Mailchimp integrates with various third-party platforms, including WooCommerce. In this section, you can explore and manage your integrations to connect Mailchimp with other tools and services.
Now that you have created the Mailchimp account and have familiarized yourself with the dashboard, it’s time to set up your email list, which will be crucial for connecting Mailchimp with WooCommerce. Proceed to the next section to learn how to set up your email list effectively.
Setting Up Your WooCommerce Store
Once you have set up your Mailchimp account, the next step is to set up your WooCommerce store. In this section, we will walk you through the process of creating a WooCommerce store, understanding the WooCommerce dashboard, and setting up your product list.
- Creating a WooCommerce Store
If you haven’t already set up your WooCommerce store, follow these steps to get started:
- Install WordPress: WooCommerce is a plugin created for WordPress, so you will need to have WordPress installed on your website. If you don’t have WordPress, you can download it from wordpress.org and follow the installation instructions.
- Install the WooCommerce Plugin: Once you have WordPress installed, go to the “Plugins” section in your WordPress dashboard. The next step is to search for “WooCommerce“, then click on “Install Now” next to the WooCommerce plugin, and activate the plugin.
- Run the WooCommerce Setup Wizard: When you activate the WooCommerce plugin, it will guide you through a setup wizard. Follow the steps to configure your store settings, such as currency, shipping options, and payment gateways. Provide the necessary information to complete the setup process.
Congratulations! You have successfully created your WooCommerce store. Now, let’s explore the WooCommerce dashboard and understand its key features.
2. Understanding WooCommerce’s Dashboard
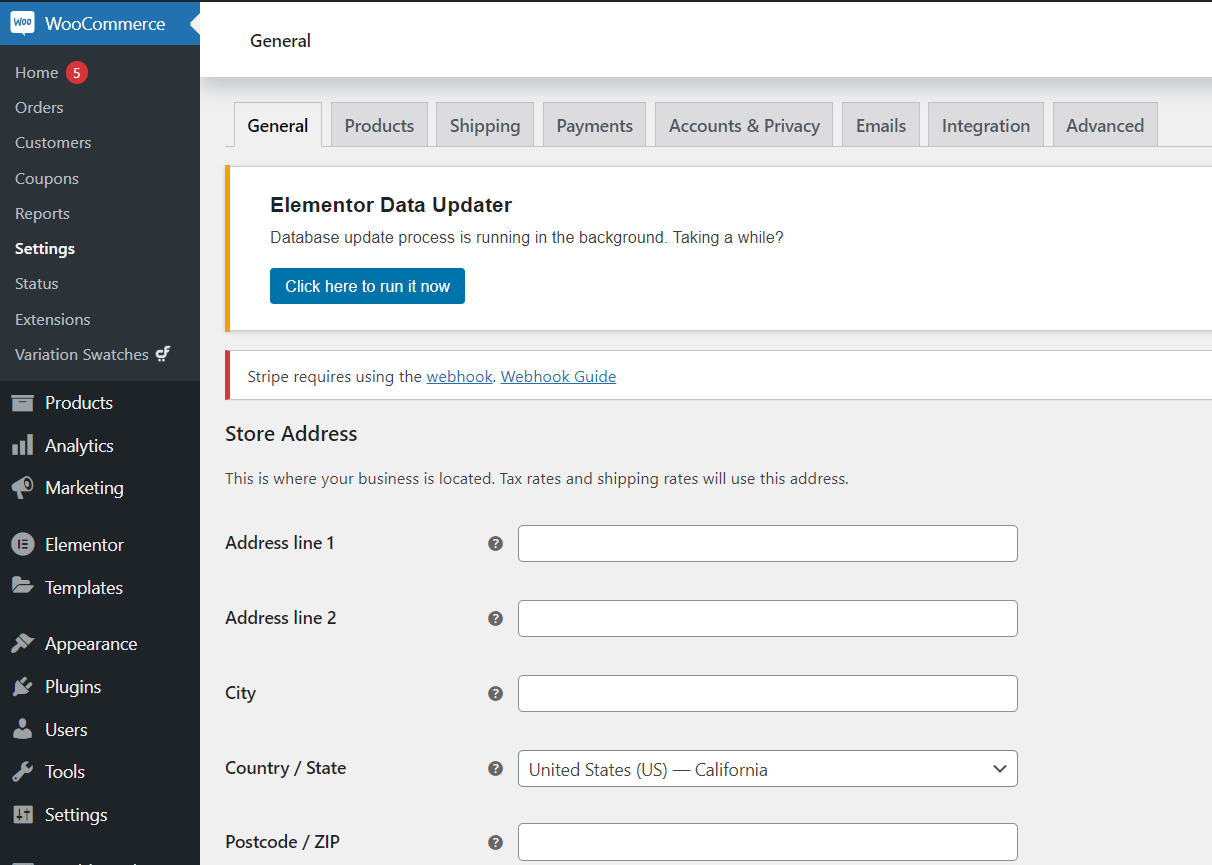
Upon completing the WooCommerce setup wizard, you will be redirected to the WooCommerce dashboard, where you can manage your online store. Here are some essential components of the WooCommerce dashboard:
- Orders: This section displays all your store’s orders. You can view, process, and manage orders from this tab. It provides information about the customer, products purchased, order status, emails, and more.
- Products: In this section, you can manage your product inventory. You can add new products, set prices, and stock levels, and manage product categories and attributes.
- Coupons: WooCommerce allows you to create and manage coupons to offer discounts and promotions to your customers. In this section, you can create coupon codes, set usage restrictions, and track coupon usage.
- Reports: WooCommerce provides detailed reports on your store’s performance. You can access information such as sales, revenue, and popular products. These reports help you analyze your store’s performance and make informed business decisions.
- Settings: The settings section permits you to configure various aspects of your store, including general settings, tax settings, shipping options, payment gateways, subscriptions, and more. You can personalize your store to align with your business requirements.
Connecting Mailchimp and WooCommerce
Now that you have your Mailchimp account set up and your WooCommerce store ready, it’s time to connect Mailchimp and WooCommerce. In this section, we will guide you through the process of installing the Mailchimp for WooCommerce plugin, configuring the plugin settings, and syncing your email list and product list.
1. Installing the Mailchimp for WooCommerce Plugin
To connect Mailchimp and WooCommerce, follow the steps for installing and activating the Mailchimp for WooCommerce plugin mentioned on the screen:
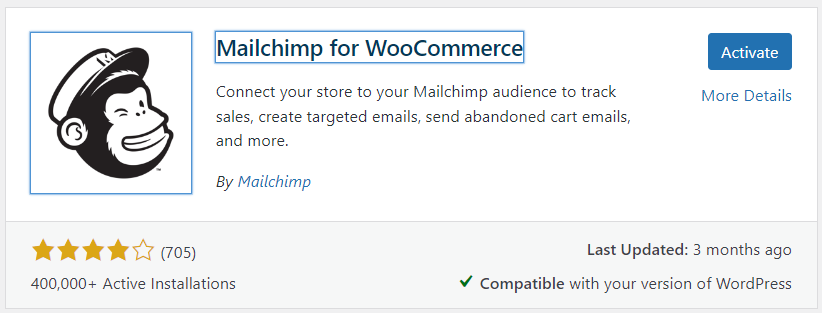
- In your WordPress dashboard, navigate to “Plugins” and click on “Add New”.
- Search for “Mailchimp for WooCommerce” in the search bar.
- Find the plugin developed by Mailchimp and click on the “Install Now” button.
- After installation, click on “Activate” to enable the plugin.
2. Configuring the Plugin Settings
Once you have activated the Mailchimp for WooCommerce plugin, you need to configure its settings to establish the connection between Mailchimp and WooCommerce. Follow these steps to configure the plugin:
- Go to your WordPress dashboard for “WooCommerce”> “Settings”> “Integration”> “Mailchimp”.
- Click on “Connect” to link your Mailchimp account with the plugin.
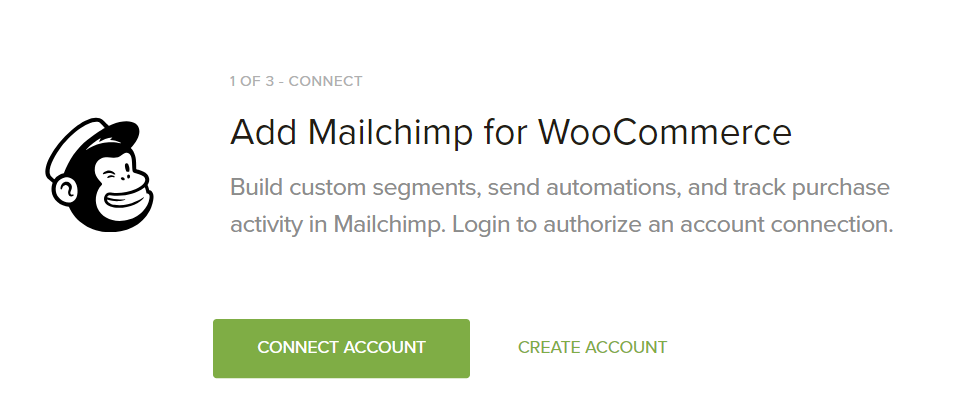
- You will be redirected to Mailchimp’s website, where you will need to grant permission for the plugin to access your Mailchimp account. Follow the prompts to authorize the connection.
- Once the connection is established, return to your WordPress dashboard and configure the remaining plugin settings. This includes selecting the Mailchimp audience to sync with, choosing the opt-in settings, and deciding whether to enable the double opt-in feature.
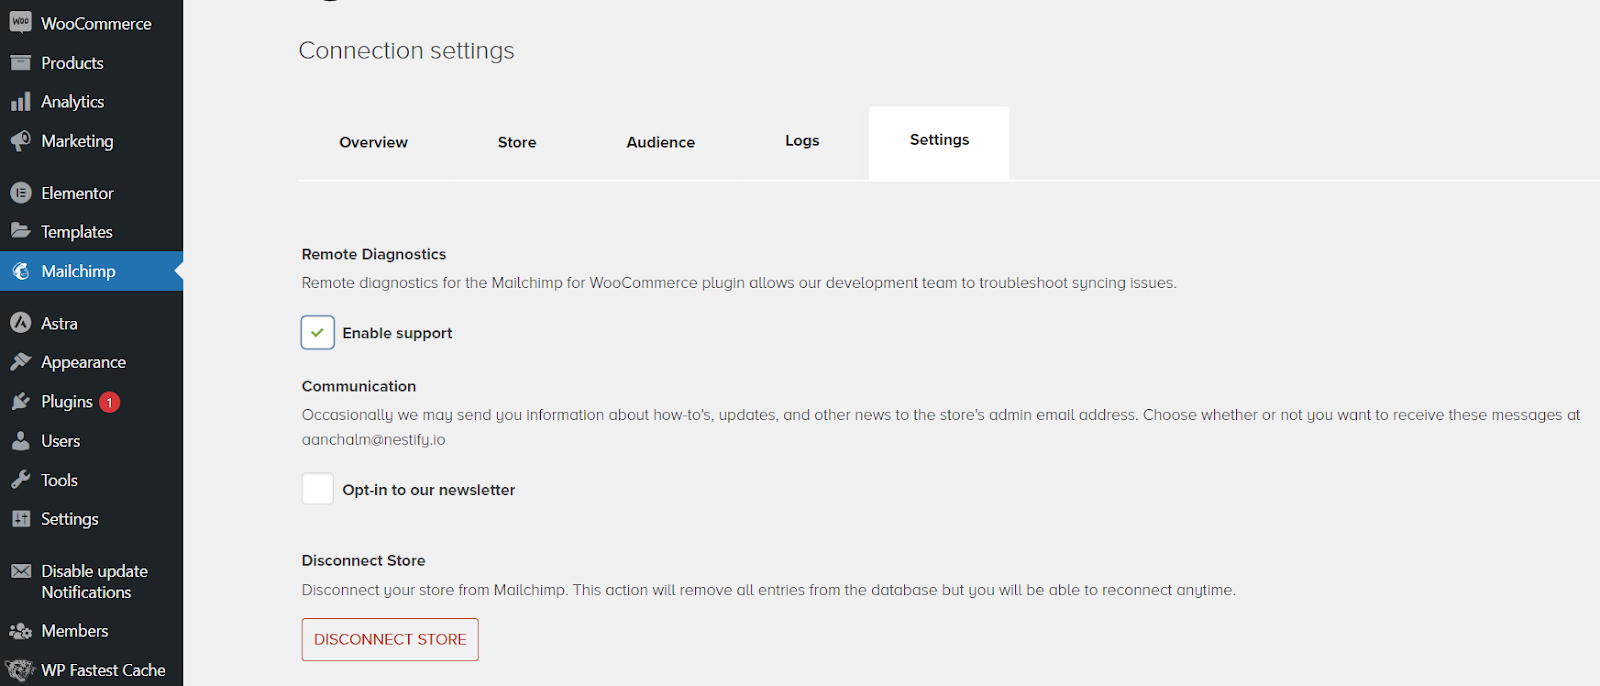
- Save your settings to apply the changes.
3. Syncing Your Email List and Product List
After the plugin is configured, you can start syncing your email list and product list between Mailchimp and WooCommerce. Follow these steps to initiate the sync:
- In your WordPress dashboard, NA to “WooCommerce”> “Settings”> “Integration”> “Mailchimp”.
- Click on the “Sync” tab.
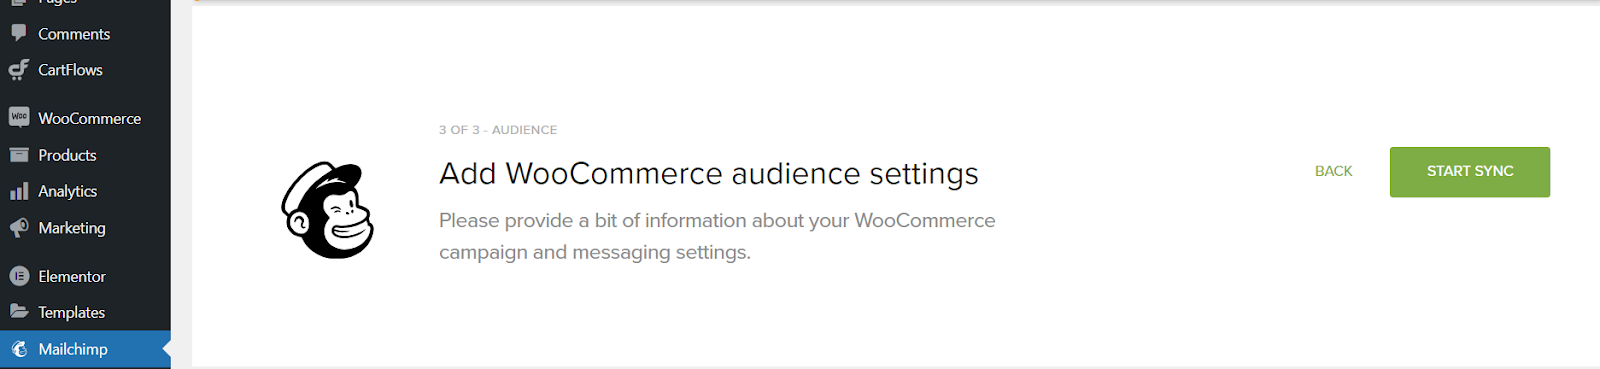
- Choose the options for syncing your email list and product list. You can choose to sync all existing subscribers and products or only sync new ones going forward.
- Click on the “Start Syncing” button to initiate the sync process.
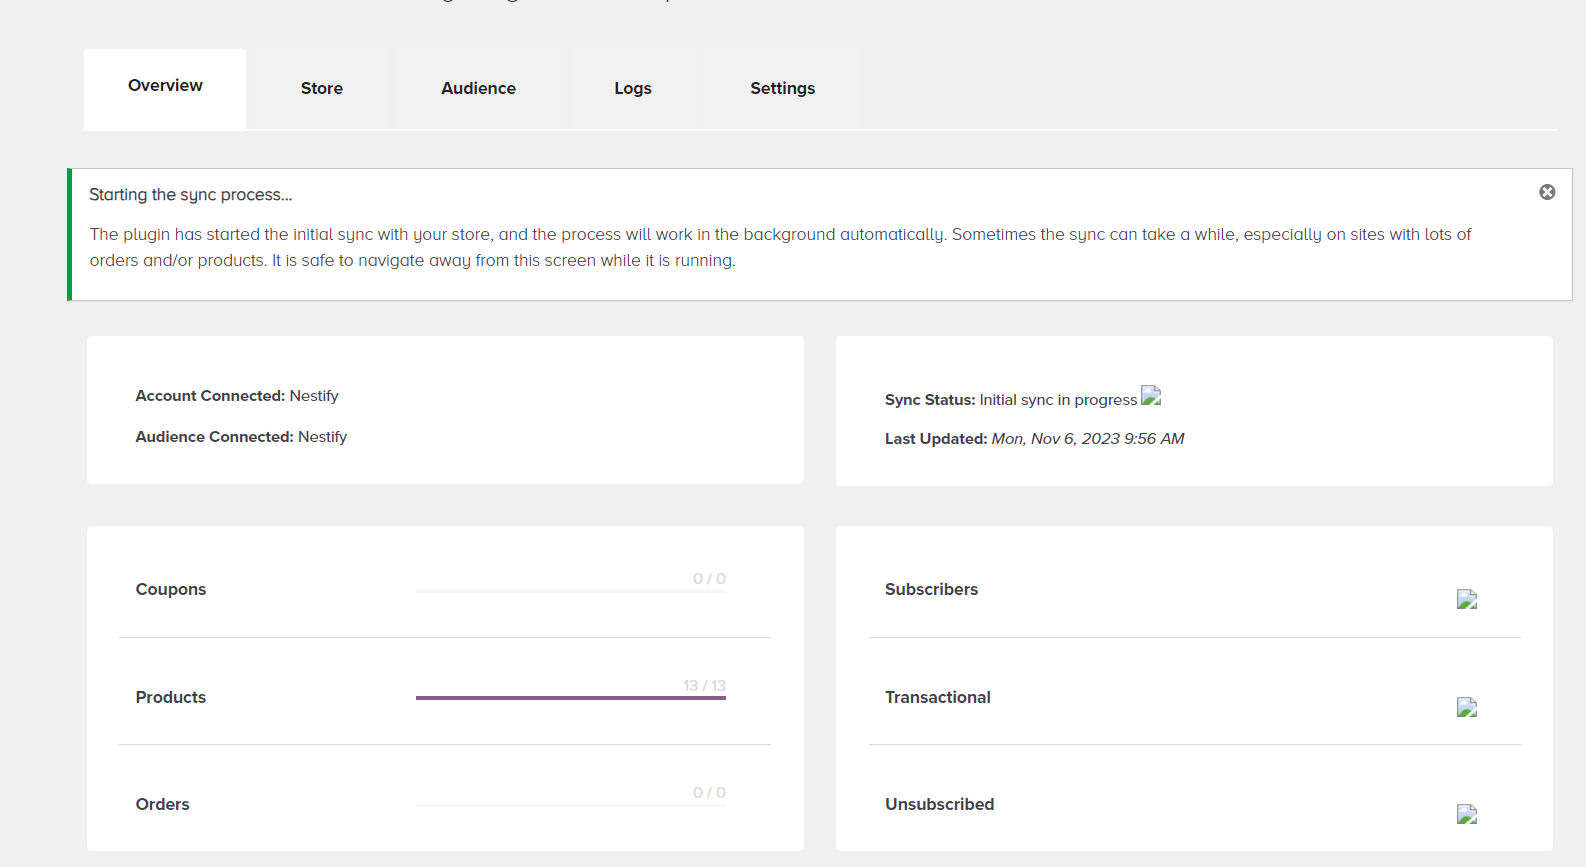
The plugin will now start syncing your data between Mailchimp and WooCommerce. Depending on the size of your lists and products, it may take some time to complete the initial sync. Once the sync is done, you will have your email list and product list connected and up to date on both platforms.
Congratulations! You have successfully connected Mailchimp and WooCommerce. In the next section, we will discuss how to test and troubleshoot the connection to ensure everything is working smoothly.
Testing and Troubleshooting the Connection
After connecting Mailchimp and WooCommerce, it is essential to test the connection and troubleshoot any potential issues that may arise. In this final section, we will guide you through the process of sending a test email, checking the sync status, and troubleshooting common issues.
- Sending a Test Email
To ensure that the connection between Mailchimp and WooCommerce is functioning correctly, it is advisable to send a test email. Follow the below-mentioned steps to send a test email:
- Go to your Mailchimp account and navigate to the “Campaigns” section.
- Create a new marketing campaign or select an existing one.
- Customize the email content and design as desired.
- Before sending the email to your subscribers, click on the option to send a test email.
- Type in your email address or the email addresses of your team members who can verify the email.
- Click on the “Send Test” button.
- Check your or the receiver’s inbox for the test email and verify that it displays correctly.
If the test email is received successfully and appears as intended, the connection between Mailchimp and WooCommerce is working correctly for sending emails.
2. Checking the Sync Status
To ensure that your email list and product list are syncing properly between Mailchimp and WooCommerce, you can check the sync status. Follow these steps to check the sync status:
- In your WordPress dashboard, navigate to “WooCommerce”> “Settings”> “Integration”> “Mailchimp”.
- Click on the “Sync” tab.
- Look for the sync status information, which indicates whether the sync is in progress, completed, or if there are any errors.
- If there are any errors or issues, the sync status will provide details on what went wrong.
By checking the sync status regularly, you can ensure that the data between Mailchimp and WooCommerce remains up-to-date and synchronized.
3. Troubleshooting Common Issues
Despite the seamless integration between Mailchimp and WooCommerce, you may encounter some common issues during the connection process. Here are a few troubleshooting tips to address these issues:
- Invalid API Key: Double-check that you have entered the correct Mailchimp API key in the plugin settings. Ensure that there are no extra spaces or characters.
- List Selection: Verify that you have selected the correct Mailchimp audience to sync with WooCommerce. Make sure the audience exists in your Mailchimp account.
- Data Filtering: Check if you have applied any data filtering options that may be preventing certain subscribers or products from syncing. Adjust the filtering settings accordingly.
- Plugin Compatibility: Ensure that you are using the latest version of the Mailchimp for WooCommerce plugin and that it is compatible with your WordPress and WooCommerce versions. Update the plugin if necessary.
- Error Messages: Stay alert for any error messages or notifications provided by the plugin. They often provide valuable insights into the cause of the issue.
If you encounter persistent issues or are unsure how to resolve them, reach out to Mailchimp support or consult relevant documentation or forums for further assistance.
Congratulations! By testing the connection and troubleshooting any issues, you have ensured that Mailchimp and WooCommerce are working harmoniously together. You can now leverage the power of integrated email marketing in your e-commerce business.
In conclusion,
Connecting Mailchimp to WooCommerce opens up a world of possibilities for targeted email marketing, automated follow-ups, and personalized customer experiences. By following the steps outlined in this blog, you have gained the knowledge to integrate these platforms seamlessly and optimize your marketing efforts. Embrace this integration, and watch your business thrive.
