
Are you a business owner using WooCommerce to power your online store? If so, you likely know the importance of correctly applying taxes to your products. However, figuring out the ins and outs of settings related to tax on WooCommerce can be confusing for many users. The importance of setting up taxes correctly is one important aspect every online store owner should know. This blog will give you a detailed summary of how to add tax on WooCommerce and be able to confidently manage your tax settings to ensure accurate and compliant taxation for your online store. So, let’s get started and make tax setup on WooCommerce a breeze!
Why Setting Up Taxes is Necessary
Taxes play a crucial role in e-commerce as they determine the amount of tax your customers need to pay on their purchases. Properly configuring taxes ensures that your online store remains compliant with local tax laws and regulations.
Setting Up General Tax on WooCommerce
To access the tax settings in WooCommerce, you’ll need to log in to your WordPress dashboard and navigate to the WooCommerce settings. From there, you can find the tax settings tab, which will allow you to configure various tax options.
Within the WooCommerce settings page, you’ll find the “General” section where you can configure basic tax options. Here, you can enable or disable tax rates and calculations, choose whether to display prices inclusive or exclusive of tax and select the tax display format.
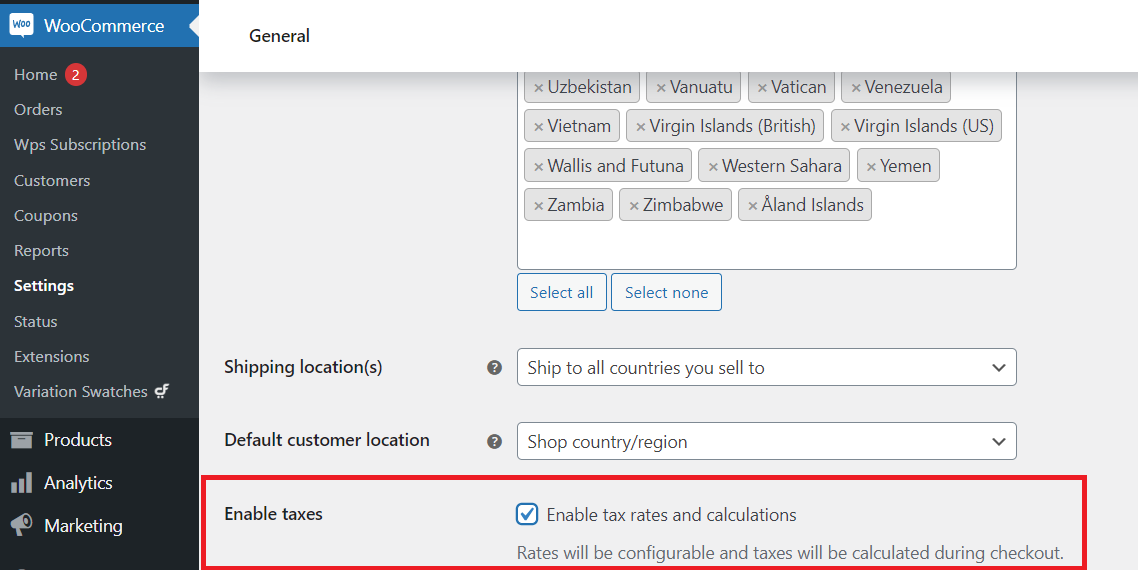
On enabling this option and saving the changes, a tax page automatically appears in the WooCommerce setting page.
It’s important to understand these tax options and set them according to your business requirements at the checkout page of your store. By correctly configuring the general tax options, you lay the foundation for accurately applying taxes to your products.
Understanding Standard Rates of Tax on WooCommerce
Standard tax rates are the most common tax rates that apply to most products. These rates are typically based on the tax jurisdiction where your business operates. Before configuring standard tax rates, it’s important to have a clear understanding of the tax rates applicable to your business location.
1. Adding a New Tax Rate
To add a new standard tax rate, go to the WooCommerce settings and navigate to the “Tax” tab. Under the “Standard Rates” section, click on the “Add Row” button. Here, you can enter the tax rate name, tax class, and the tax rate percentage.
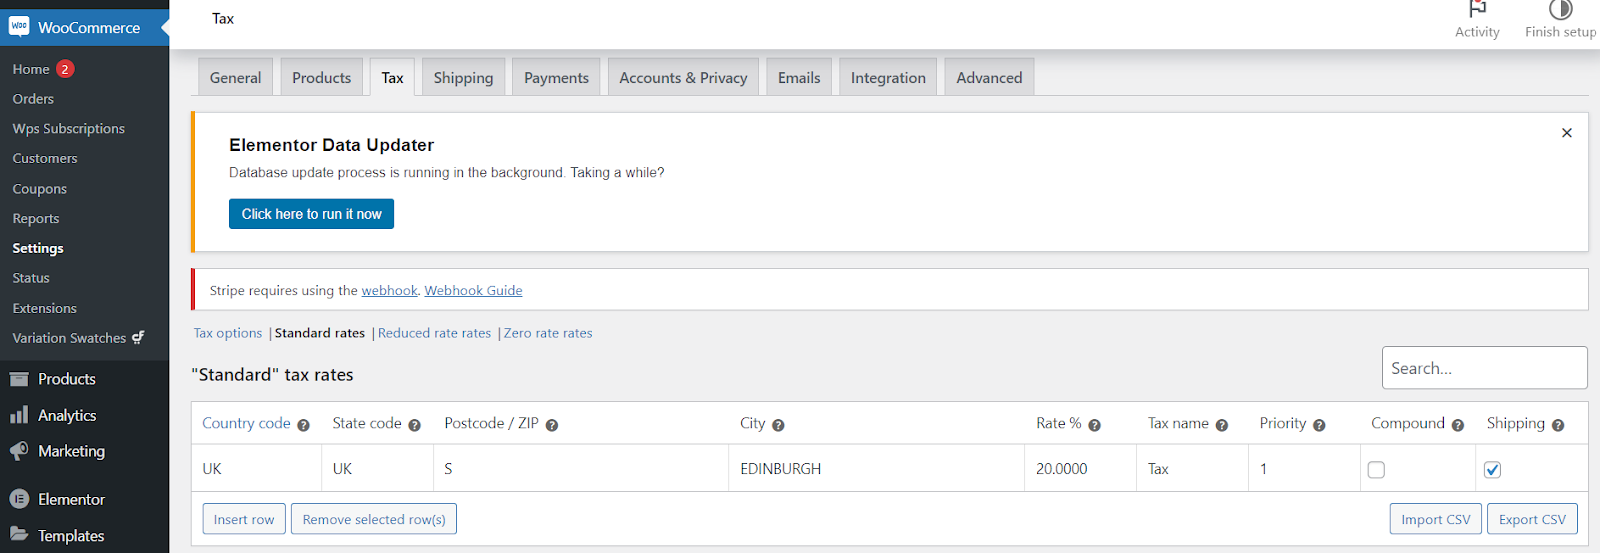
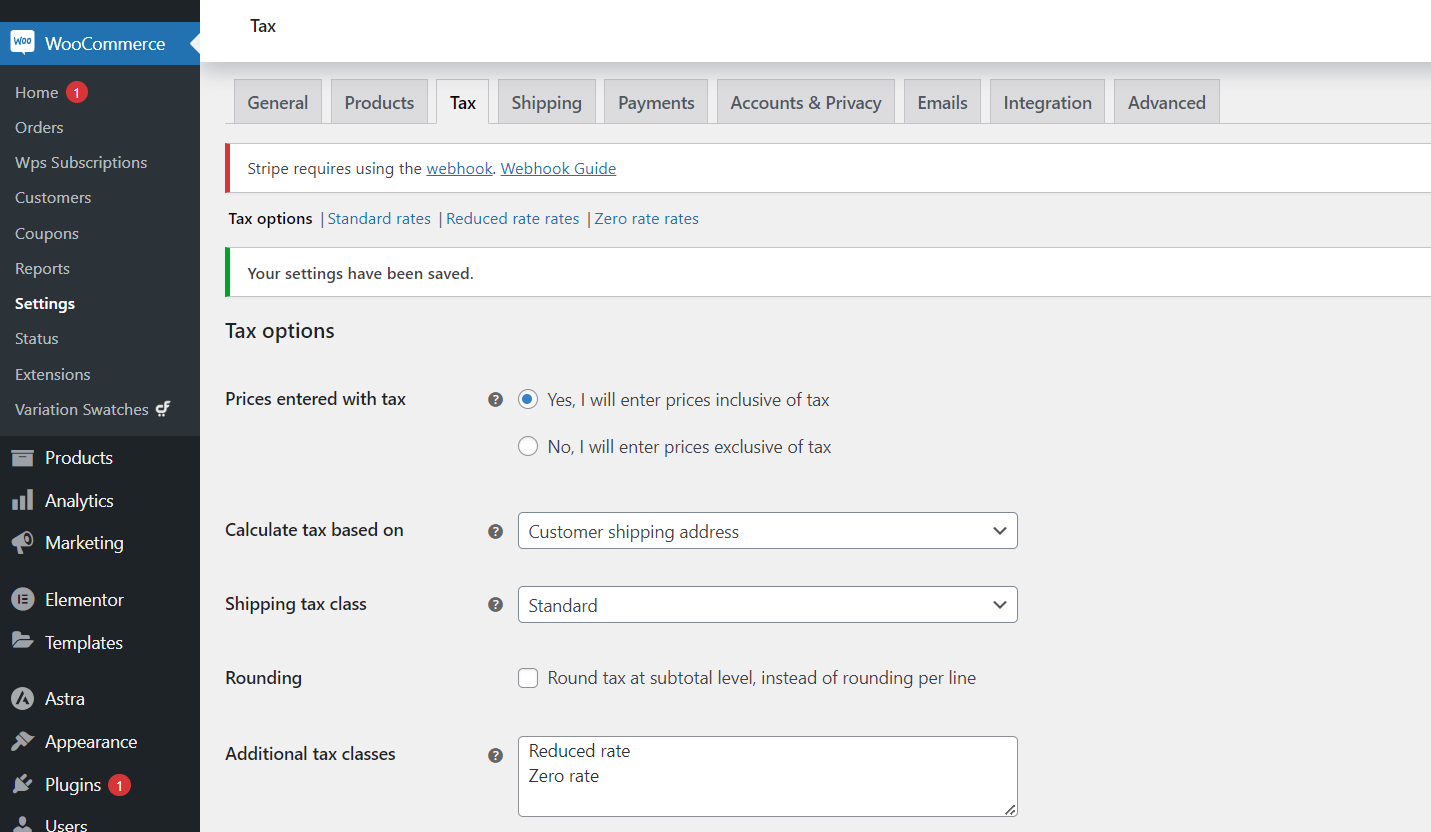
You can also specify whether the tax is compound or not. This choice holds significant importance in tax management for your store, as it dictates how you input product prices later on.
Selecting “Yes, I will enter prices inclusive of tax” means all catalog prices include your store’s base tax rate. For instance, in the UK, you’d input prices inclusive of the 20% tax rate. For a product priced at £9.99, inclusive of £1.67 tax, a UK customer pays £9.99, while a US customer pays £8.32.
On the other hand, choosing “No, I will enter prices exclusive of tax” means catalog prices exclude tax. Using the same example, a UK shop would enter £8.32 as the product price. A 20% tax would be added during checkout, making the total payable amount £9.99.
The tax calculation for tax-inclusive prices is:
tax_amount = price - ( price / ( ( tax_rate_% / 100 ) + 1 ) )The tax calculation for tax-exclusive prices is:
tax_amount = price * ( tax_rate_% / 100 )To know how to calculate taxes on WooCommerce, here is their detailed guide.
2. Editing and Deleting Existing Rates
If you need to make changes to an existing standard tax rate, you can easily edit it from the standard tax settings page. Simply locate the tax rate you want to modify and take the cursor on the tax rate%. Make the necessary changes and save the updated tax rate.
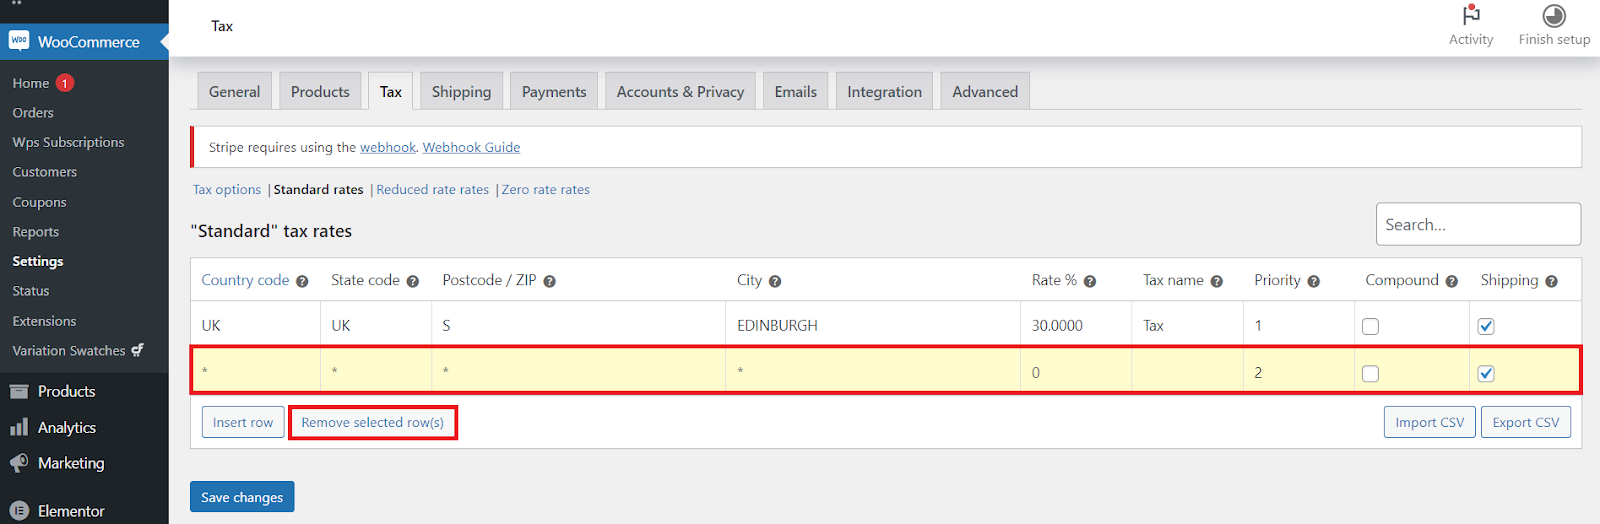
Similarly, if you want to delete a standard tax rate, locate the tax rate in the list and click on the delete icon. Confirm the deletion and the tax rate will be removed from your tax settings.
Configuring standard tax rates correctly ensures that your products are taxed accurately based on the applicable tax rates. Once you have configured the standard tax rates, you can move on to the next section, where we will explore how to set up reduced rate and zero rate tax on WooCommerce.
3. Setting Up Reduced Rate and Zero Rate Tax on WooCommerce
Setting up reduced rate and zero rate taxes in WooCommerce allows you to handle specific tax scenarios where products may be taxed at a lower rate or are exempt from tax altogether. In this section, we will guide you through the process of setting up reduced rate and zero rate taxes in WooCommerce.
Reduced rate taxes are applicable when certain products or services are subject to a lower tax rate compared to the standard rate. This can include items like essential goods, books, or specific services that qualify for a reduced tax rate.
Zero rate taxes, on the other hand, are applicable when products or services are exempt from tax entirely. This can include certain types of food, medical supplies, or exports.
- Adding New Reduced or Zero Rate Tax on WooCommerce
To add a new reduced or zero rate tax, navigate to the tax settings page in WooCommerce. Under the “Reduced Rate” or “Zero Rate” section, click on the “Add Row” button. Provide the necessary details, such as the tax rate name, tax class, and tax rate percentage (which may be zero for zero rate taxes).
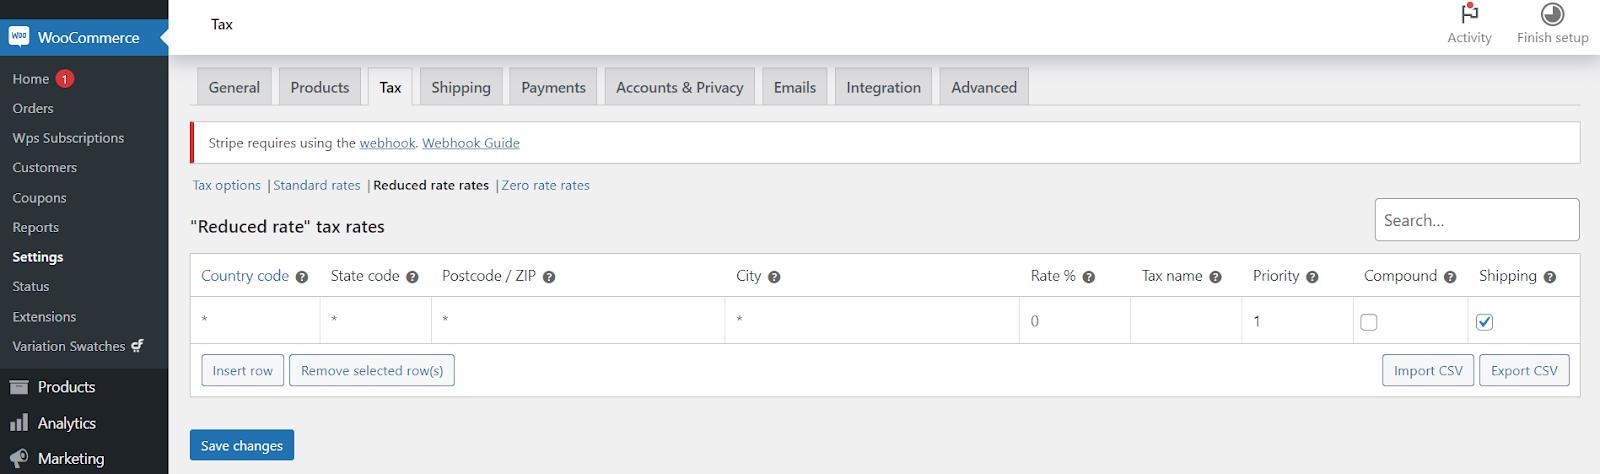
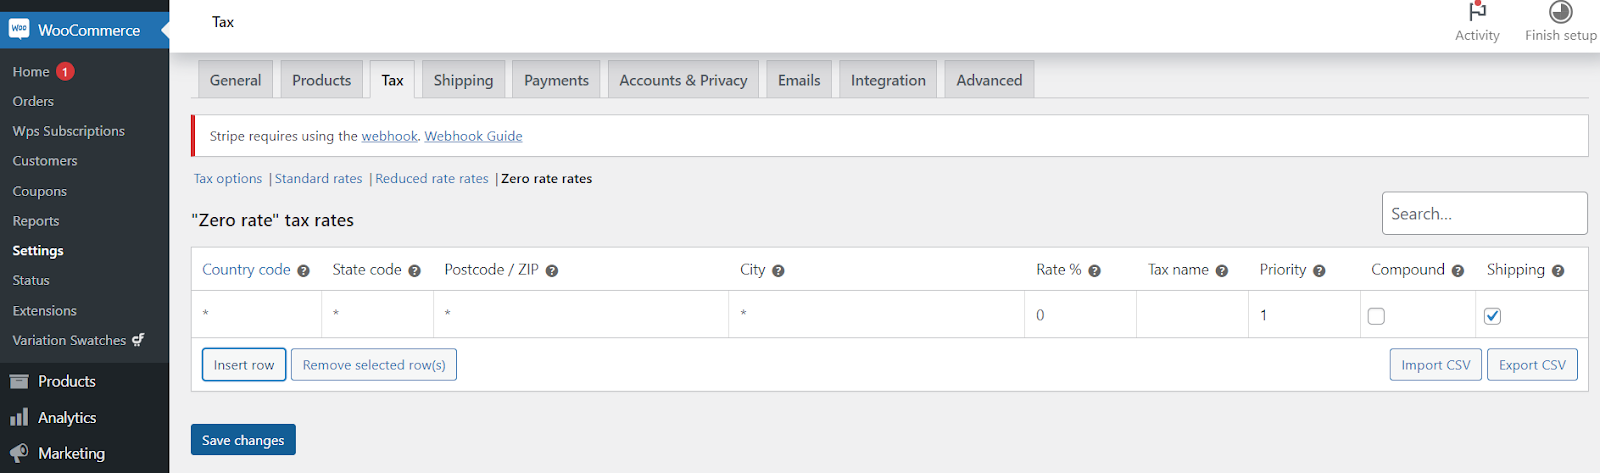
- Managing Reduced and Zero Rate Tax on WooCommerce
Once you have added reduced or zero rate taxes, you can easily manage them from the tax settings page. You can edit the tax rates to make any necessary changes, such as updating the tax rate percentage or tax class. Similarly, if you no longer require a reduced or zero rate tax, you can delete it from the tax settings.
Setting up reduced rate and zero rate taxes ensures that you accurately handle tax scenarios where certain products or services are subject to different tax rates or exemptions. Once you have configured these taxes, you can proceed to the next section, where we will explore advanced tax options and troubleshooting techniques in WooCommerce.
Advanced Tax Options
In addition to the basic tax options covered earlier, WooCommerce offers advanced tax options that allow you to customize tax settings further. Product tax classes allow you to categorize your products based on their taxability. WooCommerce provides default tax classes such as “Standard,” “Reduced Rate,” and “Zero Rate.” However, you can create custom tax classes based on your specific needs. By assigning tax classes to your products, you can apply different tax rates or exemptions based on the product category.
WooCommerce provides the option to calculate taxes based on the customer’s shipping address rather than the store’s location. This is particularly useful for businesses that have customers in different tax jurisdictions. By using this option, you can make sure
Once you enable this option and save the changes, a tax tab automatically appears in the settings section.
that the appropriate tax rates are applied based on the customer’s location. These taxes are then added to the shipping charges of the specific product that is to be shipped.
In most configurations, the shipping tax class is derived from the item being shipped. For instance, if you’re shipping a reduced-rate item like plastic boxes, the reduced rate would apply. If this isn’t the case in your area, opt for a different tax class.
In scenarios involving multiple tax rates in an order:
- If there’s a product with the Standard rate, it applies to shipping, regardless of its value.
- If there’s no Standard rate product, the first rate found in the Additional tax class section is used for shipping.
To ensure the highest rate applies to shipping (if you don’t use the Standard class), list your highest rate first in the Additional tax class section. Although you can’t delete the Standard tax rate, leaving it empty will make it irrelevant.
Setting Up Tax Based on Shipping Address
In the tax setting page, locate tax options. Navigate to “Additional tax classes” and add tax names. In the example below, we added Tax Z.
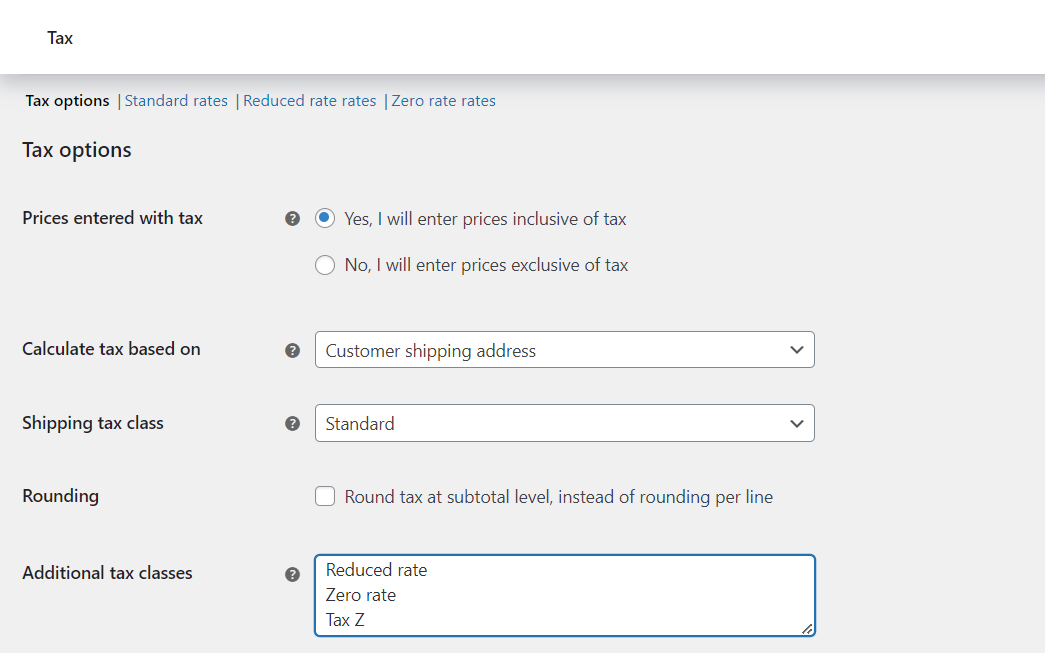
Additional Tax class becomes visible after you save the changes.
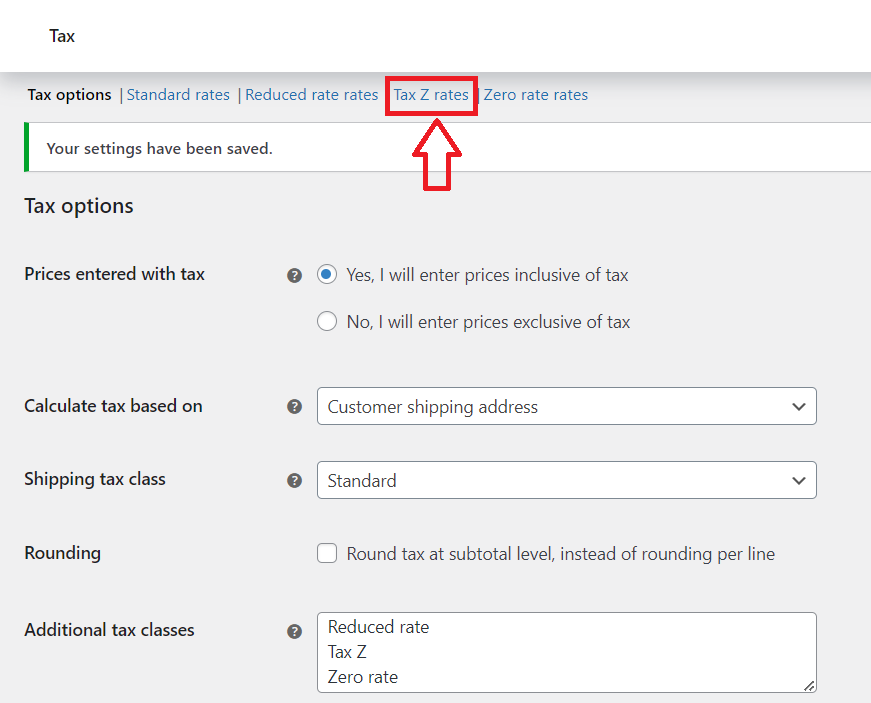
Click on the Tax Z page and do the necessary changes.
By utilizing the advanced tax options in WooCommerce, you can ensure accurate tax calculations and a seamless shopping experience for your customers.
Conclusion
Congratulations! You have now gained a comprehensive summary of how to add tax on WooCommerce. With this knowledge, you can confidently configure and manage tax settings to comply with local tax regulations and accurately apply taxes to your products.
Now it’s time to put your newfound expertise into action and optimize your WooCommerce store’s tax settings. Happy selling!
