The checkout page is a crucial part of any online store, as it is where your customers complete their purchases and provide their payment and shipping information. However, the default checkout page might not always meet your specific needs or match your brand’s aesthetic.
In this blog, we will take you through the process of customizing your WooCommerce checkout page without spending a dime. So, if you’re ready to take control of your WooCommerce checkout page and create a customized and optimized experience for your customers, let’s dive in!
Understanding the Basics: Anatomy of WooCommerce Checkout Page
The WooCommerce checkout page is where the magic happens – it’s the final step in the purchasing process for your customers. Before diving into the customization options, it’s essential to understand the basic structure and elements that make up the WooCommerce checkout page.
- Billing and Shipping Information: This section allows customers to input their personal details, including name, address, email, and phone number. It’s crucial to have clear and intuitive fields for customers to fill out accurately.
- Order Summary: This section provides a summary of the customer’s order, including the products, quantities, prices, and any applicable discounts or coupons. It ensures transparency and allows customers to review their orders before proceeding to payment.
- Payment Options: The payment options section allows customers to select their preferred payment method, such as credit card, PayPal, or other available payment gateways. It’s important to provide a variety of secure and popular payment options to accommodate different customer preferences.
- Order Notes: This optional section allows customers to leave additional notes or special instructions regarding their order. It can be useful for customers who have specific requests or need to communicate any particular information to the store owner.
- Terms and Conditions: Including a checkbox for customers to agree to your store’s terms and conditions is essential to protect both parties. Make sure to clearly display your terms and conditions and require customers to agree before proceeding with their purchase.
- Place Order Button: This is the final call-to-action button that customers click to complete their purchase. It should be evidently displayed and easily accessible to ensure a seamless checkout experience.
Understanding the basic elements and structure of the WooCommerce checkout page is fundamental before proceeding with any customization. With this knowledge, you’ll be able to make informed decisions about which aspects of the checkout page you want to customize and improve for your customers’ convenience and satisfaction. Now that we have a clear understanding of the anatomy of the WooCommerce checkout page, let’s move on to accessing and navigating the WooCommerce checkout settings.
How to Access and Navigate WooCommerce Checkout Page Settings
Accessing and navigating the WooCommerce checkout settings is the first step toward customizing your checkout page. In this section, we will walk you through the process of accessing the WooCommerce checkout settings and explain each option available for customization.
- Accessing WooCommerce Checkout Page Settings
- Login to your WordPress admin panel
- Navigate to the WooCommerce tab on the left-hand side of the dashboard
- Click on “Settings” to get access of the general settings page
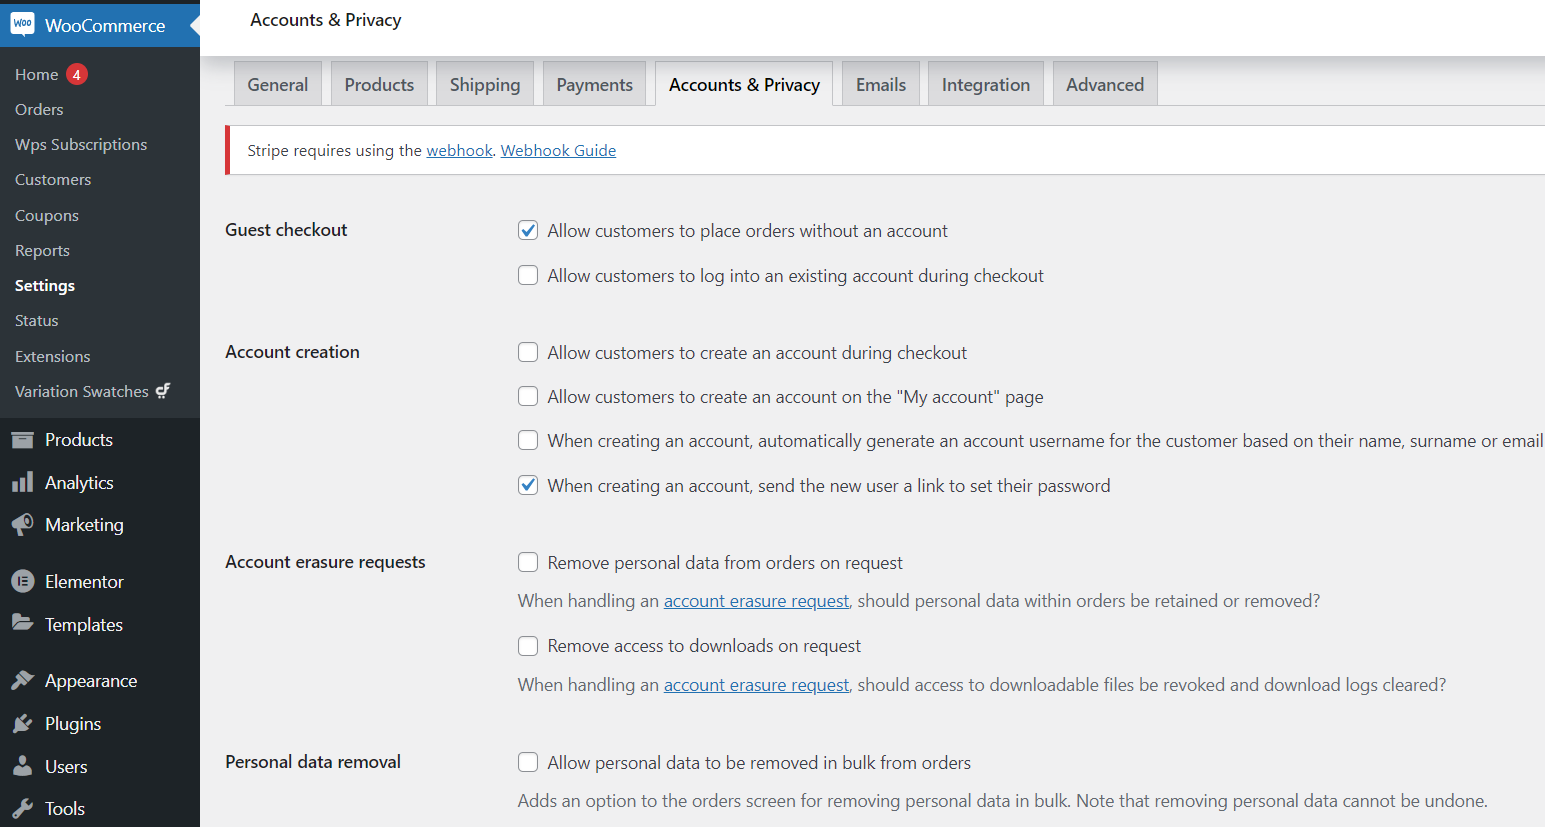
- Within the settings page, click on the “Accounts and Privacy” tab at the top
2. Understanding Checkout Page Options
Once you have accessed the WooCommerce checkout settings, you will be presented with several options that control the behavior and appearance of your checkout page. Let’s take a closer look at each of these options:
- Checkout Process: This option allows you to choose between a one-page or multi-step checkout process. You can select the one that suits your store’s needs and provides the best user experience for your customers.
- Checkout Pages: WooCommerce allows you to select the pages that will be used for the cart, checkout, and terms and conditions. This gives you the flexibility to use custom pages or templates for each of these sections.
- Checkout Endpoints: Endpoints are URLs that are used for specific actions within the checkout process, such as order received, payment processing, and order payment. WooCommerce provides default endpoints, but you can customize them to match your preferred URL structure.
- Enable Guest Checkout: Enabling guest checkout allows customers to complete their buying process without creating an account. This can improve conversion rates for customers who prefer a quick and hassle-free checkout process.
- Force Secure Checkout: This option ensures that the checkout process is conducted over a secure HTTPS connection, providing an added layer of security for your customers’ sensitive information.
- Enable Coupons: Enabling coupons allows customers to apply discount codes during the checkout process. It’s a great way to incentivize purchases and boost customer satisfaction.
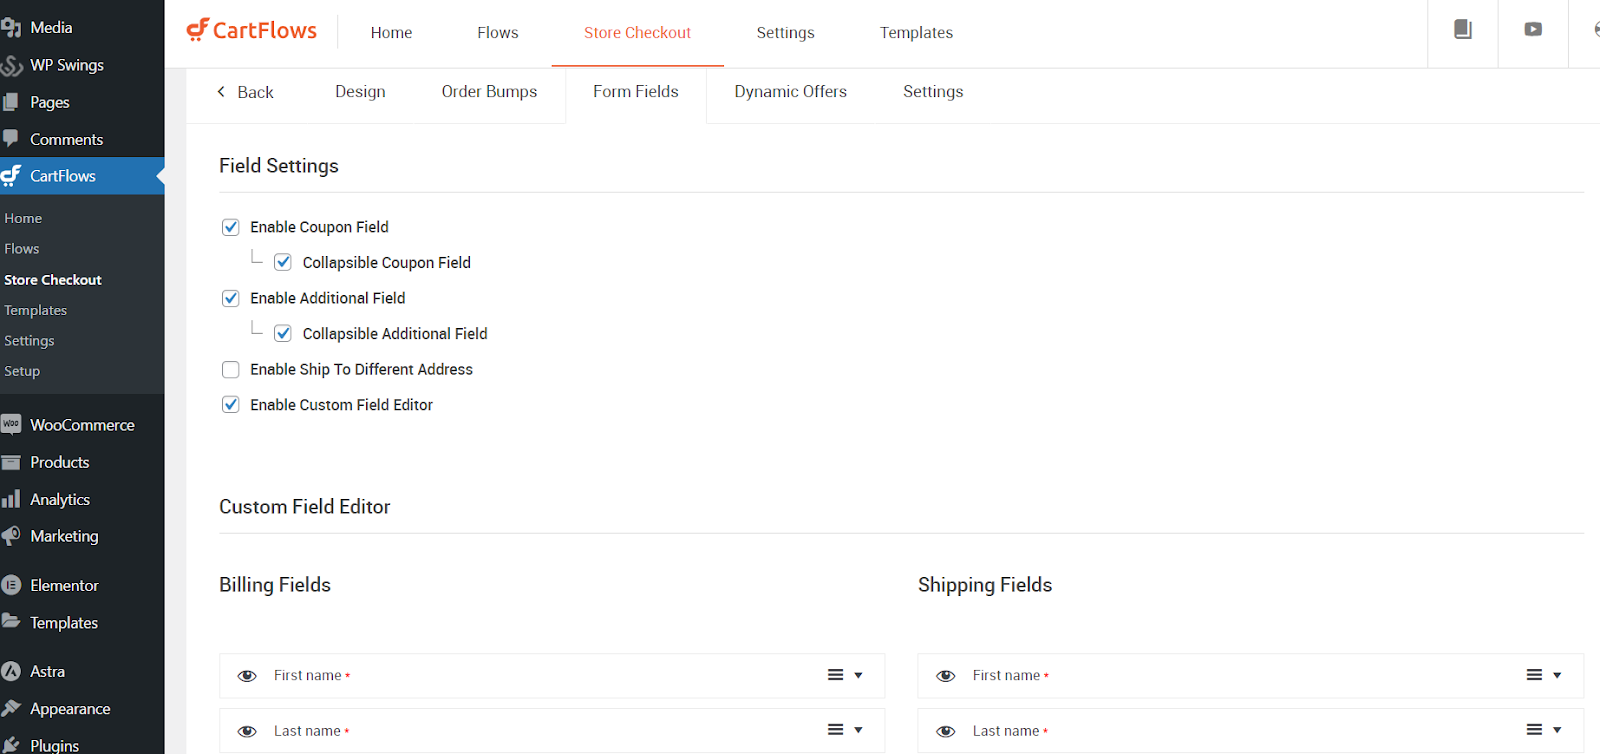
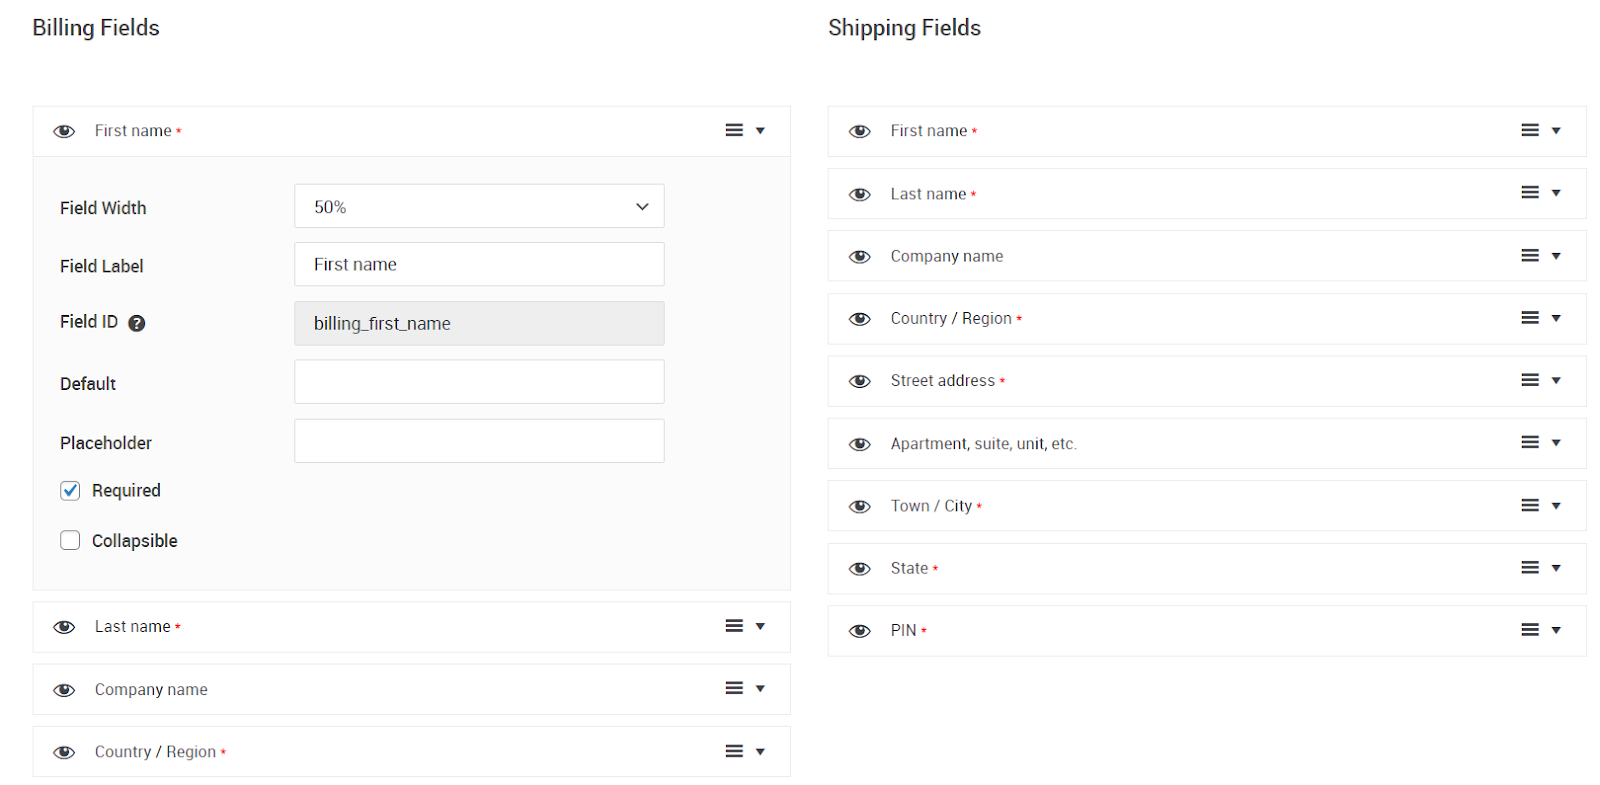
3. How to Customize Checkout Page Fields
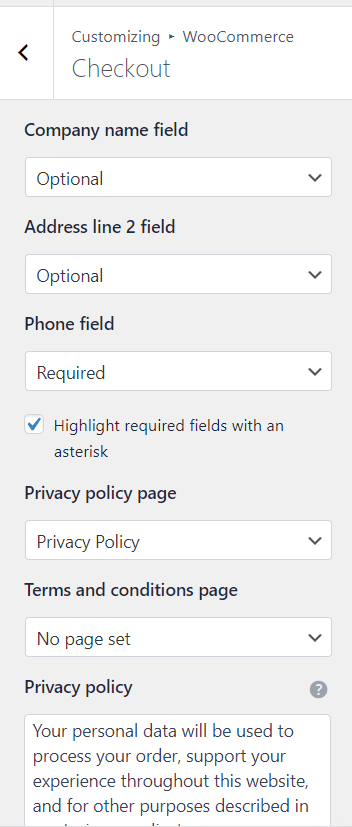
WooCommerce also provides the ability to customize the fields displayed on the checkout page. This allows you to collect the necessary information from customers and tailor the checkout process to your specific requirements. To customize checkout fields:
- Click on the “Checkout Fields” option in the WooCommerce checkout settings.
- You will see a list of available fields such as billing address, shipping address, taxes, and additional fields.

- To edit a field, click on the “Edit” link next to it.
- You can then customize the label, placeholder text, and other attributes for each field.
- Additionally, you can rearrange the fields by dragging and dropping them into your preferred order.
By accessing and navigating the WooCommerce checkout settings, you are now equipped with the knowledge of how to configure the checkout process, select the appropriate pages, and customize the fields displayed on the checkout page. In the next sections, we will explore how to take your customization further by using free plugins and code snippets.
How to Edit Checkout Page Using Free Plugins
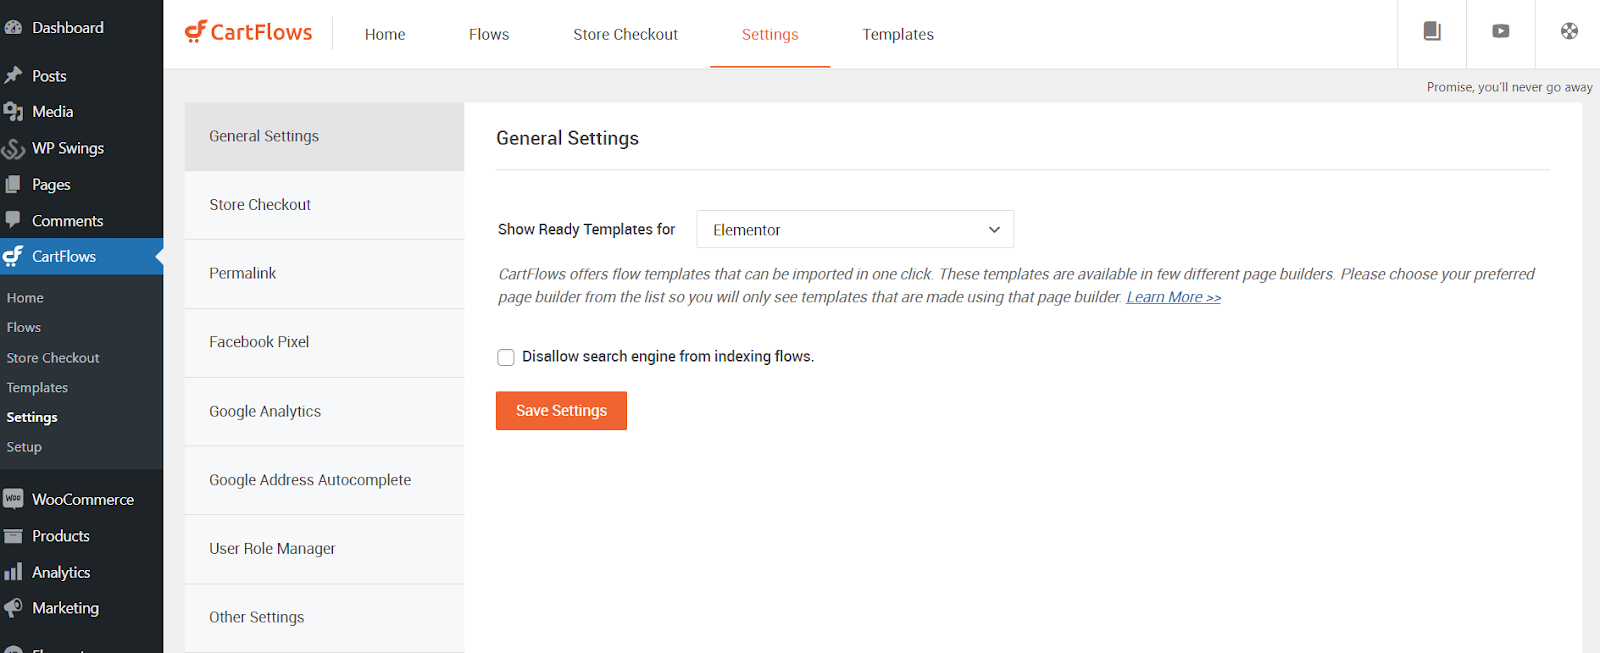
When it comes to editing your WooCommerce checkout page, there are several free plugins available like Cartflows that can help you achieve the desired customization. In this section, we will guide you through the process of choosing the right plugin to edit your checkout page.
Installing and activating the plugin is the initiation step, after which you can begin customizing your WooCommerce checkout page. The process may vary depending on the plugin you have chosen, but here are some common steps:
- Locate the plugin settings in your WordPress dashboard. This is typically found under a dedicated tab or settings page.
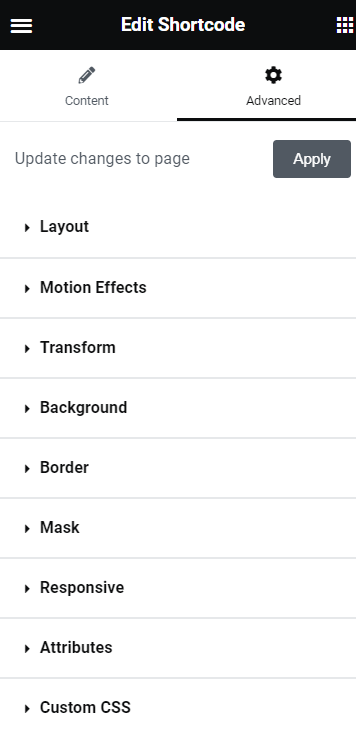
- Explore the different customization options provided by the plugin. These may include options to change the layout, colors, form fields, or add custom CSS.
- Configure the settings according to your preferences. Take your time to experiment and preview the changes before finalizing them.
- Save your changes and visit your checkout page to see the modifications in action.
- If needed, make further adjustments or fine-tune the customization until you are satisfied with the result.
By utilizing free plugins, you can unlock a wide range of customization possibilities for your WooCommerce checkout page. Take advantage of these plugins to tailor the checkout experience to your brand and improve conversions. In the next section, we will explore an alternative method for editing your checkout page using code snippets.
How to Test and Optimize Your Checkout Page
Once you have edited and customized your WooCommerce checkout page, it’s crucial to test and optimize it to ensure a smooth and seamless user experience. So, let’s discuss the importance of testing, how to conduct A/B testing, and provide some tips for optimizing your checkout page in this final section.
- Why Testing is Crucial
Testing your checkout page allows you to identify any potential issues or bottlenecks that may hinder the conversion process. By analyzing user demographics and feedback, you can implement strategies and make data-driven decisions to optimize your store’s checkout page and improve your conversion rates. Here are a few reasons why testing is crucial:
- Identify User Experience Issues: Testing helps you uncover any usability issues or obstacles that may frustrate or confuse your customers during the checkout process.
- Optimize Conversion Rates: By identifying and addressing any barriers or friction points, you can optimize your checkout page to improve conversion rates and increase sales.
- Improve User Satisfaction: A smooth and seamless checkout experience enhances user satisfaction, leading to higher customer retention and positive reviews.
2. How to Conduct A/B Testing
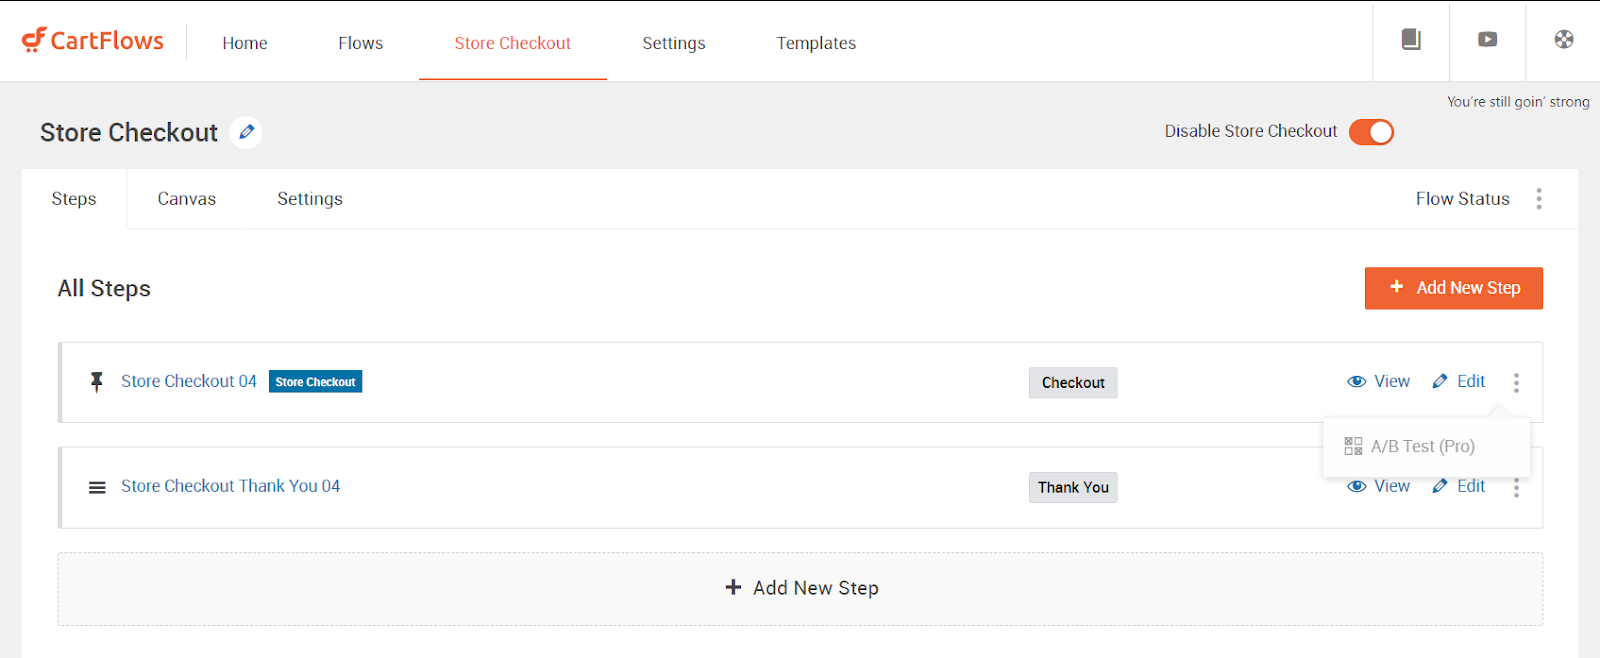
A/B testing is the most valuable technique to assess different versions of your checkout page and determine which performs better. This usually comes as an in-built feature in a plugin as shown in the above pic. Here’s how to conduct A/B testing for your WooCommerce checkout page:
- Define Your Goals: Clearly set the goals you want to achieve through A/B testing. This could be increasing conversion rates, reducing cart abandonment, or improving average order value.
- Identify Variations: Create variations of your checkout page with different elements, layouts, or designs. For example, you can test different button colors, form layouts, or the placement of trust seals.
- Split Traffic: Divide your website traffic between the original checkout page and the variations. This process can be done using A/B testing tools or plugins that allow you to split traffic evenly.
- Measure Results: Monitor key metrics such as conversion rates, bounce rates, and average order value for each variation. Analyze the data to determine which variation performs better.
- Implement the Winning Variation: Once you have identified the winning variation, implement it as the new default checkout page for your WooCommerce store.
3. Tips for Optimizing Your Checkout Page
In addition to A/B testing, here are some general tips for optimizing your WooCommerce checkout page:
- Simplify the Process: Streamline the checkout process by minimizing the number of steps and reducing form fields. Remove any unnecessary distractions that may cause friction.
- Display Trust Signals: Incorporate trust signals such as security badges, customer reviews, or SSL certificates to instill confidence in your customers and alleviate any concerns about security.

- Provide Clear Instructions: Ensure that your checkout page provides clear instructions and guidance for customers. Use descriptive labels, tooltips, or help icons to assist users in filling out the required information.
- Optimize for Mobile: With the incremental use of mobile users, it’s essential to optimize your checkout page for mobile devices. Make sure it is responsive and provides a seamless experience on smaller screens.
- Enable Guest Checkout: Offer the option for guest checkout to eliminate the process of creating an account for a one-time user. This can reduce friction and improve conversion rates.
Also Read: Checkout Process Optimization: 8 Tips To Increase Ecommerce Sales
By testing and optimizing your checkout page, you can create an easy and user-friendly experience for your customers, resulting in higher conversion rates and improved sales. Regularly monitor and assess the checkout page’s performance to identify areas for improvement and get a competitive edge.
If you have not launched your website yet, you can test your checkout page in the staging environment. This saves you from a lot of errors prior to launching.
If your site has become live and you need testing, you can test in a production environment too.
Conclusion
Congratulations! You have now learned how to edit your WooCommerce checkout page for free, access and navigate the checkout settings, and test and optimize your checkout page. Apply these strategies and techniques to create a checkout process that aligns with your brand, enhances user experience, and drives more sales for your WooCommerce store.
