
The demand for WordPress development has never been higher. Agencies must incorporate an effective WordPress Development Workflow to ensure project excellence, meet customer expectations, efficiently manage projects, and surpass competitors, which is vital.
With an effective WordPress Development Workflow, almost everything falls into place. However, making one from scratch might seem overwhelming to a beginner.
Yet, you can execute the task effectively with a strategic approach and an understanding of the appropriate tools and technologies.
This guide will explore strategies to empower your WordPress development agency to deliver high-quality projects with effective workflows.
Additionally, we will recommend some tools to facilitate the implementation of these strategies.
Characteristics of a High-Quality Code as a Part of WordPress Development Workflow
When designing the coding for your website, there are a few crucial considerations. These characteristics assist ensure that your code is clean, well-organized, and easy to skim.
Here are some characteristics of high-quality code:
- Streamlined: Free of unnecessary complexity and redundant code, focusing on simplicity and clarity.
- Modularity: Broken down into reusable and self-contained modules or functions.
- Scalable: Able to handle growth in data volume or user load without significant performance degradation.
- Well documented and commented: Well-documented with comments and external documentation explaining the code’s purpose and usage.
- Minimal Dependencies: Limit reliance on external libraries or frameworks unless necessary, reducing the risk of dependency-related issues.
- Maintainable: Simple to update and modify without introducing errors or requiring extensive rewriting.
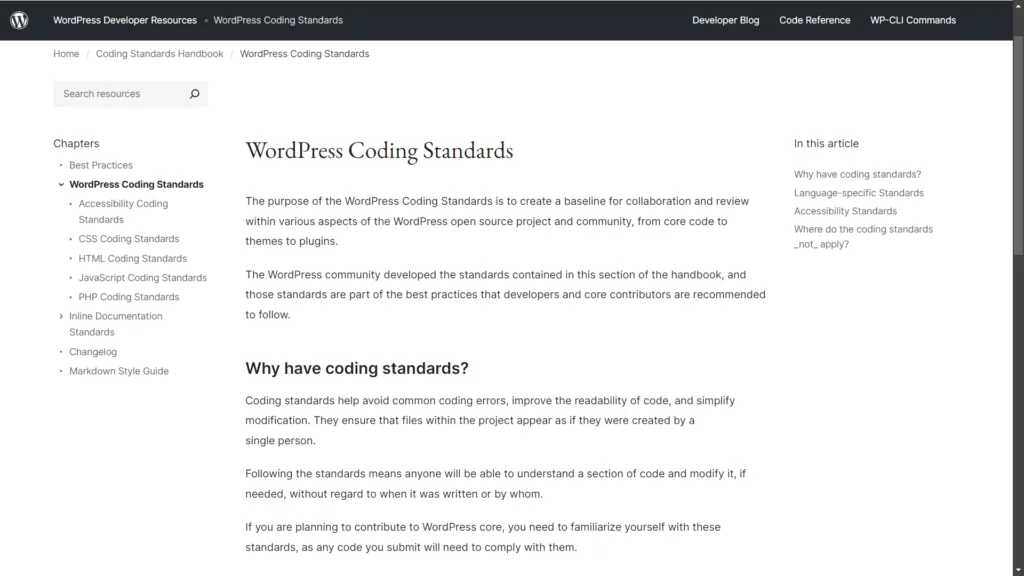
You can follow a style guide and standards for coding and designing your WordPress website. This helps to keep your code consistent and easy to read.
We recommend starting with the WordPress Coding Standards. However, you will most likely make countless changes and additions as time goes on.
Reasons Why the High-Quality Coding Principles Are Essential for WordPress Development
- WordPress sites are complex
- Helps with debugging and troubleshooting
- Ensures a smoother transition to future updates
- Better user experience by reducing load times
- Good coding practices make it easier to scale the website as it grows
- A single line of code can have a significant impact
- Well-written and tested code is critical
- High-quality code is easier to maintain
- Quality code boosts performance
Remembering these principles as you work through your web development planning processes can help you stay focused and greatly reduce your iterations.
Optimization Tips to Elevate Your WordPress Development Workflow
Learn how to level up your WordPress site projects with these essential web development workflow tips, which guarantee to spur productivity and make things much smoother from start to finish.
1. Choose a Good Hosting Provider
When hosting your WordPress site, choosing the correct provider is critical for achieving peak performance, security, and user experience. A reputable hosting service can considerably impact your website’s performance, reliability, and scalability.
Nestify is an excellent option thanks to its dedicated “Hosting for Agencies” hosting solution. You can browse Nestify’s hosting solutions here.
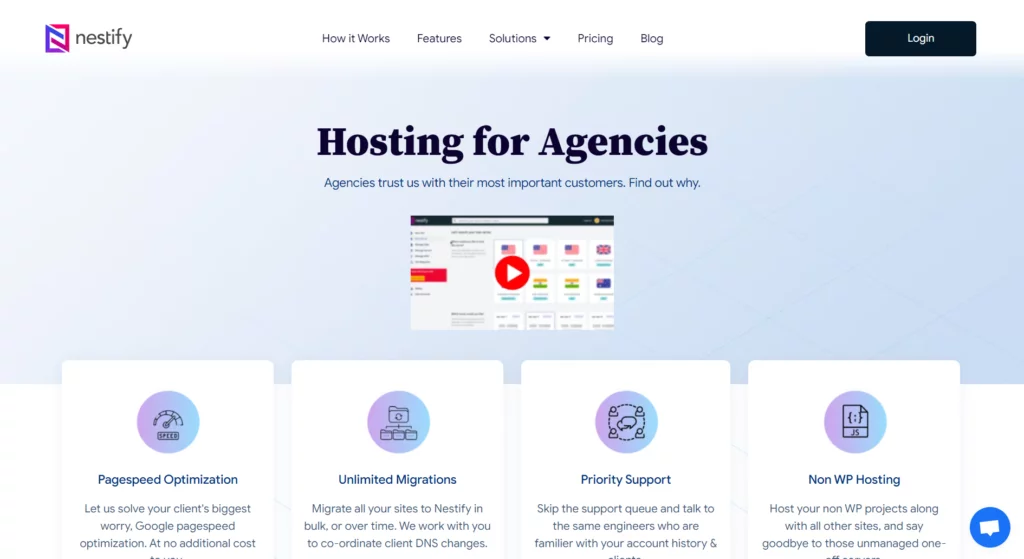
- Powered by AWS EC2 and Vultr Bare Metal servers: At Nestify, we leverage the cutting-edge technology of Amazon Web Services (AWS) and Vultr Bare Metal servers; you can sit back and relax while we take care of the heavy lifting.
- Blazing Fast: Nestify offers page speed optimization, improved core web vitals, a Global CDN with WordPress site integration, and image optimization—all the latest tools that keep your website snappy.
- Free Staging Environment: Nestify offers each WordPress installation with its own staging environment at no additional cost. This enables you to safely test updates, plugins, and modifications before publishing them to the live site, resulting in a more seamless user experience.
- Security Measures: With Nestify, you get free SSL, free malware cleanup, multisite support, a Web Application Firewall (WAF), DDoS shield protection, and more for enhanced security.
- Scalable: Its custom architecture leverages your preferred cloud provider. Nestify offers excellent scalability options 24/7 tailored to fit your specific business needs.
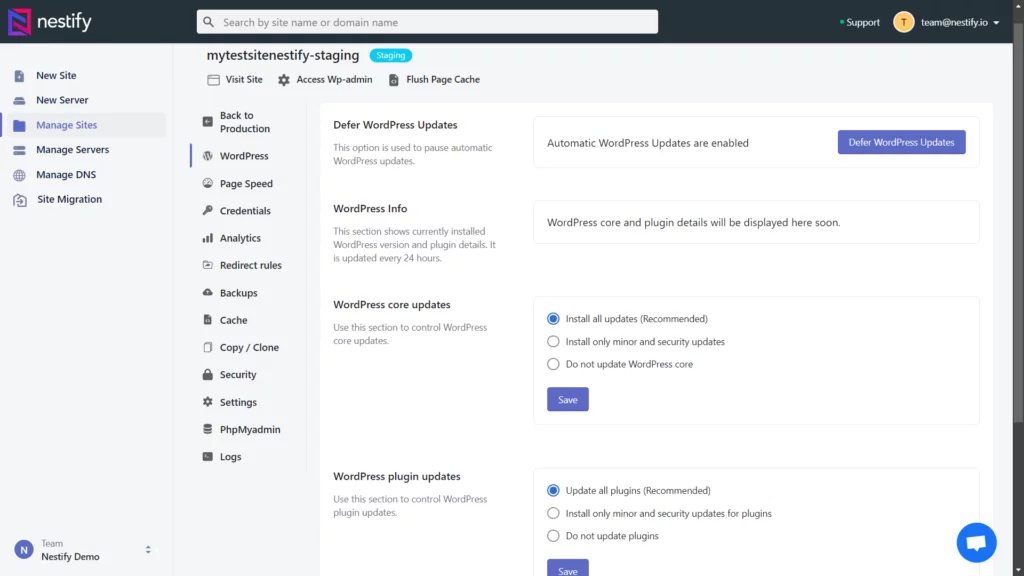
2. Conduct Site Updates in a Staging Environment
Making alterations directly to your live site poses the risk of potential crashes. This is especially precarious if your site is integral to your business, as any downtime could lead to a loss in sales. And staging environment bypasses this problem very easily.
There are numerous benefits to employing a staging site:
- Test changes before implementing them on your live website
- To avoid any difficulties, test on a staging site
- Make certain that your changes are operating as intended
- Avoid potential downtime on your live website
- Reduce the possibility of breaking your live website
To mitigate this avoidable risk, it’s advisable to utilize a test environment to update your WordPress site. A staging site is suitable for minor fixes.
However, opting for a local environment is recommended if you’re testing functionality or introducing a new site design.
We strongly recommend implementing the forthcoming best practices in a test environment before applying changes to the production site!
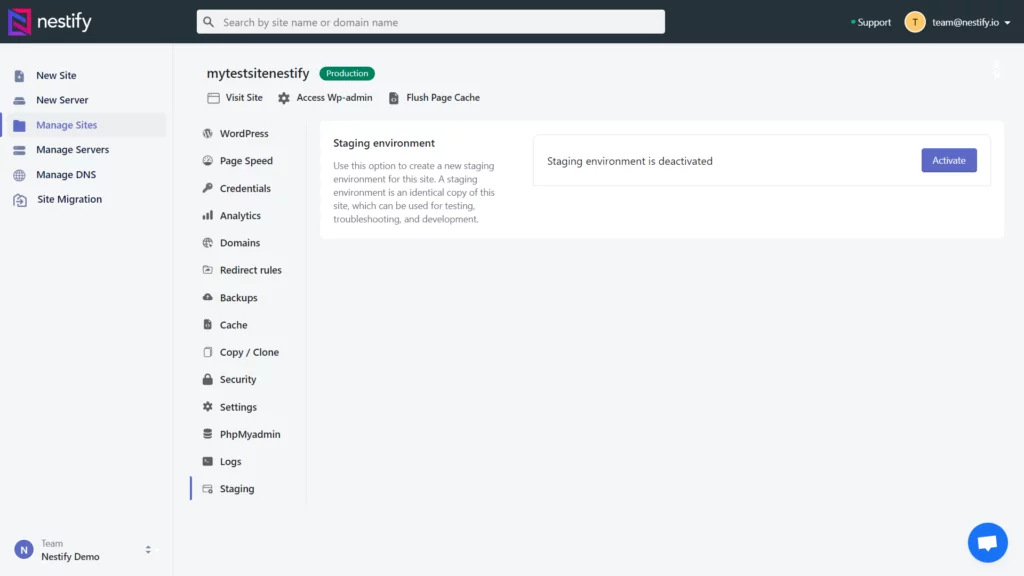
At Nestify, you can create a separate staging environment with a few simple clicks. The images below depict how it looks on the dashboard:
3. Implement Project Version Control
Version control tracks the changes that the files go through over time. And we know that humans make mistakes. This is where something like version control grants the users the ability to revert changes to their previous version, which also undoes the coding errors.
Imagine this: You’ve downloaded WordPress, set it up in your development environment, and are working on a theme. You’re running tests locally and making changes, but two more team members suddenly join to work on the same project. This can lead to mistakes, which is when version control can revert the changes and save the day.
It’s not practical to jump into the production environment and copy the project, especially because you’ll continue working on it.
The version they copied would need to be updated (and vice versa). When all three upload files to the server, conflicts are likely.
Undoing this mess is complicated because the server files have already been overwritten, causing a headache.
Using version control solutions such as Git is essential for efficient WordPress development. Git allows you to log changes, interact with other developers, and revert to prior versions.
The three most popular platforms for hosting and managing Git repositories are GitHub, Bitbucket, and GitLab.
This keeps everyone updated, minimizes conflict chances, and simplifies conflict resolution. Even if conflicts occur, it’s easier to manage, and you won’t lose precious files because Git stores older versions in its repository.
Version control not only prevents problems but also facilitates error identification. Other developers can review your code, and if errors are found, you can easily revert to the previous version.
4. Use WP-CLI
The WordPress command-line interface (WP-CLI) is a powerful tool for managing WordPress installations. Having access to WP-CLI means being able to run almost any WordPress API function. WP-CLI, for example, allows you to add, remove, and edit users and passwords.
This can be handy for various tasks, including user creation and management, plugin installation and update, and if you recently inherited a site and the owner has locked themselves out.
WP-CLI simplifies the initial deployment. The following tasks can be completed with a few commands and even automated:
- Downloading core, themes, and plugins.
- Searching and replacing in the database.
- Adding an administrator user
How to Install WP-CLI
- Download the WP-CLI.phar file.
- Move the file to a location in your PATH (for example, /usr/local/bin).
- Rename the file to “wp.”
- Make the file executable (using chmod +x /usr/local/bin/wp).
- Run wp –version to confirm that WP-CLI is installed.
This is especially beneficial for repeated or multi-step jobs. WP-CLI, for example, allows you to install WordPress, create posts and pages, install plugins and themes, and do various other things. It’s also useful if you need to update numerous sites at once.
5. Use Linting
Linting tools are static code review and analysis tools that help you identify problems in your code. Linting is a huge help for most developers on projects of any size. A fully equipped IDE, such as PHPStorm, performs this out of the box; however, more straightforward editors, such as VSCode or Sublime Text, require a dedicated code review/linter tool.
One approach to accomplishing this is to configure your editor to run a linter every time you save a file. PHP_CodeSniffer is the de facto linter for PHP. In addition to checking for syntax mistakes, it may also determine whether your code adheres to style rules like PSR-2.
For JavaScript, ESLint is a popular linter. It includes a comprehensive ruleset and supports custom configurations for all JavaScript dialects and frameworks available. Integrating linting into a CI/CD build process ensures that all code is automatically evaluated before its eventual deployment.
6. Familiarize Yourself With Vue.js or React
Although you may not be using Vue.js or React immediately, becoming acquainted with these frameworks is critical. This is useful for WordPress development because it has become more popular and widely used.
The WordPress core and nearly all WordPress plugins rely on jQuery. Therefore, you can’t stop using it. It doesn’t make sense to not use it for simple things like concealing a few elements or executing a one-time AJAX request when you’re used to it. jQuery will be loaded regardless, and it is simple to use.
Given the complexity of modern web pages, breaking down an app into components is a tried-and-true method for creating maintainable, fast web apps of any complexity. Components are highly reusable, segregated, and hence readily testable “bricks,” so understanding the notion is quite beneficial.
The two most popular component-based libraries right now are Vue.js and React. Both are popular choices for WordPress web development since they are quick, lightweight, simple to use, and necessary for converting WordPress into a headless CMS.
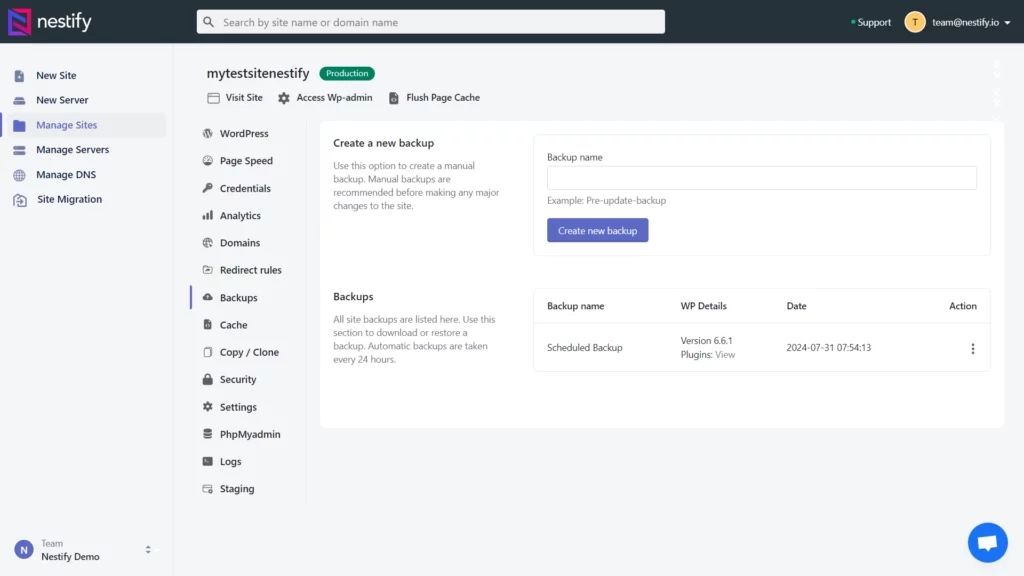
7. Schedule Automated Backups
This step is critical because it ensures that you have a recent backup of your website that can be restored in the event of data loss, hacking, or other unforeseen situations.
Backups preserve your site’s content, themes, plugins, and database. You can manually back up your WordPress website by copying its files and exporting the database from the hosting control panel.
This provides you complete control over what and when it is backed up and the freedom to store the backup in any location you want. However, proper site restoration takes time and requires technical skills.
Nestify offers a daily cloud backup option. This ensures that you always have the latest version of your site stored for emergencies. This add-on generates backups of your WordPress site at a predetermined frequency and saves them on an external server.
8. WordPress Development Frameworks
A WordPress development framework is an essential tool for optimizing your development process, offering both time savings and error reduction. By providing a structured approach, these frameworks simplify the creation of WordPress sites and themes.
Several prominent WordPress development frameworks are widely used, each with unique features:
- Genesis: Developed by StudioPress, the Genesis framework accelerates the process of building WordPress sites with its robust foundation and flexible design options.
- Underscores: Created by Automattic, Underscores serves as a lightweight starting point for theme development, providing a solid base to build custom WordPress themes quickly.
- Foundation: Designed by Zurb, the Foundation framework focuses on creating responsive WordPress sites. It offers a range of tools and components to ensure your site looks great on any device.
- Bootstrap: Developed by Twitter, Bootstrap is ideal for designing responsive WordPress websites. Its extensive collection of pre-built components and layout options streamlines the development of mobile-friendly and visually appealing sites.
9. Use the WordPress Rest API
The WordPress REST API is a powerful tool for interacting with your WordPress site from outside the admin area. It allows you to create bespoke solutions for your WordPress site. For example, you might utilize the WordPress REST API to develop a mobile app or a custom dashboard.
The most crucial benefit is that the WordPress REST API standardizes communication between the back and front ends, a significant step toward your code’s modularity, reusability, and readability.
Use the WordPress Command Line Interface to get started with the WordPress REST API. We produced a tutorial on configuring the WordPress REST API that walks you through each step.
10. Implement Continuous Code and UI Testing
By incorporating continuous regression coding and UI testing, developers can avoid project delivery delays caused by inadequately tested code and poorly designed UI.
Developers should also proactively identify bugs and vulnerabilities in the code and UI during the early stages of web development.
Preventing these issues from entering the live site is crucial, as they can lead to project delivery delays. A wise approach to streamline this process is to leverage automated testing tools.
These tools help ensure thorough and efficient testing, minimizing the risk of issues affecting the live site and contributing to timely project deliveries.
11. Have a Streamlined Feedback Mechanism
Implement a well-organized feedback mechanism to simplify your workflow. A streamlined feedback system enables WordPress agencies to assess whether client expectations are met promptly.
You can incorporate peer-review methods to find discrepancies in your code and address them before finalizing it.
This proactive approach prevents client dissatisfaction and helps the agencies to deliver services aligned with their customers’ requirements while maintaining the quality of the overall project.
12. Essential Rules for WordPress Agencies
While specific regulations vary based on the agency’s location and business activities, here are key compliance areas for WordPress agencies:
- Business licenses: Obtain necessary permits and licenses for legal operations.
- Taxation: Comply with sales, income, and other relevant taxes.
- Intellectual property: Respect copyright laws and intellectual property rights.
- Data protection: Ensure GDPR or other data protection regulations are followed.
- Accessibility: Develop websites meeting accessibility standards like WCAG.
- Consumer protection: Be transparent about services, pricing, and refund policies.
- Contracts: Use clear, comprehensive contracts outlining project details.
- Security: Implement security measures to safeguard client websites and data.
Consult legal and financial professionals specialized in your region and industry. As laws evolve, staying informed and proactive is crucial for WordPress agencies to maintain compliance.
13. Engage Clients in the Design and Development Process
Ensure project success by actively involving clients in the design and development stages. There’s nothing more disheartening than discovering a client isn’t satisfied after making substantial progress. Prioritize regular client feedback throughout the project to maintain alignment.
During the onboarding phase, take the time to understand the client’s business, preferences, and goals for the year. Use a client questionnaire to standardize this process and avoid oversights in the initial project stages.
As the project progresses, check in with the client at various phases, including wireframes, mockups, and development. If using tools like “Local” for site development, share a preview link, allowing clients to explore a working version.
Collecting feedback early in the process prevents significant changes later on, ensuring client satisfaction and a smoother project trajectory.
14. Identify Your Favorite Tools
Streamline the tools you use for client site development to boost your productivity and efficiency in the upcoming year. While new challenges and unique requirements may arise, consider auditing your tools. Look for overlap and opportunities to simplify.
For instance, do you consistently use a single framework for WordPress themes or trust a specific theme company? Alternatively, do you invest significant research time for each new site design to identify a novel solution?
If you still need to identify your favorite tools, that’s alright. However, make it a goal for the year to enhance efficiency by establishing go-to options. This way, researching a custom solution becomes the exception, not the rule.
15. Deployment and Maintenance
Deployment and website maintenance are essential stages of the WordPress development process. By streamlining this process, the developers can stay worry-free regarding the site launch and focus more on the client-customer relationship.
A few simple things listed below can help your ship sail through the waters smoothly:
- Checklist: Create a complete deployment checklist that includes operations like database migrations, file transfers, and environment configuration settings. This checklist serves as a guide to verify that all necessary procedures are completed before the website goes live.
- Utilize a Staging Site: Before deployment, use staging environments to reproduce the live site for final testing. A staging site helps identify and handle any difficulties in the production environment, facilitating a smoother transition.
- Implement CI/CD pipelines: The CI/CD pipelines automate the process of testing, building, and deploying code changes. Developers can implement CI/CD using tools such as Jenkins, GitLab CI, or GitHub Actions, which reduces the risk of deployment failures and ensures a consistent workflow.
- Rollback Plans: Always keep a rollback plan in place. Despite careful manual and automated testing, unexpected errors may develop after deployment. Having a backup plan (just like a WordPress backup file) can be a boon in times of need.
Instructional Roadmap: Integrating WP Engine Push from Staging to Production
1. Development and Testing
Begin your WordPress development by building and testing changes locally. This includes coding new features, fixing bugs, and making improvements. Once these changes are ready, move them to a staging environment. WP Engine provides a dedicated staging environment that mirrors your production site, allowing for thorough testing and quality assurance.
2. Review and Validation
Conduct code reviews and perform thorough testing in the staging environment. Ensure that all changes meet quality standards and are approved by stakeholders or team members before proceeding to production. WP Engine supports this process with tools to compare the staging and production environments, helping you validate and review changes effectively.
3. Deployment
Once changes are tested and approved, deploy them from staging to production. WP Engine’s deployment tool simplifies this process, allowing you to push changes with a few clicks. You can select specific components to deploy and monitor the progress in real-time, ensuring a smooth transition to the live environment.
4. Post-Deployment Testing
After deployment, test the live site to confirm that all changes are applied correctly and that the site functions as expected. Continuous monitoring is essential to detect and address any issues that may arise. WP Engine offers performance monitoring tools to help track site performance and resolve post-deployment concerns.
5. Rollback and Recovery
If any issues are detected post-deployment, be prepared to roll back changes or fix problems promptly. WP Engine provides robust backup and rollback features, allowing you to revert to a previous version if necessary. This capability ensures quick recovery from any deployment-related issues.
6. Ongoing Maintenance
Maintain and update the site regularly to address new issues and implement improvements. Keep detailed records of changes and deployments for future reference. WP Engine supports ongoing maintenance by offering continuous support and ensuring that your environment stays up-to-date with the latest security patches and performance improvements.
Reap Optimal Benefits with WordPress Development Workflow
By implementing the strategies and best practices outlined, you can streamline your development process, enhance code quality, and ensure robust site performance.
If you’re aiming to refine your current workflow or are in search of a more efficient development approach, we invite you to explore Nestify’s free trial. It offers a range of tools and services designed to support your WordPress development needs, from advanced staging environments to automated backups and security measures. The platform is tailored to help you simplify complex processes and achieve superior results with greater ease.
FAQs on WordPress Development Workflow
How can version control benefit my WordPress development workflow?
Version control systems, like Git, help manage and track changes to your codebase. They facilitate collaboration, allow for easy rollback to previous versions, and provide a clear history of modifications, which is essential for managing complex projects.
What role does automated testing play in the workflow?
Automated testing helps identify bugs and issues early in the development process, ensuring code quality and functionality before deployment. It speeds up the testing phase and reduces the risk of manual errors.
Can I streamline my WordPress development workflow with managed hosting?
Yes, managed WordPress hosting providers often offer features such as automatic updates, staging environments, enhanced security, and performance optimization, which can significantly streamline your development workflow and reduce manual tasks.
