
It’s important to recognize that no system is entirely immune to security risks, and WordPress websites remain attractive targets for hackers due to their widespread use. Therefore, it’s crucial for site administrators to remain vigilant, stay informed about emerging threats, and continuously evaluate and refine the security measures to fortify the WordPress login page and maintain the overall security of the website.
By implementing a comprehensive security strategy and adopting best practices, administrators can significantly reduce the likelihood of security threats and safeguard sensitive data and user accounts associated with their WordPress websites.
Strategies for Securing Your WordPress Login Page
1. Use Strong Passwords
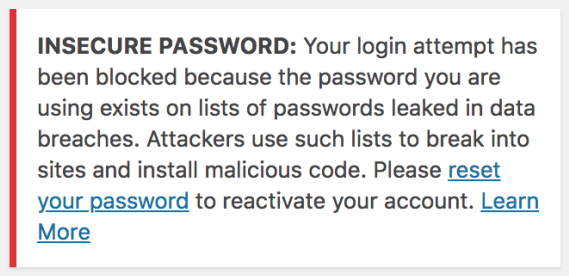
Strong passwords are characterized by their complexity, which makes them difficult for automated tools to guess or crack. They should ideally be at least 12 characters long and a fusion of uppercase and lowercase letters, special characters, and numbers. The more diverse the characters used, the stronger the password becomes.
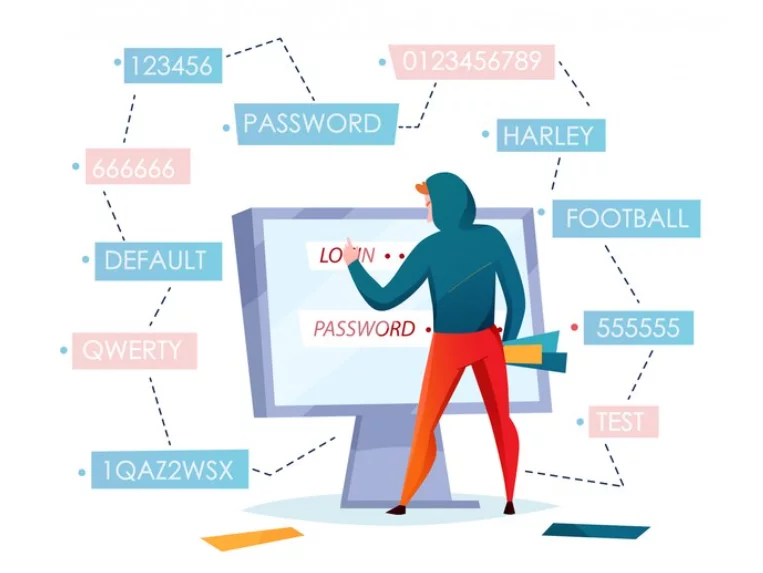
Hackers often use dictionaries, common phrases, and patterns to crack passwords more efficiently. Therefore, it’s essential to avoid using easily guessable combinations such as “password,” “123456,” or common phrases like “iloveyou” or “letmein.” Additionally, refrain from using sequential or repetitive characters (e.g., “abcd1234” or “aaaa1111”).
Managing multiple strong passwords can be challenging, but using a password management solution can simplify the process. These tools securely store and generate passwords, allowing users to access them with a single master password or biometric authentication. Popular password managers include LastPass, Dashlane, and 1Password.
2. Limit Login Attempts
Limiting login attempts is a proactive security measure that helps protect your WordPress login page from brute force attacks, where hackers try to get access by repeatedly guessing usernames and passwords. By implementing a restriction on the number of login attempts from one IP address, you can effectively thwart such malicious attempts and strengthen the security of your website. This feature typically works by temporarily locking out an IP address after a mentioned number of failed login attempts, thereby preventing further unauthorized login attempts from that address for a set period.
Limiting login attempts is especially crucial because it nullifies the risk of unauthorized access even if users have weak or easily guessable passwords. Hackers often rely on automated tools to systematically try numerous combinations until they find the correct one. By restricting the number of attempts allowed, you introduce a barrier that significantly slows down or deters these automated attacks. This not only protects your website from potential breaches but also helps preserve server resources by reducing the load caused by excessive login attempts.
3. Two-Factor Authentication (2FA)
Enable 2FA to add an added layer of security to the login process. This usually involves requiring users to enter a one-time code sent to their mobile or email in addition to their password. The effectiveness of Two-Factor Authentication for the login page lies in its ability to mitigate various security threats, including phishing attacks and password breaches.
Even if a hacker somehow obtains a user’s password through means like phishing emails or data breaches on other platforms, they would still need the secondary authentication factor to get access to the WordPress account. This additional barrier greatly reduces the likelihood of successful unauthorized access, as it requires attackers to possess both the user’s password and the secondary authentication method, which is typically something only the legitimate user has access to.
4. Hide Login Page
Hiding the WordPress login page involves changing the default login URL (e.g., wp-login.php) to a custom one, making it less accessible and harder for potential attackers to find. This tactic adds an extra layer of security by obscuring the entry point to your website’s backend, thereby reducing the likelihood of brute force attacks and unauthorized login attempts. By customizing the login page URL, you essentially create a unique and less predictable pathway for accessing the login page, making it more challenging for automated bots and malicious actors to target your site.
Implementing this security measure can be done through various methods, such as using security plugins or modifying your site’s .htaccess file. These approaches typically involve redirecting requests from the default login page URL to the custom one, ensuring that legitimate users can still access the login page while thwarting potential attackers.
5. Use HTTPS
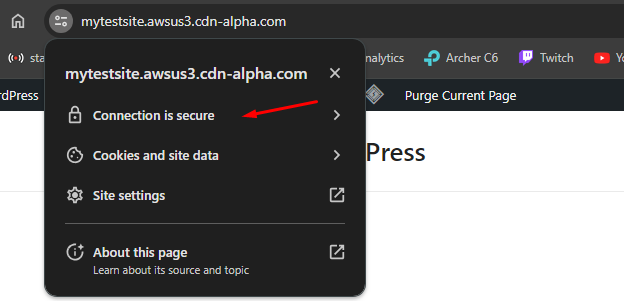
Using HTTPS (Hypertext Transfer Protocol Secure) is essential for securing the communication between the user’s browser and your WordPress website’s server. HTTPS encrypts data transmitted over the network, guaranteeing that sensitive information like login page credentials, personal data, and payment details are protected from eavesdropping and tampering by malicious actors. By encrypting the connection with HTTPS, you create a secure tunnel through which data can safely travel, reducing the risk of interception and unauthorized access to sensitive information.
Implementing HTTPS involves obtaining an SSL (Secure Sockets Layer) certificate for your website and configuring your server to use HTTPS for all connections. Once HTTPS is enabled, visitors to your website will observe a padlock icon in their browser’s address bar, directing that the connection is secure. This not only instills trust in your website but also helps improve your site’s rankings, as many search engines like Google prioritize websites with HTTPS in their rankings.
6. Disable XML-RPC
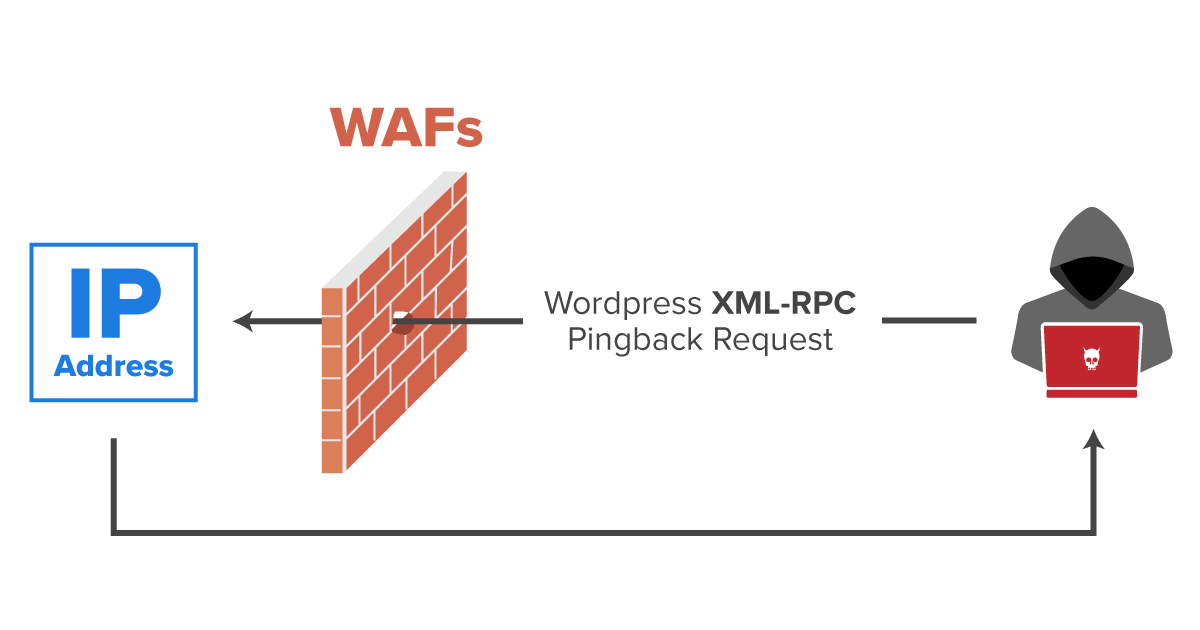
Source: Invicti
Disabling XML-RPC is a crucial security measure for WordPress websites, as it helps mitigate various security risks associated with this protocol. XML-RPC (XML Remote Procedure Call) is a feature that allows remote access to your WordPress site, enabling functionalities such as remote publishing, pingbacks, and trackbacks.
However, it has been exploited by attackers for nefarious purposes, including brute force attacks, denial-of-service attacks, and even remote code execution. By disabling XML-RPC, you effectively close off a potential avenue for attackers to exploit vulnerabilities and compromise your website’s security.
Disabling XML-RPC can be achieved through various methods, such as using security plugins, adding code snippets to your theme’s functions.php file, or modifying your site’s .htaccess file. Once XML-RPC is disabled, remote access to your WordPress site via this protocol is blocked, lessening the attack surface and strengthening the overall security posture of your website.
Regularly monitoring your site’s security logs and staying informed about emerging threats can help you make informed decisions about whether to disable XML-RPC and implement other security measures to protect your WordPress login page and website.
7. Implement IP Whitelisting
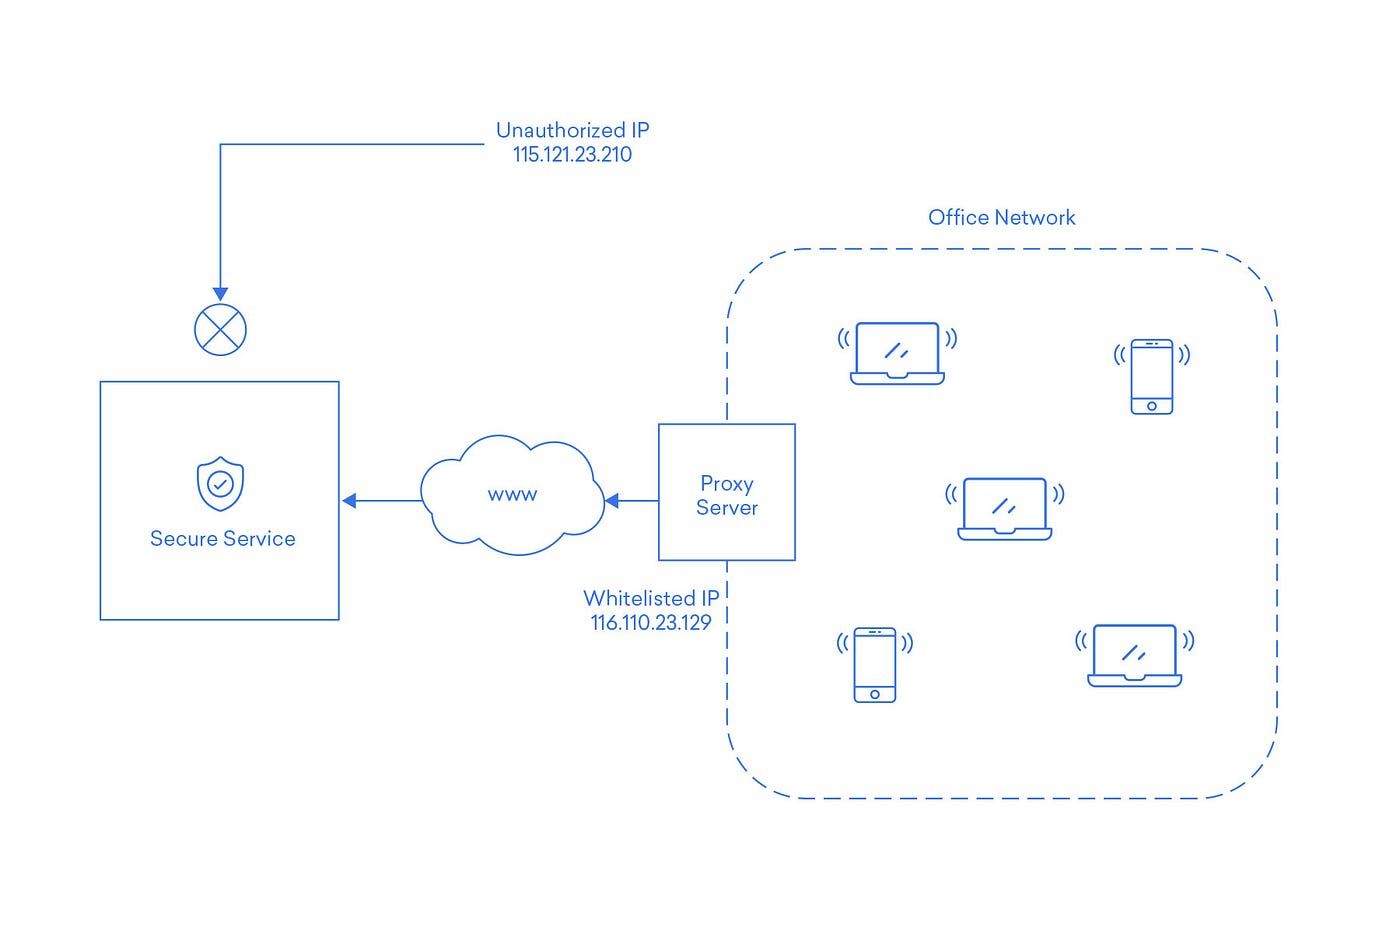
Source: Medium
Implementing IP whitelisting is a powerful security measure that allows you to control access to your WordPress login page by specifying which IP addresses are permitted to access it. This effectively creates a list of trusted IP addresses from which users can log in while denying access to all other IP addresses. By restricting access to only authorized IPs, you significantly lessen the risk of unauthorized login attempts and brute force attacks originating from unknown or malicious sources.
To implement IP whitelisting, you can use various methods, such as configuring server-level rules in your web server’s configuration file or using security plugins specifically designed for WordPress. Once configured, only users connecting from whitelisted IP addresses will be able to access the WordPress login page, while all other IP addresses will be denied access.
8. Activate Auto Logout
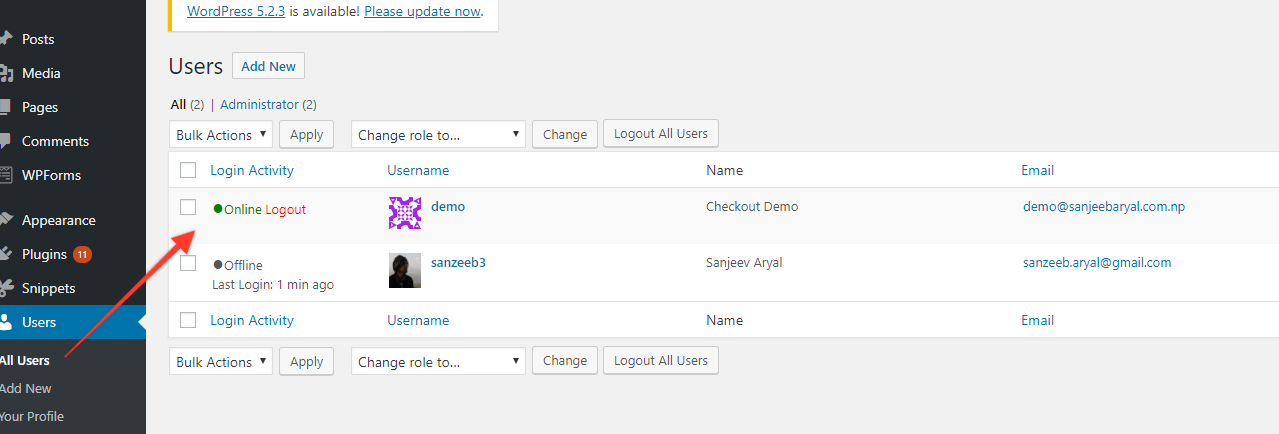
Enabling and configuring auto logout is crucial, especially for websites with multiple users, as it helps mitigate security breaches caused by human error. Since administrators have limited control over how users access the WordPress dashboard, implementing auto logout rules provides an additional layer of protection.
For instance, if a user forgets to log out after accessing their account from a public computer, WordPress automatically logs them out after 48 hours. However, for users who opt to stay logged in by selecting the “remember me” option, this period extends up to 2 weeks. To address potential security concerns stemming from these prolonged time frames, it’s advisable to customize auto logout settings using third-party plugins like Inactive Logout, WPForce Logout, or other security plugins offering similar features. These plugins enable administrators to set shorter auto logout intervals, thereby reducing the risk of unauthorized access and enhancing overall website security.
9. Integrate CAPTCHA
CAPTCHA is an abbreviation of Completely Automated Public Turing test which is known to distinguish between Computers and Humans. It requires users to complete a challenge, such as identifying distorted text or selecting images, to prove they are human before gaining access. This helps prevent automated bots from performing brute force attacks or other malicious activities on your login page.
By combining CAPTCHA with security questions, users are prompted to answer predefined questions or provide specific pieces of personal information that only they would know. This adds another hurdle for potential attackers to overcome, as they would need to not only bypass the CAPTCHA but also correctly answer the security questions to gain access.
10. Deactivate Login Hints
To prevent attackers from gaining any insights, it’s essential to disable login hints within WordPress. This action removes potentially revealing information inadvertently disclosed by other websites. Achieving this is straightforward; you only need to insert a few lines of code into your functions.php file:
function no_wordpress_errors() { return ‘an error message of your choice.’; } add_filter( ‘login_errors’, ‘no_wordpress_errors’ );
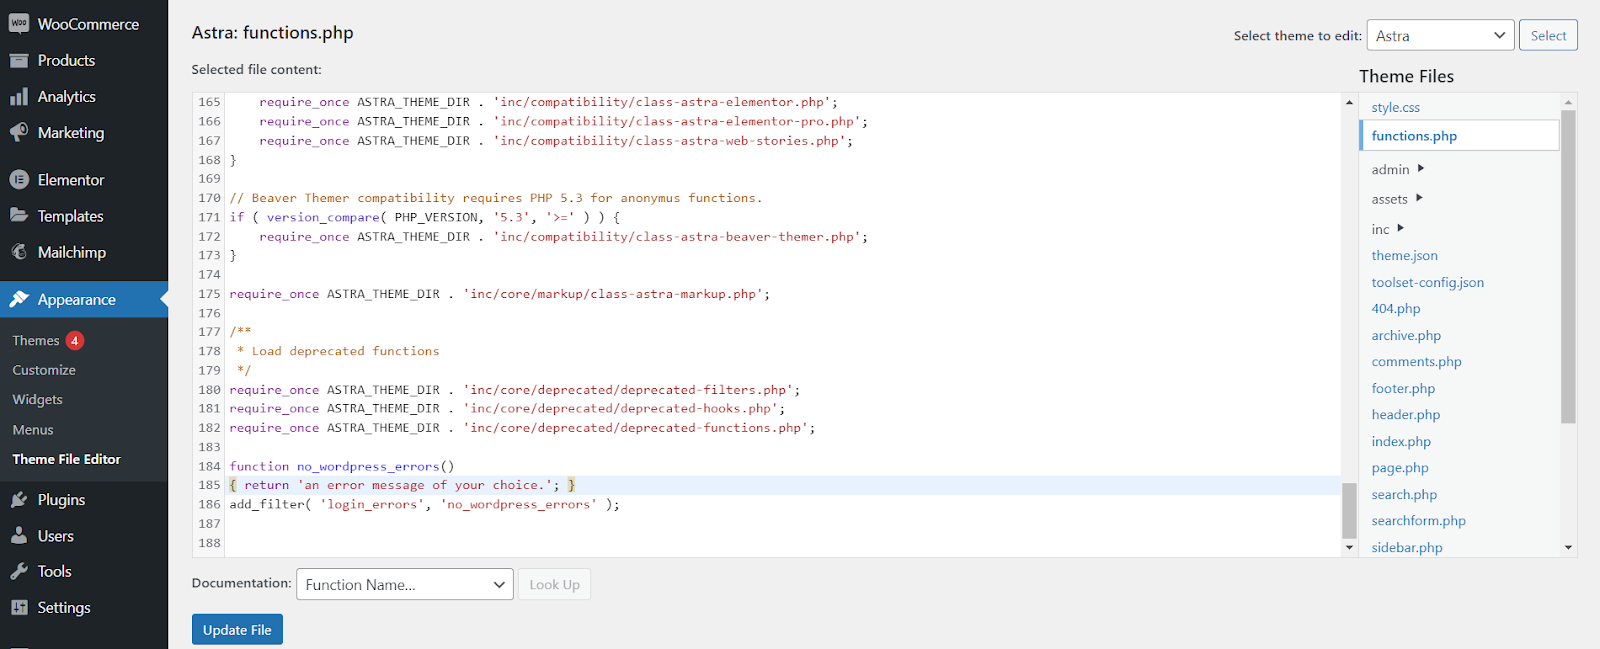
With this code in place, WordPress will now display “An error message of your choice” instead of the default messages, which may disclose which part of the login information was incorrect whenever failed login attempts occur.
However, it’s crucial to remember that the functions.php file gets overwritten during WordPress updates. Consequently, any additional code you insert will be lost. To maintain this customization, it’s advisable to keep a backup of the code and reapply it after each update.
Conclusion
Investing minimal effort in enhancing WordPress login security can significantly bolster your website’s overall security. Whether you opt for two-factor authentication, enforce login attempt limits, modify the login page URL, or combine these measures, the key is to remain vigilant and proactive.
Staying abreast of WordPress’s security recommendations and adhering to their best practices is crucial. By staying informed and implementing these strategies, you can effectively safeguard your website against potential security threats and nullify the risk of unauthorized access or breaches.
FAQs
What are the common security threats to WordPress login pages?
Explore common threats such as brute force attacks, password guessing, and exploitation of vulnerabilities in login forms.
Are there any plugins specifically designed to enhance WordPress login page security?
Explore popular security plugins that offer features like IP whitelisting, login activity monitoring, and more.
How can I stay informed about WordPress security best practices and updates?
To stay informed about WordPress security best practices and updates, follow official WordPress security blogs, subscribe to newsletters from reputable security companies, join WordPress forums or communities dedicated to security discussions, and regularly check for updates within your WordPress dashboard.
