
It’s no surprise that many people are interested in linking their PayPal accounts to WooCommerce, given its reputation as a convenient and efficient solution for online stores.
As one of the most popular and reliable payment gateways available, PayPal ensures a smooth and safe payment experience for both merchants and customers alike.
In this blog post, we’ll provide a step-by-step guide on how to set up PayPal for your WooCommerce store. By following these instructions, you’ll be able to quickly and effortlessly start accepting payments through your online store.
Whether you’re an experienced eCommerce professional or new to the world of online selling, this guide will simplify your customer payment processes and enhance your overall online sales performance.
So, without further ado, let’s dive into the setup process!
How to Open a Sandbox PayPal Account
Before conducting real transactions, a PayPal Sandbox Account offers a secure and private setting for testing payment gateway functionality.
For WooCommerce sites that have setup payment gateways and uploaded merchandise but have yet to test them, this is very crucial.
Let us help you through the process of creating a PayPal Sandbox account and connecting it with your WooCommerce business.
- Login to the PayPal Developer Website.
- Click the Login to Dashboard button.
- You may either create a new PayPal account or log into an existing one.
- Choose your country, input your email address, and generate a new password.
- Once your account has been established, you will view the dashboard and error logs.
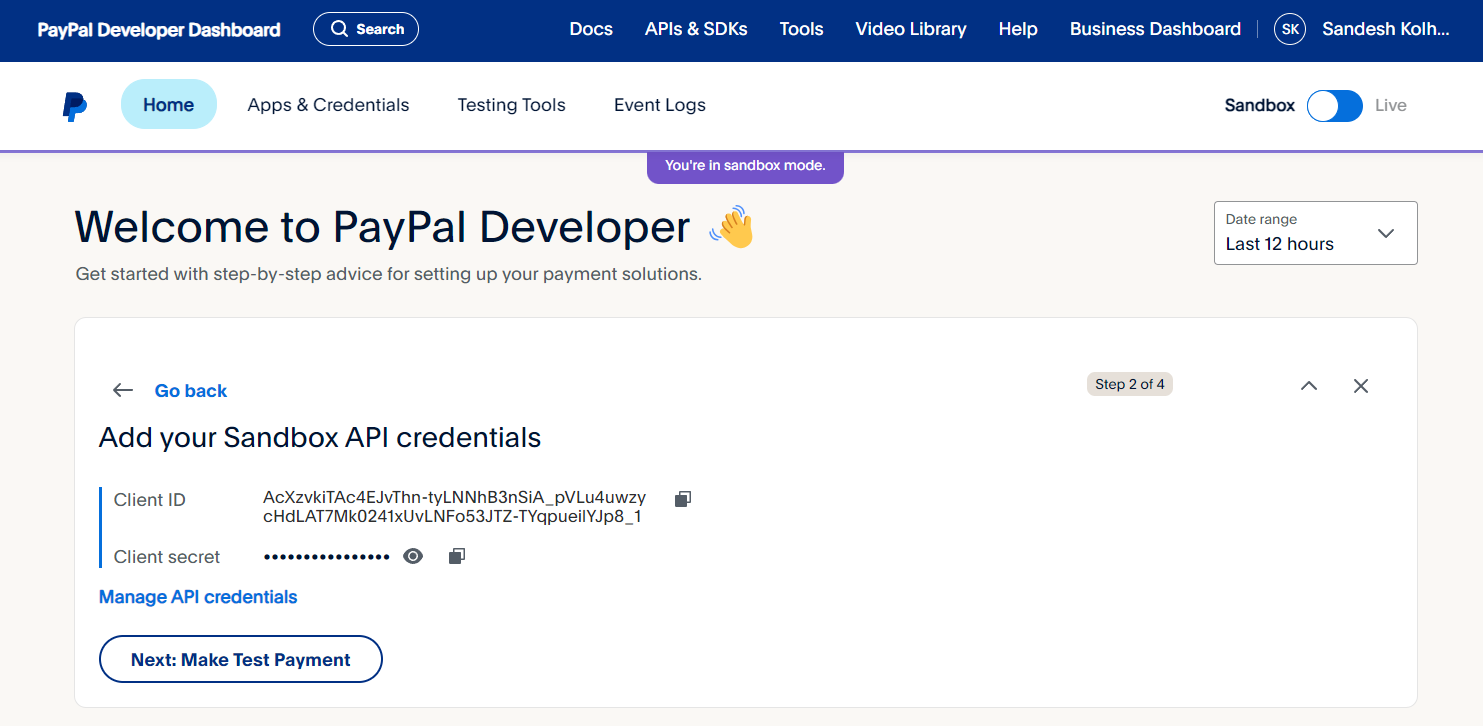
That is it. You’ve successfully established a PayPal sandbox account. The next big step is to integrate PayPal with the WooCommerce store.
How to integrate PayPal Account in WooCommerce (Easy Step-by-Step)
To set up a PayPal account in WooCommerce, just follow the steps below. Select “Plugins” from the left sidebar of your WordPress dashboard.
Click “Add New” and enter “WooCommerce PayPal Payments” into the search box.
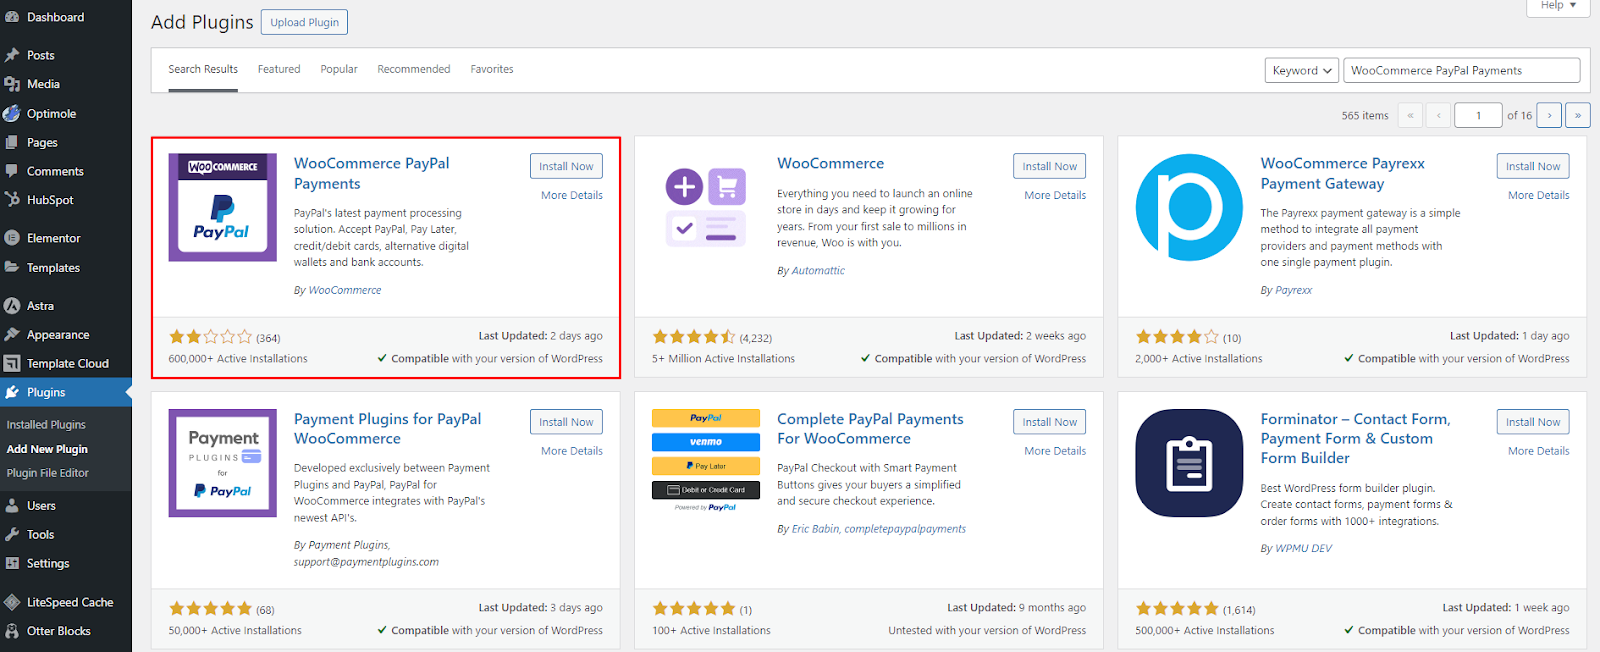
- Install the woocommerce paypal plugin
- Find the plugin and choose “Install Now.”
- To use the plugin when it has been installed, click the “Activate” button.
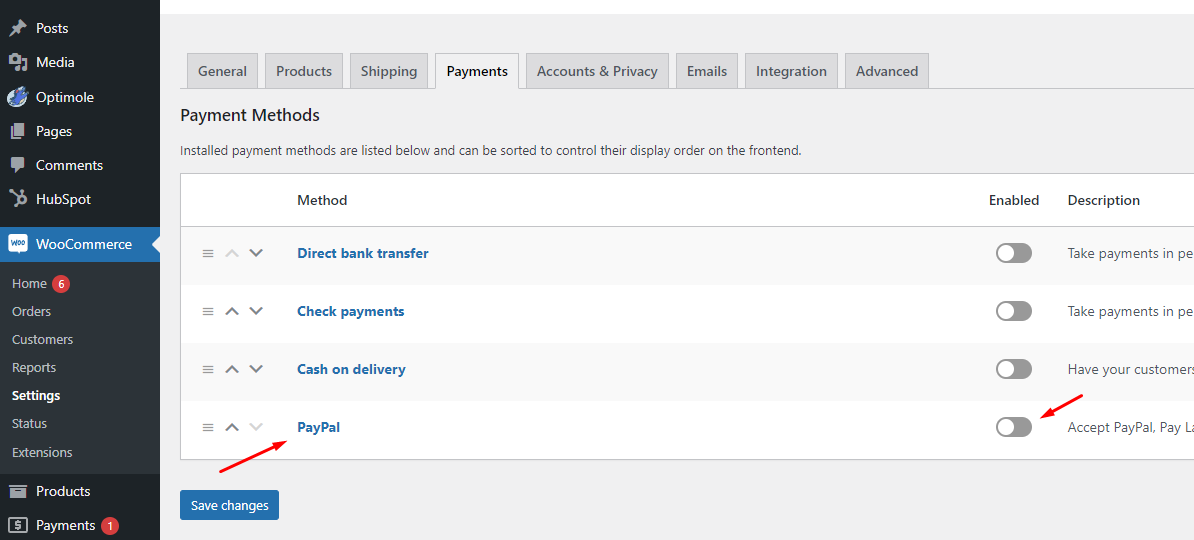
- Navigate to WooCommerce > Settings > Payments.
- To activate PayPal, click the toggle button.
Setting up PayPal settings
Configuring PayPal settings in WooCommerce is essential to ensure smooth payment processing for your online store. Follow these steps to set up PayPal integration:
- Toggle PayPal Integration:
- Click on the PayPal toggle button to activate PayPal integration.
- Check the “securely accept box” to ensure safe transactions.
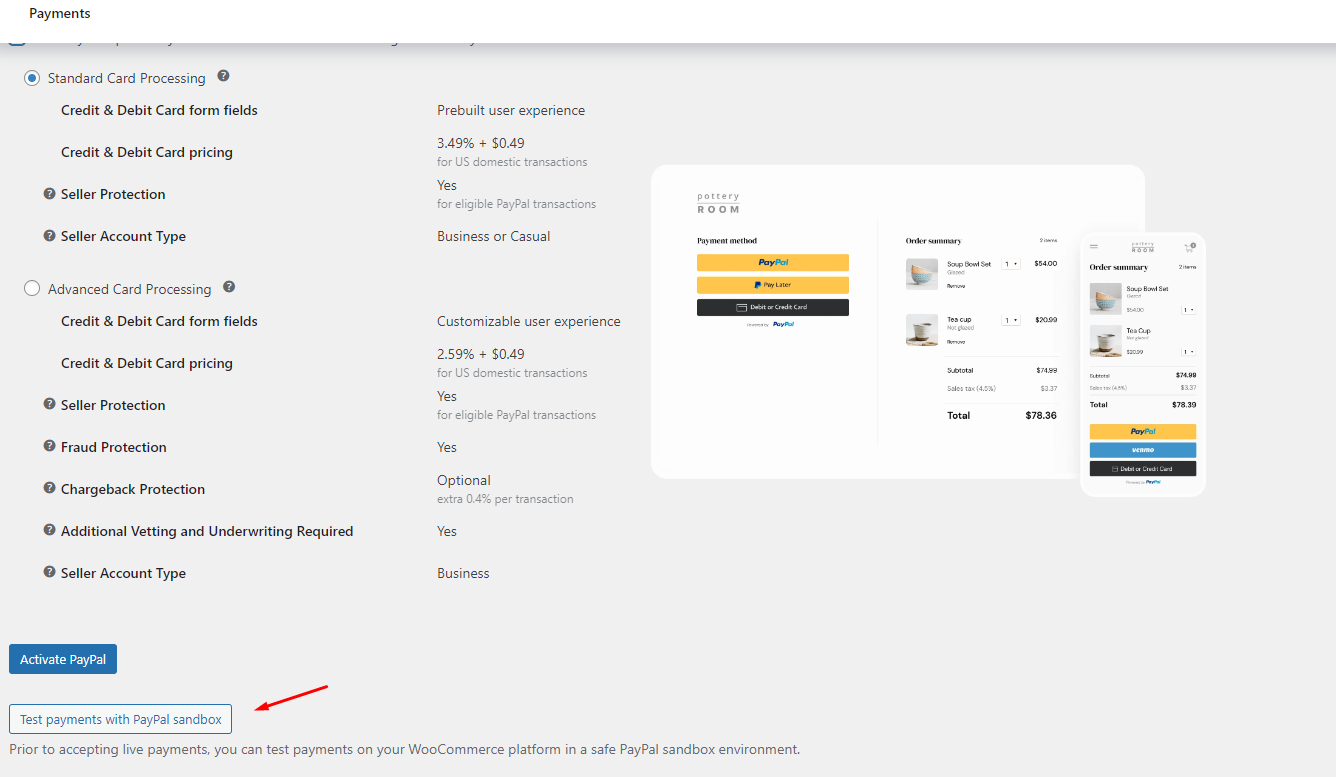
- Select the desired options for your PayPal integration.
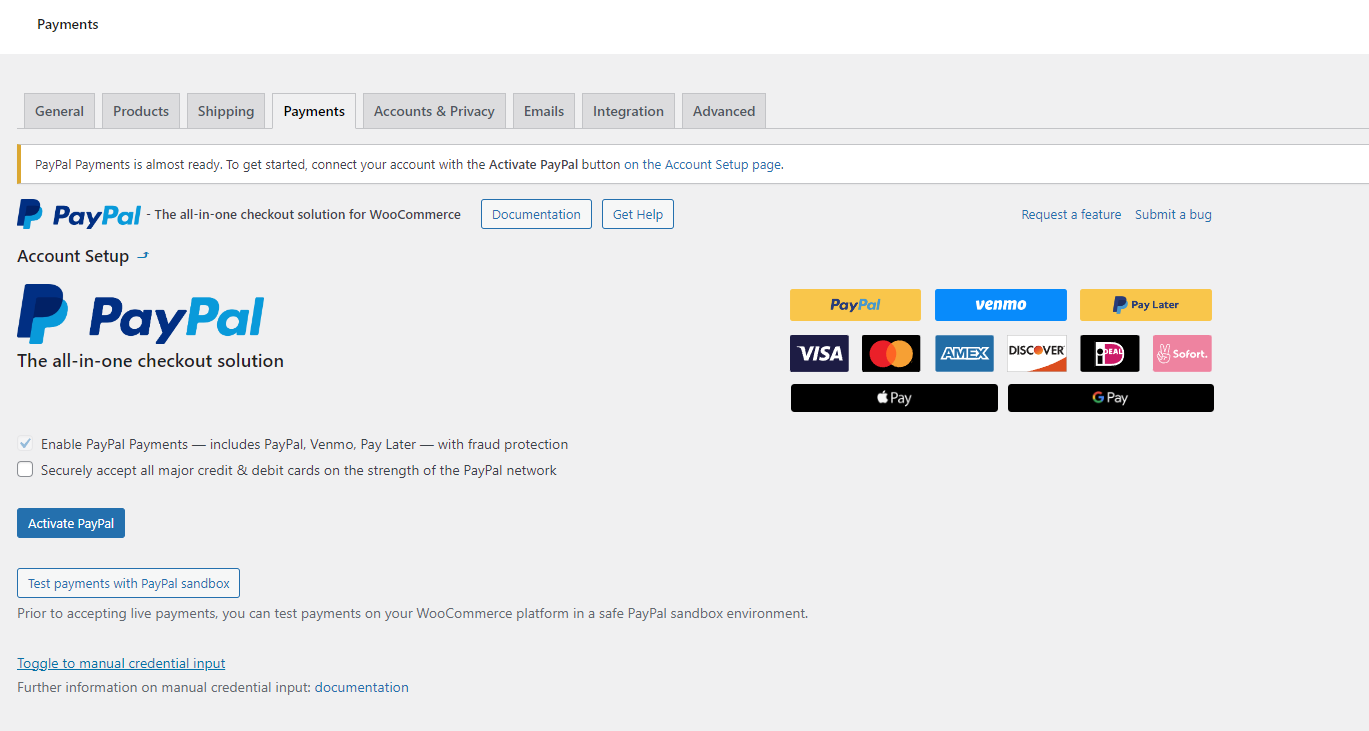
- Scroll down and click on “Test Payment With PayPal Sandbox” to test your setup.
- You’ll need a PayPal Sandbox email account and password for this step.
- Creating a PayPal Sandbox Account:
- If you don’t have a Sandbox account, move to this part to create one.
- Access PayPal Sandbox accounts and click “Sandbox test accounts.”
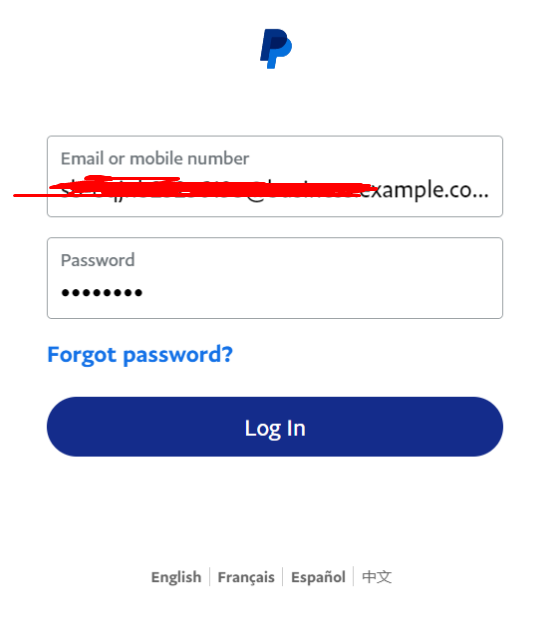
- Click “View/Edit account” to retrieve your Sandbox Email ID & System Generated Password.
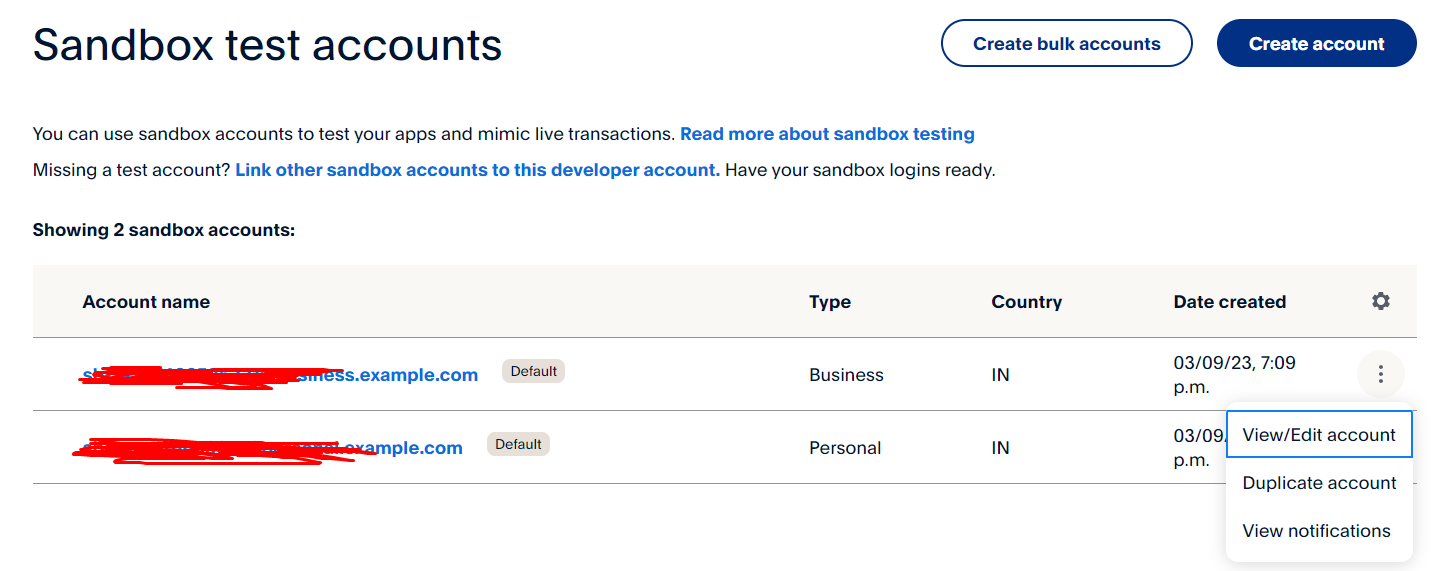
- Copy these details and paste them into the WooCommerce PayPal Payments settings.
- Connecting Your PayPal Account:
- Once the details are entered, click “Agree and Connect” to connect your PayPal account.
- Upon successful configuration, you’ll receive a confirmation message.
Verification and Customization:
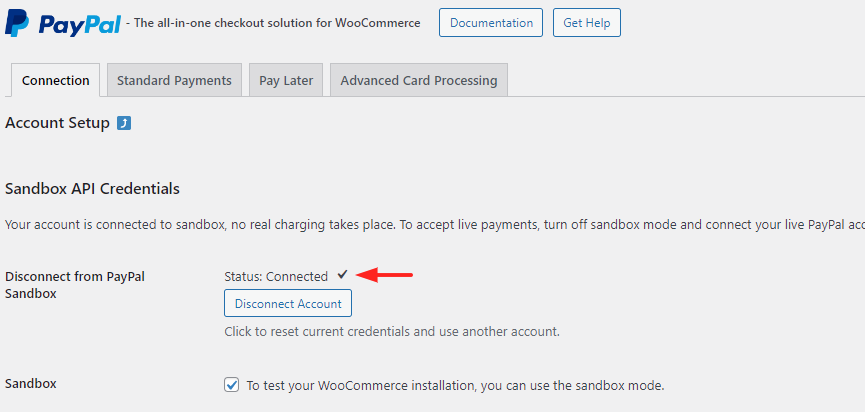
- Return to your WooCommerce store and navigate to the Payment section to ensure a successful connection with the PayPal Sandbox Account.
- Customize your PayPal settings, including PayPal Standard Payments settings, PayPal Checkout appearance, Pay Later messaging, and more.
PayPal Configuration
Once you’ve activated PayPal integration, it’s important to configure your PayPal settings according to your preferences. In the WooCommerce PayPal Payments settings, you’ll discover a scope of options that you can tailor to optimize your PayPal checkout process.
Here’s a breakdown of the key settings you can customize:
- Standard Payment Settings: Customize the standard payment settings to define how PayPal transactions are processed on your WooCommerce store.
- Checkout: Customize the checkout settings to enhance the PayPal checkout experience for your customers. You can adjust settings related to the checkout page layout, fields, and additional options.
- Single Product Page: Fine-tune the settings for the single product page to ensure a smooth PayPal checkout process when customers purchase individual products.
- Cart: Configure the cart settings to optimize the PayPal checkout experience for customers when they review and finalize their orders in the shopping cart.
- Mini Cart: Customize the mini cart settings to provide a convenient and efficient PayPal checkout experience for customers who interact with the mini cart feature on your WooCommerce store.
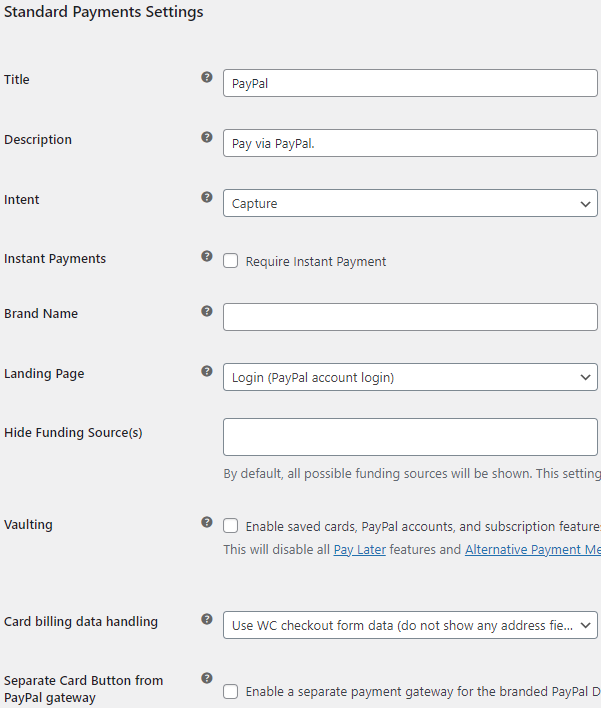
Standard Payment Settings
In this section, you have the flexibility to customize various settings for your PayPal Standard payment gateway, ensuring a tailored checkout experience for your customers. Here’s what you can adjust:
- Title: Define the title that customers will see on the checkout page, reflecting your brand or payment method.
- Description: Provide a brief description to accompany the payment method during the checkout process, offering clarity to customers.
- Intent: Choose between “Capture” for immediate payment processing or “Authorize” for payment authorization after order creation, depending on your business needs.
- Instant Payments: Enable instant payment transfer for quicker transaction processing by checking this option.
- Brand Name: Incorporate your brand name into the PayPal checkout process, reinforcing your brand identity to customers.
- Landing Page: Select either the “Login” or “Billing” page as the landing destination for customers during the PayPal checkout process.
- Hide Funding Source(s): Opt to hide specific grant sources such as Credit Cards, Debit Cards, or Venmo, providing a streamlined payment experience.
- Vaulting: Allow users to securely store their payment information, including PayPal and credit card accounts, for future transactions by enabling this option.
- Card Billing Data Handling: Ensure that the billing information entered by customers matches the data provided during the checkout process, enhancing transaction security.
- Separate Card Button from PayPal Gateway: Create a secondary gateway specifically for card payments, distinct from the primary PayPal gateway, offering customers additional payment options.
And congratulations, you’re done! If you wish to learn more about WooCommerce then you can check out our guide on WooCommerce customization and much more here.
Also read: PayPal Integration in PHP: How to Automate Online Payments in Easy 4 Steps
Wrapping up
Integrating PayPal into your WooCommerce store is a seamless process that enhances your customers’ checkout experience while offering a trusted and secure payment solution. By following the steps outlined in this guide, you can quickly set up and configure PayPal payments, allowing you to accept transactions with ease and confidence. With customizable settings and features, you can tailor the PayPal integration to meet your specific business needs and importance, ensuring a smooth and efficient payment process for both you and your customers. Embrace the power of PayPal in WooCommerce to streamline your online store operations and drive growth in your eCommerce business.
FAQs on WooCommerce integrate with Paypal
Is it necessary to have a PayPal Business account to integrate with WooCommerce?
Indeed, in order to integrate PayPal Business with WooCommerce and process payments, you must have one. On the PayPal website, you may register for a PayPal Business account.
Can I offer PayPal as a payment option alongside other payment gateways in WooCommerce?
Absolutely! WooCommerce allows you to offer multiple payment options to your customers, including PayPal, credit cards, bank transfers, and more. You can enable PayPal alongside other payment gateways in your WooCommerce settings.
Is it safe to integrate PayPal into my WooCommerce store?
Indeed, PayPal provides a reliable and safe way to make payments for purchases made online. To guard against fake and unauthorized access, they use industry-standard encryption and security measures for both customers and sellers.
Is it possible to make changes to how WooCommerce’s PayPal checkout page looks?
Yes, WooCommerce provides various customization options for the PayPal checkout page, allowing you to adjust the title, description, branding, and other settings to match your store’s branding and preferences.
What should I do if I encounter issues during the PayPal integration process?
If you encounter any issues or have questions during the PayPal integration process, you can refer to the WooCommerce documentation for guidance. Additionally, you can reach out to PayPal’s customer support for assistance with any technical or account-related issues.
