
If you use the internet frequently, you can run into issues loading websites and get different error status numbers.
One of the most frequent error codes is the 401 Error, often referred to as the 401 Unauthorized Error. This error means that there was a problem authenticating the request made to the website or web application. Thankfully, this problem can usually be fixed simply.
You will discover more about the 401 error code in this lesson, along with five different ways to diagnose it and potential reasons.
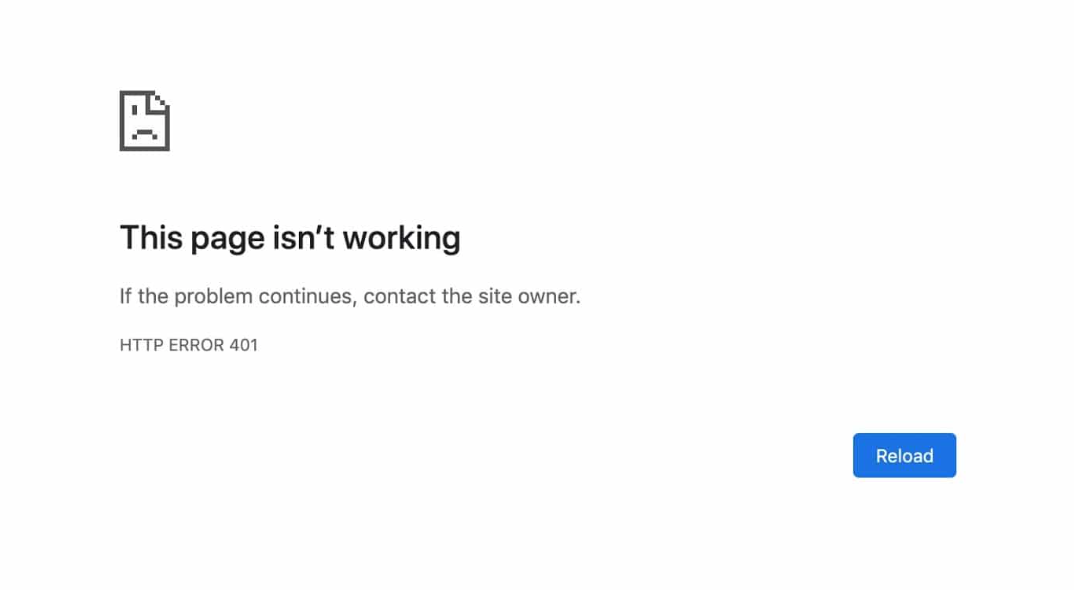
Error Code: HTTP 401 Unauthorized Error
Error Type: Typically, a client-side error
Error Variations:
- HTTP Error 401 Unauthorized
- 401 Unauthorized Error
- Error 401 Unauthorized
- Access Denied
- 401 Authorization Required
This article will explain 401 error messages and discuss their causes. Then, we’ll guide you through five different ways to resolve them.
So, let’s get going!
What is HTTP 401 Unauthorized Error?
The HTTP 401 Unauthorized error indicates that the server’s request lacks valid authentication credentials for the targeted resource, hence failing to verify it. When you attempt to access a URL, your browser sends a request that isn’t authenticated in this case.
This error commonly arises from client-side issues, including:
1. Inputting the wrong URL.
2. Providing incorrect username or password.
3. Outdated browser cache and cookies.
For instance, encountering the 401 Error might happen when trying to access restricted resources, such as a password-protected web page, without logging in or providing the correct authentication details first.
While client-side issues are typically the primary culprits, the error can occasionally stem from server-side factors. The server might intentionally block client access to the requested resource, or its authentication process may be flawed.
When faced with the 401 Error, the browser displays an error code or message instead of directing you to the desired web page. You might encounter messages such as:
- HTTP Error 401
- 401 Authorization Required
- 401 Unauthorized Error
- Access Denied
Also read: How to Fix WordPress 404 Error “Page Not Found” in 7 Easy Steps
What Causes HTTP 401 Unauthorized Error?
1. Missing or Incorrect Login Credentials
One of the most straightforward causes of a 401 Unauthorized error is the absence of valid login credentials. This typically happens when:
- The username or password is incorrect: If you attempt to access a resource on a website or API and enter the wrong credentials, the server will return a 401 error, indicating that authentication has failed.
- Credentials are not provided: If you haven’t logged in at all or neglected to provide your credentials, the system will reject your access attempt.
In these cases, the solution is simple: double-check your login details and ensure they are entered correctly. If you’re unsure about your credentials, most systems offer a “forgot password” option to help you recover access.
2. Expired or Revoked Tokens
Many modern web services, especially APIs, use token-based authentication (such as OAuth tokens) to authorize users. These tokens act as temporary access keys, but they come with expiration times or may be revoked for security reasons. If you’re working with an API or a service that requires such tokens, a 401 error can occur if:
- The token has expired: Tokens typically have a limited lifespan for security purposes. Once expired, they no longer grant access, and you will need to refresh or request a new one.
- The token has been revoked: In some cases, a server might revoke tokens to prevent unauthorized access. This might happen if there’s a security breach or if your account has been flagged for suspicious activity.
To fix this, you should regenerate the token or refresh it, depending on the service’s authentication protocol. Always check the service’s documentation on how to properly manage and renew tokens.
3. Session Expiry
Another frequent cause of the 401 Unauthorized error is session expiry. Most websites and applications use session cookies to keep users logged in as they navigate between pages or access different resources. However, these sessions are usually time-limited for security reasons. If your session has expired, even if you were previously logged in, the server will no longer recognize you as an authenticated user, leading to a 401 error.
To resolve this, try logging out and logging back in to refresh your session. If you’re working with an API, ensure the session token is still valid, or reauthenticate as needed.
4. Incorrect Authorization Header
When interacting with APIs, the Authorization header plays a critical role in sending authentication credentials, such as an API key, bearer token, or basic auth credentials. If this header is:
- Missing: Without the necessary credentials in the header, the server will be unable to authenticate your request.
- Malformed: If the structure of the authorization header is incorrect, such as having an extra space or missing the “Bearer” prefix for token-based authentication, the server may reject the request.
- Invalid: If the credentials contained within the header are incorrect, expired, or insufficient, the server will return a 401 Unauthorized response.
To fix this, review the request and ensure that the Authorization header is correctly formatted. Double-check that the credentials (token or API key) are valid and that the syntax matches the expected format (e.g., Authorization: Bearer <token>).
5. IP or Geolocation Restrictions
In some cases, a 401 error might occur due to restrictions set by the server based on IP addresses or geographical locations. These restrictions are often implemented for security reasons, such as:
- Blocking unauthorized IPs: Servers may restrict access to certain IP addresses or ranges, which means if your IP falls outside the allowed range, your request will be denied with a 401 status.
- Geo-blocking: Some websites and services limit access based on geographic location, either as a security measure or as part of compliance with local regulations. If you’re trying to access a service from a restricted country or region, the server may block your request and return a 401 error.
To address this, check if there are any IP restrictions or geolocation policies in place, either on your local network or enforced by the server. If necessary, contact the service provider to ensure your IP or location is whitelisted.
Also read: How to Fix 413 Request Entity Too Large Error in WordPress
401 Unauthorized Error Status Code: How to Resolve Authentication Failures
1. Check the URL Is Correct
The user may get the 401 error code if they typed the incorrect URL into the address bar of their browser. Verify the URL you entered in before attempting the other techniques.
Example: Correct one https://nestify.io/features – wrong one https://nestify.io/feotures
Check to make sure you noticed all the special letters and numbers. Make sure the link you are following is correct if it came from another website or online application.
The 401 error may occasionally occur when the hyperlink needs to be updated or fixed.
Try using the website’s homepage to manually navigate to the affected page in order to gain access to the restricted content. This will yield the right URL. Alternatively, you might try searching Google for the page.
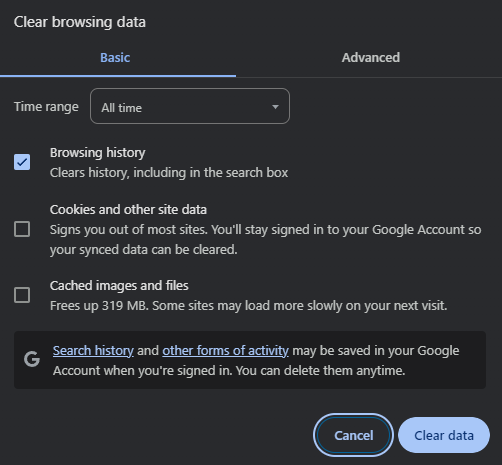
2. Clear Your Browser’s Cache
Your browser’s cache is intended to enhance your online experience by lowering page load times. Unfortunately, it can also result in unwelcome disruptions.
As previously stated, one of the most common error of the 401 error is obsolete or erroneous cache data or cookies.
If you don’t see any problems with the page’s URL, the next step is to delete your browser’s cache. This will remove any erroneous information saved locally in your browser that may be interfering with the login procedure.
Similarly, your browser’s cookies may store authentication data that only has to be renewed.
If you’re using Google Chrome, click the menu symbol in the top-right corner of the browser and then select Settings. In the Privacy and Security menu, choose Clear browsing data.
Access the cookie page of your browser using one of the following shortcuts:
- Chrome on Windows: Ctrl + Shift + Delete
- Chrome on Mac: Command + Shift + Delete
- Firefox on Windows: Ctrl + Shift + Delete
- Firefox on Mac: Command + Shift + Delete
- Safari: Go to Settings > Safari > Clear History and Website Data
- Microsoft Edge: Command + Shift + Delete
3. Clean Your DNS
Flushing your Domain Name Server (DNS) is another option for resolving the 401 error. While this is a less common problem, it might be the culprit, so it’s worth a shot if the previous two options fail.
To accomplish this with Windows, press the Start button and enter “cmd” into the search option. When you press Enter, the Command Prompt window opens.
Copy and paste the “ipconfig /flushdns” command, then press Enter again.
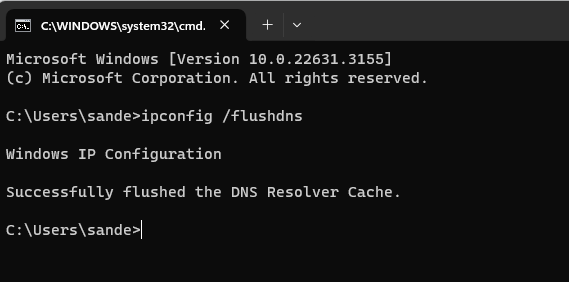
On a Mac, open Finder > Applications > Utilities > Terminal.
Enter the command: “sudo killall -HUP mDNSResponder” and click Enter.
Then, try refreshing the page you were trying to access to check whether the 401 error has been resolved.
4. Deactivate Your WordPress Plugins
The issue causing your 401 error might not solely stem from your browser. If you’re encountering difficulties accessing your WordPress site, it’s plausible that one or more plugins could be at fault.
Certain plugins, particularly security-focused ones, may trigger a 401 error if they detect suspicious login activity indicative of a potential attack. Others might encounter compatibility issues. Therefore, it’s advisable to deactivate all your WordPress plugins temporarily to see if that fixes the issue.
Using your WordPress dashboard, go to Plugins > Installed Plugins and deactivate all of your plugins at the same time.
To select all plugins, check the box at the top, then pick Deactivate from the Bulk Actions drop-down menu, and click Apply.
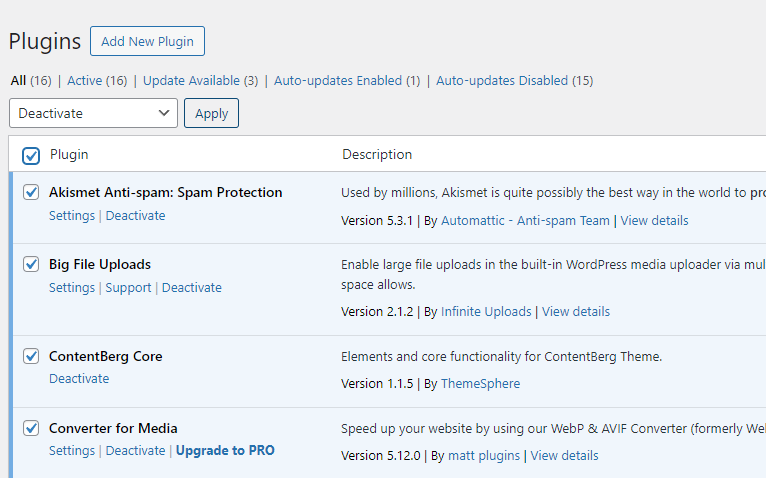
After deactivation, attempt to reload the page that previously displayed the 401 error to determine if this action has resolved the issue. If successful, you can then reactivate each plugin individually to identify the culprit. Subsequently, you may choose to remove the problematic plugin, substitute it with an alternative, or seek assistance from its developer.
5. Verify the Authentication Credentials
When you attempt to access a password-protected website or other restricted resource using improper authentication credentials, you may see the 401 Unauthorized Error code. You will thus be unable to access the page.
Verify again that you are logged in using a legitimate login name and password. Try altering the password if you are certain that you have entered the information accurately.
Try changing your WordPress password if you’re experiencing problems getting onto a site that requires a password.
From Debugging to Solutions
Encountering the dreaded 401 Unauthorized error can feel like hitting a roadblock in your digital journey. But fear not—resolving this issue is easier than you think! By following the steps in this guide, you can pinpoint and fix the root causes of the 401 error and get back to business without missing a beat.
From double-checking the URL, clearing browser cache, and flushing DNS, to deactivating troublesome WordPress plugins, these methods are your toolkit for troubleshooting authentication problems quickly and efficiently.
By staying one step ahead with these proactive fixes, you can ensure smoother browsing and uninterrupted access to the resources you need.
Looking for a hosting solution that keeps you worry-free from errors like these? Try Nestify’s high-performance hosting with a free trial and experience blazing-fast, secure, and reliable website hosting. Start your free trial now! and ensure your website runs flawlessly—no more 401 errors!
FAQs on 401 Unauthorized Error
What is the significance of the 401 (Unauthorized) status code error?
The 401 error indicates that the server requires authentication for accessing the requested resource, but the client failed to provide valid credentials or did not provide any at all.
What are the common scenarios that trigger a 401 error?
Common causes include entering incorrect login credentials, attempting to access restricted areas without proper authorization, or encountering authentication issues due to server misconfigurations.
How do I recognize if I’m encountering a 401 error?
When a 401 error occurs, your browser typically displays a message such as “401 Unauthorized,” indicating that the requested resource requires authentication.
What actions should I take to troubleshoot and resolve a 401 error?
Begin by double-checking your login credentials to ensure they are right. If the problem persists, try deleting your browser’s cache and cookies, flushing your DNS cache, or disabling any incompatible plugins or extensions.
Are there any server-side factors that could contribute to a 401 error?
Yes, server misconfigurations, authentication failures, or access control restrictions set up by the server can also lead to a 401 error. It’s essential to investigate both client-side and server-side factors when diagnosing and resolving the issue.
