
If you’ve been using WordPress for long enough or uploading large media files, you might have encountered the “413 Request Entity Too Large.” error.
This error occurs when the file you are trying to upload exceeds your server’s maximum file size limit. In this article, we will explore the causes of the 413 error and provide effective solutions to fix it.
Understanding the 413 Request Entity Too Large Error
The 413 Request Entity Too Large error is an HTTP status code indicating the server refuses to process the request because the uploaded file is too large.
When you encounter this error, the file you are trying to upload exceeds the maximum upload size limit set on your server.
Some common causes of the 413 Error
There’re many factors when it comes to 413 error requests in WordPress, Some common causes are:
- Server Configuration: The server’s configuration settings may have a maximum upload size limit defined, and if your file exceeds this limit, the error occurs.
- Misconfigured .htaccess File: The .htaccess file is an essential configuration file for your WordPress site. If it is misconfigured or lacks necessary directives, it can cause the 413 error.
- php.ini Configuration: The php.ini file is a server configuration file that sets various PHP settings. If the maximum upload size is too low in the php.ini file, it can trigger the 413 error.
- Insufficient Hosting Plan: Some shared hosting plans limit the maximum file size that can be uploaded. If you exceed this limit, the error will occur.
How to check the Maximum upload size limit
Check the maximum upload size configured on your WordPress site before applying any solutions. To do this:
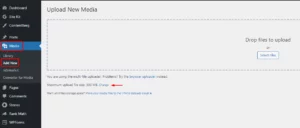
- Login into your WordPress dashboard
- Go to Media -> Add New
- Look at -> Maximum upload file size
Increasing the Maximum Upload Size via .htaccess File
Changing the .htaccess file is one way to raise the maximum upload size limit.
But before making any changes, it is highly recommended to take a backup of the .htaccess file.
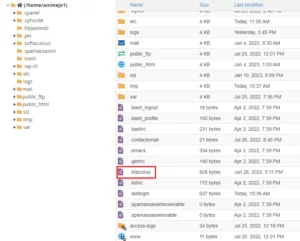
- First, access your website’s root directory using an FTP client or the File Manager in your hosting control panel.
- Locate the File Manager
- Download the .htaccess file & have a backup copy for safety.
- Open the .htaccess file to any Text editor.
- Add the below code at the end of the file.
php_value upload_max_filesize 99M
php_value post_max_size 99M
php_value max_execution_time 300
php_value max_input_time 300
Replace the “99M” with you’re desired maximum upload size. Save the updated .htaccess file and upload it to the server.
Increasing the Maximum Upload Size via php.ini File
Access the php.ini file on your server, you can modify it to increase the maximum upload size. Here’s what you need to do:
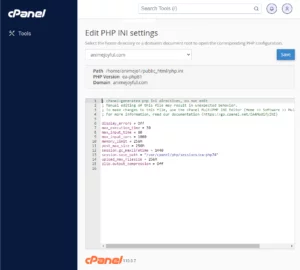
- Locate the php.ini file in your server’s root or WordPress root directory.
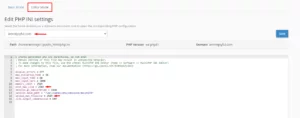
- Go to edit php.ini setting “Editor Mode.”
- Select the domain’s root.
- Copy the below code or edit the “32M” in settings.
upload_max_filesize = 32M
post_max_size = 32M
Increase the values of both directives to your desired maximum upload size.
Save the changes and upload the modified php.ini file back to your server.
Increasing the Maximum Upload Size via a Plugin
Only some enjoy writing code or utilizing SSH or FTP to access root files. Fortunately, a WordPress plugin is available for increasing WordPress upload size. To do so:
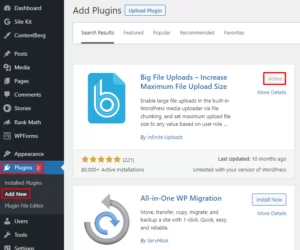
- Go to Plugins -> Installed Plugins then -> Add New
- Search for Big File Uploads
- Click on Install Now & Active
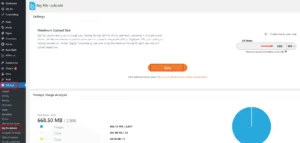
After activating, go to Settings -> Big File Uploads.
Look for All Users, put the desired size you want to increase, and then click Save.
Clearing Browser Cache and Cookies
Sometimes, the 413 error can be caused by cached data in your browser.
The problem may be fixed by clearing the cache and cookies in your browser. After clearing the cache and cookies, try uploading the file again to see if the error persists.
Conclusion
Encountering the 413 Request Entity Too Large error can be frustrating, but you can overcome it with the right solutions.
This article discussed various methods to fix the 413 error in WordPress. Whether you modify server files, use plugins, or optimize your images, these solutions will help you increase the maximum upload size and ensure a smooth file upload experience on your website.
FAQs
What does the error code 413, “Request Entity Too Large,” mean?
-> The 413 Request Entity Too Large Error is an HTTP status code that occurs when the file you try to upload to your WordPress site exceeds the maximum upload size limit set on your server.
Are there any alternative solutions to fix the 413 error?
-> Yes, besides increasing the maximum upload size, you can clear your browser cache and cookies and contact your web host provider for assistance. They may have alternative solutions or be able to help you overcome the 413 error.
What should I do if my web host provider doesn’t support increasing the maximum upload size?
-> If your web host provider doesn’t support increasing the maximum upload size, you can optimize your images to reduce their file size. Consider switching to a different web host that offers higher upload size limits.
