In the early days of the web, sites were made with only two elements: text and static HTML. Such static websites required direct code alterations, even for some minor modifications, which was quite cumbersome. Transitioning from HTML site to WordPress can alleviate this issue.
Converting HTML site to WordPress has several benefits, but most importantly, it takes a lot of weight off your shoulders. You no longer have to worry about managing everything manually, which can get quite messy once your website progresses to a much more complex version.
Thanks to open-source projects like WordPress, people can now choose from an array of themes and plugins to create highly interactive modern websites. While HTML5 is quite robust, particularly for creating a showcase website, WordPress’s flexibility provides a more streamlined solution for broader website functionalities.
This easy guide will show you how to convert HTML to WordPress.
Ways to Convert HTML Site to WordPress
It is purely your personal preference which method out of the three listed below you choose to convert an HTML website to WordPress.
If you are still confused, the summaries listed below will help you determine which of the three methods will be best for you, depending on your skill level, time, and monetary investment.
1. Creating a WordPress Theme Based on Your Static HTML File
If you wish to keep the design of your previous HTML website intact, this is the option for you. It’s also the most difficult route, requiring coding.
You’ll need to utilize FTP to access your current site directory and start using your existing code. From there, you’ll need to generate the WordPress theme files and copy code from the WordPress codex.
This should be quite basic and straightforward if you’ve previously worked with HTML, CSS, and PHP.
2. Adopting a New Theme and Keeping the Content
This is likely the best option, considering its value and simplicity. Assuming you already have purchased hosting for your current website, you only need to pay if you buy a premium theme.
If you favor a fresh start (theme-wise), this option is for you. You merely need to move the content to its new home.
3. Using a Child Theme Adapted from a Pre-existing Theme
Using a WordPress child theme to convert your original HTML into a CMS format gives you more flexibility and requires far less technical know-how than before.
This is probably the simplest option to keep the old website’s style. Using this strategy, you will build on an existing WordPress theme. As a bonus, you can immediately start using WordPress’ amazing features.
4. Paying an HTML to WordPress Conversion Service
This is the simplest solution if you lack time but have a budget because it requires little effort. However, it will not do much to familiarize you with WordPress, and the price will vary depending on who you employ.
Before You Begin
Regardless of the option you choose from the four we just saw above, there are a few prerequisites that you should keep in mind.
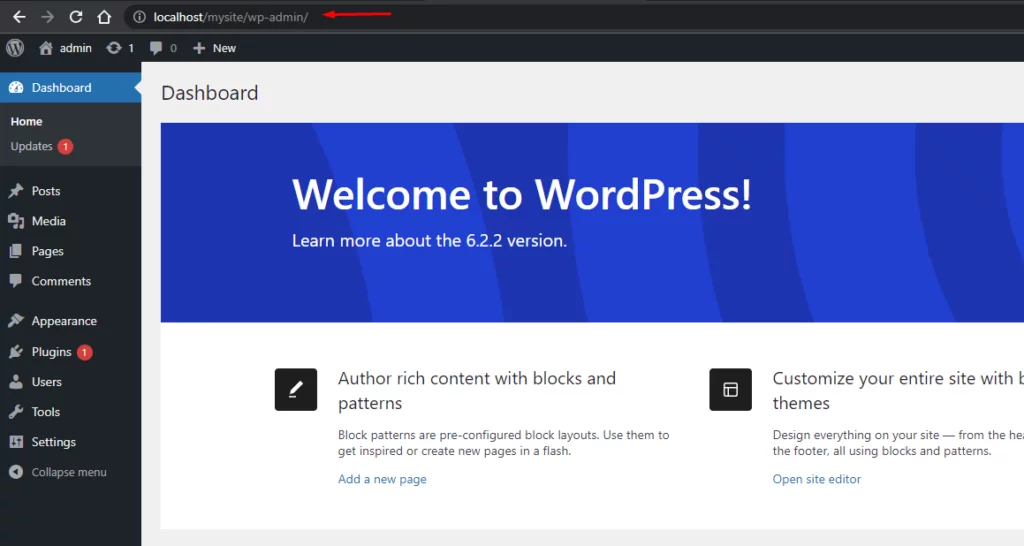
Hosting services: Before you begin, you must have a hosting plan in place because the requirements differ from those of an HTML website. You will require hosting for your WordPress website. On the other hand, you can choose to host your website locally and go online later. Once you’ve decided, you’ll need to install WordPress and access WP Admin.
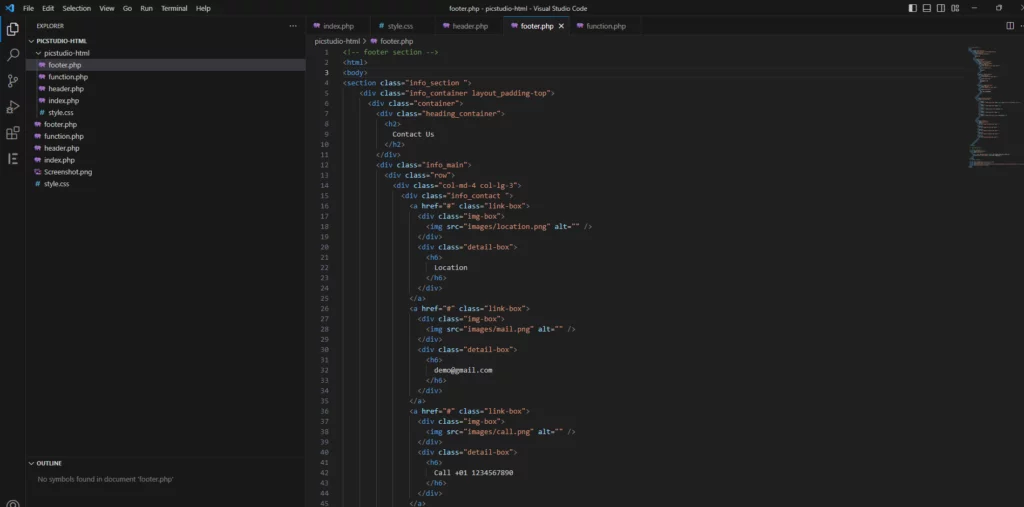
Code editor: If you choose to change your website’s HTML code yourself, you’ll need a code editor like Notepad++, Atom, or Sublime.
Time and money: You must assess the time and money you are willing to devote. You can hire developers or use WordPress migration applications to assist with conversion. Hiring someone is considerably easier, but you will miss the opportunity to learn, and the process may be costly.
Install and Configure WordPress: Before proceeding with theme development, ensure that WordPress is installed and configured:
- Installation: Confirm that WordPress is installed on a local development environment or the live server. If WordPress is not yet installed, refer to the official WordPress.org installation guide for detailed instructions.
- Configuration: Complete the initial setup of WordPress, which includes configuring database connections, site settings, and any necessary plugins.

Converting Static HTML File to a WordPress Theme
Converting an HTML theme to a WordPress theme ensures a smooth transition and that the resulting WordPress site retains the design and functionality of the original HTML site. To do this:
Step 1: Create a WordPress Theme Folder for the Basic Files
Create a new folder on your desktop to store your theme files. Name it whatever you want your theme to be called. Here’s how you can do it:
- Navigate to the Theme Folder: Access the themes directory within your WordPress installation. This can typically be found under XAMPP > htdocs > WordPress folder (e.g., my site) > wp-content > themes.
- Create a New Folder: Create it within the directory to house your theme. Assign a name to this folder representing your theme, such as my-custom-theme.

Once you have created the new theme folder, you must generate several key files necessary for the theme’s functionality. Next, use your code editor (e.g., Visual Studio Code) to generate a few files (all of which will be saved in your new theme folder).

- Style.css
- Index.php
- header.php
- sidebar.php
- footer.php
Some CSS files may be optional, depending on your theme’s functionality and style. After creating the files, keep the editor open. We’ll come back to it later for further editing.
Step 2: Copy the Existing CSS to WordPress Style Sheet
You likely have some CSS files you’d like to save to copy a design. So, the first file you’ll want to change is style.css.
This file contains the CSS rules that define your website’s visual appearance. To begin, place the following code at the top of your file:
/*
Theme Name: Replace with your Theme's name.
Theme URI: Your Theme's URI
Author: Nestify
Author URI: Your website address.
Description: Static HTML to WordPress.
Version: 1.0
*/

This code indicates to WordPress that it is a theme stylesheet header. Follow the steps listed below to complete this process:
- Replace the placeholder text with your theme name, URL, author, and description.
- After the header comment, paste the CSS code from your old HTML website directly into the style.css file. This ensures that all CSS file styles previously applied to your site are preserved and utilized in the WordPress theme.
- Save the file (Ctrl + S or Cmd + S on macOS) to apply the changes.
Step 3: Separate the Existing HTML and Add It to the Right Folders
Before we begin this step, let’s first look at how WordPress works to understand it better.
WordPress uses PHP to access and retrieve data from its underlying database. The files in this guide are intended to tell WordPress which parts of your site’s content should be shown and where.
This step involves separating your HTML file and cutting and pasting sections of your existing code into the files we’ve just created so WordPress knows where to show it.
Here are the the newly created WordPress files:
header.php File
- First, navigate to your current site’s index.html file.
- Highlight everything from the top of your index.html file to the opening div class=”main” tag.
- Copy and paste this content into your header.php file, then save and close.
This php file includes everything from the beginning of your old HTML code to the main content area. The main content area is commonly represented by or <main> or <div class=”main”>
Pro tip: Copy and paste the code <?php wp_head();?> immediately before the </head> element. This guarantees that WordPress plugins function properly. When you’re finished, save the file. Look at the example code below:
<head>
<meta charset="UTF-8" />
<meta name="viewport" content="width=device-width" />
<title> Example code </head></title>

<link rel="stylesheet" type="text/css" media="all" href="style.css" />
<link href="https://fonts.googleapis.com/css?family=Assistant|Oswald" rel="stylesheet">
<?php wp_head();?>
</head>

sidebar.php File
This file contains all content from the section in your old HTML code. When you’re finished copying and pasting, save the file.
This is how it looks:
<aside class="sidebar one-third right">

      <aside class="widget-area">

        <div class="widget-container">

          <h3 class="widget-title">Test Button</h3>

          <img width="250" height="360" src="https://img.freepik.com/free-vector/hand-drawn-youth-day-jumping-people_23-2148573399.jpg?t=st=1722782584~exp=1722786184~hmac=0b8218b2736b04bbcc6fd7756569cd5a7eff6dcb5230d8a054672add39271531&w=1060" alt="WordPress: Your text here" style="max-width: 100%; height: auto;" />

          <p><em> Filler text here</em> Filler text here.</p>

        </div>

      </aside>

    </aside>
Second, return to your index.html file. Highlight the aside class=”sidebar” element and its contents. Copy and paste this portion into the sidebar.php file, then save and close the folder.
footer.php File
Third, in your index.html, select anything after the sidebar, copy and paste it into your footer.php file, and then save and close the folder.
Footer information should cover everything up to the conclusion of the file, which will be included in this file.
Just before the closing bracket, ensure that you add the following code.
<?php wp_footer();?>

After you paste it, make sure you save the file.
Finally, pick anything left in your index.html file (this should be the primary content area) and copy and paste it into your index.php. Save, but don’t close yet.
Step 4: Finalize Your Header.php and Index.php Files
Next, modify the header.php and index.php files to conform to WordPress’s format.
Modifying The header.php File
Locate a link in the </head> section that looks like this:
<link rel="stylesheet" type="text/css" media="all" href="style.css" />Replace it with a newer link (which conforms to the WordPress’s format)
<link rel=”stylesheet” href=”<?php echo get_template_directory_uri(); ?>/style.css” type=”text/css” media=”all” />
Finally, save and close the header.php file. You’re done with it for now.
Modifying index.php File
Open the index.php file. It should be empty.
Enter the following exactly like this:
<?php get_header(); ?>

<?php get_sidebar(); ?>

<?php get_footer(); ?>
The spacing between the first and second lines of code is critical. This is where you’ll paste your Loop code. It’s a type of PHP used by WordPress to show posts.
Save and close your index.php. Your theme is now ready to be uploaded to your WordPress site.
Step 5: Upload the New WordPress Theme File
Finally, create and upload a screenshot of your WordPress theme. The screenshot displays a sample of your website in the WordPress backend.
Crop this screenshot to 880×660 pixels. Save the file as screenshot.png. Now, place the screenshot in your theme folder.
It’s time to upload your theme to WordPress.
Navigate to your WordPress admin dashboard. Go to Appearances > Themes. Select Add New > Upload Themes.
At this point, all you have to do is import the content of your static HTML website into your new WordPress website. You might also wish to install an under-construction plugin while you clean up the content of your old site and create your new WordPress website. You can also clone your WordPress website to safeguard your digital assets.
Adopting a New Theme and Keeping the Content
If the processes outlined above are too time-consuming or complex for you, don’t worry; another option exists. Instead of adapting the design you’re currently working with into a WordPress theme, you can use any of the thousands of themes available in the WordPress marketplace.
This strategy will also make importing content much easier. You only need to install and activate the theme you like, then follow the steps provided below.
Step 1: Set Up a New Site
There are both free and premium WordPress themes. Before determining which one is best for you, you should examine which themes are created to meet your specific requirements and browse by theme category.
Step 2: Install the Import Plugin
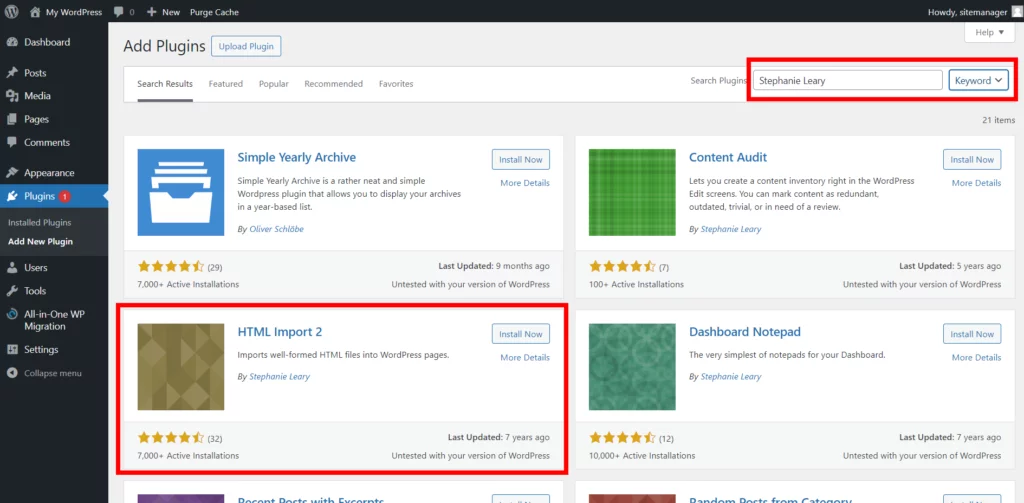
Now, it’s time to install the plugin that enables this. You will search for and install the HTML Import 2 WordPress Plugin on your site to create the WordPress theme.

Click Install Now, then activate it.
Utilizing a dedicated plugin can be highly advantageous in facilitating the efficient and precise transition of HTML content into a WordPress environment.
This approach is particularly beneficial if you seek a new website design and prefer a streamlined workflow.
Step 3: Upload Pages Via Configuration
Access the plugin settings by navigating to Tools > HTML Import 2. Proceed with the following configurations:
- Preserve file names: Enable this option to ensure the file names are preserved as URLs in the new WordPress site. The plugin will utilize your file names as the new URL.
- Directory to Import: The directory to import is where you copied your previous HTML code. Specify the path to the directory on your server where the HTML files are located.
- Old site URL: Enter the site’s old URL. It primarily serves as a redirect.
- Default File: Define the default file for import processing, typically “index.html”.
- File extensions: Enter the extensions of the files that will be imported. List the extensions that should be included in the import, such as .html.
- Exclude directories: Remove anything from the old site you do not wish to carry over. Specify any directories that should be excluded from the import to avoid unnecessary content being imported.
Once that’s done, navigate to the content tab and configure the HTML element that contains your website’s content.
Step 3: Configure Content Tags
- Set Up Content Tag Handling
Navigate to the “Content” tab within the plugin settings to configure how various HTML tags and content elements should be handled during the import process:
- Titles: Define how HTML titles should be interpreted and imported into WordPress.
- Custom Fields: Specify how your HTML content should handle and import custom fields.
- Categories and Tags: Configure how categories and tags should be assigned to the imported content to ensure proper organization and classification.
Step 4: Save Settings and Initiate Import
- Save Your Configurations
After configuring all the necessary settings across the plugin’s different tabs, ensure you save your changes. This will apply the configurations and prepare the plugin for the import process.
- Execute the Import Process
Click the “Import Files” button to import your HTML content into WordPress. The plugin will process and integrate the HTML files into your WordPress site. Monitor the progress and verify that the import is proceeding as expected.
- Review and Adjust
After the import is complete, review the imported content on your WordPress website to ensure that it accurately reflects the original HTML content. Make any necessary formatting, content placement, or functionality adjustments to achieve the desired result.
Round Up of Insights: Convert HTML to WordPress
We’ve explored the essentials of converting a static HTML site to WordPress, including the preparatory steps and various methods for achieving the transition.
You can opt to develop a WordPress theme from scratch—a rewarding, albeit complex, task if you have coding skills and time to spare. Alternatively, using plugins can streamline the conversion process, making it easier to import all your content and migrate it smoothly.
As you integrate WordPress features, thoroughly test your new theme, and deploy it to your live site, you’ll be unlocking the full potential of WordPress, enhancing both functionality and user experience.
To complement this transition, consider hosting your WordPress site with Nestify. Our fast, secure, and reliable web hosting solutions ensure a smooth, hassle-free experience, allowing you to focus on crafting outstanding content while we manage the technical aspects. With Nestify, your WordPress journey is supported every step of the way. Experience seamless migration and optimal performance with the 7-day free trial!
Common FAQs on How to Convert an HTML Site to WordPress
Can I convert any HTML website into a WordPress business theme?
Yes, you can convert any HTML site to a WordPress business theme. However, the complexity of the conversion process may vary depending on the design of your HTML website.
Will converting to WordPress affect my website’s SEO rankings?
When done correctly, converting your HTML site to WordPress should not negatively impact your SEO rankings. In fact, WordPress offers numerous SEO benefits and provides greater flexibility to optimize your website for search engines.
Do I need coding knowledge to convert an HTML website to WordPress?
A rudimentary understanding of HTML, CSS, and PHP can be helpful during the conversion process. However, plugins and tools are also available that can simplify the conversion process for those without coding experience.
Can I retain the same design and layout after converting to WordPress?
Yes, it is possible to retain the same design and layout of your HTML website when converting to an HTML site to WordPress. You can customize your chosen WordPress theme to closely match the design elements of your HTML website.


