
Are you looking to add a dynamic and interactive form to your WordPress page? Look no further than Gravity Forms. It is a valuable plugin that allows you to seamlessly create and manage forms on your WordPress site. So, let’s get started and make your WordPress site even more interactive with Gravity Forms!
Understanding Gravity Forms: An Introduction
Gravity Forms is a versatile and robust form builder plugin for WordPress. It presents a great range of features and functionalities that make it a known choice among website owners and developers. In this section, we will provide an introduction to Gravity Forms and explain why it stands out among other form builder plugins.
What is Gravity Forms?
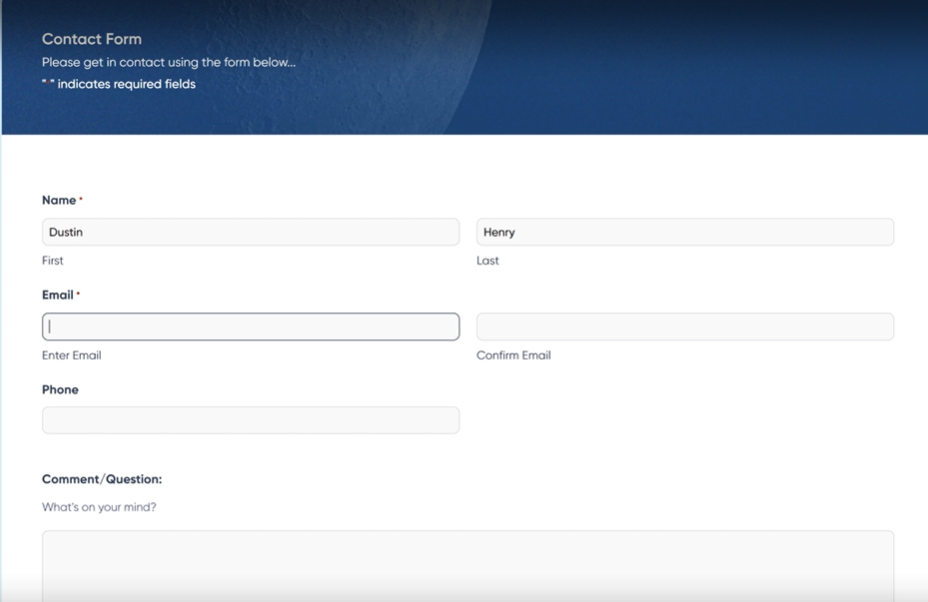
Gravity Forms is a WordPress premium plugin that lets you create and manage forms on your website with ease. Whether you need a simple contact form, a complex survey, or an event registration form, Gravity Forms provides an intuitive interface to build and customize forms according to your specific requirements.
Key Features of Gravity Forms
- Drag-and-Drop Form Builder: Gravity Forms offers a user-friendly form editor that lets you create forms by simply dragging and dropping form fields into place. This makes it easy for both beginners and experienced users to design forms without any coding knowledge.
- Extensive Form Field Options: Gravity Forms provides a wide range of form field options, including text fields, dropdown menus, checkboxes, radio buttons, file uploads, and more. These options allow you to collect the specific information you need from your users.
- Conditional Logic: With Gravity Forms, you can create dynamic forms that can be altered based on user input. Conditional logic permits you to show or hide form fields, sections, or even entire pages based on user responses, making your forms more personalized and interactive.
- Integration Capabilities: Gravity Forms seamlessly integrates with popular third-party services and applications, such as payment gateways (PayPal, Stripe), email marketing platforms (Mailchimp, AWeber), CRM systems (Salesforce, HubSpot), and more. This enables you to automate your workflow and efficiently manage form submissions.
- Advanced Form Settings: Gravity Forms offers various advanced settings, such as limiting form entries, scheduling forms to be available only during specific dates or times, enabling form saving, and enabling AJAX form submissions. These settings provide greater control and customization options for your forms.
- Form Notifications and Confirmations: You can configure Gravity Forms to send email notifications to both users and administrators upon form submission. Additionally, you can customize the confirmation messages displayed to users after form submission, providing a seamless user experience.
Why Choose Gravity Forms?
Gravity Forms has gained popularity and recognition in the WordPress community for several reasons:
- Ease of Use: Gravity Forms is known for its user-friendly interface, making form creation and management a breeze, even for beginners.
- Flexibility and Customizability: The plugin offers a wide range of form field options, customization settings, and integration capabilities, allowing you to create forms that perfectly align with your website’s needs.
- Reliability and Support: Gravity Forms has a solid reputation for its stability and reliability. The plugin is routinely updated and supported by a dedicated team, ensuring that any issues or bugs are promptly addressed.
- Security: Gravity Forms prioritizes the security of form submissions, ensuring that sensitive data is protected. It offers features like reCAPTCHA integration and form field encryption to enhance security.
- Documentation and Community: Gravity Forms provides comprehensive documentation, tutorials, and a vibrant user community. This makes it easier to find solutions, get help, and explore new possibilities with the plugin.
Now that you have a better understanding of what Gravity Forms is and why it is a popular choice, let’s move on to the next section and learn how to install and activate the Gravity Forms plugin on your WordPress site.
How to Install and Activate Gravity Forms Plugin
Installing and activating the Gravity Forms plugin is a straightforward process. In this section, we will guide you through the steps required to install and activate the plugin on your WordPress site.
Why Use Gravity Forms?
Before we dive into the installation process, let’s quickly recap why Gravity Forms is a great choice for creating forms on your website:
- Versatility: Gravity Forms offers a wide range of form field options and customization settings, allowing you to create forms tailored to your specific needs.
- Integration: The plugin seamlessly integrates with popular third-party services and applications, enabling you to automate your workflow and streamline data collection.
- Ease of Use: Gravity Forms provides an intuitive and user-friendly interface, making it effortless for both beginners and experienced professionals to create and manage forms.
Now, let’s move on to the installation process.
Getting the Gravity Forms Plugin
To get started, you need to obtain the Gravity Forms plugin. Here’s how:
- Purchase Gravity Forms: Visit the official Gravity Forms website and navigate to the pricing page. Choose the license that fulfills your needs and click on the “Buy Now” button. Follow the prompts to complete the purchase.

You can also buy it from the WordPress site.
- Download the Plugin: After completing the purchase, you will receive an email that contains your license key and a web link to download the plugin. Click on the downloadable link to acquire the plugin file (a .zip file).
Installation Process
Now that you have the plugin file follow these steps to install Gravity Forms on your WordPress site:
- Access the WordPress Dashboard: Log in to your WordPress site and navigate to the admin dashboard.
- Navigate to the Plugins Page: From the dashboard, go to “Plugins” in the menu on the left of the screen, and then click on “Add New”. This will take you to the plugin installation page.

- Upload the Plugin: On the plugin installation page, go to the “Upload Plugin” at the top of the page. Choose the Gravity Forms plugin file you downloaded earlier and click “Install Now”. WordPress will upload and install the plugin.
- Activate the Plugin: After finishing the installation, select the “Activate Plugin” button to enable Gravity Forms on your site. You will be navigated to the plugins page, where Gravity Forms should appear as an activated plugin.
Activation Process
Now that the plugin is installed, you need to activate it using the license key you received during the purchase process. Follow these steps to activate Gravity Forms:
- Access the License Settings: In the WordPress dashboard, navigate to “Forms” in the left-hand menu, and then click on “Settings”. This will take you to the Gravity Forms settings page.

- Enter the License Key: On the settings page, click on the “License” tab. Enter your license key in the existing field and click on the “Activate License” button. If the license key is valid, Gravity Forms will be successfully activated.
Congratulations! You have now installed and activated the Gravity Forms plugin on your WordPress site. In the next section, we will explore how to create a form using Gravity Forms so you can start designing your own custom forms.
Creating a Form Using Gravity Forms
Creating a form using Gravity Forms is a straightforward process that allows you to design and customize forms according to your specific needs. In this section, we will guide you through the steps of creating a form using the Gravity Forms plugin.
Accessing Gravity Forms Dashboard
To start creating a form, follow these steps:
- Access the WordPress Dashboard: Log in to your WordPress site and navigate to the admin dashboard.
- Navigate to the Forms Page: From the dashboard, go to “Forms” in the left-hand menu. This will take you to the Gravity Forms dashboard, where you can manage all your forms.
Understanding the Form Editor
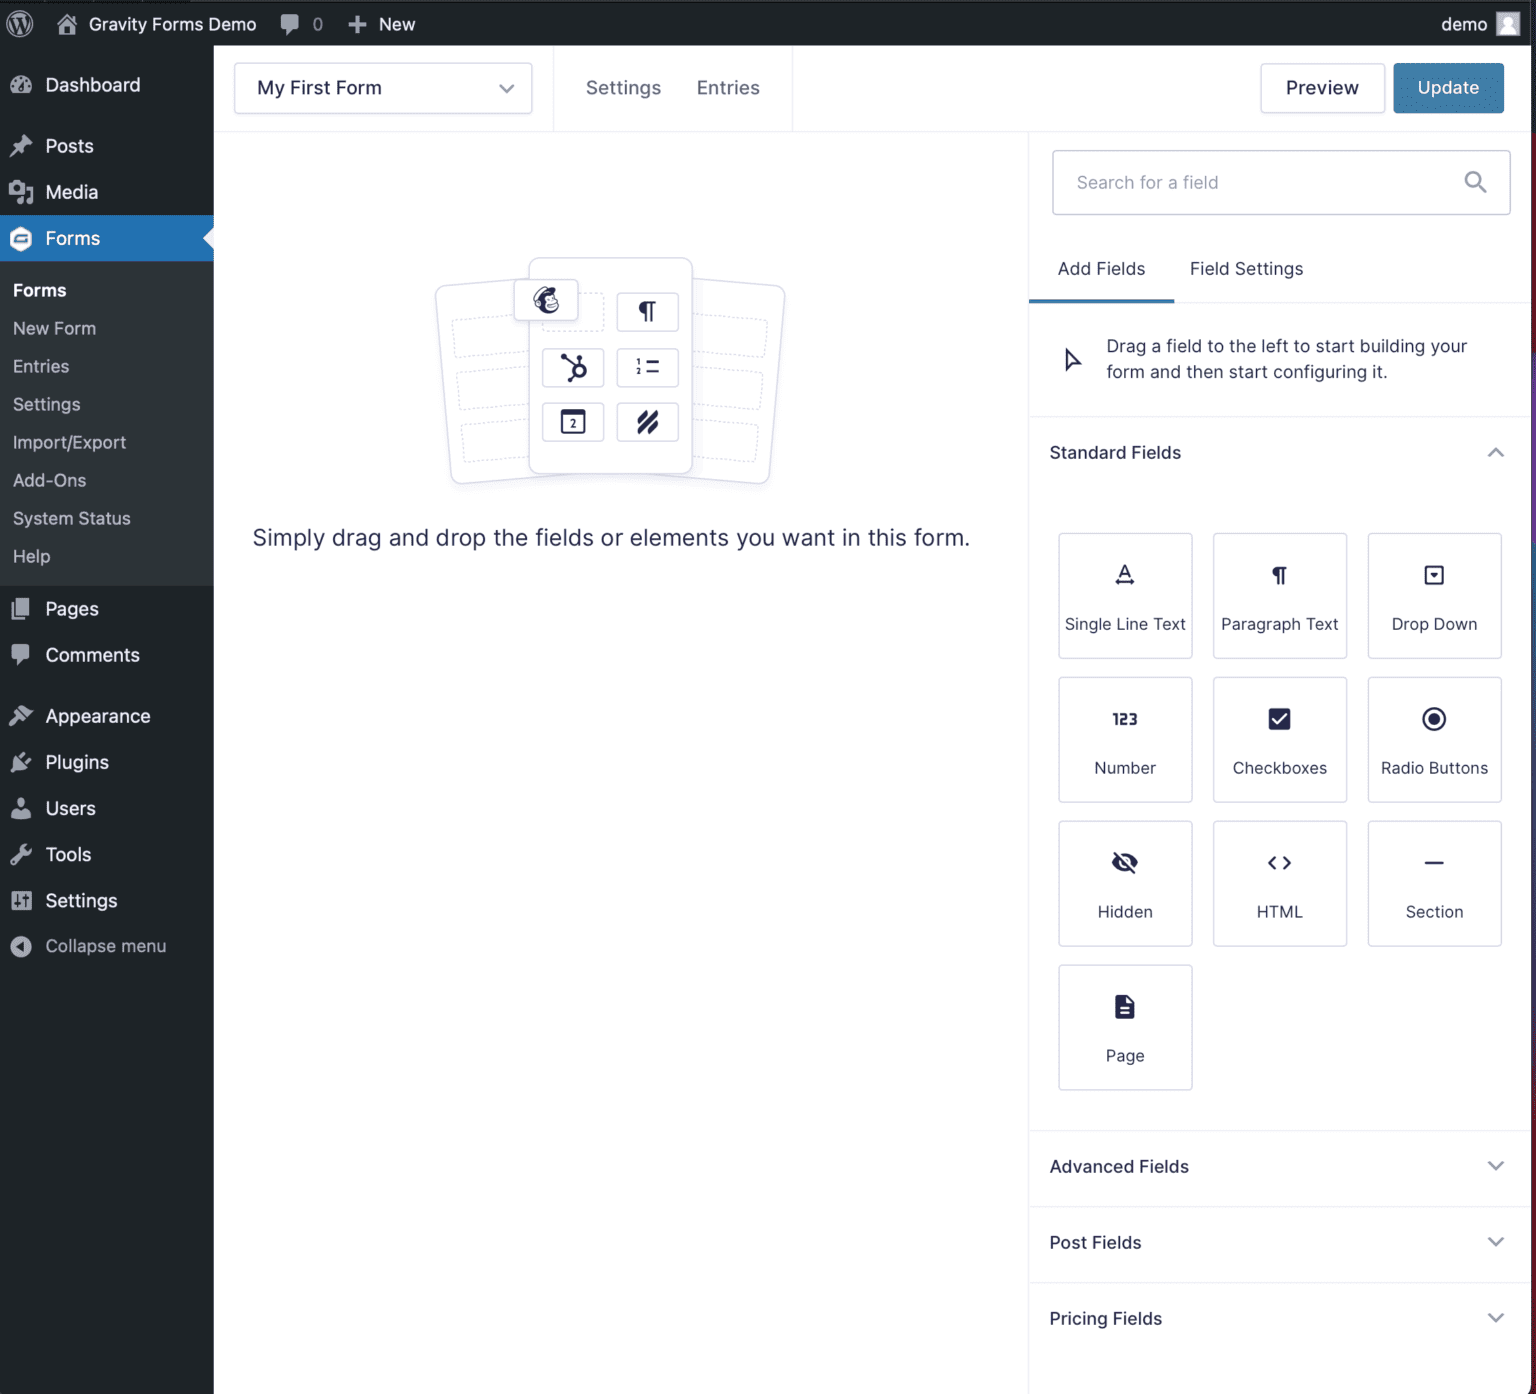
The Gravity Forms form editor provides a user-friendly interface that permits you to build and customize your form. Here’s an overview of the key components of the form editor:
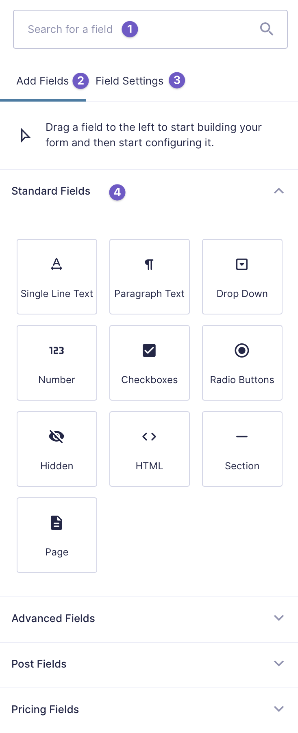
- Form Fields: The left-hand side of the form editor displays a list of form fields that you can drag and drop into your form. These include common fields like text fields, checkboxes, radio buttons, dropdown menus, and more.
- Form Preview: In the center of the form editor, you can see a live preview of your form as you design it. This allows you to visualize how your form will appear to users.
- Form Settings: On the right-hand side of the form editor, you will find various tabs that allow you to configure form settings, notifications, confirmations, and more. These settings provide greater control over how your form functions and behaves.
Adding and Customizing Form Fields
To add form fields to your form, simply drag and drop them from the left-hand side of the form editor into the preview area. Gravity Forms offers a wide range of form field options to choose from.

Once you’ve added a form field, you can customize it by clicking on the field in the preview area. This will open a settings panel on the right-hand side, where you can configure various options specific to that field. You can set field labels, placeholders, validation rules, and more.
Setting up Form Settings and Confirmations
Gravity Forms provides various settings and configurations that allow you to customize the behavior of your form. Here are some key settings you can explore:
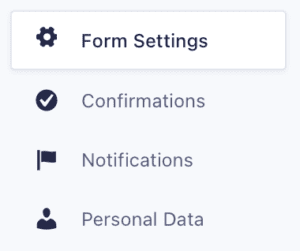
- Form Settings: Under the “Form Settings” tab, you can configure general settings for your form, such as form title, description, and availability schedule. You can also enable features like AJAX form submission, form saving, and limiting the number of entries.
- Notifications: The “Notifications” section lets you set up email notifications that are sent to specific recipients when a form is submitted. You can customize the email content, recipients, and even conditional notifications based on user input.
- Confirmations: The “Confirmations” tab allows you to customize the message or page displayed to users after they submit the form. You can choose to show a simple message, redirect users to a specific page, or even dynamically display content based on user input.
Saving and Managing Forms
As you work on your form, it is important to save your progress regularly. Gravity Forms automatically saves changes as you make them, but it is recommended to manually save the form when you reach important milestones.
To manage your forms, you can access the “Forms” page from the Gravity Forms dashboard. This page displays a list of all your created forms, allowing you to edit, duplicate, delete, or view form entries.
Congratulations! You have now learned how to create a form using the Gravity Forms plugin. In the next section, we will explore how to add the form to a WordPress page, making it accessible to your website visitors.
Adding the Form to a WordPress Page
Once you have created your form using Gravity Forms, the next step is to add it to a WordPress page. In this section, we will explore two methods for adding the form to your page: using shortcodes and using Gutenberg blocks.
Using Shortcodes to Embed the Form
Gravity Forms provides a shortcode for each form you create, which allows you to easily embed the form on any WordPress page or post. Here’s how to use shortcodes to add the form:
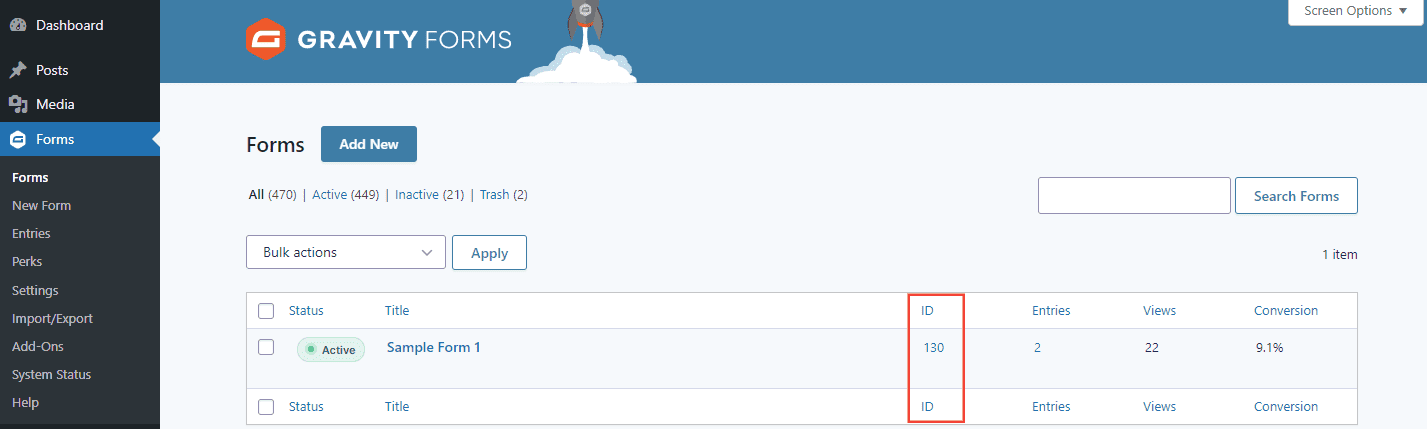
- Copy the Form Shortcode: From the Gravity Forms dashboard, go to the “Forms” page and locate the form you want to add to your page. There, you will find a shortcode enclosed, such as [gravityform id= “1”]. Copy this shortcode to your clipboard.
- Edit the WordPress Page: Navigate to the WordPress page where you want to add the form. From the admin dashboard, go to “Pages” and select an old page you want to edit, or you can even create a new page.
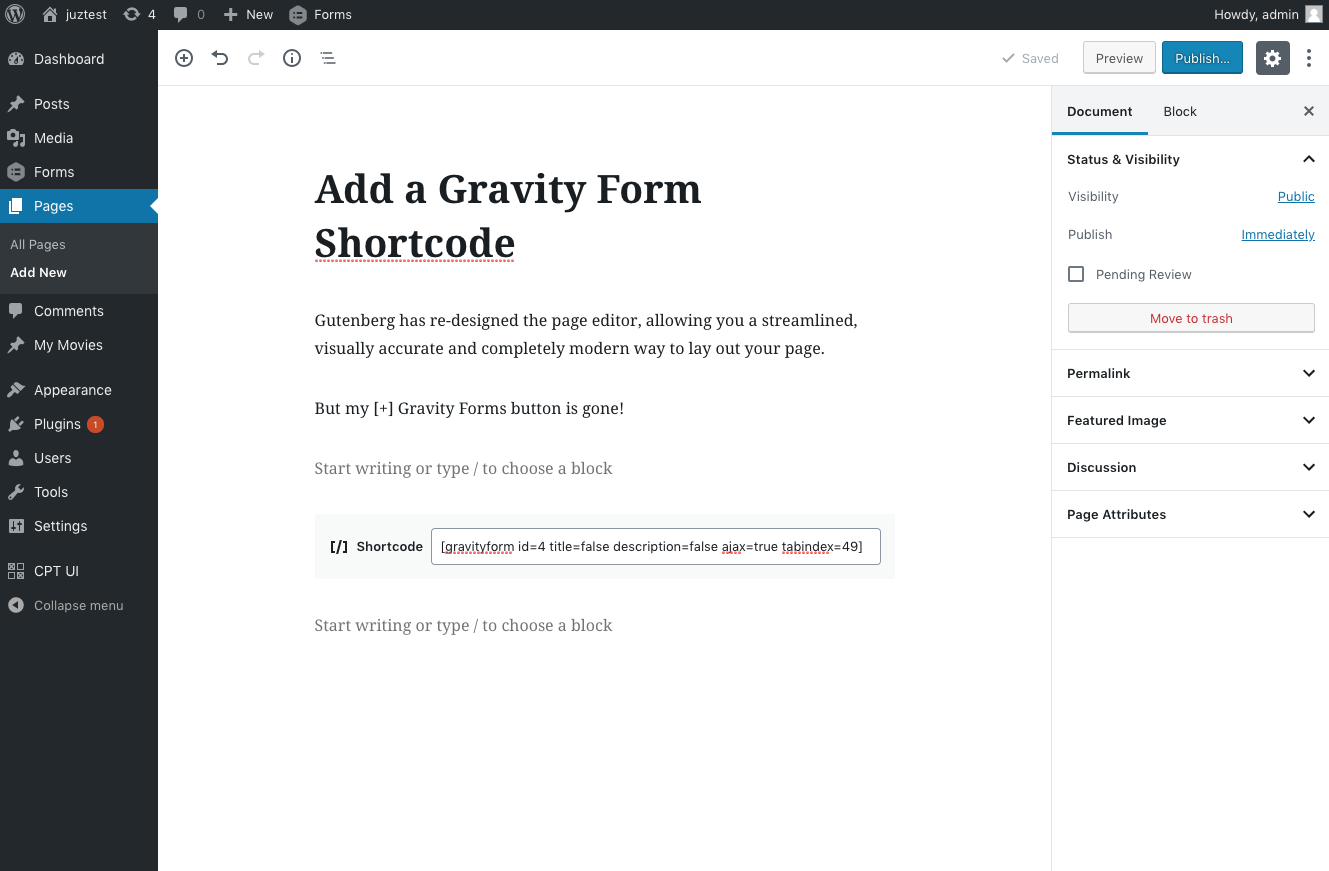
- Paste the Form Shortcode: In the page editor, place your cursor at the position where you want to add the form. Then, simply paste the shortcode you copied earlier. The shortcode will be substituted with the actual form when you view the page.
- Update or Publish the Page: After adding the shortcode, make any additional changes or content updates to the page as needed. Lastly, click the “Update” or “Publish” button to save the changes and make the form live on the page.
Using Gutenberg Blocks to Add the Form
If you have implemented the Gutenberg editor in WordPress, you can also add your Gravity Form using Gutenberg blocks. Here’s how to do it:
- Edit the WordPress Page: Navigate to the WordPress page where you want to add the form. From the admin dashboard, go to “Pages” and select an old page you want to edit or create a new page.
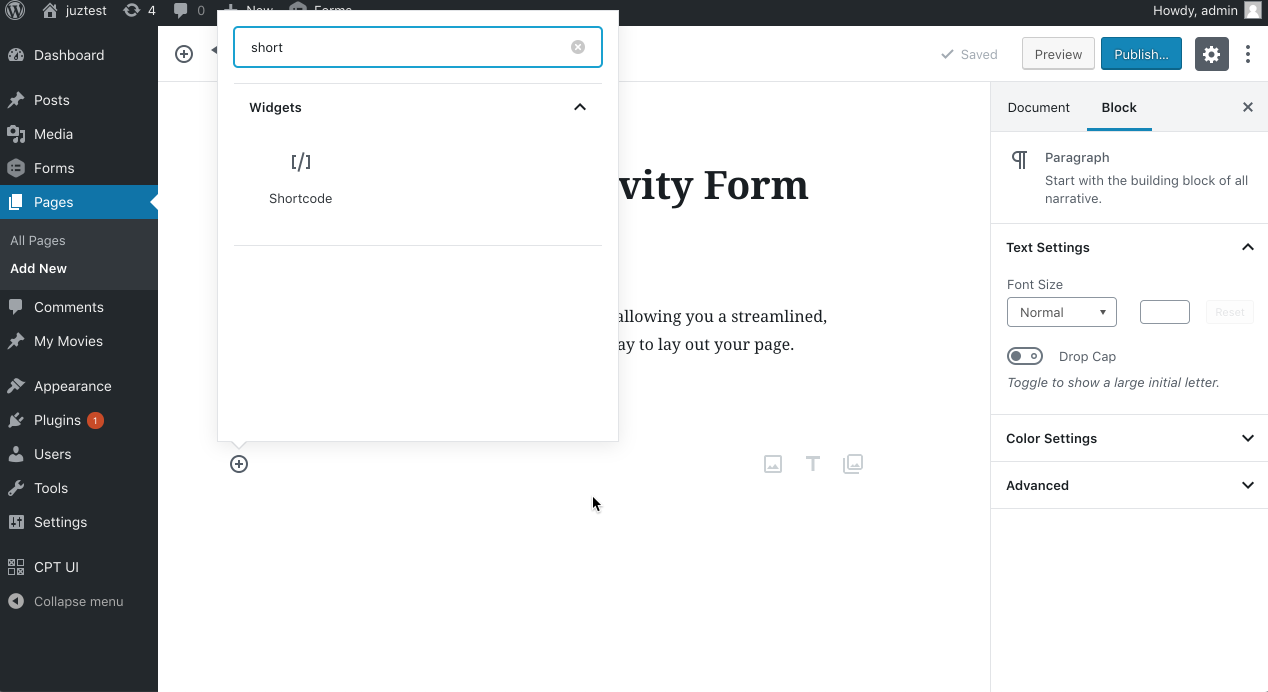
- Add a Gutenberg Block: In the page editor, click on the “+” icon to add a new block. Search for “Gravity Forms” or scroll down to find the Gravity Forms block.

- Select the Form: Once you’ve added the Gravity Forms block, a dropdown menu will appear where you select the form you want to add from the list of available forms.
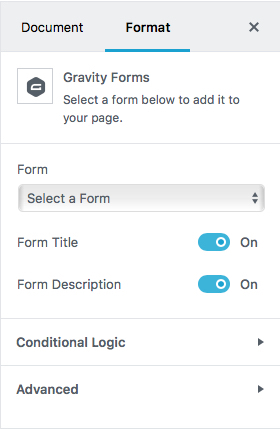
- Customize the Form Block: After selecting the form, you can tailor the appearance and settings of the form block using the block toolbar and sidebar options. You can adjust the alignment, width, and other display settings.
- Update or Publish the Page: After customizing the form block, make any additional changes or content updates to the page as needed. Lastly, click the “Update” or “Publish” button to save the changes and make the form live on the page.
Adjusting Form Display Settings
Gravity Forms provides various settings to control the display and behavior of the form on your WordPress page. To access these settings, go to the “Forms” page in the Gravity Forms dashboard and click on the form you want to modify. From there, you can explore options such as form layout, button styling, conditional logic, and more.
By adjusting these form display settings, you can ensure that the form seamlessly integrates with your WordPress page and matches your website’s design and branding.
Congratulations! You have successfully added your Gravity Form to a WordPress page using either shortcodes or Gutenberg blocks. In the next section, we will cover how to test the form and manage form submissions to ensure everything is functioning as expected.
Testing and Managing Form Submissions
After adding a Gravity Form to your WordPress page, it is essential to thoroughly test the form to ensure it functions correctly. Additionally, you will want to have a system in place for managing and reviewing form submissions. In this section, we will cover the steps to test the form and manage form submissions effectively.
Testing the Form
- Preview the Form: Before testing the form, use the preview feature in Gravity Forms to see how the form appears to users. This allows you to review the form layout, field validation, and any conditional logic you have implemented.
- Submit Test Entries: Fill out the form with test data and submit it to ensure that the form submission process is working as expected. Test various scenarios, such as leaving required fields blank, entering invalid data, and selecting different options in conditional fields.
- Check Notifications: Verify that email notifications are being sent to the designated recipients upon form submission. Check the content, formatting, and delivery of the emails to ensure they meet your requirements.
- Test Integrations: If you have integrated your form with third-party services, like payment gateways or email marketing platforms, perform test transactions or subscriptions to ensure that the data is being successfully passed to those services.
Managing and Exporting Form Entries
Gravity Forms provides a convenient way to manage and review form entries within the WordPress dashboard. Follow these steps to effectively manage and export form submissions:
- Access Form Entries: From the Gravity Forms dashboard, go to the “Forms” page and click on the form you want to manage entries for. Then, click on the “Entries” tab to view a list of form submissions.
- Review Form Entries: In the entries view, you can review individual form entries, including all the data submitted by users. You can sort, filter, and search entries to find specific submissions.
- Export Form Entries: To export form entries, select the desired entries or choose to export all entries. Gravity Forms allows you to export entries in various formats, such as CSV, Excel, or XML. This is useful for further analysis or integration with other systems.

- Configure Entry Notifications: Gravity Forms also provides the option to set up entry notifications, which can be sent to specific recipients whenever a form submission is received. This helps ensure that you promptly receive notifications of new form entries.
Troubleshooting Common Issues
Sometimes, you may encounter issues or errors while testing or managing your Gravity Forms. Here are some common issues and troubleshooting steps you can take:
- Validation Errors: If users are encountering validation errors or having trouble submitting the form, review the form settings and field configurations to ensure they are set up correctly. Check for any missing required fields or incorrect validation rules.
- Email Notification Issues: If email notifications are not being received or are landing in spam folders, verify that the email settings in Gravity Forms are correct. Make sure that the email addresses are entered correctly and that your server is properly configured to send emails.
- Integration Problems: If you are experiencing issues with third-party integrations, double-check the integration setup and ensure that the necessary credentials or API keys are correctly entered. Verify that the integration plugins or services are up to date.
- Conflicting Plugins or Theme: In some cases, conflicts with other plugins or themes can affect the functionality of Gravity Forms. Temporarily deactivate other plugins or switch to a default WordPress theme to identify and resolve any conflicts.
By effectively testing your form, managing form submissions, and troubleshooting common issues, you can ensure that your Gravity Forms are running smoothly and collecting data seamlessly.
Conclusion
Congratulations! You have now learned how to test and manage form submissions in Gravity Forms. This concludes our comprehensive guide on how to add a Gravity Form to a WordPress page. We hope this information has been helpful in enhancing your website’s interactivity and data collection capabilities.
