
Did you know that 99.7% of all websites using tag managers use Google Tag Manager? This represents 49.3% of all web pages.
Google Tag Manager lets you add tracking code snippets to your WordPress site. It’s a free program that allows you to monitor various user actions.
In this post, we’ll teach you how to install and configure Google Tag Manager in WordPress correctly, as well as discuss its benefits.
What is Google Tag Manager?
Google Tag Manager, a tool provided by Google for free, simplifies the process of deploying and updating various code snippets, known as ‘tags,’ on your website.

Services such as Google Analytics, Adobe Analytics, Facebook Pixel, and advertising tools like Google Ads often require adding specific lines of JavaScript or HTML code to integrate their functionalities into your website.
You can manage all of these code snippets with Google Tag Manager, which removes the need for you to manually change the code on your website.
In addition to handling tracking snippets, Google Tag Manager also facilitates the integration of additional tracking functionalities into Google Analytics. This includes tracking actions on your website that aren’t automatically monitored by default, such as eCommerce transactions, button clicks, form submissions, and more.
While the concept may seem straightforward, configuring the various tags and triggers required for these tracking features can become quite complex. Moreover, the tutorials available for setting up these functionalities tend to be lengthy and detailed.
Benefits of Google Tag Manager
Google Tag Manager enables you to manage many tags from different sources in one location. This unified method streamlines the process of adding, modifying, and deleting tags from your website.
- Customization Options: With Google Tag Manager, you can create custom tags tailored to your specific tracking needs. Additionally, you can connect your website with third-party services by integrating custom tags enhancing flexibility and functionality.
- Access to Pre-built Tags and Templates: Google Tag Manager provides pre-built tags, including options for integrating Google Analytics and Google Ads. Moreover, it offers access to a community template gallery, where you can find tag templates for popular third-party services. This extensive library streamlines the setup process for various tracking functionalities.
- Simplified Deployment: By using Google Tag Manager, you can deploy tags without directly editing your website’s code. This eliminates the need to modify WordPress core files, declining the risk of errors and streamlining the deployment process.
- Tracking and Monitoring: Google Tag Manager keeps track of changes made to tags and provides insights into tag performance. Additionally, it facilitates event tracking in Google Analytics, allowing you to monitor user interactions and behaviors on your website effectively.
Create an Account and set up Google Tag Manager
First, visit the official website of Google Tag Manager, click on Start for free, and create an account.

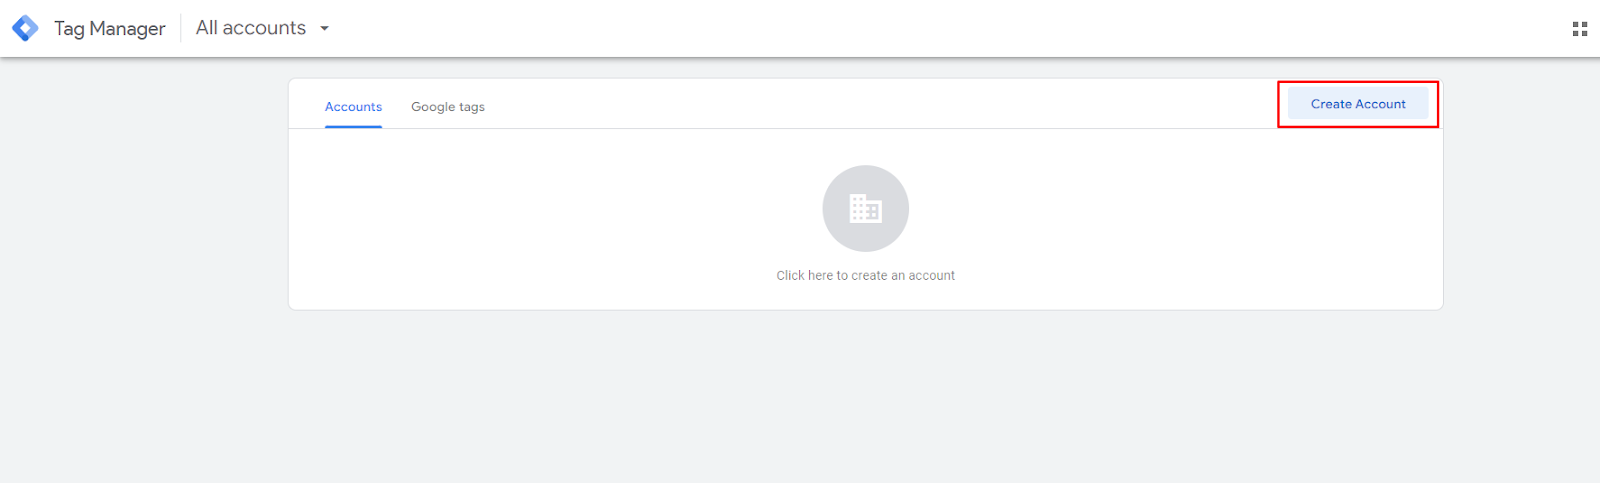
After logging in, you’ll land on the page to add a new account.
- Click on the ‘Create Account’ button.
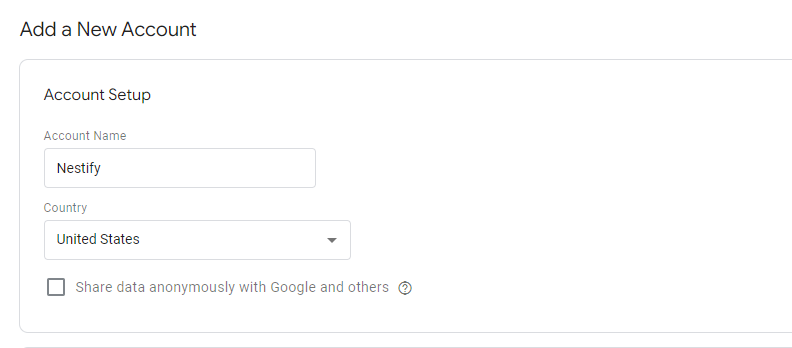
- Now, give your account a name and select your country from the list.
- You have the option to share data with Google anonymously by ticking a box.
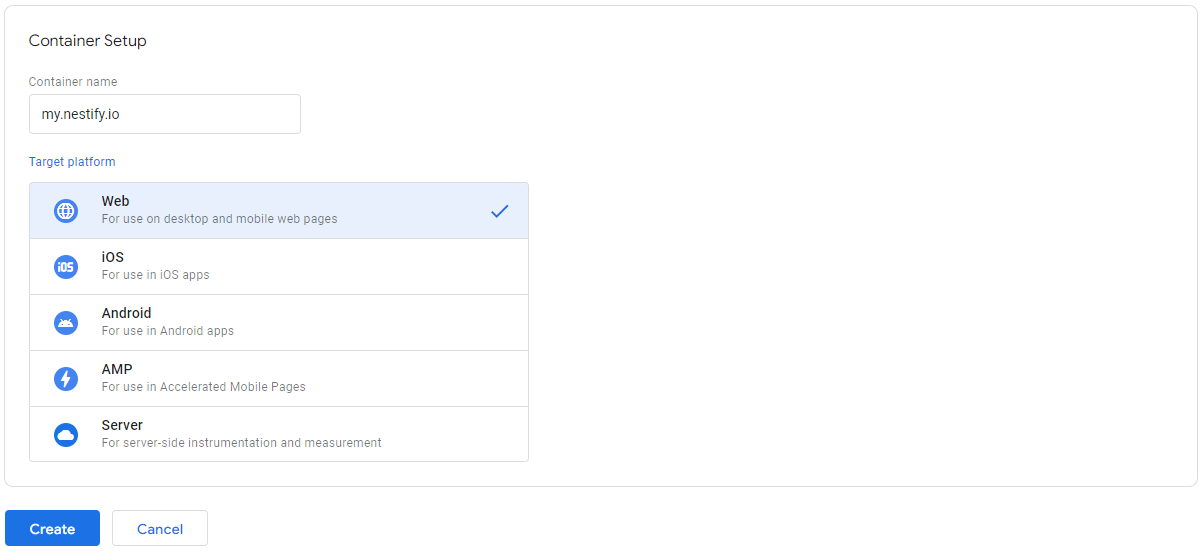
- Next, add a container to your account. This could be for a website, iOS or Android apps, or a server.
- We’ll choose the ‘Web’ option here.
- Use your website’s domain as the container name. Once done, click ‘Create’.
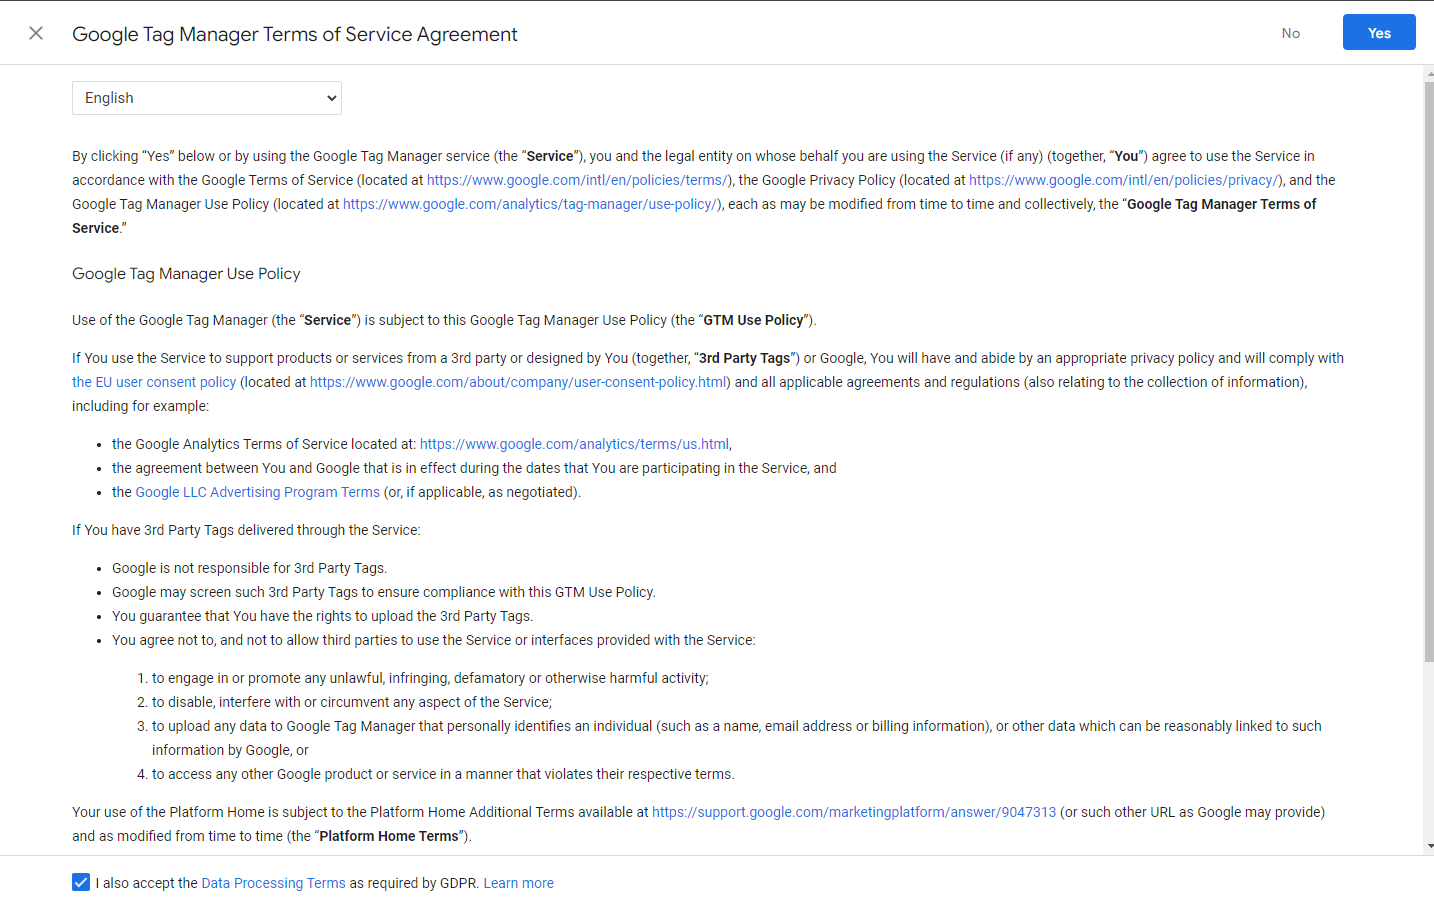
- You’ll see a new window with Google Tag Manager’s terms of service agreement.
- Accept the terms by ticking the box and then clicking ‘Yes’.
Google Tag Manager will create your account.
Next, it will display tracking codes you need to add to your site.
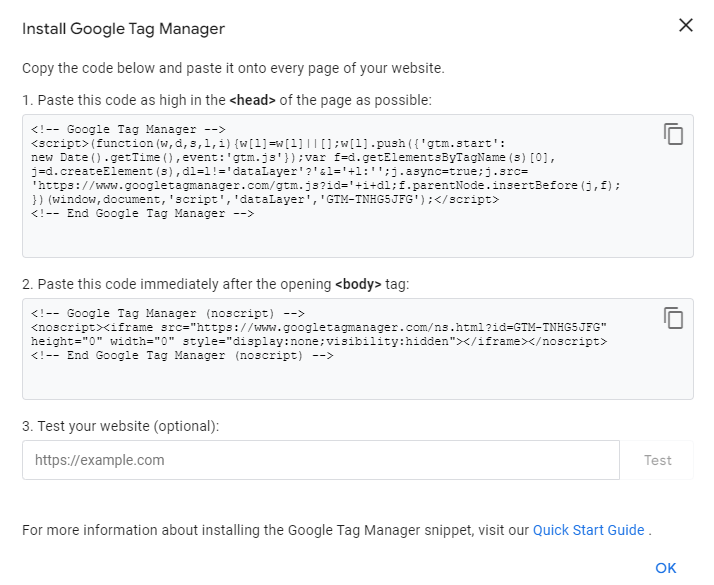
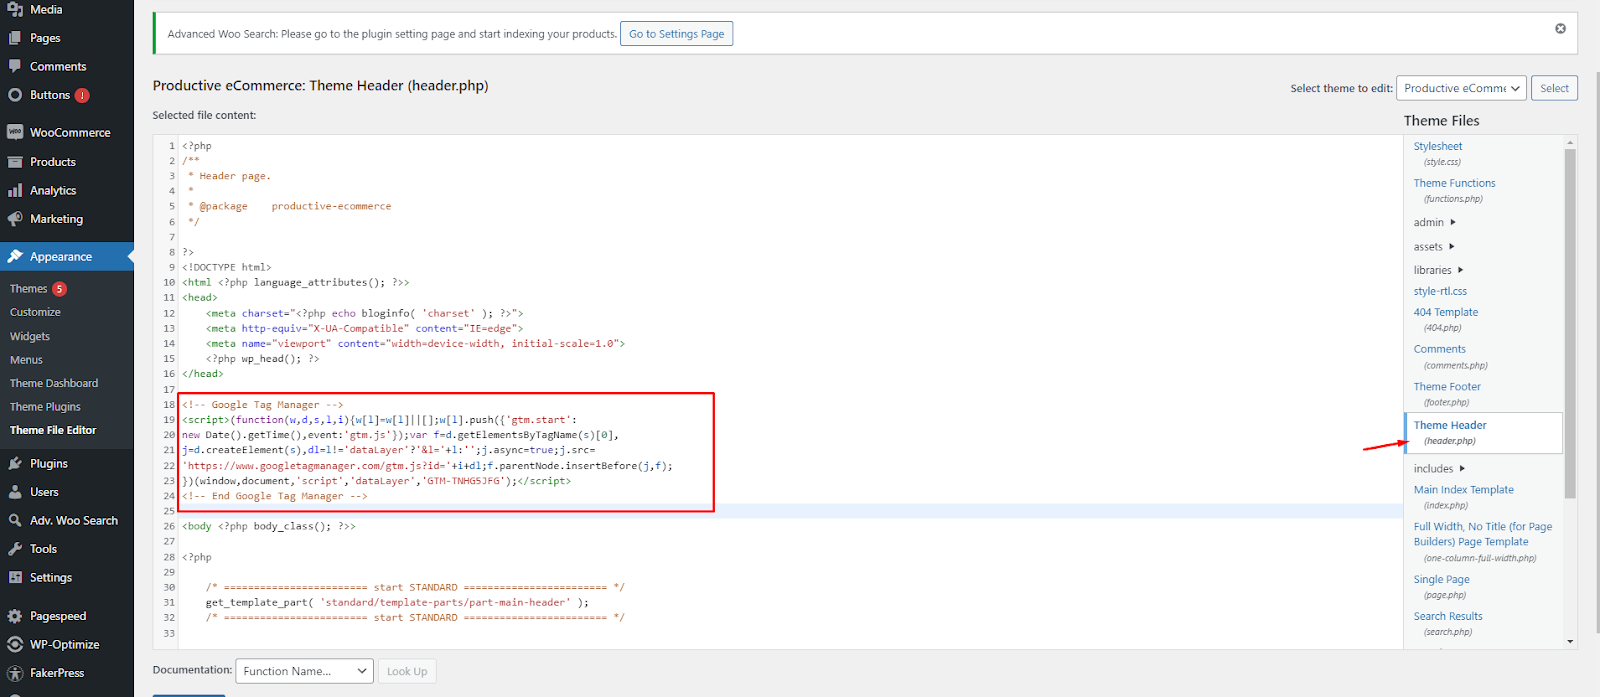
Simply copy these two codes. You’ll need to paste them into the header and body sections of your WordPress website.
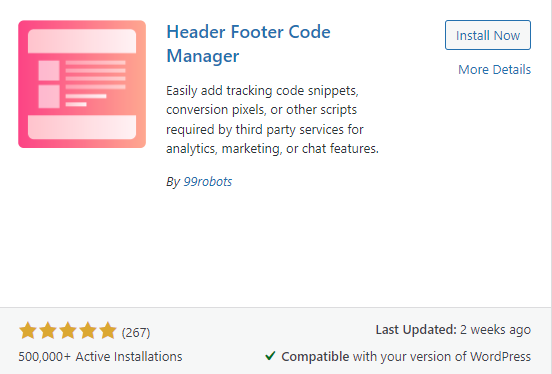
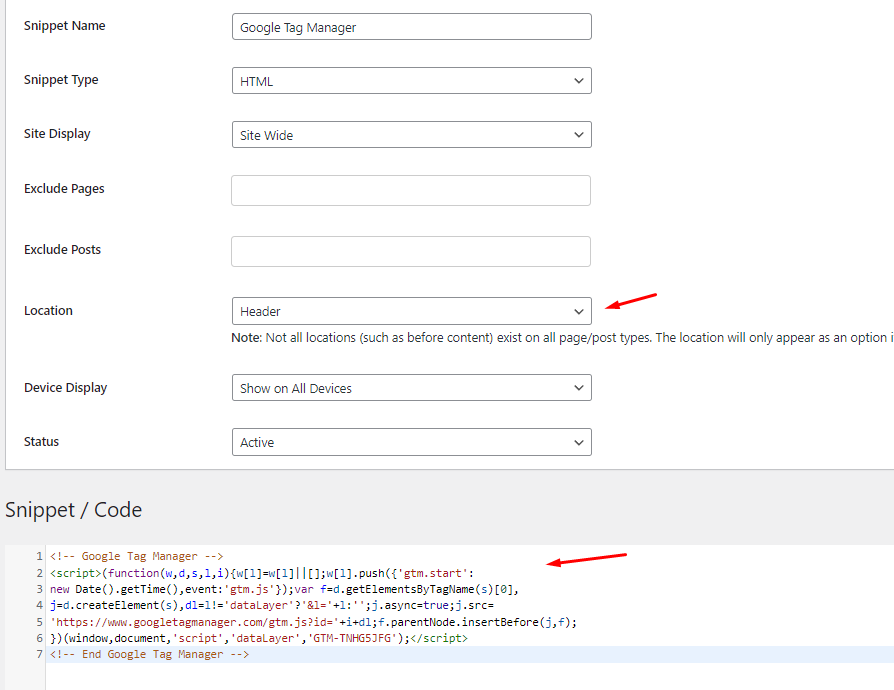
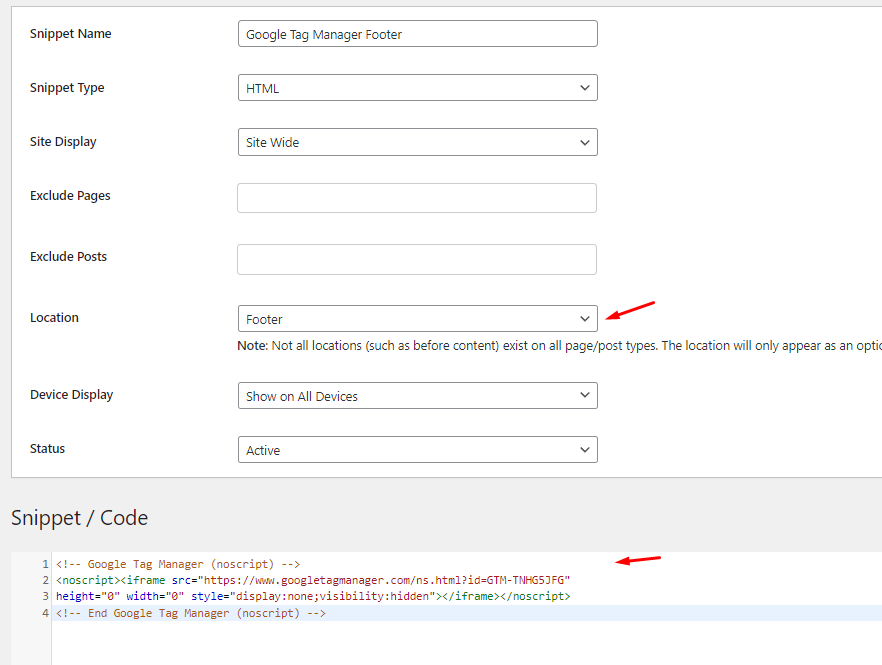
If the above method is not working, then use the Header Footer Code Manager; just click on Install Now and Activate the plugin.
You can find the plugin directly below Settings – HFCM to Snippets and click Add New Snippet.
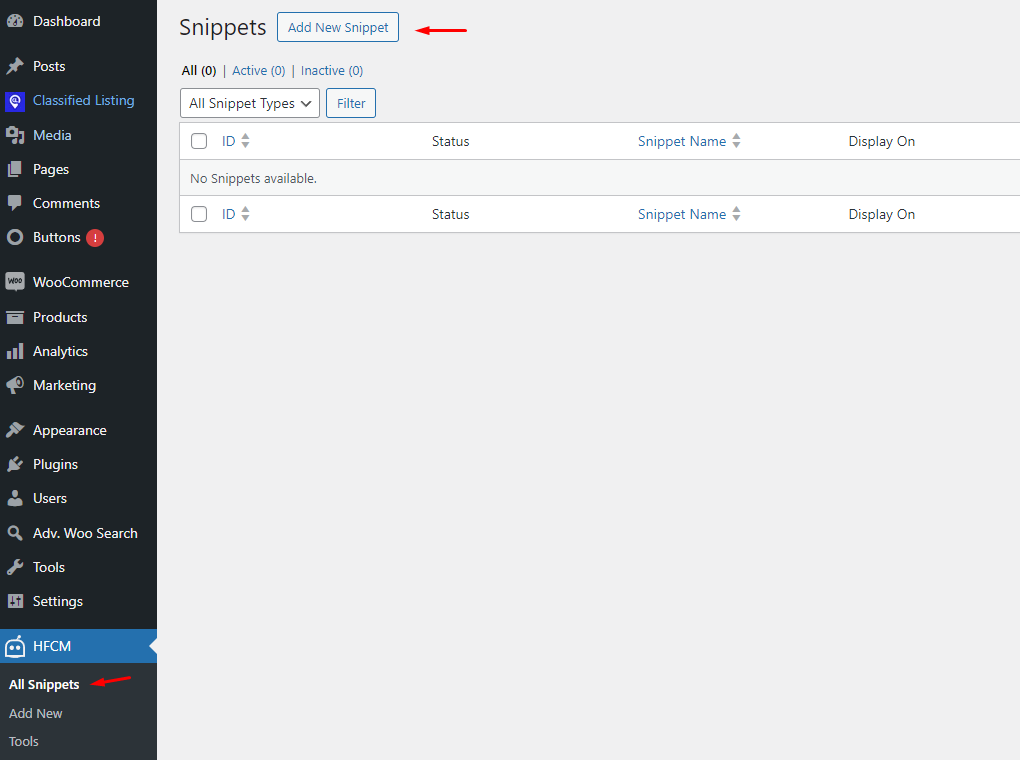
There, give the snippet its name, its type, and its location (Header). The first code will go to the Header, and the second code will go to the Footer.
Here is an example:
- 1st code:
- 2nd code.
Benefit of Header Footer Code Manager
- Prevents accidental placement of code snippets in the wrong location.
- Reduces the need for multiple plugins to add small code snippets, promoting a cleaner plugin environment.
- Ensures that code snippets are retained when switching or changing themes.
- Provides clear visibility into which snippets are active on your site, where they are displayed, and who added them.
- Allows for the addition of different snippets targeting specific post types using the Specific Post Types feature.
Wrapping up
Installing and setting up Google Tag Manager in WordPress offers significant benefits for website owners seeking to streamline tracking and analytics functionalities. By centralizing tag management and simplifying the process of deploying various tracking codes, Google Tag Manager enhances the efficiency and effectiveness of website analytics.
Furthermore, its customization options and compatibility with third-party services make it a versatile tool for optimizing website performance and user experience. By following the steps outlined in this guide, you can seamlessly integrate Google Tag Manager into your WordPress site and leverage its powerful capabilities to gain practical insights into visitor behaviour and site performance.
FAQs on Google Tag Manager
What is Google Tag Manager, and why should I use it?
A free tool called Google-Tag-Manager makes it simpler to set and maintain tracking codes, or “tags,” on your website. It provides centralized tag administration, customization possibilities, and connectivity with third-party services, making it an indispensable tool for boosting website analytics and tracking features.
How do I install Google Tag Manager on my WordPress site?
To install Google-Tag-Manager on your WordPress site, you must first establish an account, then configure a container for your website and add the given tracking codes to the header and body sections. The handbook contains detailed instructions.
Can I use Google Tag Manager with other analytics tools?
Yes, Google Tag Manager works with a variety of analytics systems, including Google Analytics, Adobe Analytics, and Facebook Pixel. You may simply include these features into your WordPress site by using Google-Tag-Manager’s configurable tags and triggers.
Will installing Google Tag Manager slow down my website?
No, Google Tag Manager itself does not significantly impact website speed. However, poorly optimized tags or excessive tracking codes added through Google-Tag-Manager can potentially slow down your site. It’s essential to manage tags efficiently and regularly audit your tracking implementations to ensure optimal website performance.
Can I track specific actions or events on my WordPress site using Google Tag Manager?
Yes, Google-Tag-Manager lets you track particular activities or occurrences on your WordPress site, like button clicks, form submissions, and eCommerce transactions. You can use custom tags and triggers to efficiently monitor user interactions and behaviours.
