

You might want users to register or create profiles on your WordPress website. This is crucial if you want users to build a community on your website that includes subscribers and contributors.
In this simple guide, I will walk you through managing users and enabling user registration on your WordPress website.
Let’s look at why user registration is essential for your website before we learn how to enable it in WordPress.
Why Enable User Registration in WordPress?
An admin can quickly add a new user from the dashboard. You can easily create a user profile with the information and a password.
However, how feasible is it to create hundreds of users? Users must be able to register through your front end for this reason.
Additionally, by allowing user registration, you can accept and publish user-generated content on your WordPress blog, such as posts, comments, images, videos, and more.
Owning an online store can boost customer engagement by providing registered users access to unique content or deals.
In addition to boosting user engagement and loyalty, this allows you to gather email addresses from users during the registration process, which can aid in developing an email list.
Let’s look at how to enable WordPress user registration quickly.
How to Assign A User Role
Assigning a user role is very simple.
Go to Settings > General > Membership in the WordPress Dashboard
Below the membership option, you will see the ‘New User Default Role” option.
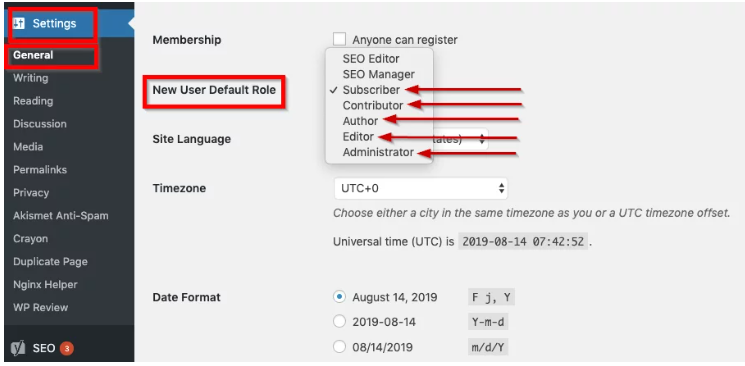
This option allows you to quickly assign a default role to each new registered user.
As an Administrator, you can manage and change the user role at any point.
Enabling User Registration in WordPress
Three basic ways are in which you can enable User Registration in WordPress. I have listed them with the appropriate steps below. They all are easy to understand and follow, but I have started with the easiest one. Let’s dive in:
- Allow Users to Register on Your Website
WordPress can manage user registrations built right in. By default, it is off, but you can quickly turn it on.
First things first, sign in as admin to your WordPress website. Next, select the “Membership” option from the Settings tab’s General section.
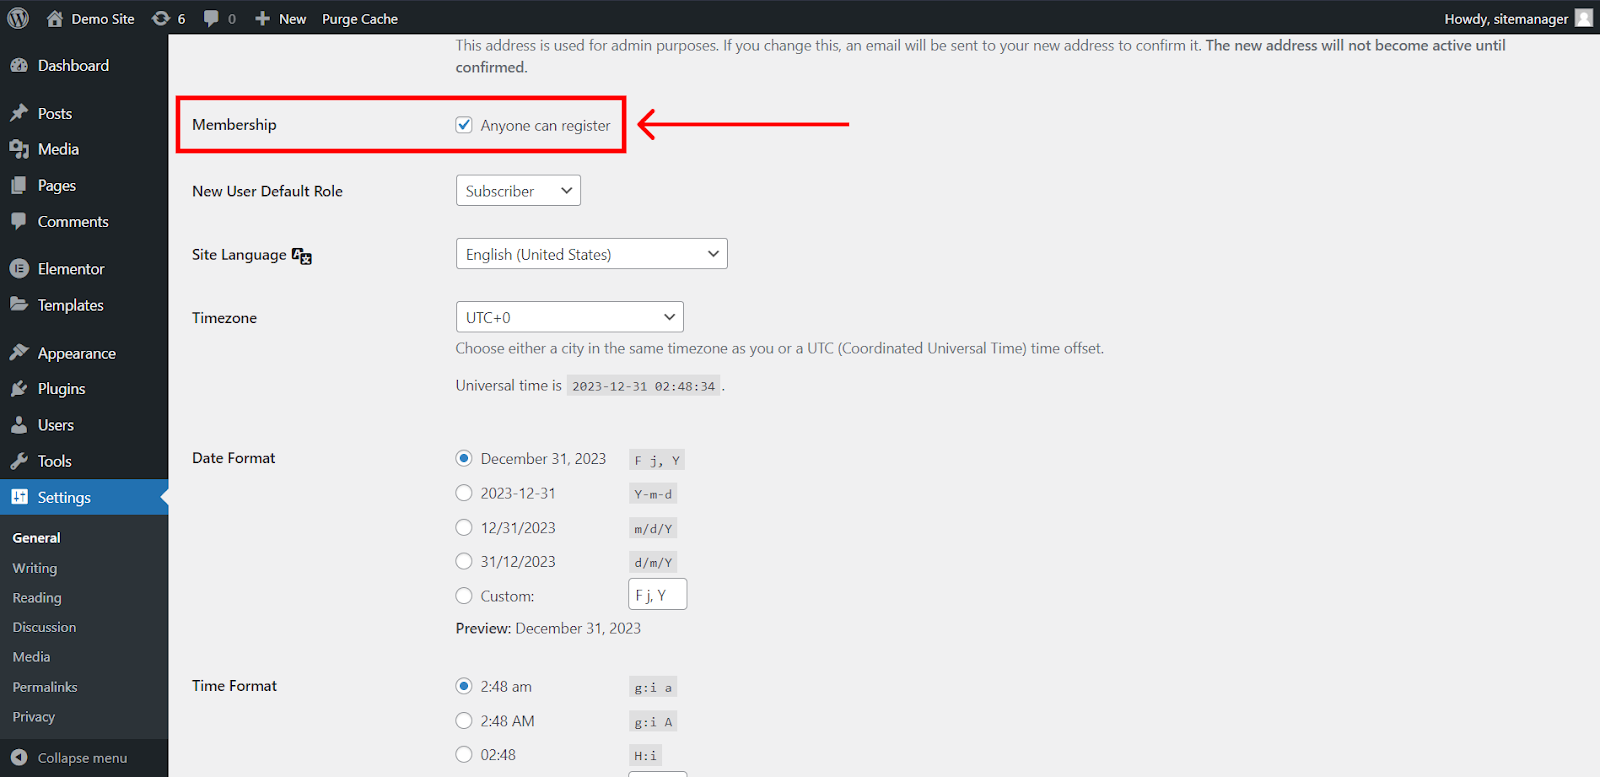
It keeps users from registering on your website when it is disabled. Users won’t hesitate to register themselves on your website once you enable this.
Press the Save Changes menu item. Users will now have access to your website’s registration form.
You can use WordPress’s default registration form, which has a small number of fields and features. You’re right—it’s monotonous!
For this reason, we will design a unique registration form for our website with more functionality and sophisticated features.
Also read: Membership Website: Everything You Need To Know To Create A Fabulous One!
- Install and Activate the User Registration Plugin
User Registration is one of the best plugins for creating a personalized registration form with incredible features and potential.
It’s a user-friendly tool lets you add fields to your WordPress website with a drag-and-drop interface.
You receive a seamless building experience and astute user management tools.
For example, you can monitor user registrations using a separate dashboard, limit user access, assign roles to users through forms, etc.
We’ll use this well-liked plugin in this guide to create a custom registration form because of all its excellent features.
Therefore, you must install and activate the plugin on your website first. You can check out my guide for more information on installing and activating a WordPress plugin.
After the installation is finished, a welcome page will appear.
You have the option to Get Started from here. This setting aids in configuring your pages and plugins.
If not, click Skip to Dashboard to access the admin dashboard for your website.
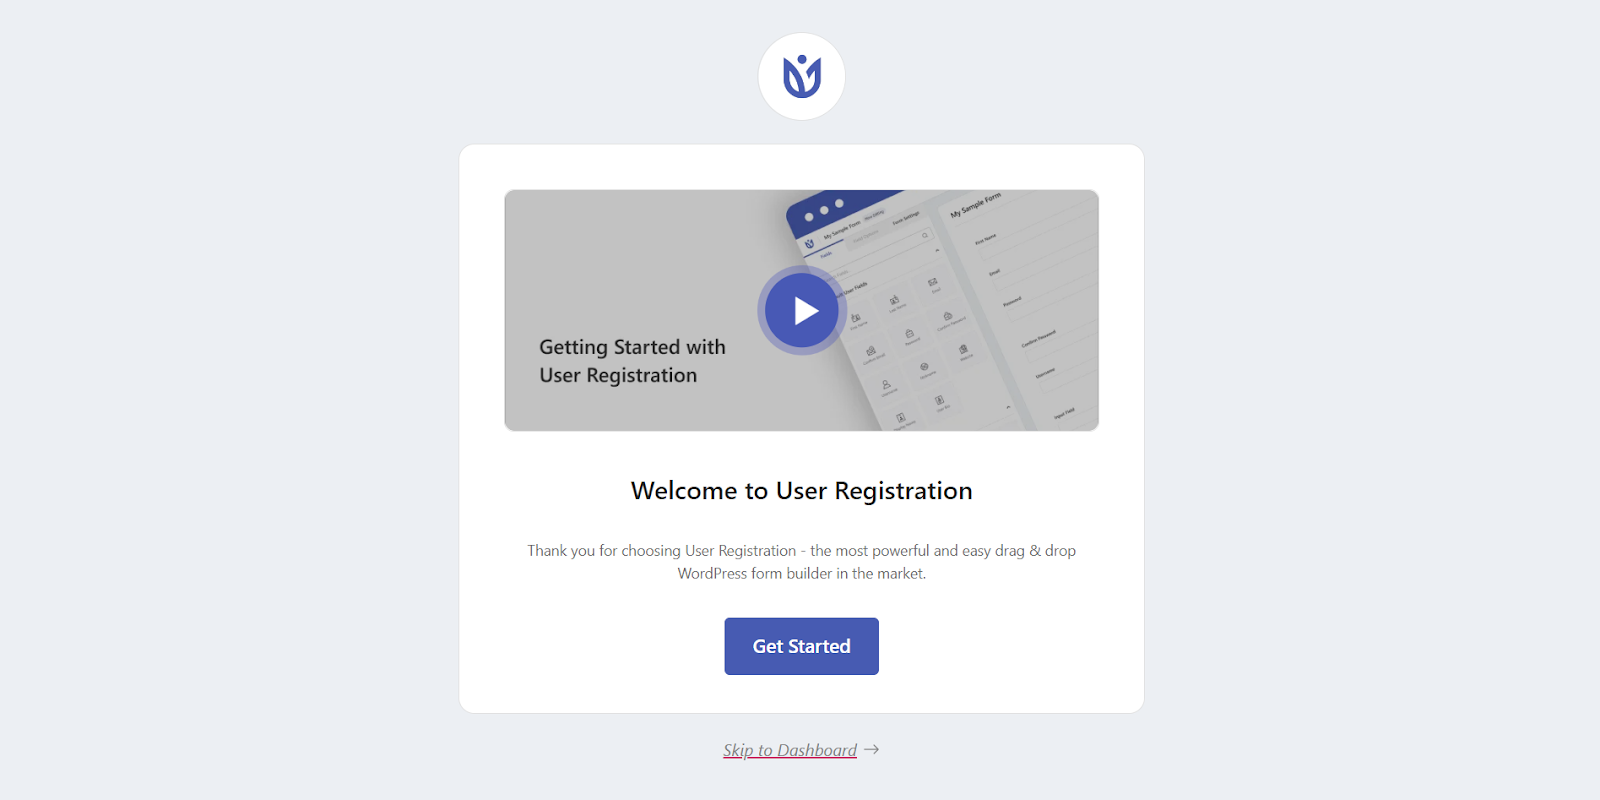
Let us now examine the setup procedure. To get started, just click the Get Started button.
First, you’ll reach the Install Pages step. The plugin automatically installs the built-in Default Registration Form on your website.
The Registration and My Account Page will be installed after you click the Install & Proceed button.
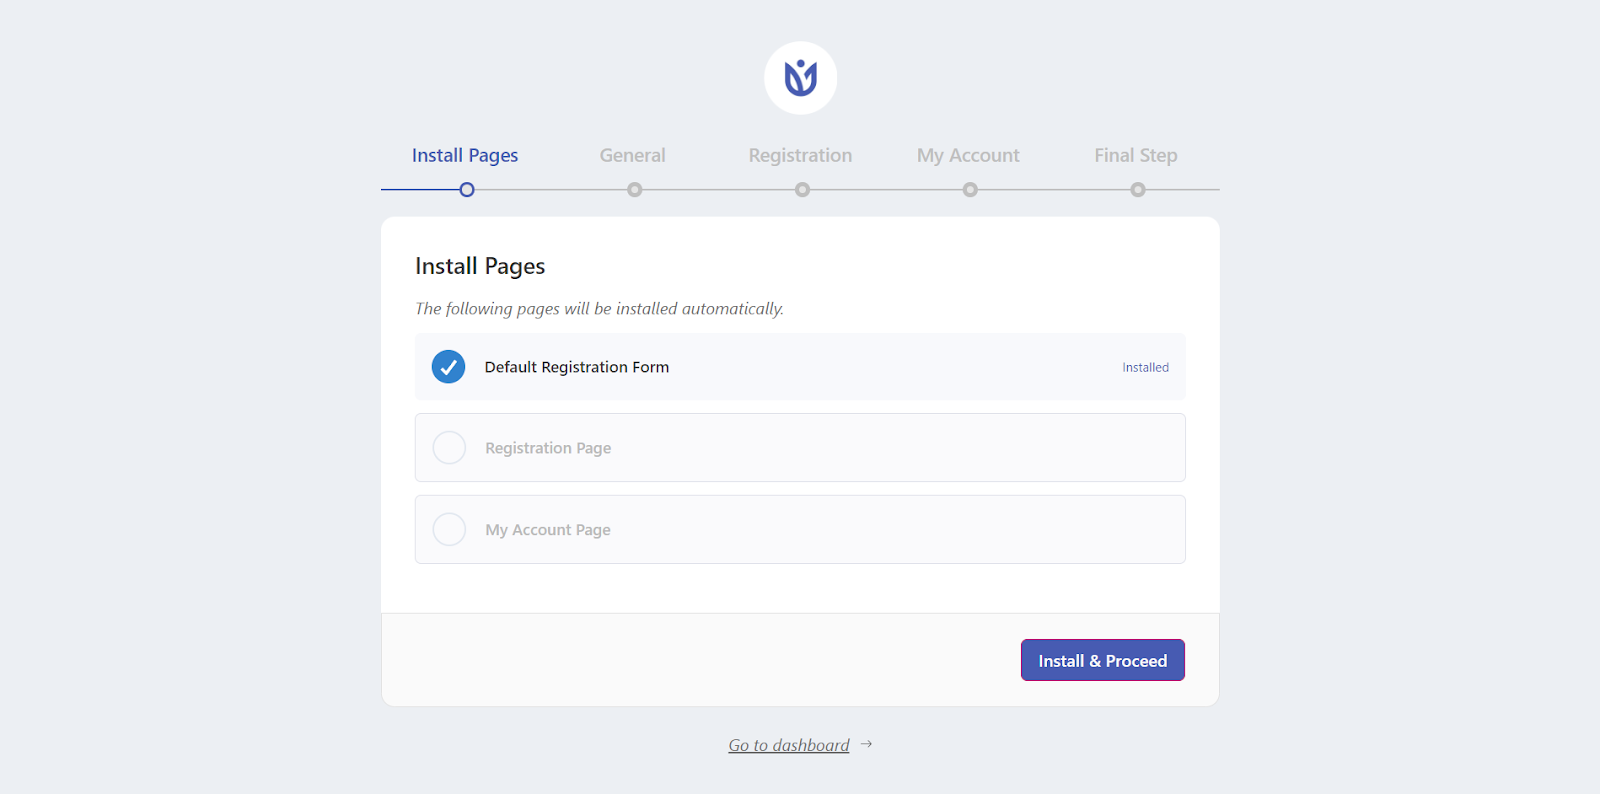
The pages are located on the Dashboard’s Pages tab. This means you can use these sample pages instead of starting from scratch when creating a user profile page and registration page.
To access the General options once the installation is finished, click Next.
As you can see, the option Anyone can Register is activated by default. Leave this enabled to allow user registration for front-end forms you create with User Registration.
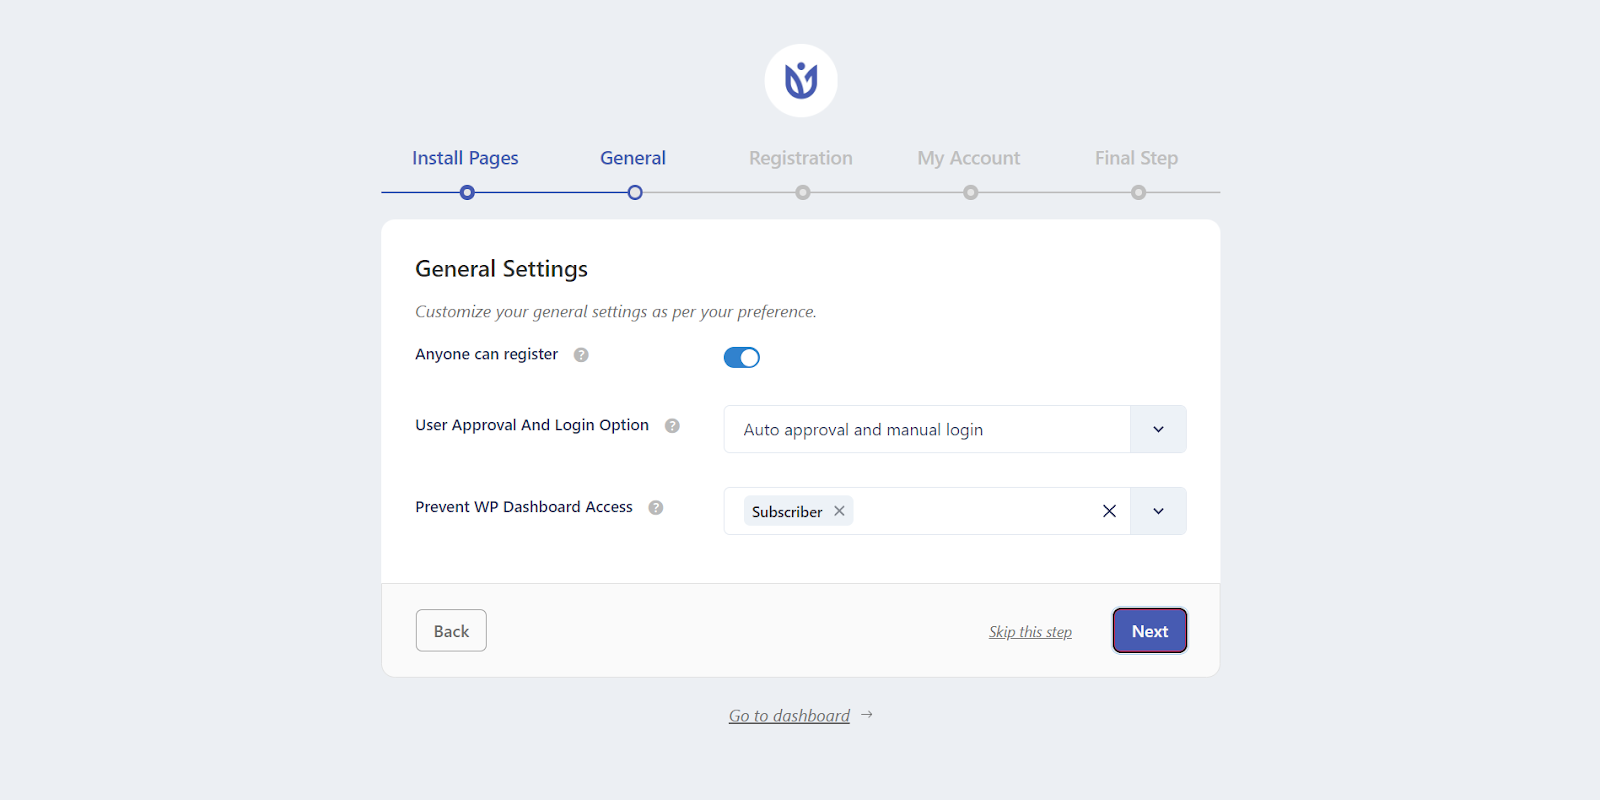
Click Next after completing the General options. To proceed to the Final Step, set up the remaining options for Registration, Login, and My Account.
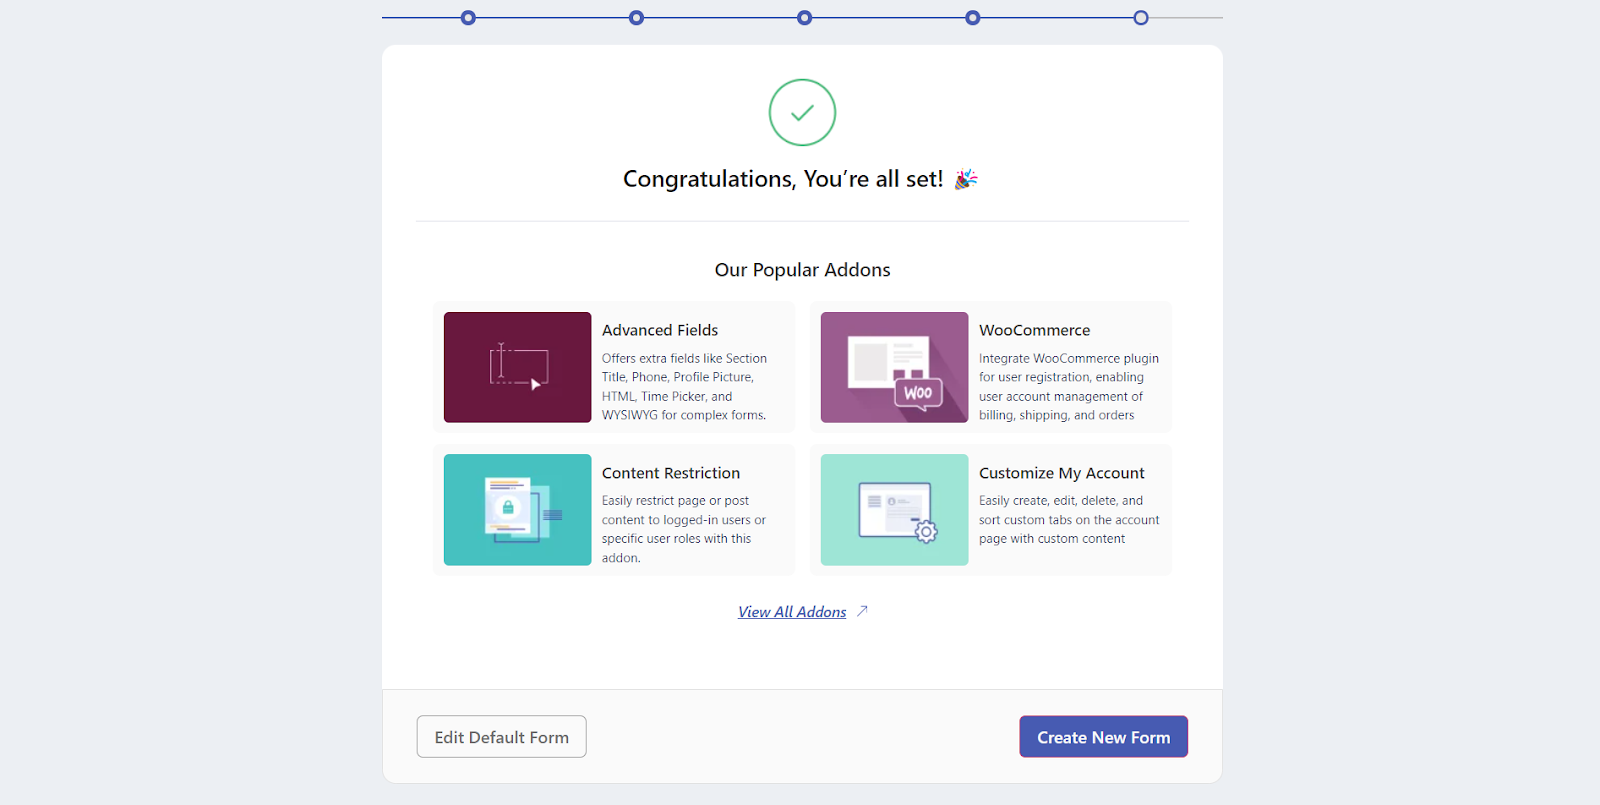
You can view a few of the most widely used User Registration add-ons from this page.
You can open the dashboard, modify the built-in form, or make a new one. In the next step, we’ll learn how to create a new form.
- Create a New Custom Registration Form
With this, you can easily create a new custom user registration form. Access your WordPress dashboard and navigate to User Registration > Add New.
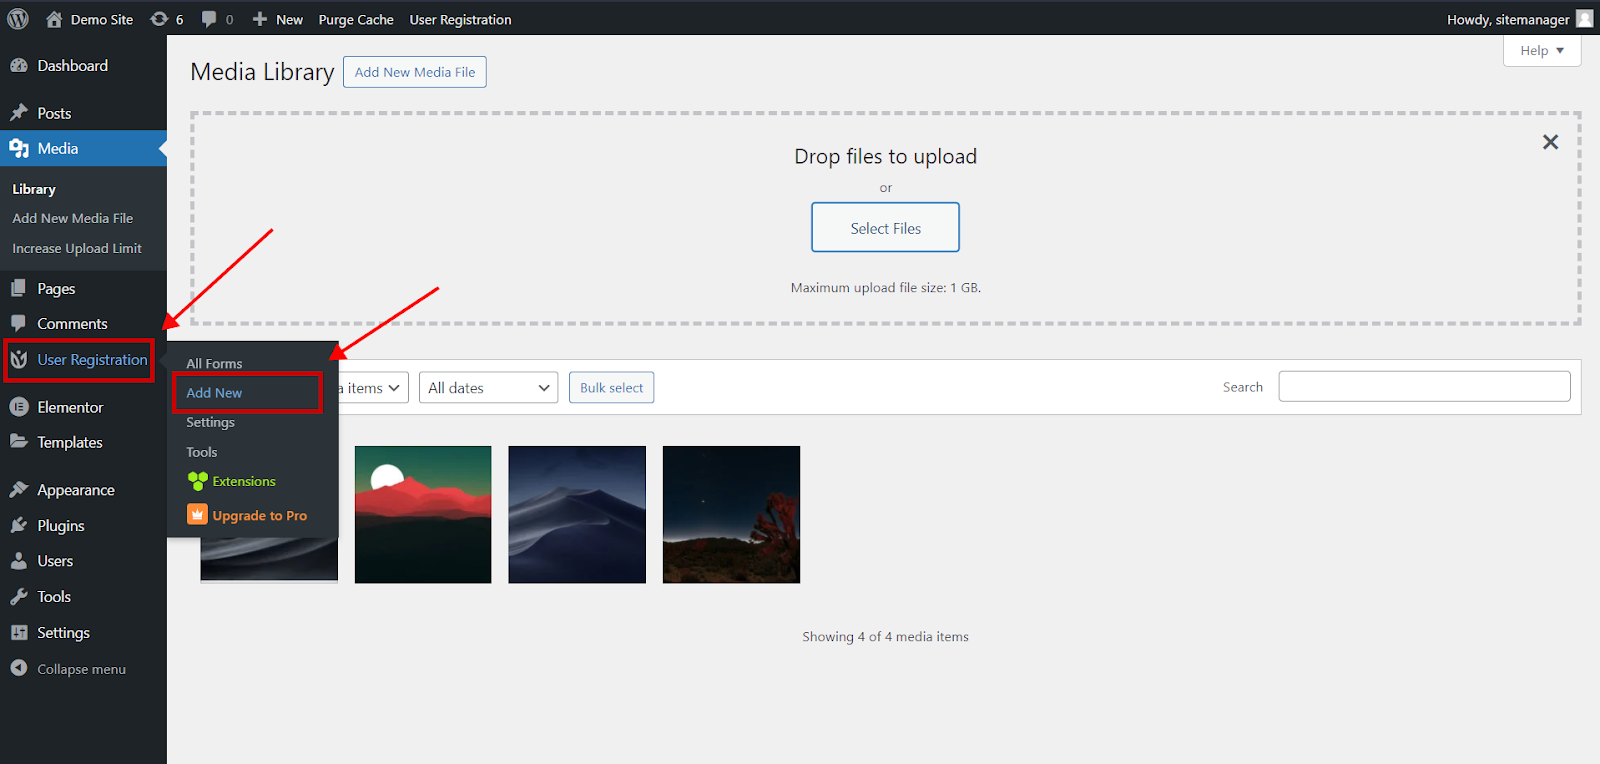
You can select from various pre-made form templates and alter them as needed here. Or you could just construct one from the ground up.
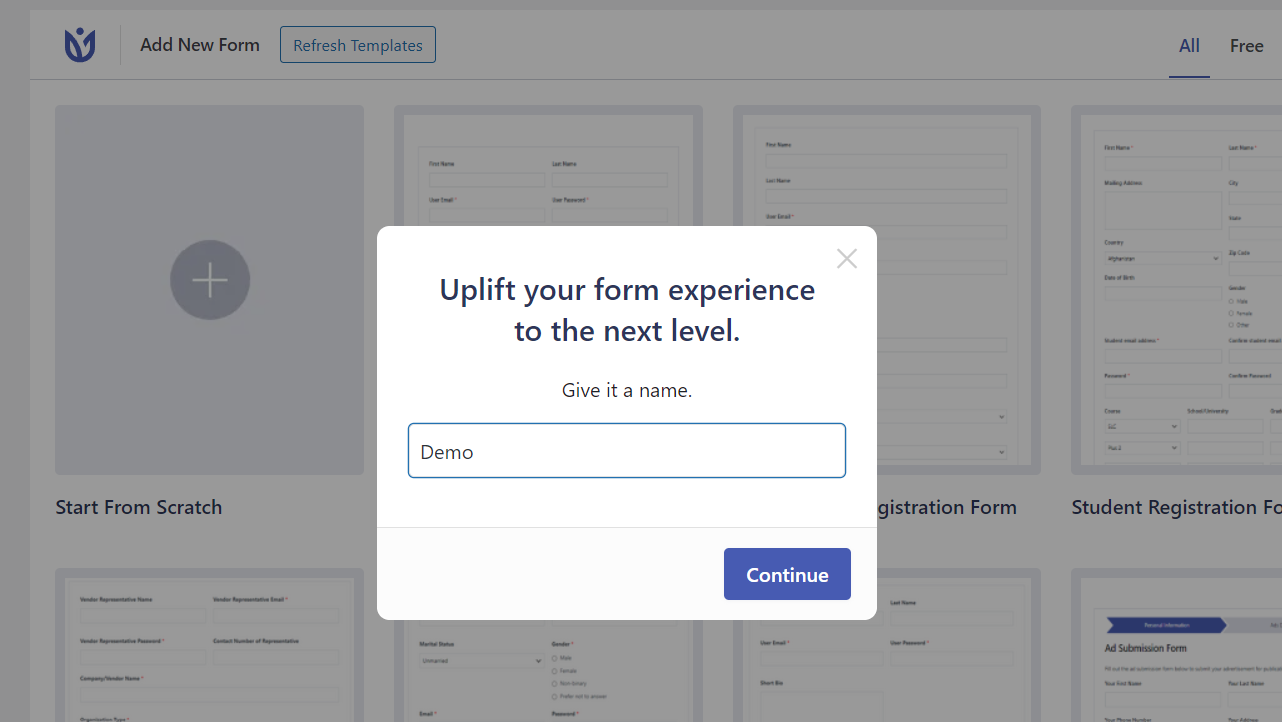
Let’s use the “Start From Scratch” option for this tutorial. The next step is to ask you to name your form.
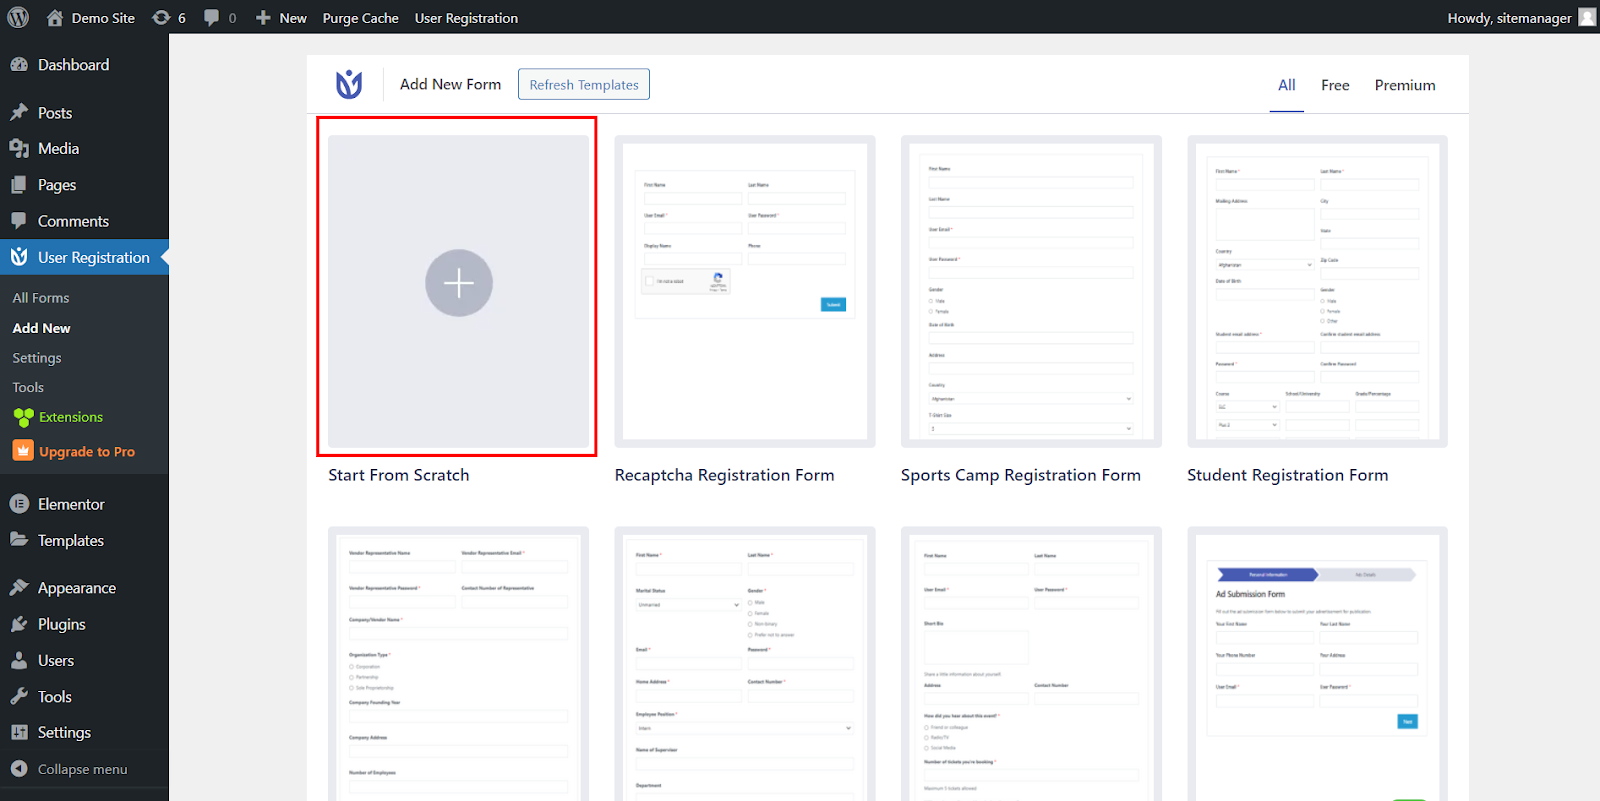
After giving your form a name, hit the Proceed button. Be at ease. The name of your form can be changed at a later time.
Following that, the form builder appears, looking like this:
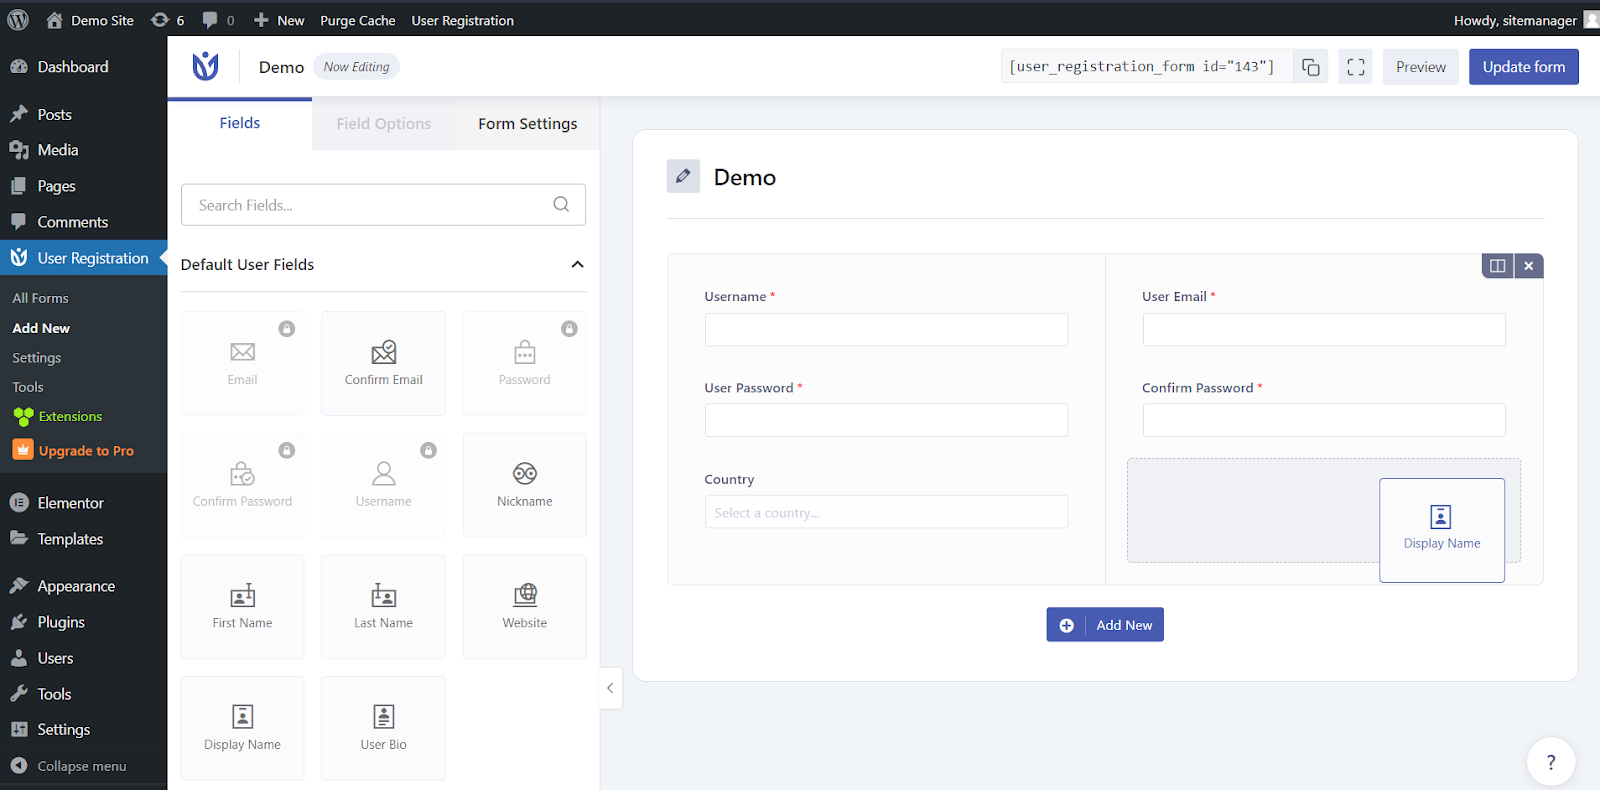
As you can see, the Form Setting, all available Fields, and their Field Options are arranged neatly on the left.
The actual form has four fields—User Name, User Email, User Password, and Confirm Password—on the right.
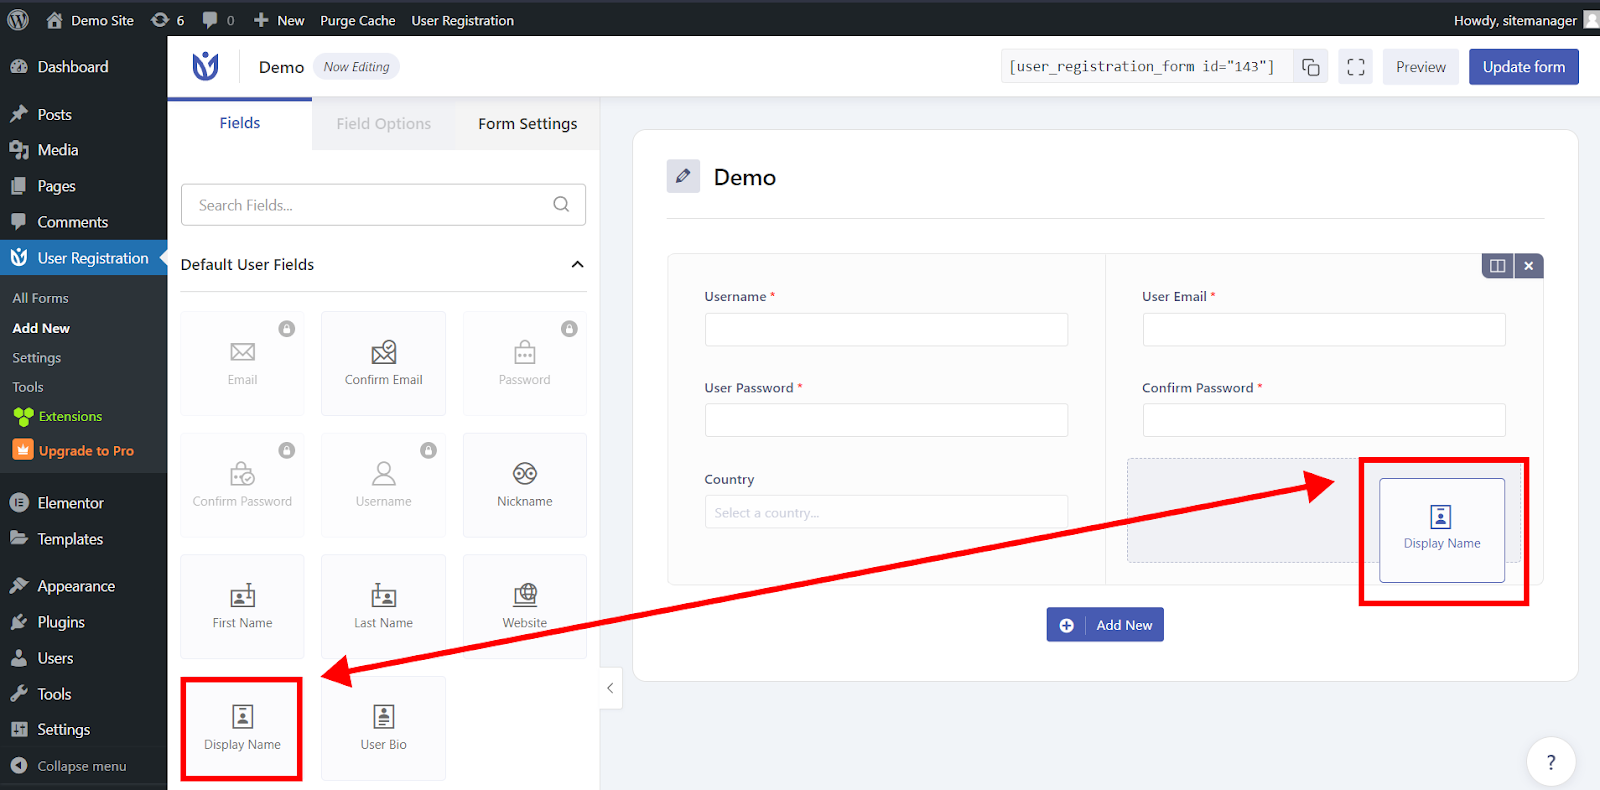
All you can do is drag and drop any more fields you require onto your form from the left.
You can choose between the Default User Fields and Extra Fields in the free version.
You will be required to buy the pro version of the plugin if you require additional fields, such as Advanced Fields, WooCommerce Fields, and Payment Fields.
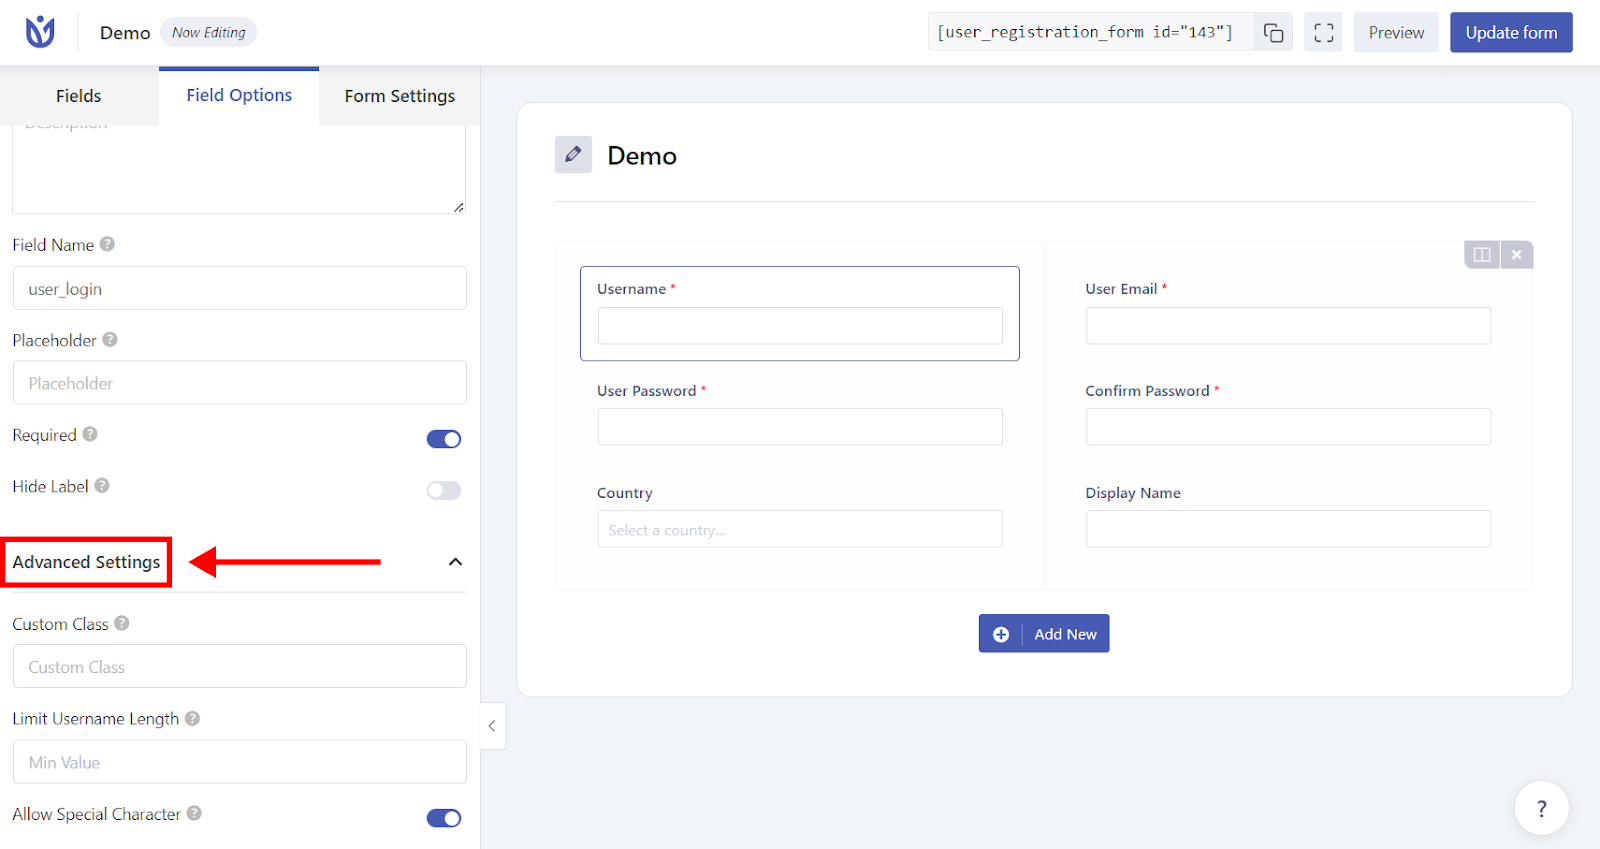
Now that the necessary fields have been added, it’s time to customize them. To edit a field, click on it; the options will appear on the left.
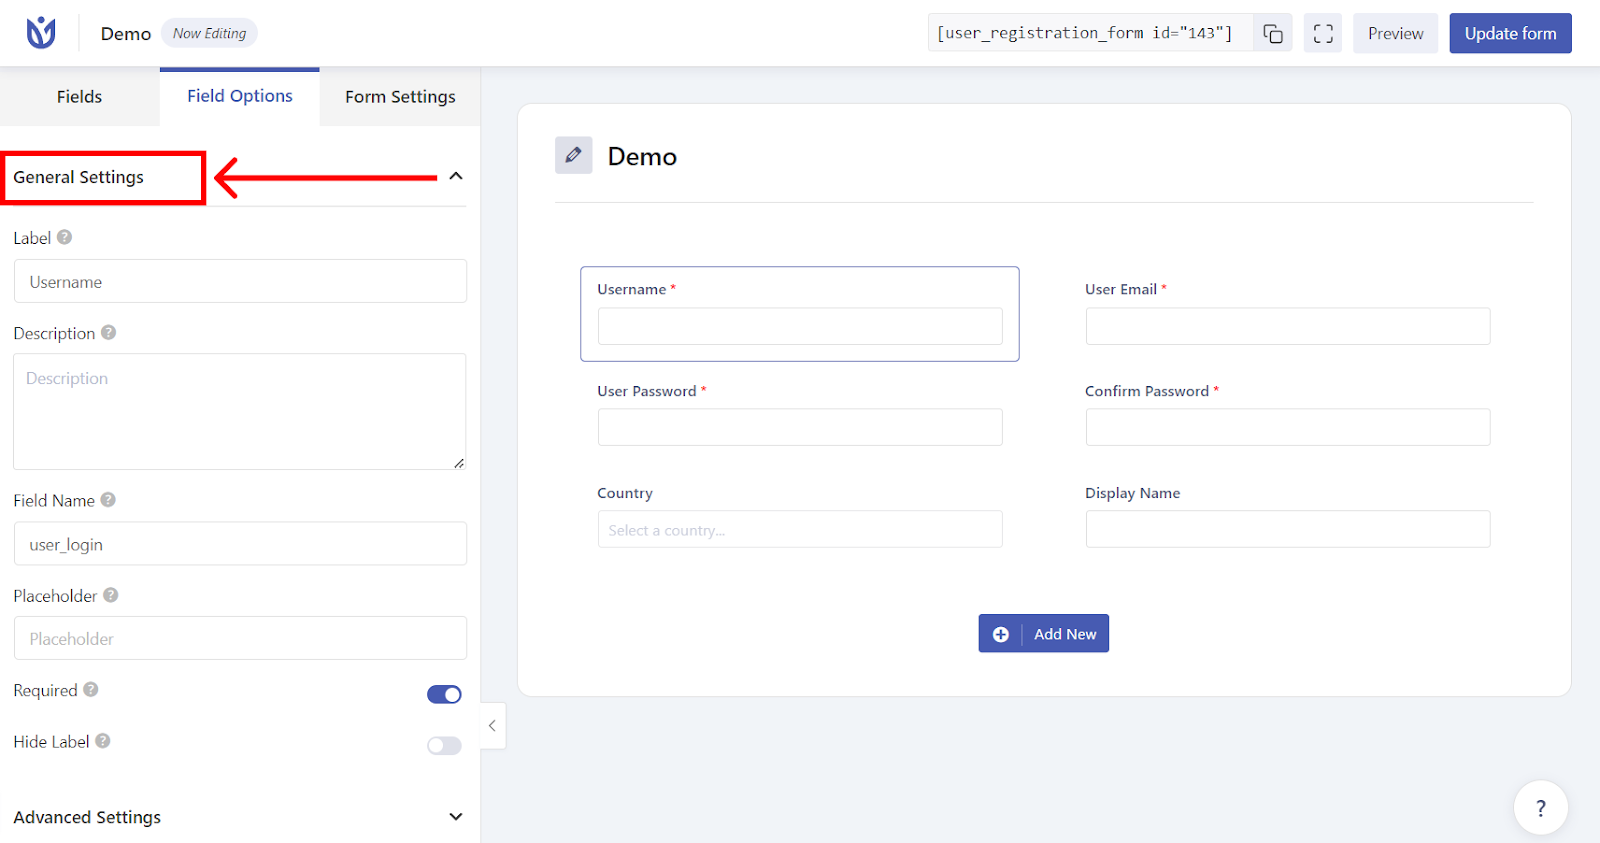
As you scroll down, you’ll see that the options are divided into General and Advanced categories. You can alter the fields Label, Description, Placeholder, and so forth from the General Settings menu.
Similarly, you can customize the CSS for the field by going to Advanced Settings. More options are available depending on the field, for example, Limit Username Length for the Username field.
Once editing every field, select Update Form at the form builder’s top.
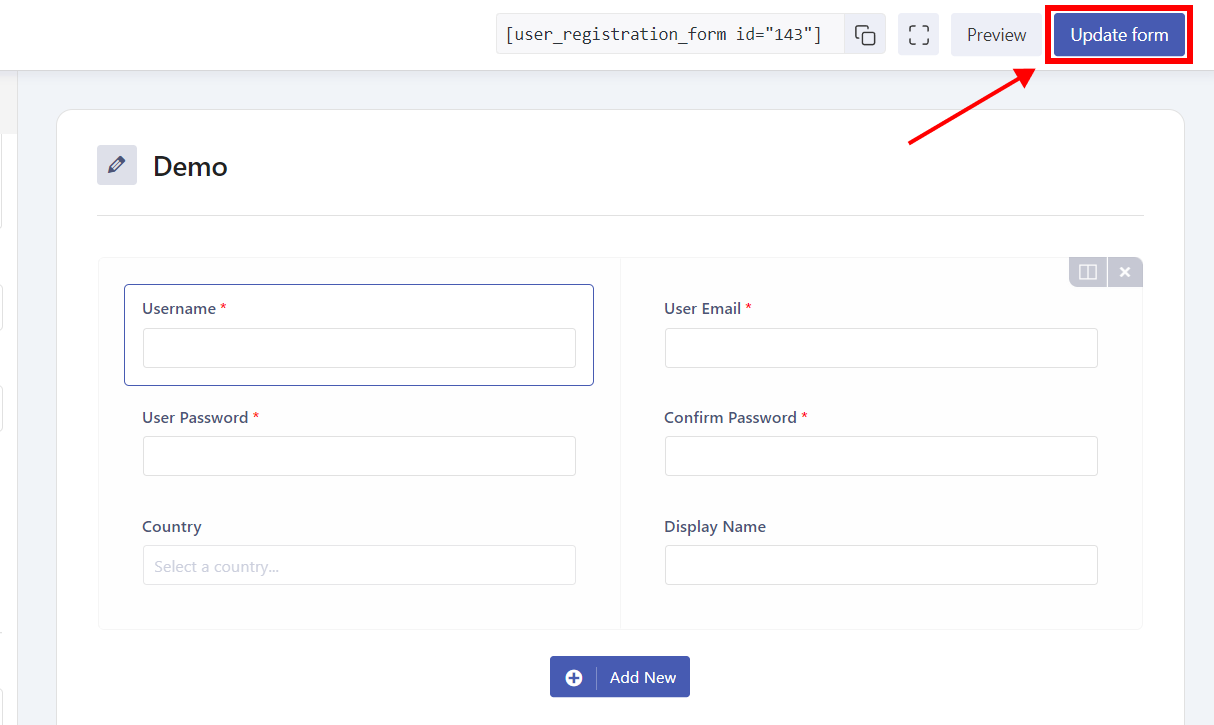
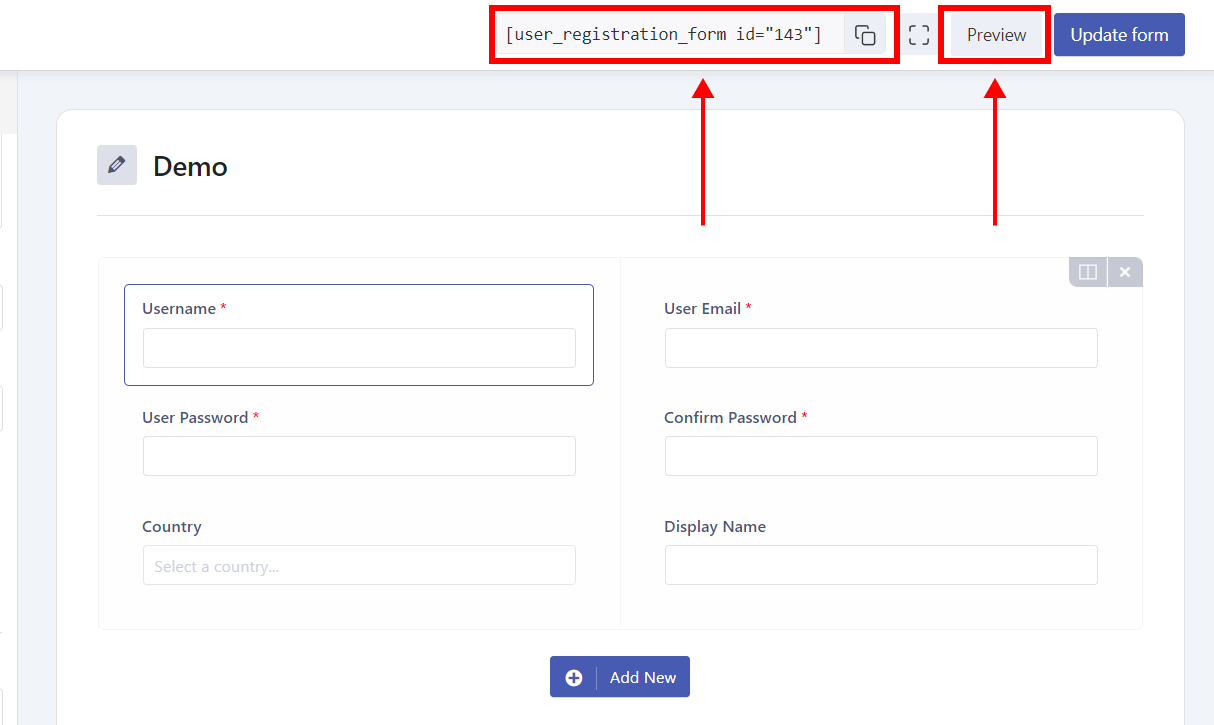
The Preview button and the form shortcode are now visible at the top of the form builder. In this guide, shortcode plays a significant role that we will address later.
To save the changes after you’ve made them, click the Update form button.
Read Also: Best Custom Login Plugins: Transform User Experience and Unlock Your Brand Identity in 2024
- Configure the Registration Form Settings
The configuration of the registration form settings comes next. You can customize the settings for each registration form from the form builder’s Form Setting tab.
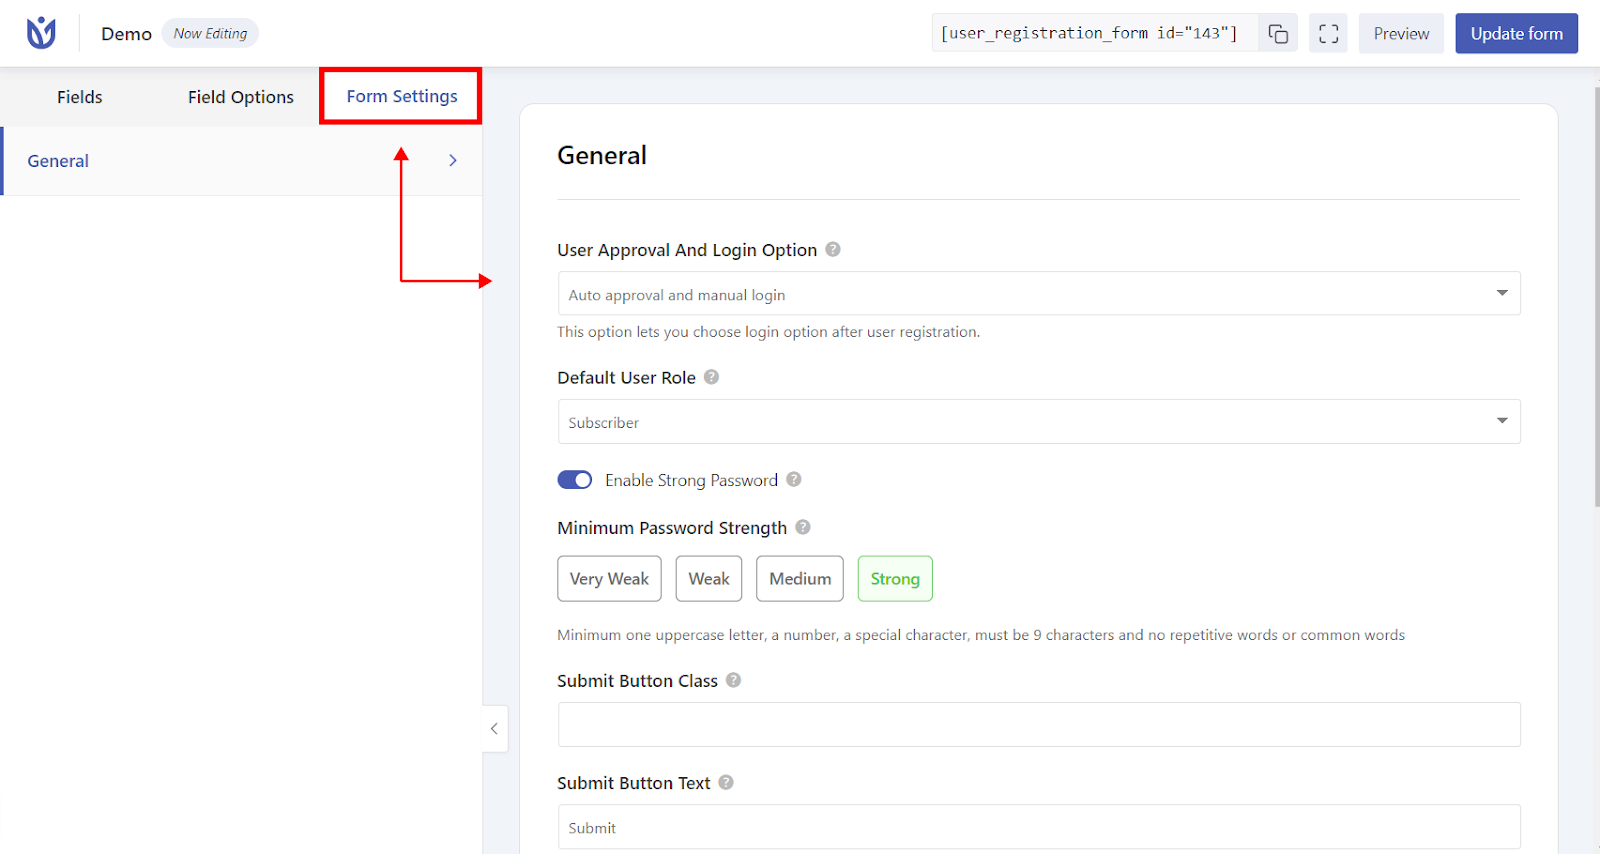
You can modify form templates, select a default user role, and set a user login option.
Additionally, you can set custom success message text, modify the position of the success message, and activate reCaptcha protection.
Once all your customizations have been made to your registration form, you can select the Update form button like before.
The registration form is now prepared to be shown on your website.
Place the Registration Form on Your Site
As we stated at the outset, it is insufficient to simply enable user registration in WordPress.
To allow users to register through the form, you must also have the registration form available on the front end of your website.
In the earlier steps, we already created the custom registration form. The form just needs to be displayed on your website.
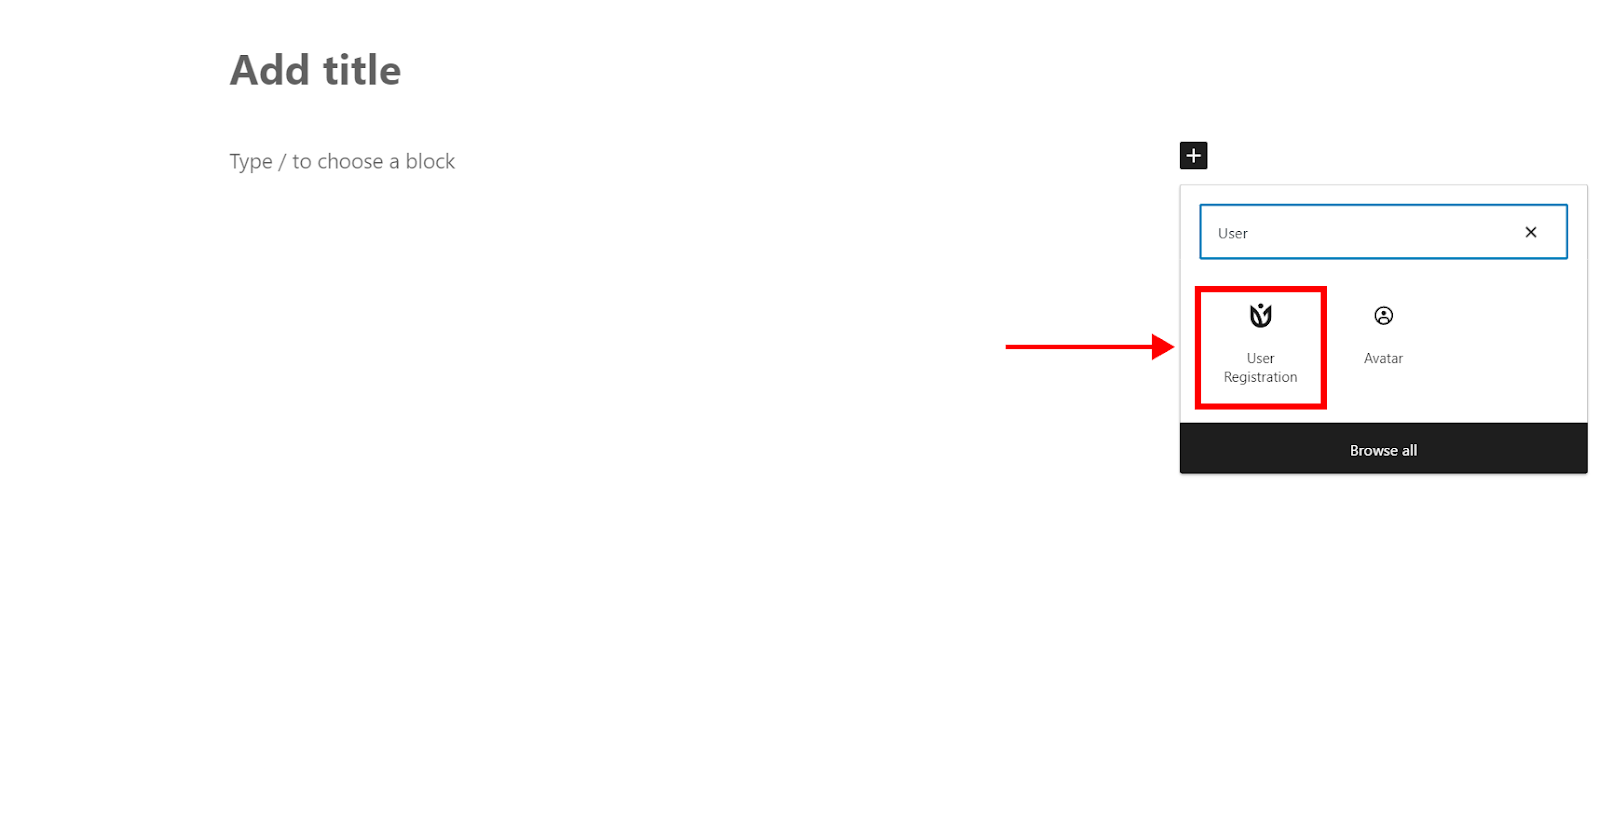
To display the form, simply open the desired page or post, and the block editor will appear. To add a User Registration block, click the block inserter (+) in this location.
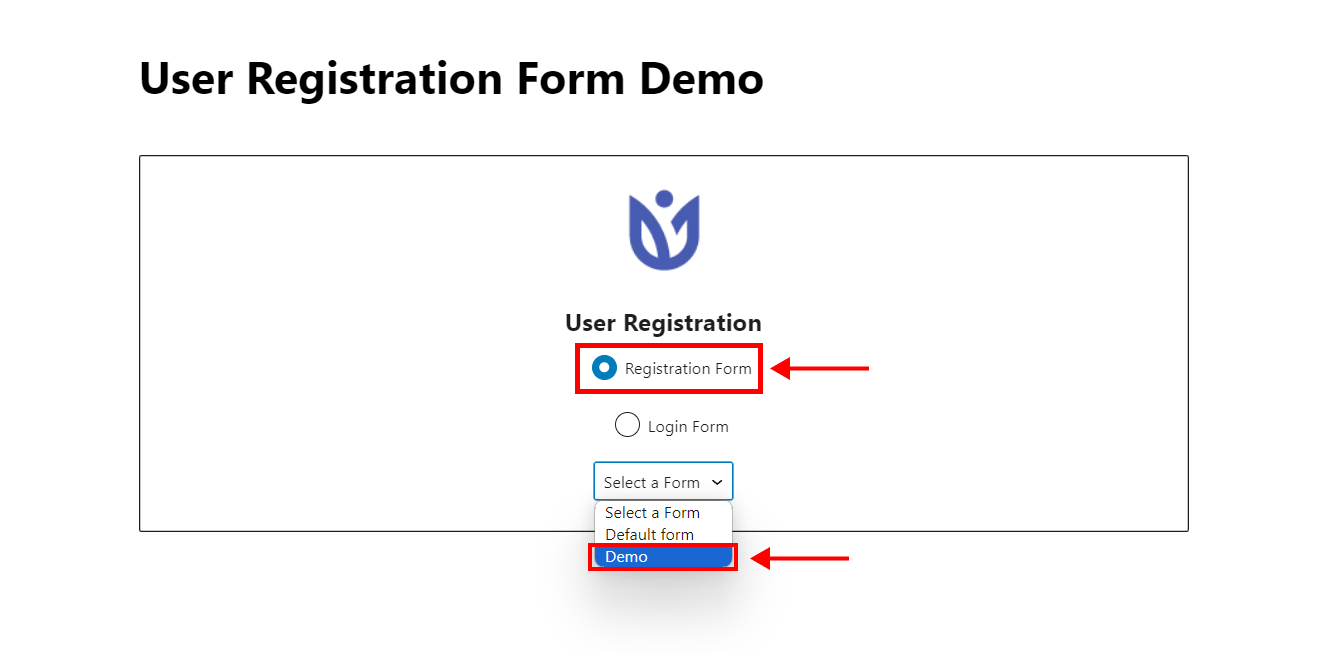
Next, pick the recently created registration form, which is Demo in our case from the dropdown menu by selecting the Registration Form radio button.
To save the form, select Update at the top of the editor. Using the Preview button, you can easily see how the form will appear. Alternatively, you can simply save your work using the Save Draft button.
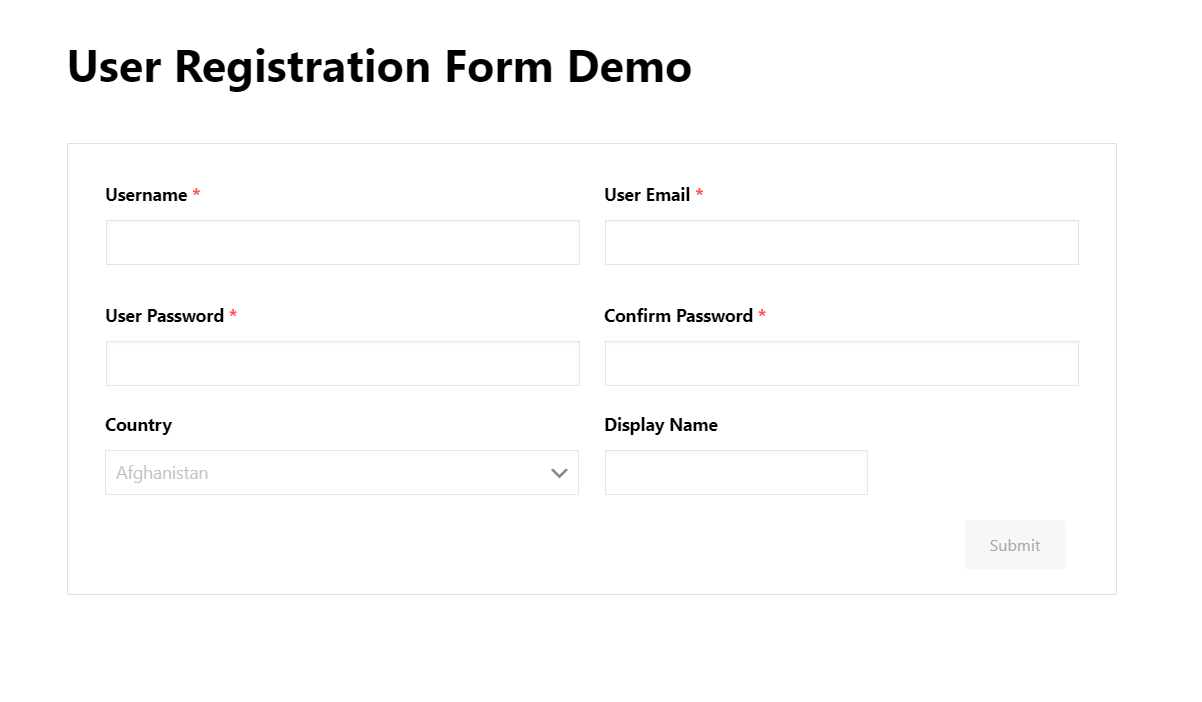
Following an update, the page or post will show the front-end registration form that users can use to register.
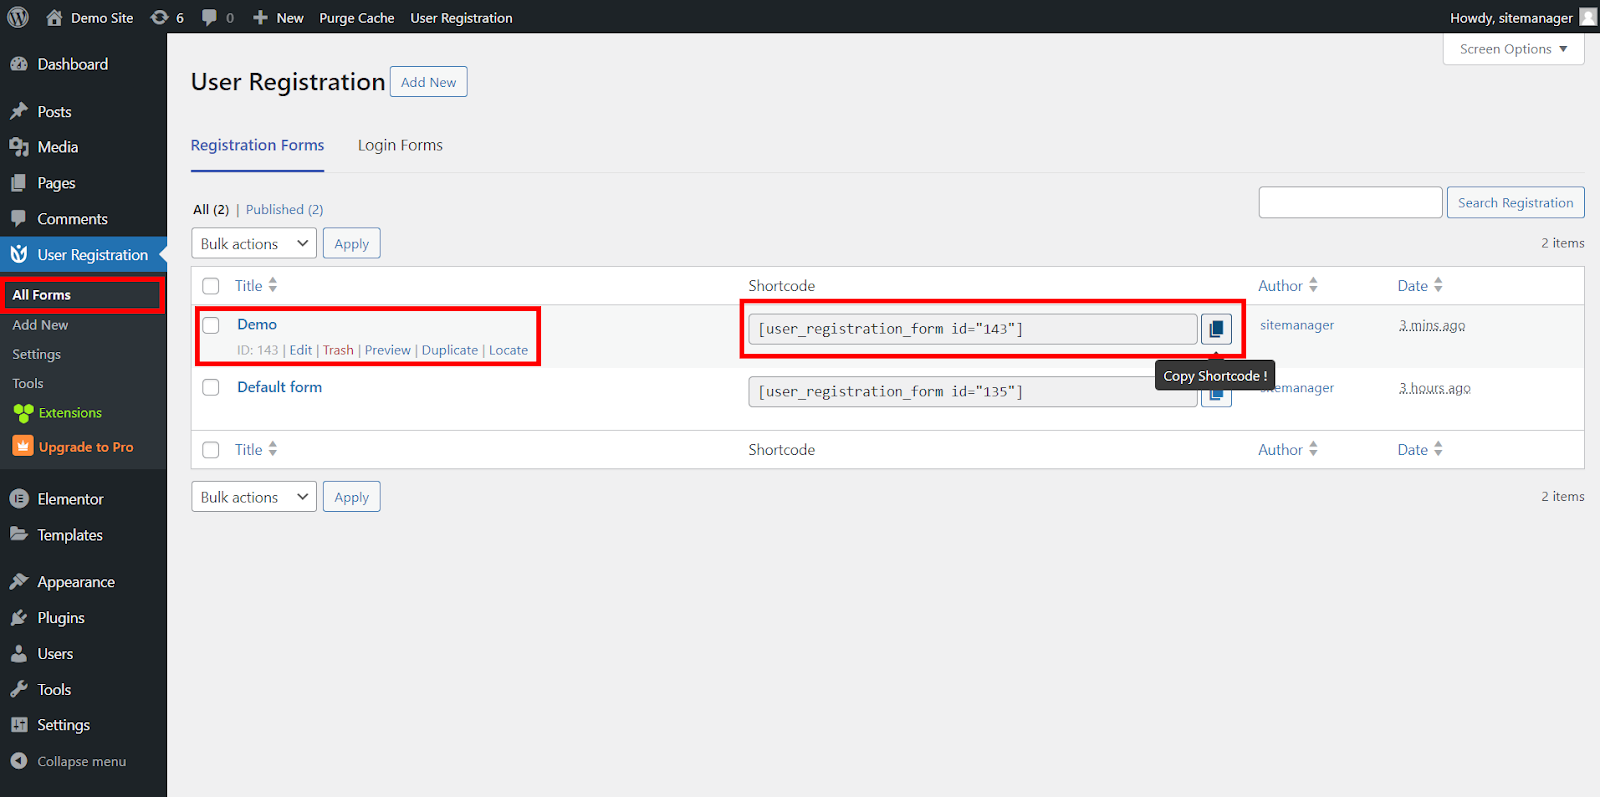
Alternatively, you can place a shortcode block in place of the User Registration block on the page or post. First, select the All Forms Tab under User Registration and copy the shortcode for your form.
You can obtain the shortcode with just one click using the Copy button.
Since the admin cannot create every user on their own, allowing users to register themselves is essential.
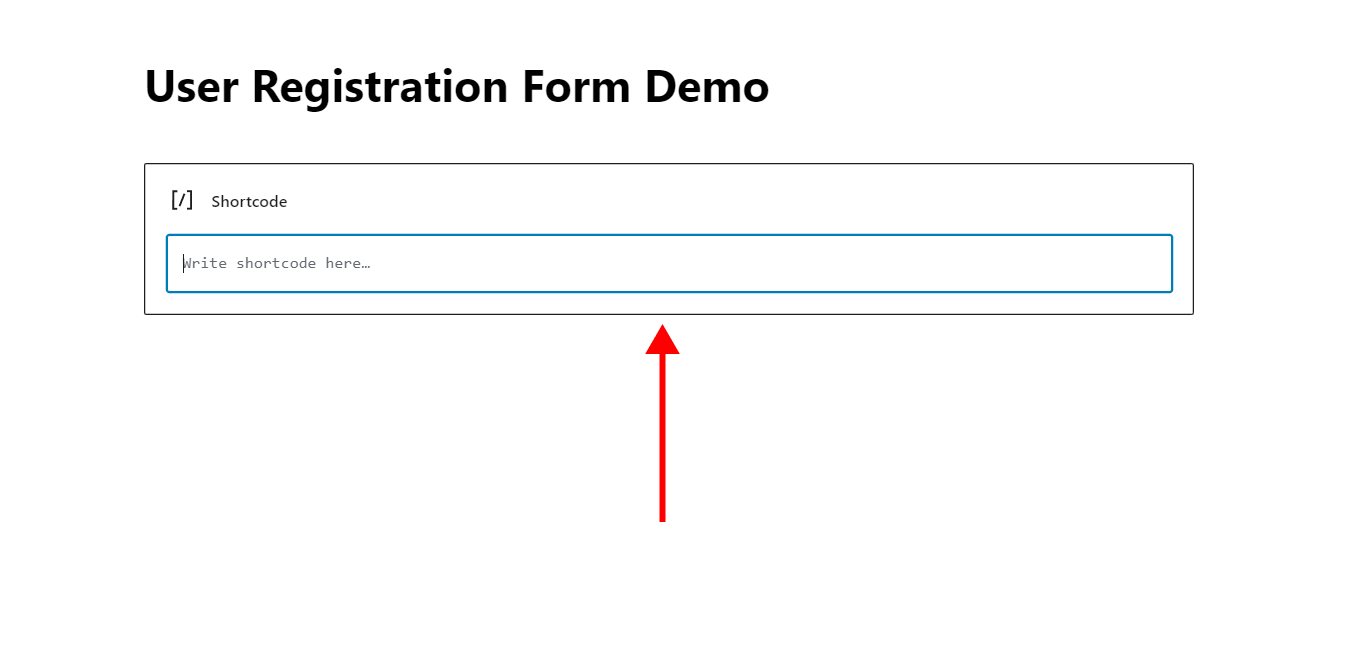
Open the post or page where you want to add your form after that. There, choose Shortcode block using the block inserter (+).
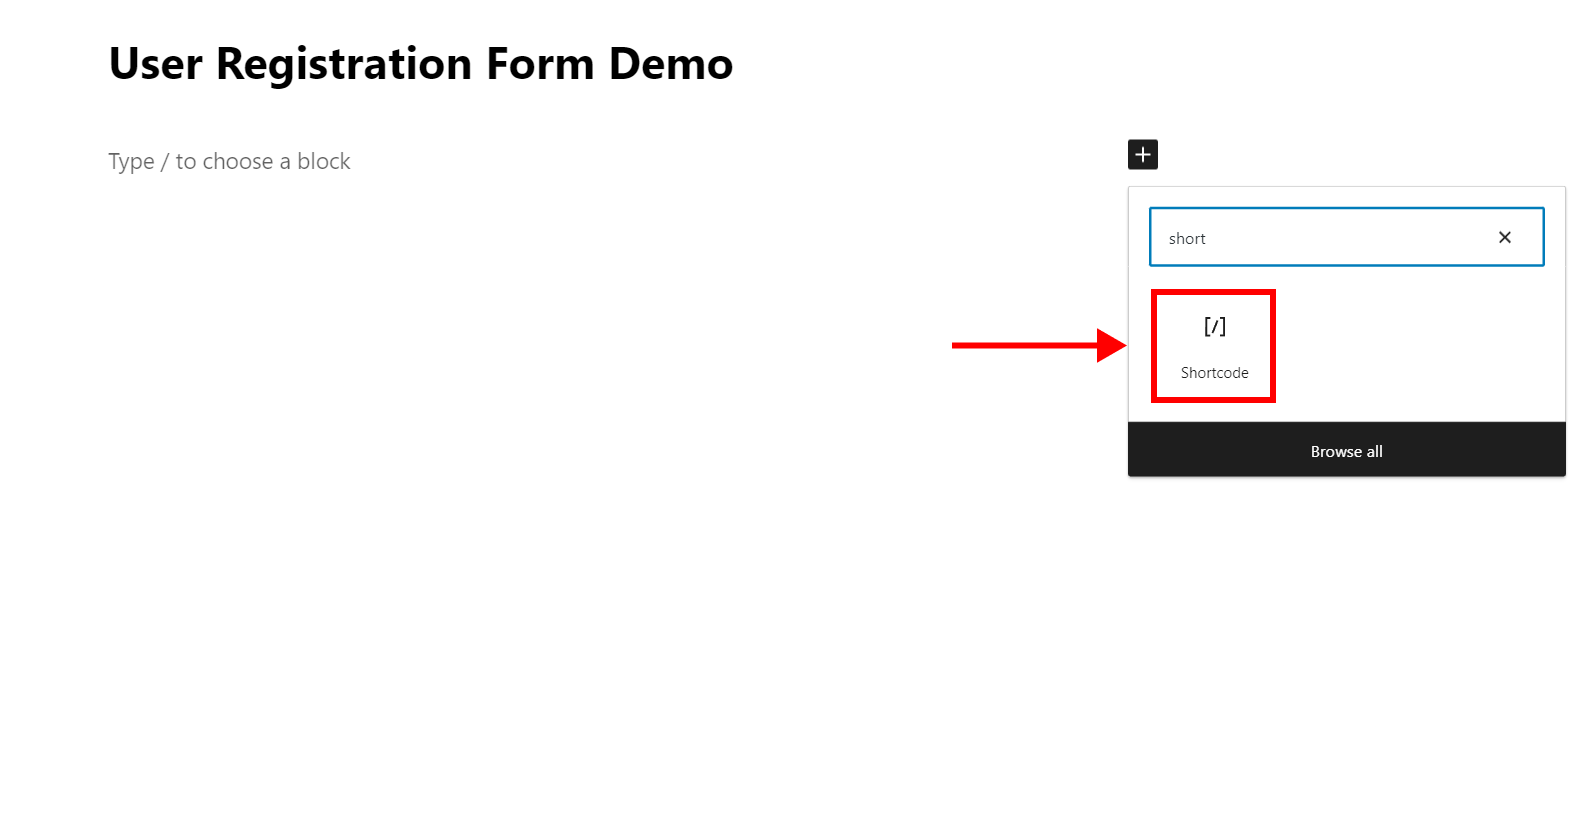
Lastly, paste the copied shortcode on the block and you’re that’s it! Easy!
You can create a highly organized and feature-rich registration form using WordPress’s default membership feature and user registration experience.
Additionally, you can use the plugin to prevent core login and use a custom login form instead of the default one. You can activate admin approval and set strong passwords in registration forms.
Additionally, User Registration comes with all the tools you need to design unique WooCommerce registration forms if you run a WooCommerce store. Take your website to a whole new level by using this plugin.
Read also: Mastering Event Registrations and Booking Forms for Event Success
Conclusion: How To Enable User Registration On Your WordPress Site
Since the admin cannot create every user on their own, allowing users to register themselves is essential.
You can create a highly organized and feature-rich registration form using WordPress’s default membership feature and user registration experience.
Additionally, you can use the plugin to prevent core login and use a custom login form instead of the default one. Additionally, you can activate admin approval and set strong passwords in registration forms.
User Registration comes with all the tools you need to design unique WooCommerce registration forms if you run a WooCommerce store. Take your website to a whole new level by using this plugin.
FAQs: How To Enable User Registration On Your WordPress Site
How do I troubleshoot common issues with user registration?
If users encounter problems during registration, ensure the registration page is easily accessible. Verify your WordPress settings, and if issues persist, check for conflicting plugins or themes by deactivating them one by one.
Is it possible to restrict certain content to registered users only?
Absolutely. You can easily control access to specific content by changing its visibility settings. In the post editor, choose “Edit” next to Visibility and select “Password protected” or “Private.” This way, only registered users can access the content.
Is there a way to moderate user registrations to prevent spam?
Absolutely. Consider using plugins like “reCAPTCHA” or “Akismet” to combat spam registrations. These tools help filter out automated bot registrations and maintain the proper integrity of your user database.
