
Are you tired of the default menu color on your WordPress website? Do you want to add a personal touch to your site by changing the menu color to match your brand or design preferences? Look no further! In this blog, we will walk you through the step-by-step process of changing the menu color in WordPress.
Understanding WordPress Themes and Menus
When it comes to customizing the menu color in WordPress, it’s important to have a solid understanding of WordPress themes and menus. These two elements play a crucial role in the overall design and functionality of your website. In this section, we will explore what WordPress themes are and how they relate to menus, providing you with a foundation to better grasp the customization process.
What Are WordPress Themes?
WordPress themes are pre-designed templates that signify the visual appearance and layout of your website. They control the styling of various elements, including the header, footer, sidebar, and, of course, the menu. Themes allow you to change the overall aesthetics of your website without altering the underlying content.
WordPress presents a vast array of themes, both free and premium, catering to different industries, styles, and functionalities. Themes can be customized to reflect your brand identity or website goals, making it essential to select a theme that aligns with your brand’s vision.
Also Read: WordPress Themes: The War Of Premium Vs. Free For Optimal Web Experience
Understanding WordPress Menu Structure
Menus in WordPress are a fundamental part of the website’s navigation system. They provide a way for visitors to navigate through different pages, posts, categories, and custom links. Understanding the structure of WordPress menus will help you locate and modify the menu color effectively. This section is located in the appearance section of your dashboard.

WordPress menus consist of several key components:
- Menu Locations: WordPress supports multiple menu locations, such as the primary menu, secondary menu, footer menu, and more. These locations are defined by the theme and determine where the menus appear on your website.

- Menu Items: Menu items are the individual links displayed within a menu. They can be pages, posts, categories, custom links, or even specific sections within a page (known as anchor links).

- Parent and Child Items: WordPress menus allow you to create hierarchical relationships between menu items. Parent items act as the main navigational links, while child items are sub-links that appear in dropdown menus when the parent item is hovered over.
- Menu Depth: Menu depth refers to the number of levels or tiers within a menu. It determines how many levels of dropdown menus are displayed. Some themes support multiple levels of dropdowns, while others may have limited depth.
By understanding the relationship between WordPress themes and menus, as well as the structure of WordPress menus, you will have a solid foundation for customizing the menu color effectively. In the following sections, we will explore different methods to change the menu color in WordPress, allowing you to develop a visually appealing and user-friendly website.
Changing Menu Color Directly in WordPress Customizer
One of the easiest and most straightforward ways to change the menu color in WordPress is by using the built-in WordPress Customizer. The Customizer allows you to make real-time visual changes to your website, including modifying the menu color. In this section, we will guide you through the step-by-step process of accessing the Customizer, finding the menu color options, and applying new colors to your menu.
Accessing the WordPress Customizer
To access the WordPress Customizer, follow these simple steps:
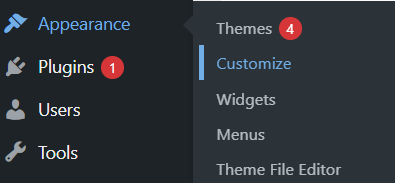
- Log in to your WordPress admin dashboard.
- Navigate to “Appearance” and click on “Customize.” This will launch the Customizer interface.
Once you’re in the Customizer, you will see a live preview of your website on the right side of the screen, along with a panel of customization options on the left.
Finding the Menu Color Options
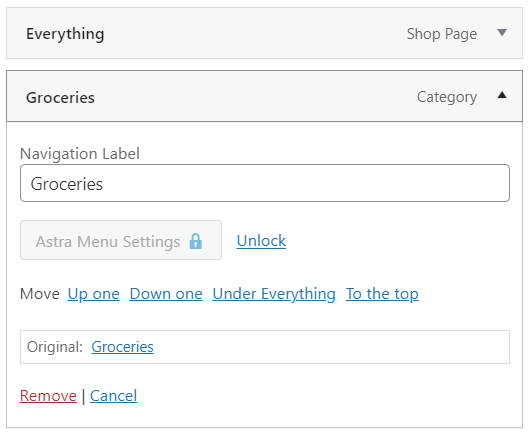
In the Customizer panel, locate and click on the “Menus” or “Header builder” option. The specific placement may vary depending on your theme.

Within this section, select the menu you want to customize, can be a secondary or primary menu.

In its design section, you should find various customization options related to your menu. Look for options such as “Menu Style,” “Menu Color,” “Menu Background,” or similar terms. The exact terminology and available options will depend on your theme’s settings.

Choosing and Applying New Colors
Once you’ve located the menu color options, you can start customizing the color to your liking. Depending on your theme, you may have different ways to change the menu color:
- Color Picker: Some themes provide a color picker tool that lets you choose a specific color from a spectrum or input a specific color code (e.g., hexadecimal or RGB values).
- Predefined Color Schemes: Other themes may offer predefined color schemes or presets that you can select from. These presets are designed to complement the overall theme design.
- Theme-Specific Options: Certain themes may have unique options to customize the menu color. For example, they may allow you to upload a custom image or pattern as the menu background.

Experiment with different color options until you achieve the desired menu color. As you make changes, the live preview on the right side of the screen will update in real-time, allowing you to see the impact of your customizations.
Saving and Publishing Your Changes
Once you are satisfied with the new menu color, click on the “Save & Publish” button in the top panel of the Customizer. This action will save your changes and make them live on your website.
Congratulations! You have successfully changed the menu color directly in the WordPress Customizer. Your website’s menu will now reflect the new color scheme you have chosen. Next, we will explore alternative methods for menu color customization, giving you even more flexibility and control over the design of your WordPress menu.
Changing Menu Color Using CSS
If you want more control over the customization of your menu color in WordPress, using CSS (Cascading Style Sheets) is a powerful and flexible option. CSS allows you to define the visual presentation of your web page, including the menu color.
Understanding the Basics of CSS
CSS is a coding language created to style and format the elements of a web page. It controls the visual appearance, such as text, colors, sizes, fonts, and layouts. To customize the menu color using CSS, you need to understand a few key concepts:
- CSS Selectors: Selectors are used to target specific HTML elements that you want to style. For menu customization, you will need to find the correct selector that targets your menu specifically.
- Properties and Values: CSS properties determine the aspect of an element you want to change, such as color or background. Each property is assigned a value, which defines the specific attribute you want to apply.
- CSS Syntax: CSS follows a specific syntax consisting of selectors, properties, and values. It is important to use the correct syntax to ensure that your CSS code is interpreted correctly by the browser.
Finding the Correct CSS Selector for Your Menu
To change the menu color using CSS, you need to identify the correct CSS selector that targets the menu element. The selector may vary depending on your theme and menu structure. Here are some common CSS selectors for targeting menus:
- Class Selector: If your menu has a specific class assigned to it, you can target it using the class selector. For example, if your menu has the class “main-menu,” the CSS selector would be “.main-menu”.
- ID Selector: If your menu has a unique ID assigned to it, you can target it using the ID selector. For example, if your menu has the ID “primary-menu,” the CSS selector would be “#primary-menu”.
- Element Selector: You can also use the element selector to target the menu by its HTML element type. For example, to target a “ul” element that represents the menu, the CSS selector would be “ul”.
Inspecting the HTML structure of your menu using the browser’s developer tools can help you identify the appropriate CSS selector. With the correct selector in hand, you can proceed to apply the new color using CSS.
Applying New Color Through CSS
Once you have identified the CSS selector for your menu, you can apply a new color using the “color” property or the “background color” property. Here’s an example of how to change the menu color using CSS:
css

.menu-selector {

color: #ffffff; /* Change to your desired color */

}
This CSS code targets the menu using the selector “.menu-selector” and sets the “color” property to the desired color value. You can replace “#ffffff” with your preferred color code or name.

To apply the CSS code, you have the following options:
- Theme Customizer: Some themes provide a built-in CSS editor in the Customizer. You can navigate to the CSS editor and paste your CSS code there.
- CSS File: If you are comfortable editing theme files, you can access the theme’s CSS file (usually named “style.css”) and add your CSS code at the end of the file.
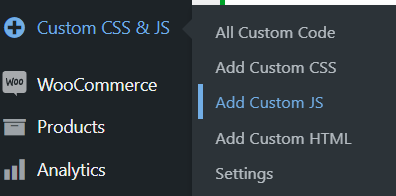
- Custom CSS Plugin: Alternatively, you can use a custom CSS plugin, such as “Simple Custom CSS and JS” or “Custom CSS,” to add your CSS code without modifying theme files directly.
After applying the CSS code, save your changes and refresh your website. The menu color should now reflect the new color you specified in the CSS code.

Using CSS to change the menu color gives you greater flexibility and control over the design of your WordPress menu. You can experiment with different color values, gradients, or even add hover effects to enhance the visual appeal. In the next section, we will explore another option for menu color customization: using plugins.
Using Plugins to Change Menu Color
If you prefer a user-friendly and convenient method to change the menu color in WordPress, using plugins is an excellent option. WordPress offers a wide range of plugins specifically designed for menu color customization. In this section, we will discuss how to choose the right plugin, guide you through the installation and activation process, and show you how to use the plugin to change the menu color effortlessly.
Choosing the Right Plugin
With numerous plugins available, it’s crucial to choose a reliable and well-maintained plugin for menu color customization. Consider the following aspects when selecting a plugin:
- Reviews and Ratings: Check the plugin’s reviews and ratings to get an idea of its reputation and user satisfaction.
- Compatibility: Make sure that the plugin is compatible with your WordPress version and theme. Read the plugin’s documentation or support forums for compatibility information.
- Active Development: Look for plugins that are regularly updated and supported by their developers. This ensures compatibility with future WordPress updates and ongoing support.
- Features: Take into account the features offered by the plugin. Some plugins may provide additional customization options beyond menu color, such as font styles or layout changes.
Using the Plugin to Change Menu Color
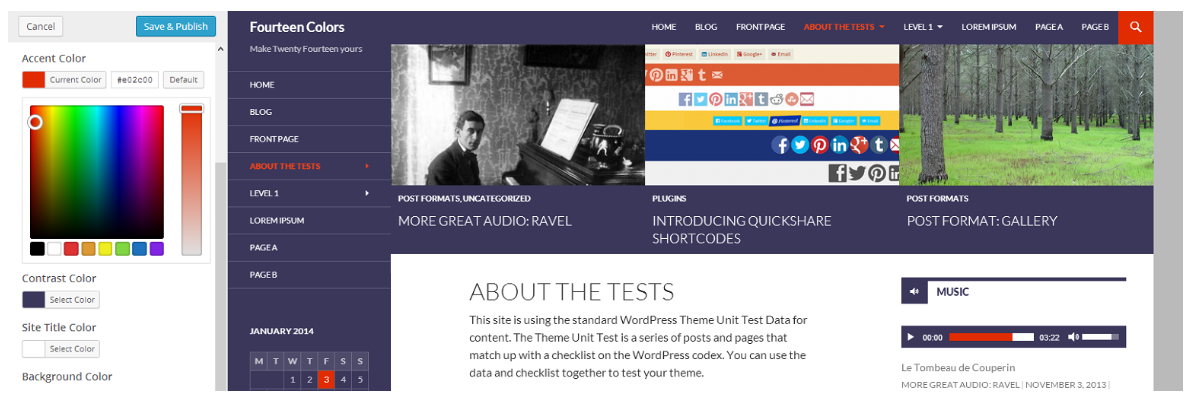
Log in to your admin dashboard to install and activate Fourteen Colors plugin. Once the plugin is activated, it should provide you with a user-friendly interface to customize the menu color. The exact steps may be different depending on the plugin you have chosen, but the general process is as follows:
- Locate the plugin settings: Look for a dedicated menu color customization section within the plugin settings. It may be found under “Appearance,” “Customize,” or have its own menu listings in the WordPress admin menu.
- Choose the menu color: Within the plugin settings, you will find options to choose the desired menu color. Depending on the plugin, you may have access to color pickers, predefined color schemes, or other customization tools.
- Apply the new color: After selecting the desired menu color, save the changes within the plugin settings. The plugin should automatically apply the new color to your WordPress menu.
- Preview and adjust: Most menu color plugins provide a live preview of the changes. Take advantage of this feature to ensure that the new color complements your website’s overall design. If needed, make further adjustments until you achieve the desired result.
- Save and publish: Once you are satisfied with the changes, save the settings within the plugin and publish your website. The menu color will now reflect the new color you have chosen.
Using plugins for menu color customization offers a convenient and efficient way to modify the appearance of your WordPress menu. With the right plugin, you can easily achieve the desired menu color without the need for coding or complex manual adjustments. Experiment with different plugins to find the one that best suits your needs and preferences.
Conclusion
Customizing the menu color in WordPress is a simple yet impactful way to enhance the visual appeal of your website. By following the step-by-step guide outlined in this blog, you can effortlessly navigate through the customization options available in your WordPress theme or use custom CSS to achieve the desired menu color. Remember, a well-designed menu not only improves the user experience but also adds a professional touch to your site. So, go ahead, experiment with colors, and make your WordPress menu stand out to leave a lasting impression on your visitors.
