
Welcome to our blog dedicated to Yoast SEO – a powerful and essential tool for anyone looking to optimize their website’s visibility in search engine results. Whether you’re a seasoned SEO professional or just starting your journey to improve your website’s online presence, this blog aims to provide you with valuable insights, tips, and tricks for making the most of Yoast SEO.
Yoast SEO is a widely acclaimed WordPress plugin known for its user-friendly interface and robust features that help you navigate the complex world of search engine optimization. With over five million active installations, it’s clear that Yoast SEO has become a go-to solution for website owners, bloggers, and businesses seeking to boost their rankings on search engines like Google, Bing, and others.
Why Choose Yoast SEO?
When it comes to optimizing your website for search engines, the importance of structured, high-quality content cannot be overstated. Search engines carefully assess web pages’ structure and quality before determining their ranking on search engine results pages (SERPs). Websites that are well-structured and optimized tend to achieve higher rankings. Therefore, it’s essential to fine-tune your content for search engine optimization (SEO).
While WordPress CMS does have some built-in search engine-friendly features, it lacks the comprehensive tools needed to attain top positions in search results. This is where a suite of SEO plugins becomes indispensable in enhancing the performance of your WordPress site.
Enter Yoast SEO, one of the most prominent SEO solutions tailored for WordPress. This plugin specializes in optimizing on-page SEO by providing valuable suggestions to enhance the discoverability of your content. By doing so, it significantly increases the likelihood of driving organic traffic to your website, which, in turn, can lead to increased revenue for your business.
Furthermore, Yoast SEO takes care of technical SEO aspects, including the implementation of rel=canonical and schema.org, ensuring that your website adheres to the highest SEO standards.
To gain a more comprehensive understanding of the capabilities of the Yoast SEO plugin, let’s explore some of its standout features:
- SEO Analysis: It offers an extensive set of parameters to ensure your content adheres to best on-page SEO practices. It carefully examines the placement of your focus keywords within your content, using a color-coded system to indicate optimization levels (green for optimized, red for under-optimized).
- Search Engine Snippet Preview: This feature allows you to review and customize how your post will appear in Google’s search results. You can fine-tune important elements such as the SEO title, slug, and meta description. Moreover, it provides previews for both desktop and mobile views, enabling you to make precise adjustments.
- Content Readability: It aims to help users create well-structured and coherent content by analyzing various factors, from paragraph length to subheading distribution. It employs a Flesch reading ease score to assess whether the content is easily digestible for readers.
- Webmaster Tools Integration: The plugin seamlessly integrates your WordPress website with various webmaster tools, including Google Search Console, Bing, and Yandex. This integration facilitates a comprehensive analysis of your website’s performance on search pages. As a result, you can make informed adjustments to enhance your SEO strategy.
Learn about SEO effect on hosting here.
How to Use the Yoast SEO Plugin for Your WordPress Website
The initial step is the installation of the WordPress plugin. Begin by locating Yoast SEO within the WordPress plugin directory. Within your WordPress dashboard, navigate to Plugins -> Add New, and enter “Yoast SEO” into the search field.
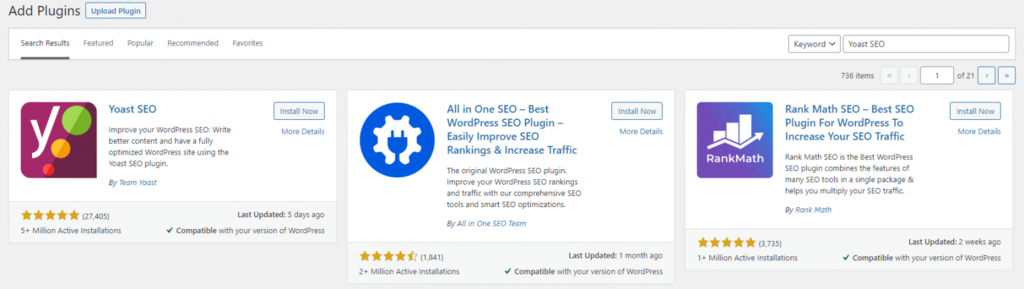
Locate Yoast SEO within the WordPress plugin directory and proceed with the installation. Click on “Install Now” and patiently await the completion of the installation process. Afterward, click “Activate.” Subsequently, you will notice the SEO section prominently displayed on the left sidebar of your admin dashboard. This is the central hub where you will carry out all configurations and utilize the full array of features.

The Yoast SEO section is now accessible within the WordPress admin dashboard. In the forthcoming sections, we will guide you through the utilization of Yoast SEO in WordPress, encompassing tasks ranging from configuring settings to optimizing your website’s posts and pages.
Transferring Data from Other SEO Plugins
If you’ve previously used a different SEO plugin, it’s important to migrate your data, preferences, and configurations. To accomplish this, follow these steps:
- Access your WordPress admin dashboard.
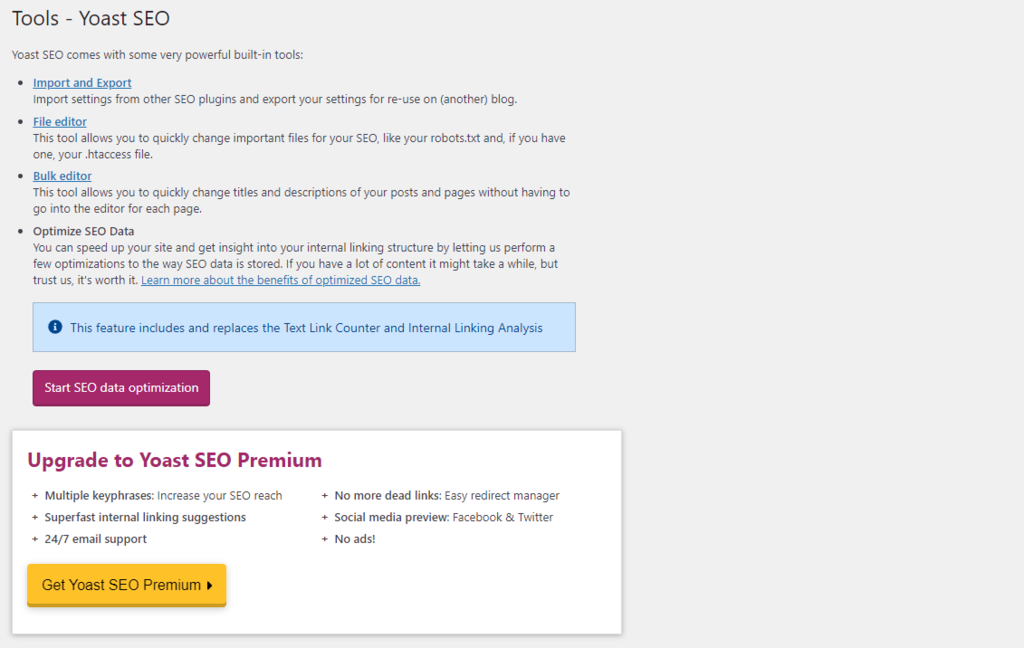
- Navigate to “SEO” -> “Tools.”
- Within the “Tools” section of Yoast SEO, choose the “Import and Export” option.
- Select “Import from other SEO plugins.”
- Additionally, if you’re switching from another Yoast SEO installation, you can import your settings. Opt for the “Import settings” choice.
- Proceed by opening the text file you’ve exported from your previous setup. Copy the content from this file and paste it into the designated field.
- Once completed, click the “Import settings” button.
Initiating the Configuration Wizard
In the event that you are installing the plugin for the first time and do not have any settings to import, you will need to configure it.
The good news is that Yoast SEO offers a configuration wizard designed to assist you in establishing the fundamental SEO framework for your WordPress website.
The setup of the configuration wizard brings forth several advantages, including:
- Managing what content appears in search results.
- Ensuring precise metadata is displayed for your website.
- Amplifying the visibility of your brand.
To commence, access your admin dashboard and select the “SEO” tab. Within this tab, you will encounter the “First-time SEO Configuration” section, which serves as your starting point.
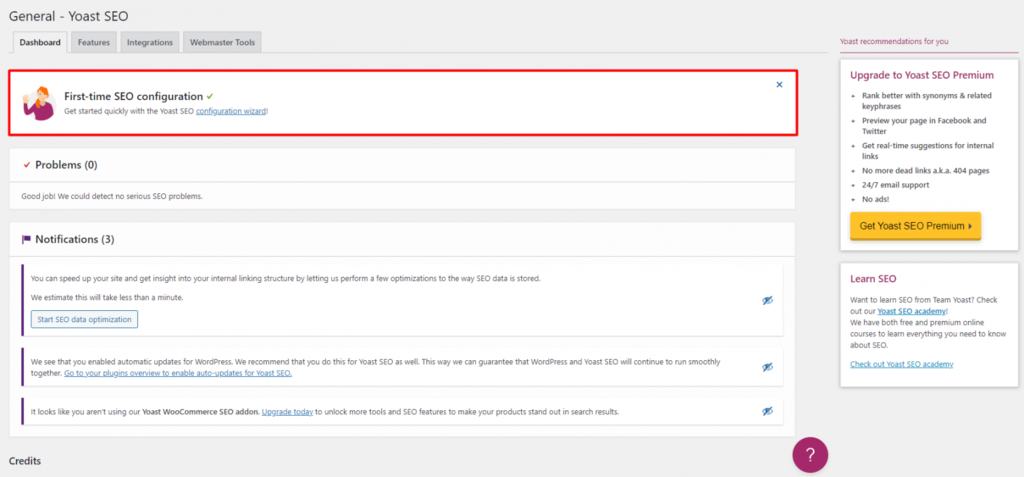
Feel free to proceed by clicking the link to access the configuration wizard. This action will open a new page where you can adjust the fundamental settings for your WordPress website.

Within the Yoast SEO installation wizard, we will now guide you through each segment:
- Environment:
In this segment, you determine whether your WordPress site should be indexed on search results pages. Unless you are working on a development site or a staging server, it’s advisable to opt for Option A. This selection enables Google and other search engines to discover and index your site effectively.
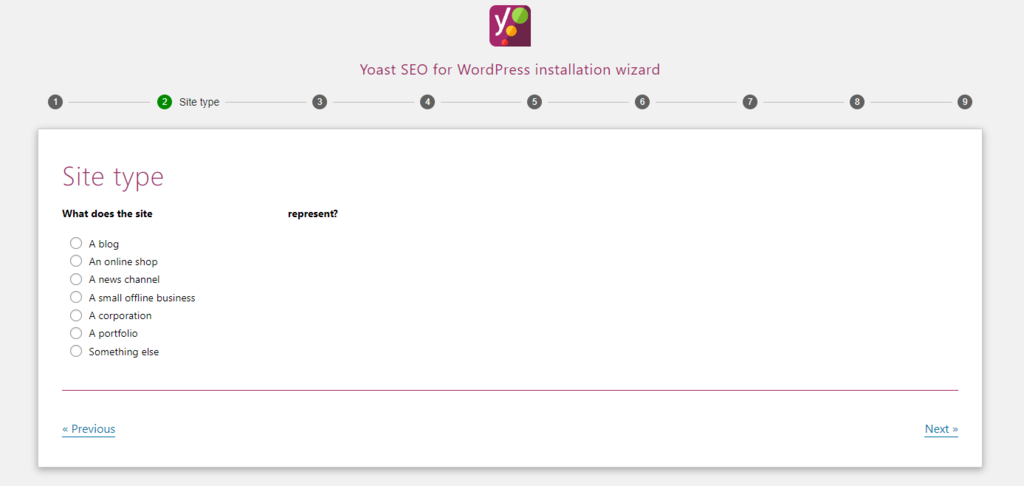
- Site Type:
On Yoast’s installation wizard, you will specify the type of site you are operating. This could range from a personal blog and online store to a business or portfolio website.
- Organization or Person:
To ensure the accuracy of your metadata, you must indicate whether your website represents an individual or an organization. In the case of organizational representation, you will be required to provide details such as your brand logo and image. For personal websites, simply input your name in the designated field.
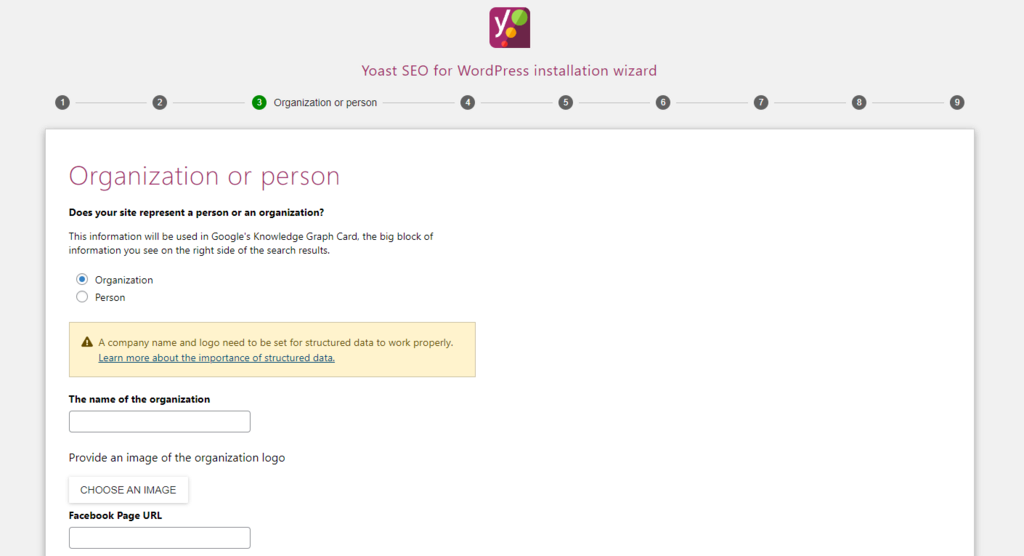
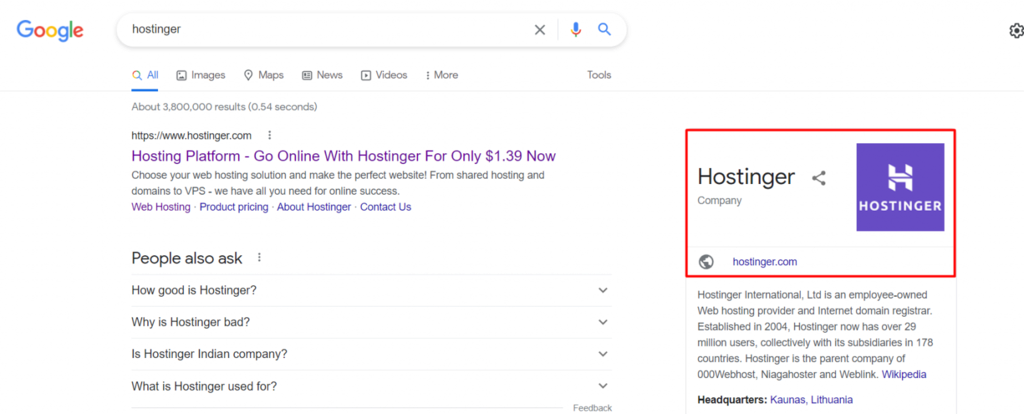
All of the information you provide here is stored within your website’s metadata. This data plays a crucial role in Google’s Knowledge Graph, ensuring that users receive accurate information about your website.
Enhancing Search Engine Visibility
Customize the types of content displayed in the SERPs In this segment, you determine whether your web posts and pages should be visible or hidden in search engine results pages (SERPs). From here, specify the content types you wish to showcase in the SERPs. Make your selections accordingly and proceed to the subsequent section.
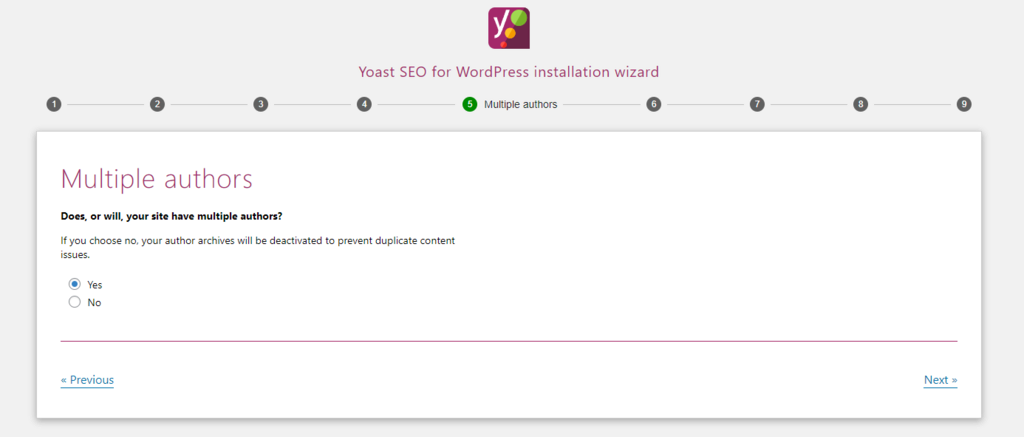
- Managing Multiple Authors
Define the number of authors permitted to publish content on your WordPress site Specify the number of individuals authorized to publish content on your WordPress site. Furnishing this information aids Yoast SEO in preventing duplicate content issues. It also assists in eliminating any potential confusion for Google when indexing your web pages.
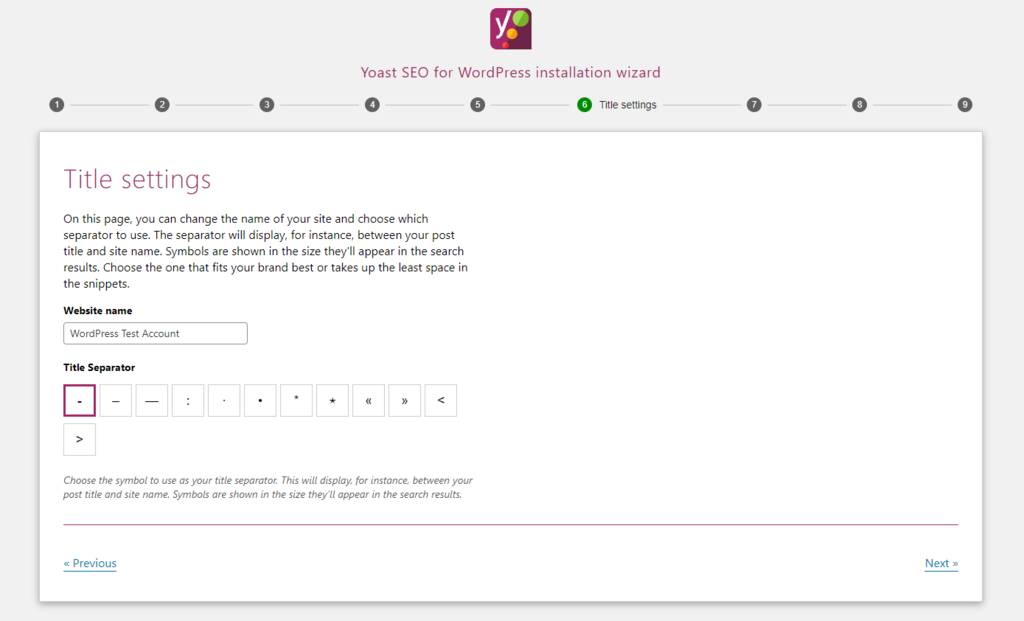
- Title Settings
Select your preferred format for displaying content titles in the snippet preview Make a choice regarding how you wish to present your content headlines within search results. This includes specifying whether to include your website’s name and selecting the title separator. The chosen symbol will appear between your post title and your website name in the snippet preview.
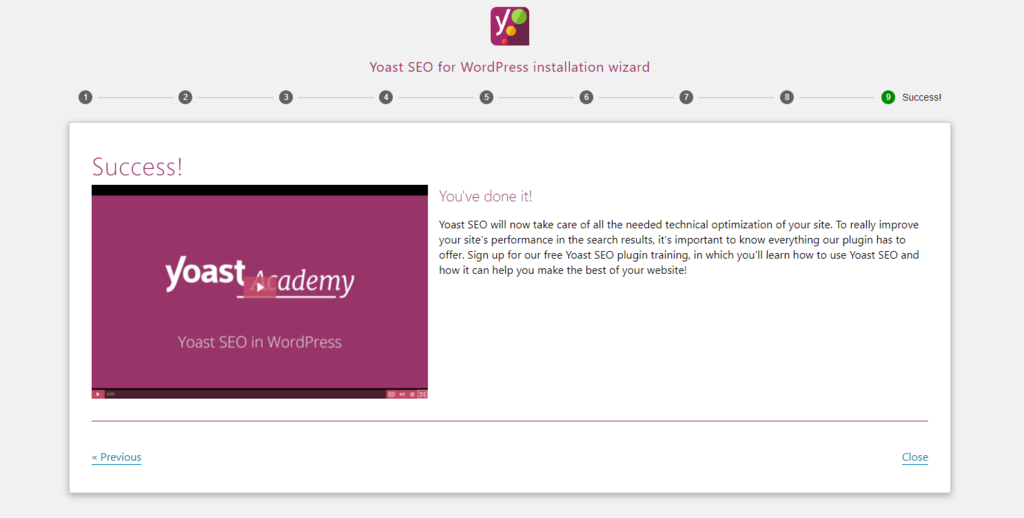
- Snippet Preview Example
By this point, you’ve successfully configured all the necessary settings. Subsequent sections will primarily invite you to subscribe to the Yoast SEO newsletter, enroll in training courses, or opt for the Yoast SEO premium plan. If you’re looking to elevate your SEO endeavors, feel free to select these options as needed. Alternatively, you can skip them and proceed to complete the setup process.
Configuring General Settings
The general settings tab serves as your central hub for revisiting or adjusting the configurations established through the wizard. Some of these settings are optional, offering users the flexibility to enable or disable them as needed.
Listed below are the options available within the General tab:
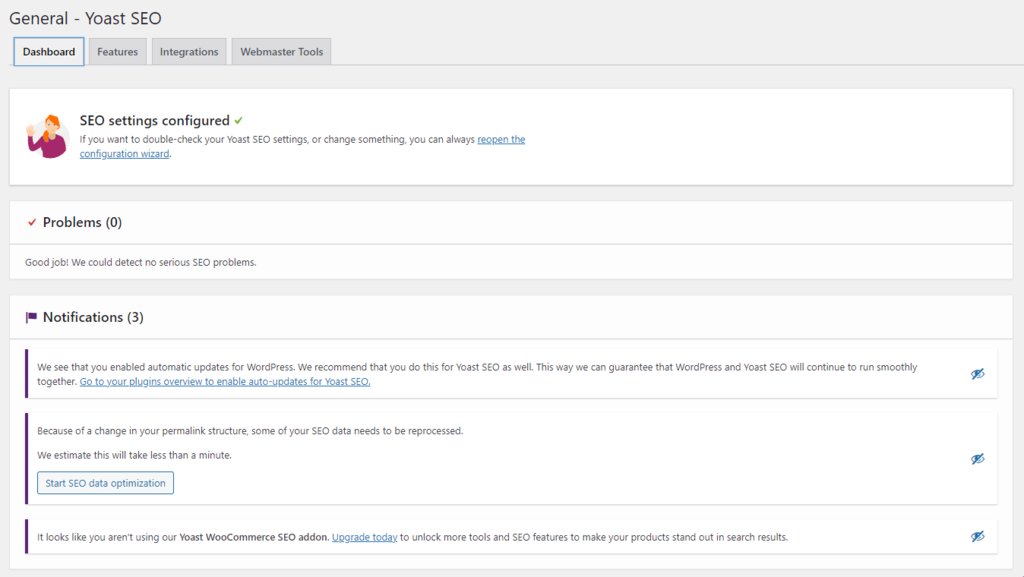
- Dashboard: Within this section, you can double-check and reopen the configuration wizard for further modifications. Additionally, a “Problem” section provides insights into any issues your website may be encountering. Recent updates and notifications are also accessible in this area.
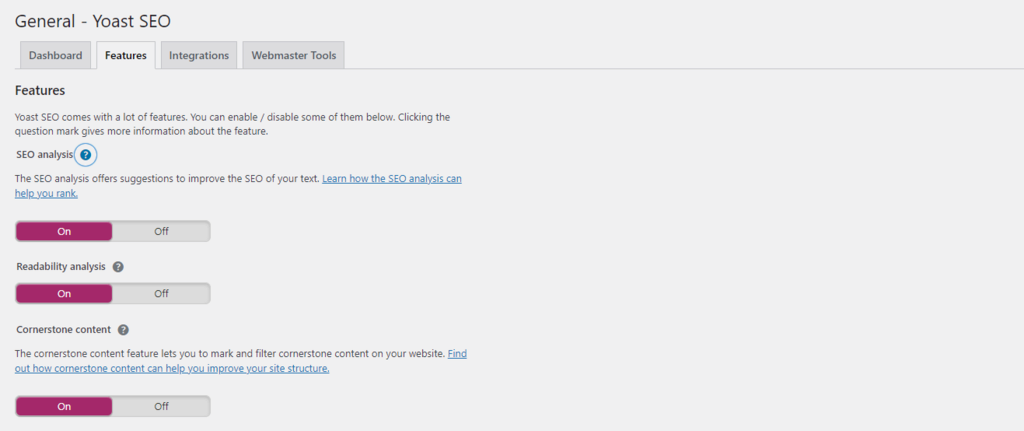
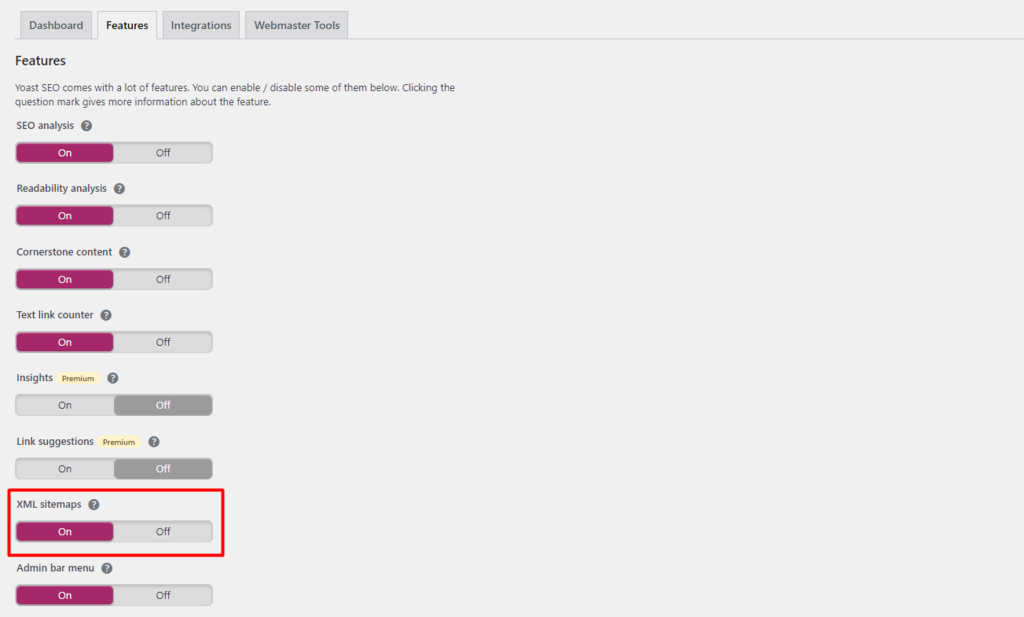
- Features: This section provides an overview of all the features included in the Yoast SEO plugin, encompassing aspects like readability analysis, cornerstone content, and XML sitemaps. Users have the freedom to enable or disable these features based on their specific objectives. For detailed information, you can click on the question mark icon next to each feature.
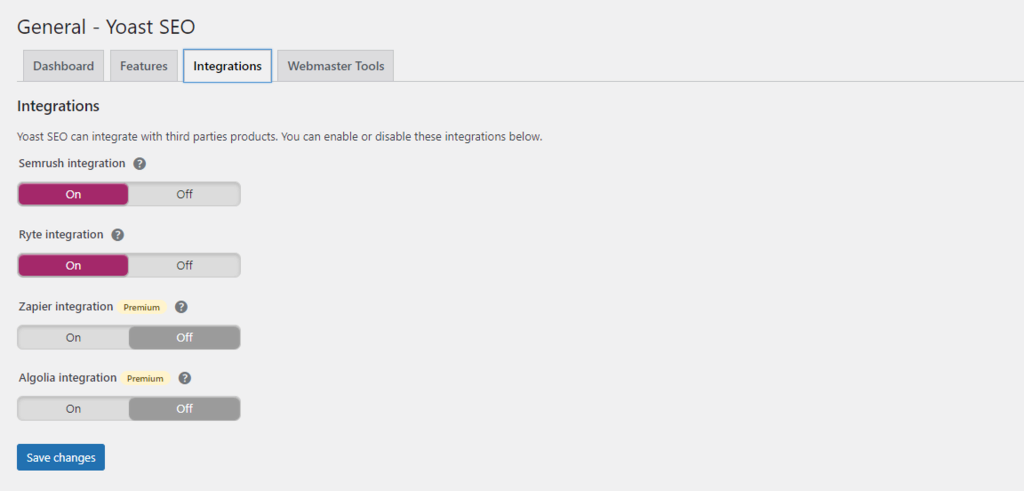
3. Integrations: The Yoast SEO plugin seamlessly integrates with various third-party applications. The free version supports Semrush and Ryte integrations, while the premium plan offers additional integrations such as Zapier and Algolia. Please note that certain options in this section may require a premium license to customize fully. Consider upgrading to the Yoast SEO premium version to unlock these advanced features.
4. Webmaster Tools: Registering for webmaster tool accounts is invaluable for monitoring various aspects of your website, including traffic, performance, and memory usage. These insights are instrumental in assessing your site’s performance in search engine results pages (SERPs).
This section also facilitates the verification of your site with various webmaster tools, including Baidu, Bing, Yandex, and Google Search Console. If your site is already verified, you can simply bypass this step and proceed to the following section for detailed instructions on setting up webmaster tools verification.
Setting Up Webmaster Tools Verification
The verification process follows a similar sequence, regardless of the webmaster tools you opt for. We’ll illustrate the process of verifying Google Search Console using the Yoast SEO plugin as an example.
Before proceeding, ensure you have a Google Search Console account. If not, create an account. Once that’s done, add your WordPress site to your Google Search Console account.
Follow these steps:
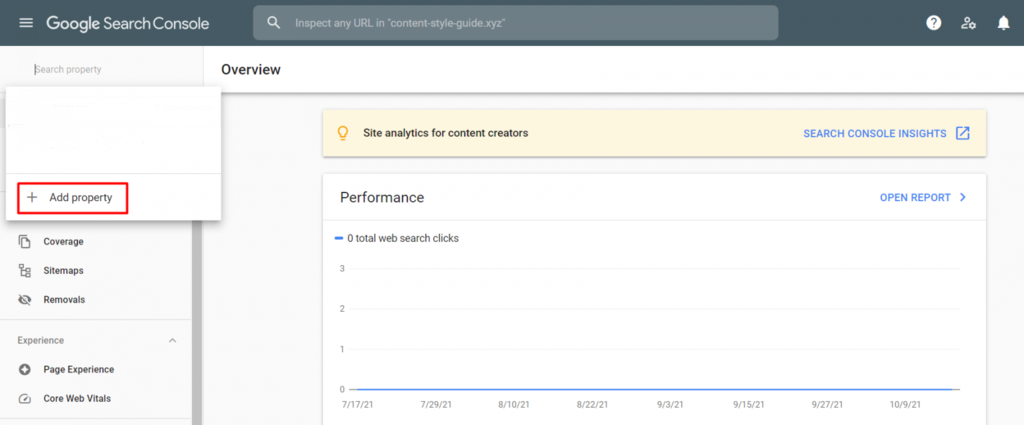
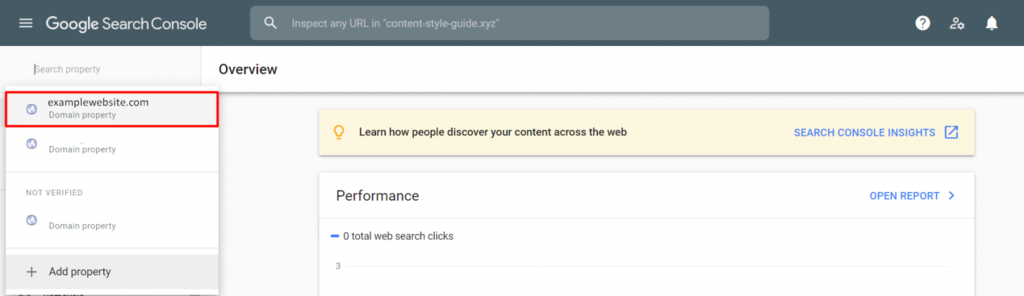
- Access your Google Search Console dashboard and locate the dropdown menu in the left sidebar. Click on the “Add Property” button.
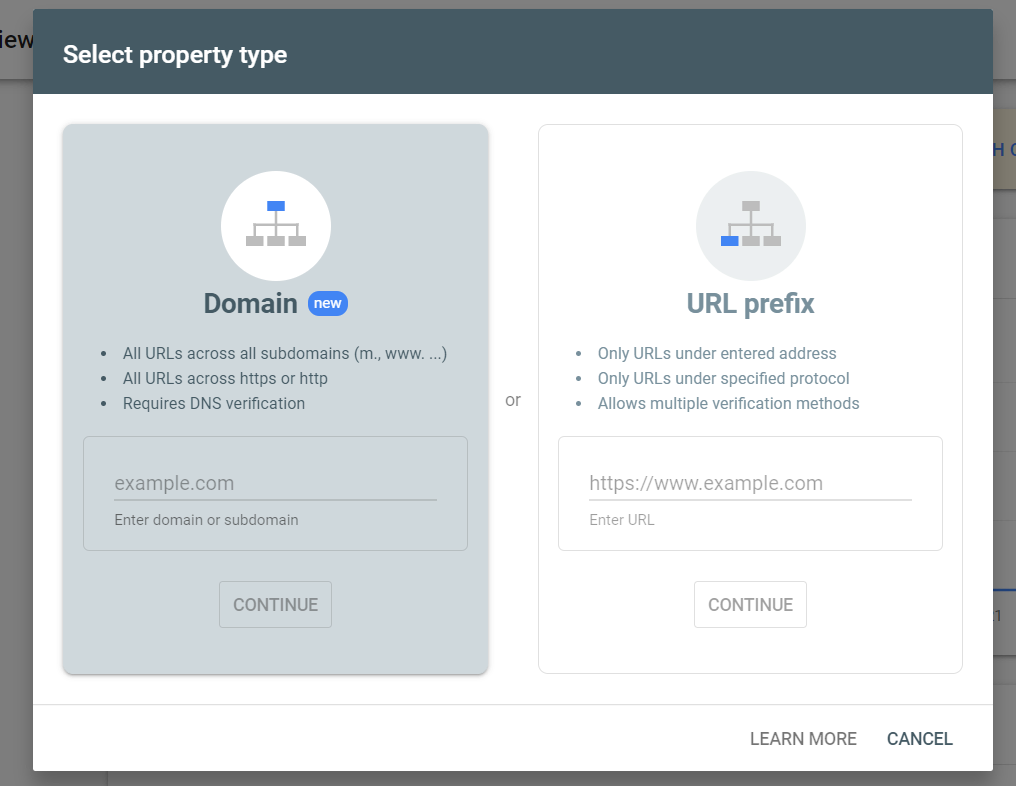
- Choose your property type. We recommend selecting the “Domain” option, as it provides a comprehensive overview of your site, covering protocols to subdomains. However, if you want to include only a specific URL, opt for the “URL prefix.” In this example, we’ll choose the “Domain” option. Clicking “Continue” will take you to the verification page. Click “Verify” after copying the provided TXT record and adding it to your hosting provider’s DNS Zone Editor.
3. Once you’ve successfully added a new property to your Google Search Console account, proceed to verify it in the Yoast SEO settings.
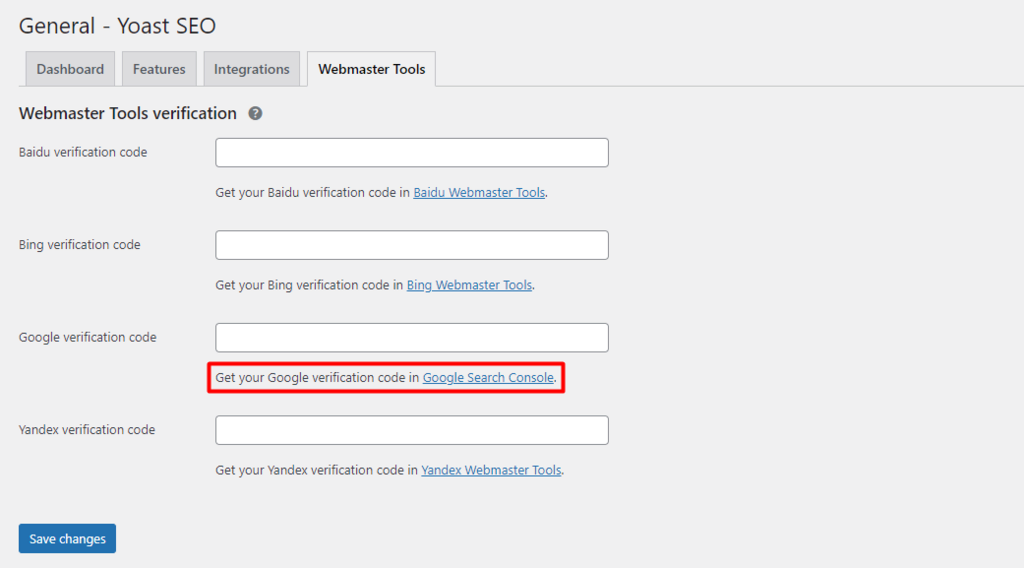
4. In your WordPress dashboard, go to “SEO” -> “General” -> “Webmaster Tools.” Click the link under the “Google Search Console” field. This link will direct you to the Webmaster Central page, where you can choose one of the methods to verify your domain. Opt for the “HTML tag” option to obtain the authorization code. Paste this code into the Yoast SEO dashboard.

Copy the metadata provided and paste it into the “Webmaster Tools” tab. Paste the metadata into the “Google verification code” field. Finally, click the “Save changes” button to complete the verification process.
Modifying Search Appearance Options
Search appearance pertains to how your website is presented on search results pages. While this setting is part of the configuration wizard, there’s a dedicated tab for customizing it further.
Moreover, within the Search Appearance section, you’ll find several tabs that enable customization. Let’s delve into the various tabs available:
- General: This tab encompasses the foundational settings introduced during the configuration wizard, ranging from the choice of title separator to meta descriptions. You also have the option to provide additional information for Google’s Knowledge Graph.

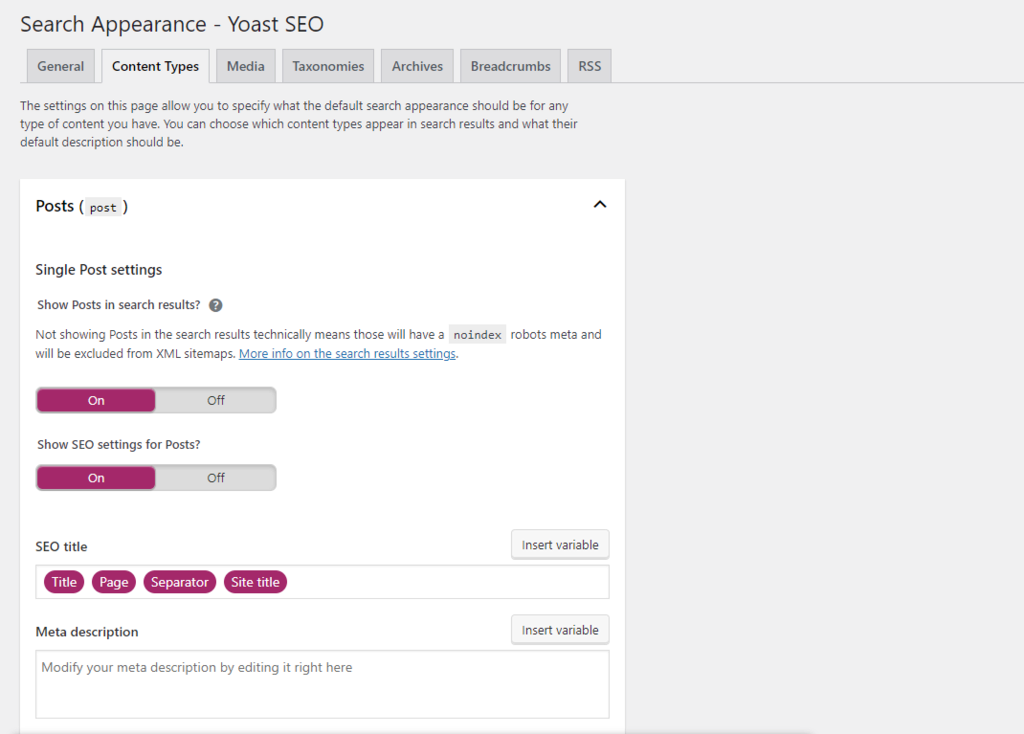
2. Content Types: In this section, Yoast SEO settings allow you to specify which content types should be visible in search results, along with their default descriptions. By default, Yoast SEO presents pages with the webpage schema and posts with the article schema. However, you have the flexibility to adjust these defaults to suit your requirements.
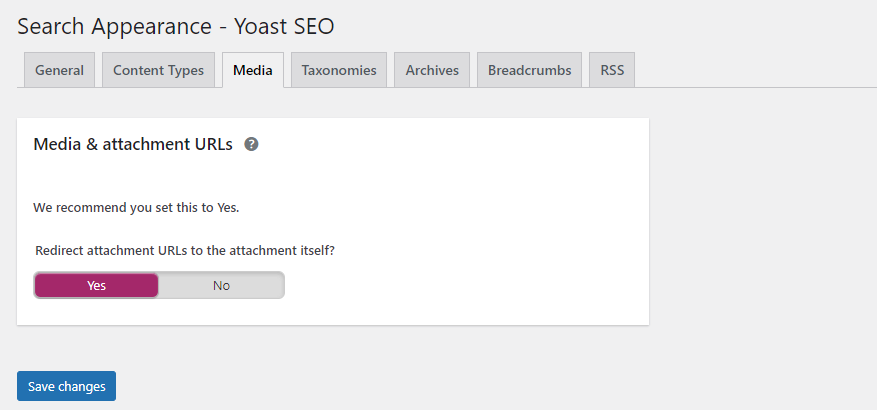
3. Media: It’s advisable to retain the default settings in this tab. Doing so ensures that when visitors click on media attachments, Google redirects them to your website posts.
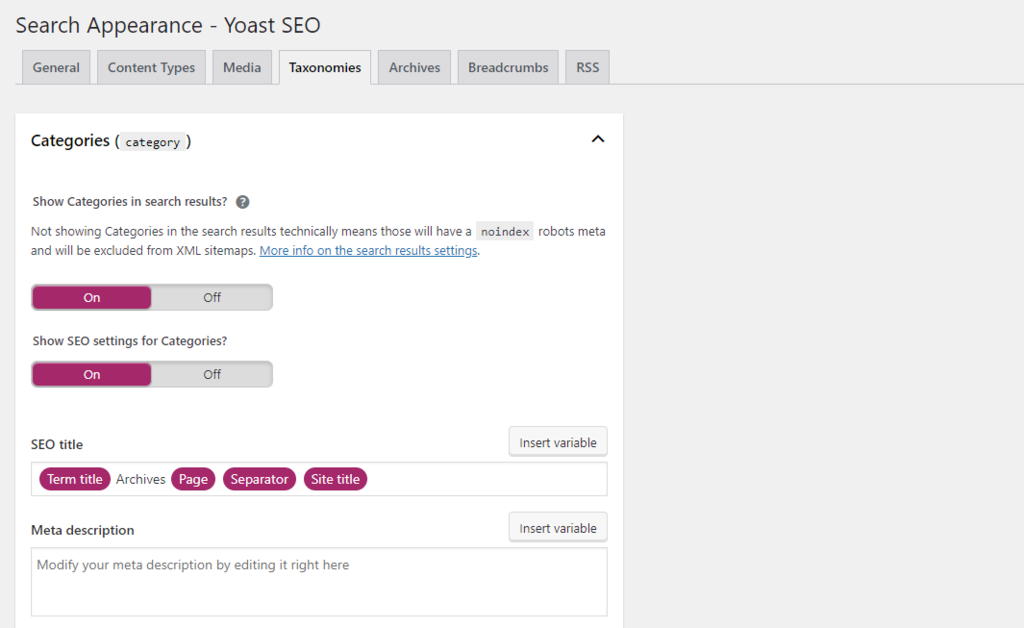
4. WordPress Taxonomies: This section enables you to customize the title and meta description template for your post categories and tags. This customization aids Google in displaying your posts when users have specific search intents.
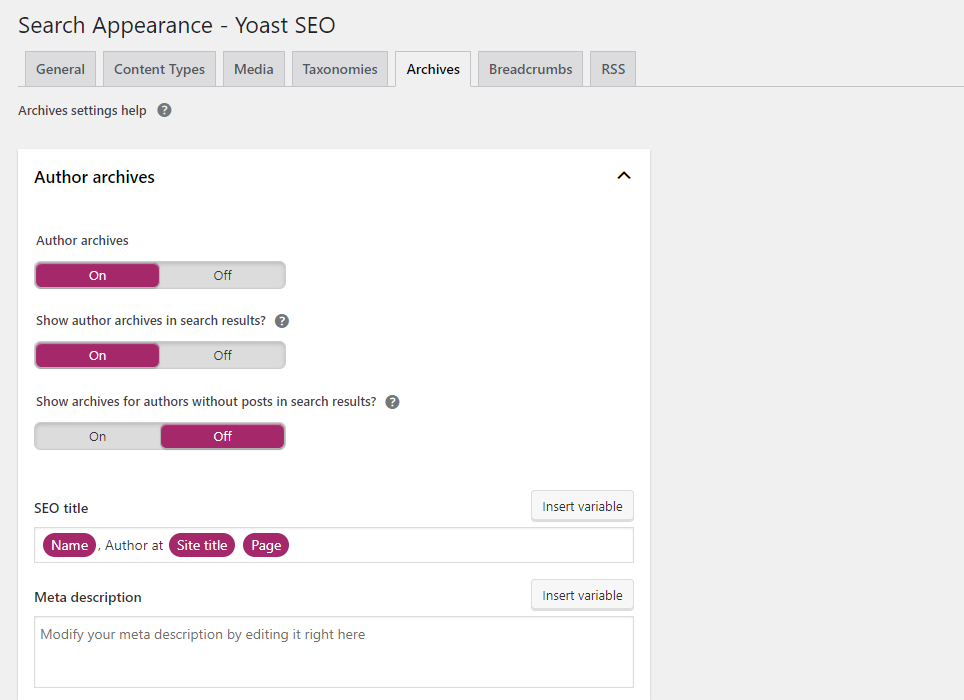
5. Archives: This tab allows you to determine how various types of archives are managed. For single-person websites, it’s recommended to deactivate author archives to avoid potential issues with duplicate content. Conversely, if your website has multiple authors, feel free to activate and tailor the settings to your needs.
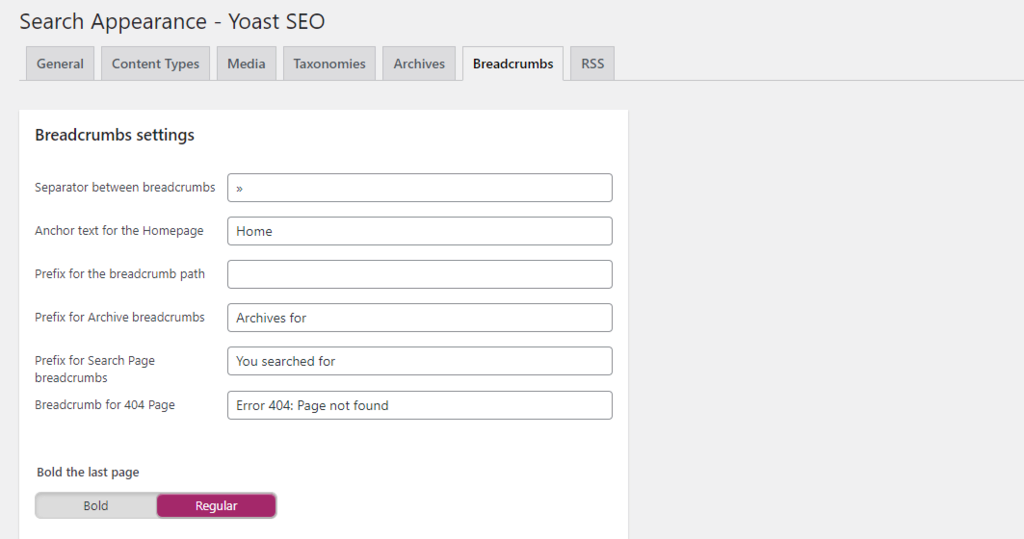
6. Breadcrumbs: Enabling this setting enhances visitors’ understanding of your site structure and assists search engine crawlers during indexing. To activate breadcrumbs through Yoast SEO settings, simply toggle the switch to “Enabled.”
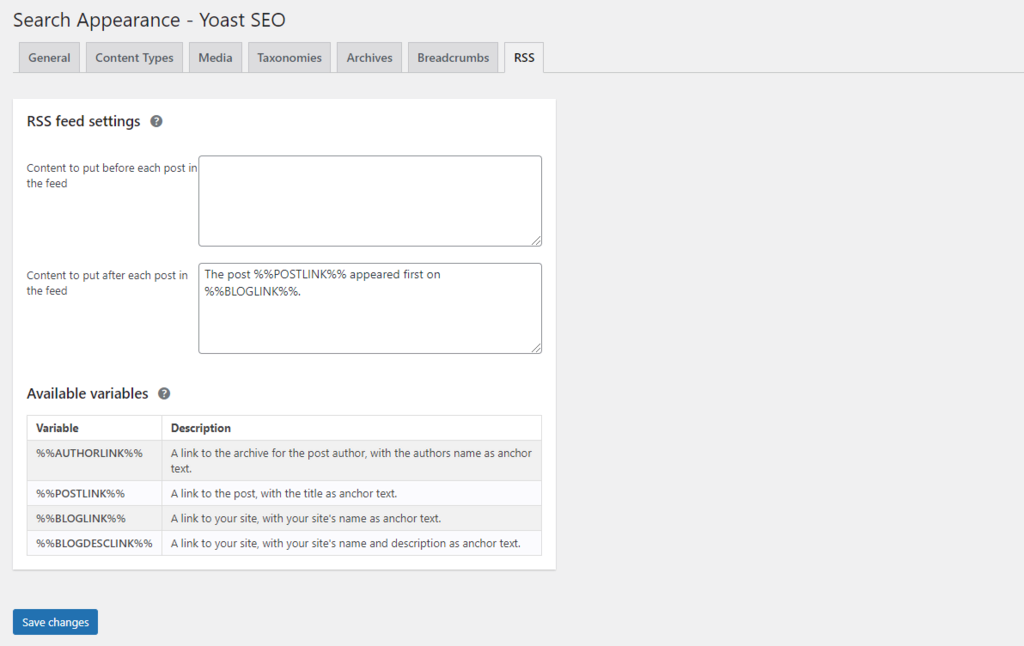
7. RSS: These settings safeguard your content against unauthorized republishing. The RSS feed adds a piece of content beneath your blog post, linking back to your site whenever the post is republished. You have various variables to choose from to customize this feature.
Integrating an XML Sitemap
An XML sitemap holds a critical role in enhancing your website’s SEO performance. This file serves as a comprehensive list of your significant web pages, effectively functioning as a navigational map to aid search engines in comprehending your site’s structure.
XML sitemaps serve the purpose of helping search engines grasp the details of your web pages, assisting them in determining which pages carry the most significance. This, in turn, facilitates the ease with which web crawlers locate relevant content within your website.
To generate a WordPress sitemap using Yoast SEO, follow these steps:
- Access your WordPress dashboard and navigate to “SEO” -> “General.”
- In the “Features” tab, scroll down to the “XML Sitemaps” section.
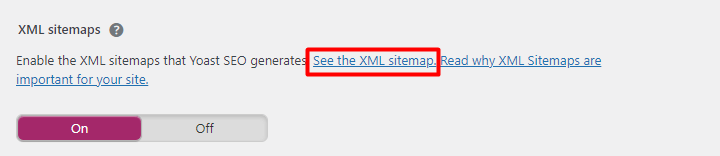
- Toggle the switch to “On,” and Yoast SEO will instantly generate an XML sitemap for your WordPress site. To view the sitemap, click on the question mark symbol adjacent to this section and select the highlighted link.
With the Yoast plugin, not only can you generate an XML sitemap, but you also have the flexibility to determine what should be included or excluded within the file. For instance, if you wish to exclude specific content types from the sitemap, simply toggle the respective button within the Yoast dashboard.
To do this, return to the “Search Appearance” menu and choose “Content Types.” Specify which content should be excluded from the sitemap and switch the button to “Off.”

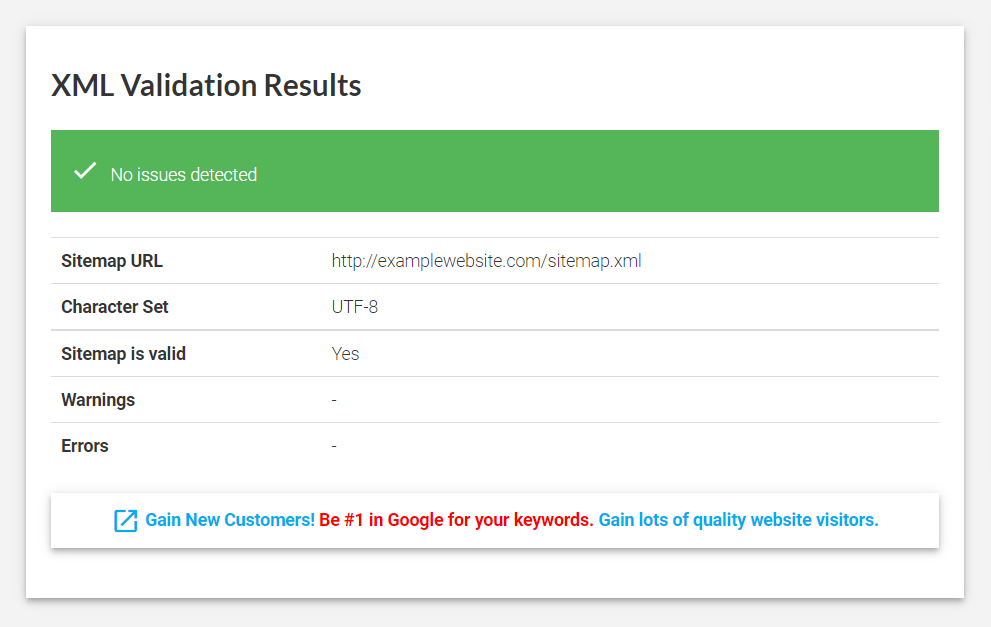
Once you have your sitemap file in hand, the next crucial step is to validate it using a sitemap validator to ensure its correct structure. Start by entering your domain name in the provided field and click “Validate Sitemap.”
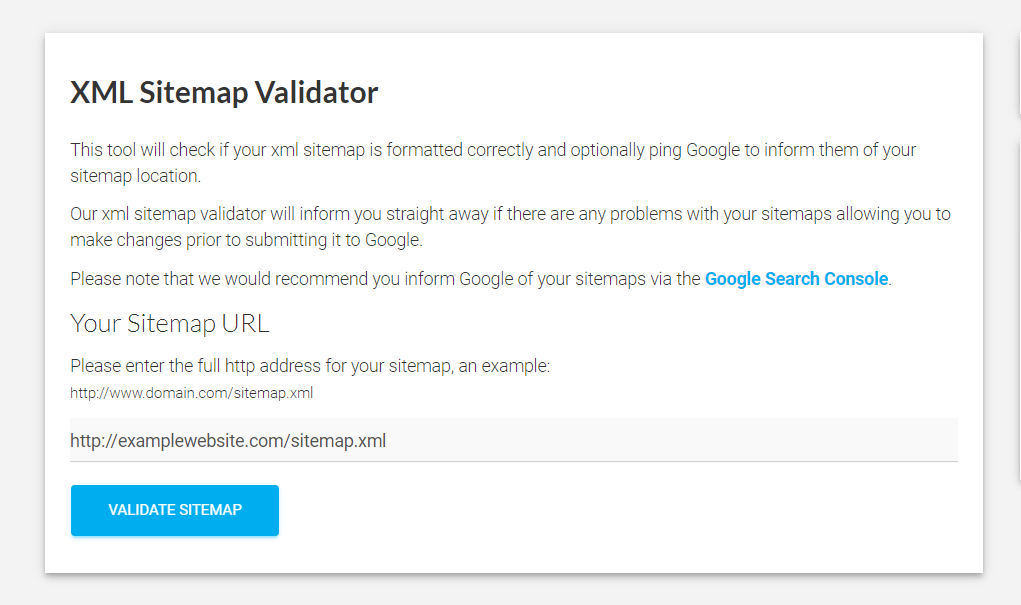
If your sitemap is valid, you will see the following confirmation screen:
Now, the subsequent step is to submit your sitemap to search engines, such as Google. Here are the steps to accomplish this on Google:
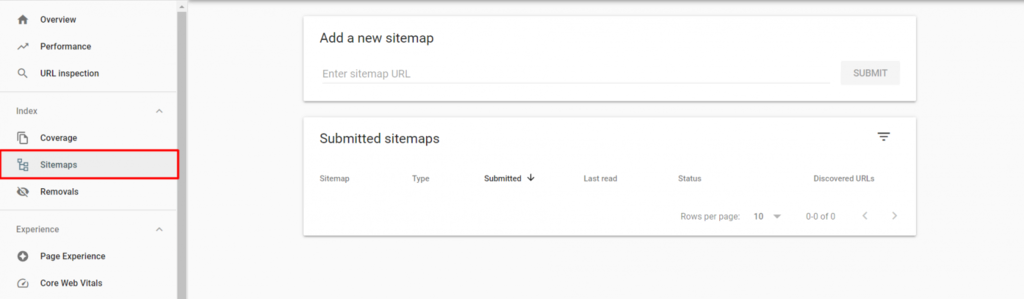
- Scroll down to the “Sitemaps” menu within Google Search Console.
- Enter your sitemap URL in the designated field and click “Submit.”
3. To check the status, navigate to “Sitemaps” -> “Submitted sitemaps.” Google Search Console will display the status and provide feedback on optimizing your site based on their documentation.
By following these steps, you ensure that your XML sitemap is not only generated but also validated and submitted to search engines, contributing to the improved visibility and accessibility of your website’s content.
Optimizing On-Page SEO
At this stage, you should have all the fundamental settings of the Yoast plugin configured and ready to go. With this groundwork in place, it’s time to leverage Yoast SEO to optimize your website’s content. The majority of the optimization process unfolds within the Meta Box provided by Yoast SEO, often referred to as the content optimization tab. You’ll find this tab beneath each of your blog posts.
Here, you’ll commence the optimization of various facets of your on-page SEO, spanning from title tags and meta descriptions to cornerstone content and readability analysis.
The following sections outline the key tasks involved in optimizing on-page SEO:
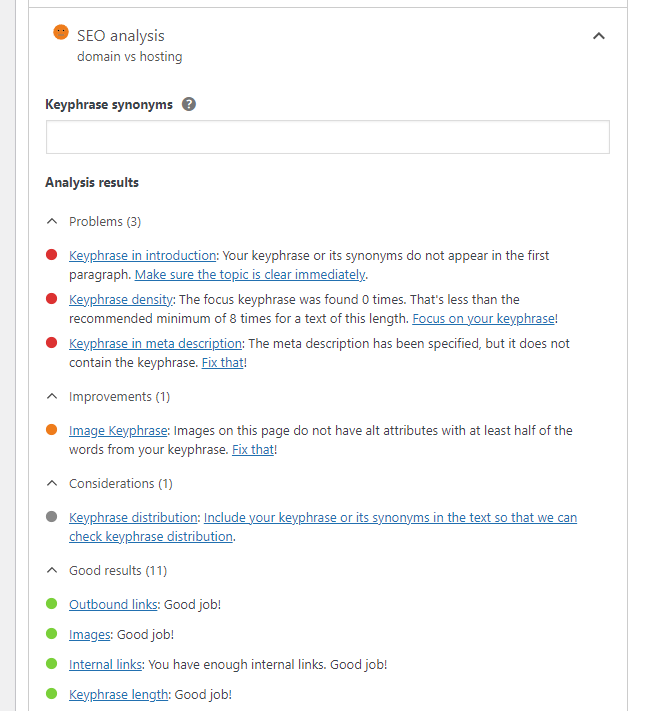
- Optimize Focus Keyphrase: The focus keyphrase or keyword represents the search term for which you want your blog posts or pages to rank in search engine results. It can consist of a single word or a combination of words, generally not exceeding five words. When you input your focus keyword into the Yoast SEO Meta Box, the plugin initiates content analysis and offers suggestions to enhance your content for improved ranking. You’ll find the analysis results and feedback in the SEO analysis section, accessible by clicking on the dropdown button. For users with the Yoast SEO premium plan, there’s an option to enter keyphrase synonyms to enhance the chances of ranking for relevant keywords. It’s worth noting that while Yoast SEO advises on keyword density, it’s crucial to avoid excessive keyword usage to prevent keyword stuffing, which can lead to Google penalties. A recommended practice is to perform keyword research using tools like Ahrefs or SEMrush to identify organic keywords, assess search volume, and evaluate keyword difficulty.
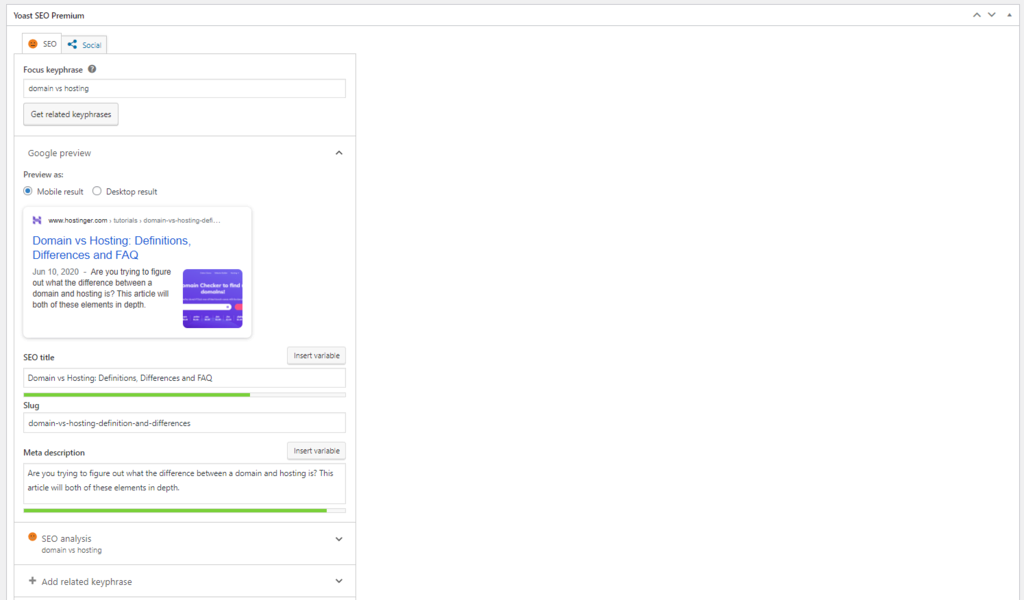
2. Customize Snippet Preview: To attract visitors to your website, it’s essential to make your post enticing and clickable. One effective way to achieve this is by optimizing your snippet preview. Visitors are more likely to click on a post with a compelling snippet. When your page garners more clicks compared to competitors, it signals search engines that your content offers better quality, thereby increasing your chances of higher rankings. In Yoast SEO, you’ll find the Google preview within the focus keyphrase section of the Meta Box. It provides a visual representation of how your post or page will appear in Google search results, allowing you to view both mobile and desktop results. Within this preview, you’ll encounter three key elements:
- SEO Title: This is the page title, typically highlighted in blue, and offers room for various variables based on your post settings. It’s advisable to incorporate your focus keyword and keep the title under 70 characters.
- Slug: The URL segment that describes your page’s content. It’s crucial to make your slug user-friendly by using descriptive words and including your focus keyphrase to enhance search engine and visitor comprehension.
- Meta Description: This is a brief excerpt that appears below the page title, providing insight into the content. An optimized meta description is essential, as Google may otherwise extract random content snippets. An optimized meta description can grab users’ attention by bolding parts containing focus keywords. Yoast SEO uses a color-coded system to indicate the status of each element, with green indicating that your snippet is ready, while red and yellow suggest areas requiring further improvement.
Identify Cornerstone Content
Cornerstone content represents a pivotal element of your website, acting as its foundation. These cornerstone articles typically exhibit qualities such as length, comprehensiveness, and a faithful reflection of your brand’s mission.
The primary objective behind having cornerstone content is to offer in-depth information to your audience and secure higher rankings for prominent keywords. Ideally, cornerstone content should not only inform but also engage visitors, ultimately leading them to engage with your website and consider your products or services.
To elevate the visibility of your cornerstone content, it’s essential to channel traffic toward it. You can achieve this through internal linking, guiding visitors from other relevant pages within your site. These internal links play a crucial role in helping web crawlers discover your cornerstone content.
The Yoast SEO plugin incorporates a feature that allows you to designate a post or page as cornerstone content. It’s worth noting that when you mark content as cornerstone, Yoast SEO provides a more comprehensive and critical analysis.
For instance, while a standard article might comprise 500 words, a cornerstone article is expected to contain a minimum of 1000 words.
Furthermore, Yoast SEO equips you with additional tools to enhance your cornerstone articles, such as a text link counter and dedicated cornerstone analysis.
To access your list of cornerstone articles, navigate to “Posts” -> “All Posts” -> “Cornerstone Content.” The text link counter offers insights into the number of internal links present within a post, enabling you to gauge whether your cornerstone articles have an adequate number of links. Premium users will also benefit from internal linking suggestions aimed at improving website structure.
Enhance Social Media Optimization
Utilizing social media as a platform to promote your website content offers a significant avenue for increasing traffic and attracting potential customers. Therefore, it’s crucial to tailor how your content appears across various social platforms to ensure its effectiveness. Ensuring your content’s visual appeal, integrating captivating images, and using concise post titles all play vital roles.
The good news is that Yoast SEO incorporates a feature designed to assist you in optimizing and customizing your social media snippet. Within the Yoast SEO meta box, you’ll find the social media tab, providing you with the means to adjust multiple elements, much like you did in the content optimization tab.
Typically, you may not need to make extensive modifications to your social media snippet, as Yoast SEO will automatically generate it based on your titles and meta tags. However, if you desire customization to align with your preferences, you can complete the provided fields accordingly.
Further Enhance SEO with Yoast SEO
Beyond on-page optimization, Yoast SEO offers additional advanced features that can enhance your SEO efforts. This section will guide you through some of these advanced settings within the SEO plugin, including utilizing the redirects module and enabling canonical URLs.
Utilize the Redirects Module to Prevent 404 Errors
Occasionally, website owners may find it necessary to delete web pages, change their locations, or modify their URLs. However, these old pages do not automatically vanish from search results. Consequently, visitors or web crawlers encountering these defunct links will encounter a 404 error.
The presence of a 404 error disrupts the user experience, preventing access to your content and potentially driving traffic away from your site. One effective approach to circumvent this issue is by implementing redirects, directing old URLs to their new counterparts. Fortunately, Yoast SEO incorporates a redirect manager functionality designed to simplify this technical task with just a few clicks. Additionally, it automatically creates redirects whenever content is moved or deleted.
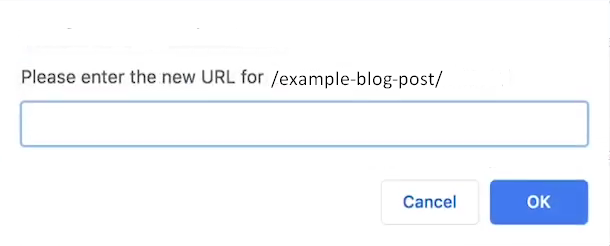
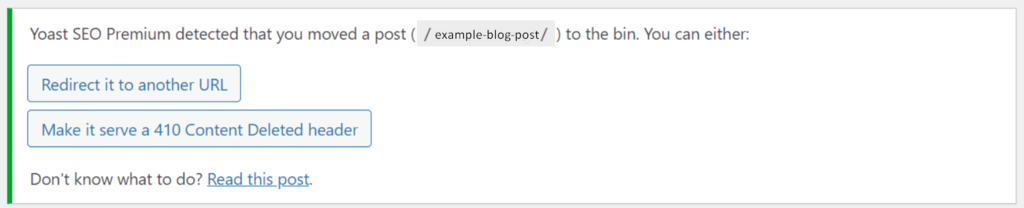
When you attempt to delete or relocate a single page or post, Yoast will issue a notification suggesting the creation of a redirect. Clicking the “Redirect it to another URL” button will trigger a pop-up box, allowing you to input the new URL. You can either provide the entire URL or just the slug. Once you’ve completed this process, click “OK,” and the post is successfully redirected to its new location.
Prevent Unintentional Duplicate Content
Having multiple pages with identical content can confuse Google and harm your page rankings. This situation often results in Google either not ranking any of the pages or penalizing the entire website.
To maintain good SEO practices, it’s crucial to steer clear of duplicate posts or pages. However, if you find yourself needing identical content for marketing or branding purposes, consider using a canonical URL.
A canonical URL represents one of the duplicate pages on your website. By employing canonical URLs, search engines can identify the original content and ensure it gets indexed and receives proper link authority.
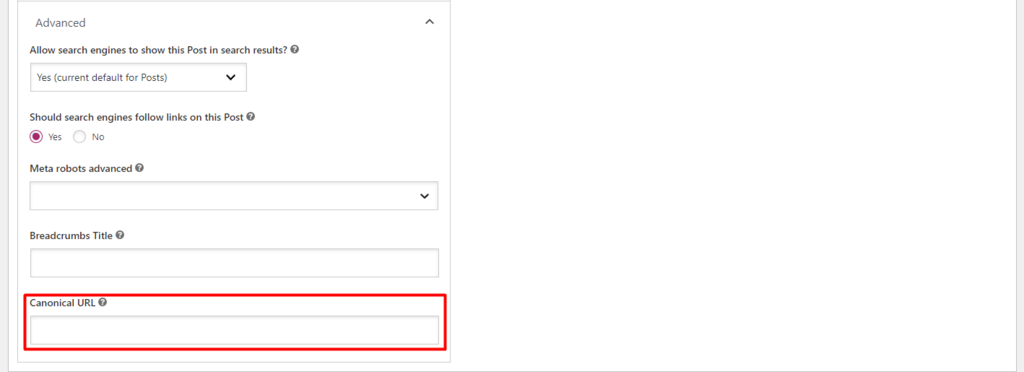
When using Yoast SEO, adding a canonical link is a simple process. Just access the Advanced tab in the Yoast SEO meta box, where you’ll find the Canonical URL section.
Then, input the complete canonical link with the URL of the original article you want to index. Update the post or page, and you’re good to go.
Effective Management of Archive Pages
As your website expands, you might organize your content by categorizing and tagging it for a consistent structure. WordPress automatically generates archive pages when you apply categories, tags, or other taxonomies to your site.
In many cases, blogs employ date-based archives, resulting in lengthy lists of articles organized by month or year. While this aids visitor navigation, it can negatively impact your SEO if not managed properly.
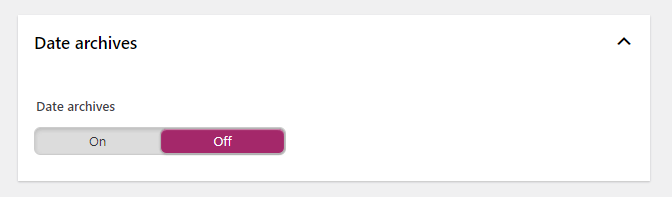
When web crawlers index these expansive archive pages, they consume your crawl budget, potentially preventing them from indexing your informative content.
To address this, it’s advisable to deactivate date-based archives. To do so, navigate to SEO -> Search Appearance -> Archives. Scroll down to the Date archives section and switch it off.
Conclusion
Yoast is an essential plugin for site owners looking to enhance their SEO. It offers a wide range of functionalities designed for advanced optimization, and many of its SEO features come preconfigured and user-friendly.
FAQs on Yoast:
How does Yoast SEO handle social media optimization?
Yoast SEO allows you to set social media meta tags (Open Graph and Twitter Cards) for your content, which can improve how your content appears when shared on social platforms.
Is Yoast SEO compatible with other SEO plugins?
While it’s generally not recommended to use multiple SEO plugins simultaneously, Yoast SEO is compatible with most other WordPress plugins. However, conflicts can arise, so it’s essential to test and ensure compatibility.
Can I use Yoast SEO for WooCommerce or other e-commerce platforms?
Yes, Yoast SEO is compatible with WooCommerce and other e-commerce platforms. It provides features specifically tailored to e-commerce websites.
Is Yoast SEO necessary for SEO success?
While Yoast SEO is a valuable tool, it’s not the only factor in SEO success. Quality content, backlinks, site speed, and other SEO best practices are equally important.
Does Yoast SEO offer support and updates?
Yes, Yoast SEO offers support for its premium users, and both the free and premium versions receive regular updates to ensure compatibility and security.
