
Indentation plays a crucial role in creating visually appealing and well-structured content on your WordPress website. Whether you are creating web pages, writing blog posts, or formatting code snippets, proper indenting can enhance readability and make your content more professional.
Let’s explore various methods to indent in WordPress, from using the default WordPress editor to utilizing HTML and plugins. So, if you’re looking to improve the formatting and organization of your WordPress content, keep reading to learn all about the different techniques and strategies for indentation in WordPress.
Understanding the Basics of Indenting in WordPress
Indenting plays a crucial role in enhancing the readability and visual appeal of your content in WordPress. It involves adding spaces or tabs at the beginning of a line to create a visual hierarchy and structure within your text. While it may seem like a small detail, a proper indentation can make a significant difference in how your content is perceived by readers. Here are some key reasons why indentation is important in WordPress:
1. Visual Organization and Readability
Indentation helps in organizing your content by visually separating different sections or elements. By indenting paragraphs, lists, or code snippets, you create a clear distinction between them, making it simpler for readers to navigate through the content and understand its structure.
2. Improved Scannability
When users visit your website, they often scan the content rather than reading it word by word. Indenting key points, headings, or bullet points helps to draw attention to important information. This makes it easier for users to quickly grasp the main ideas and find the specific details they are looking for.
3. Code Clarity and Maintainability
WordPress allows you to include custom code snippets or embed third-party scripts on your website. Indenting code properly not only improves its readability but also makes it easier to understand and maintain. Well-indented code helps you identify logical blocks, spot errors, and make modifications more efficiently.
4. Consistency and Professionalism
Consistent indentation throughout your website creates a sense of professionalism and attention to detail. It adds a polished touch to your content and demonstrates that you have taken the time to structure and organize it effectively.
Now that we understand the importance of indentation in WordPress, let’s explore different methods and techniques to achieve proper indentation in your content. We will begin by looking at how to use the default WordPress editor for indenting.
How to Use the Default WordPress Editor for Indenting
The default WordPress editor, also known as the Gutenberg editor, provides built-in features that allow you to easily indent your content. In this section, we will explore how to access the editor and utilize its indentation capabilities.
Why Indenting is Important in WordPress Editor
Before we dive into the steps, let’s briefly discuss why indentation is important in the WordPress editor. Proper indentation helps in organizing your content, improving its readability, and making it more visually appealing. It allows you to create a clear structure, separate different elements, and highlight important information.
Accessing the Editor
To begin indenting your content in the WordPress editor, follow these steps:
- Log in to your WordPress admin dashboard.
- Direct yourself to the “Posts” or “Pages” section, depending on where you want to edit your content.
- Click on “Add New” or cherry-pick an existing post/page to edit.
- The Gutenberg editor will load, displaying a visual representation of your content.
Indenting Text in WordPress Editor
Once you have accessed the WordPress editor, you can start indenting your text with the following steps:
- Select the paragraph or section of text you want to indent. You can do this by clicking and dragging your cursor over the desired portion.
- Look for the formatting options toolbar at the top of the editor. It should appear automatically when you select the text.
- Within the formatting options toolbar, you will find an icon that resembles an arrow pointing to the right. This is the “Indent” button.
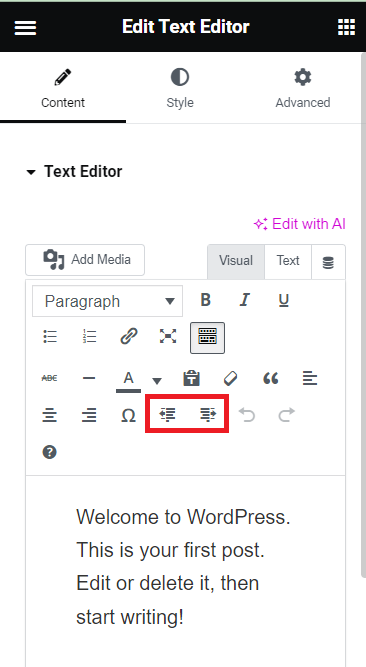
- Click on the “Indent” button once to indent your selected text. You can click multiple times to increase the level of indentation.
Alternatively, you can also make use of keyboard shortcuts to indent your content. For Windows, you can press “Ctrl + ]”, and for Mac, you can press “Cmd + ]”. To decrease indentation, use “Ctrl + [“(Windows) or “Cmd + [“(Mac).
By following these steps, you can effortlessly utilize the default WordPress editor’s built-in indentation features to organize and structure your content effectively. In the next section, we will explore how to use HTML for indenting in WordPress.
How to Indent Using HTML in WordPress
In addition to the default WordPress editor, you can also use HTML to achieve indentation in your WordPress content. HTML provides greater flexibility and control over the formatting and structure of your text. In this section, we will explore the basics of HTML indentation and how to implement it in WordPress.
Understanding the Basics of HTML Indenting
HTML (Hypertext Markup Language) is the model markup language created to structure and format web pages. It makes use of tags to define the structure and appearance of different elements on a webpage. HTML indentation involves adding specific HTML tags to create the desired indentation effect.
Also Read: Text Formatting In HTML And CSS: A 5 Step Tutorial
How to Use HTML for Indenting in WordPress
To indent your content using HTML in WordPress, follow these steps:
- Access the WordPress editor by logging in to your admin dashboard and navigating to the “Posts” or “Pages” section.
- Edit an existing one or create a new post.
- Switch to the “Edit as HTML” mode in the editor. This allows you to directly edit the HTML code of your content.

- Locate the section or paragraph of text that you want to indent.
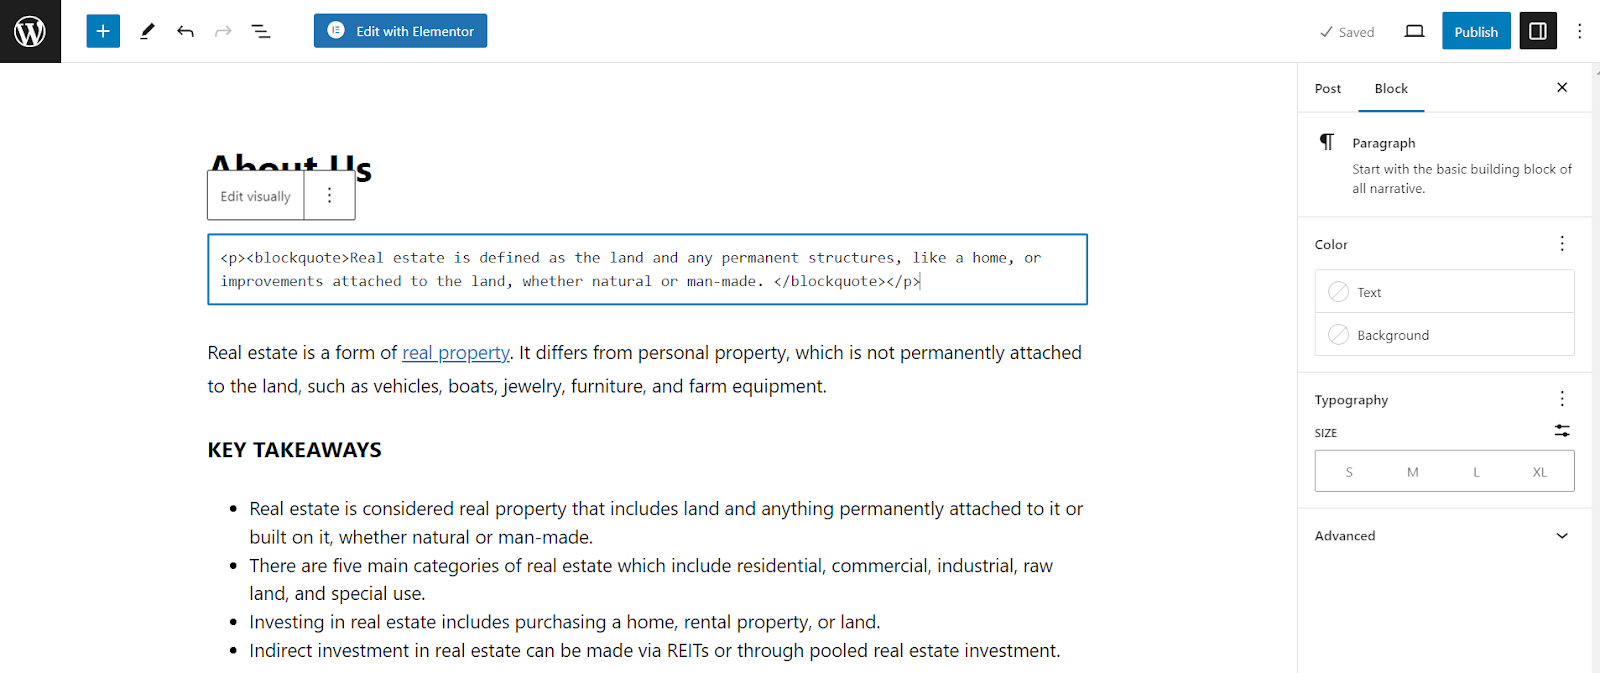
- Add the HTML <blockquote> tag before the text you want to indent and the closing </blockquote> tag after the indented text.
- Save or update your post/page.
By using the <blockquote> tag, you can create a visually indented block of text within your WordPress content.
Common HTML Indenting Issues and How to Fix Them
While using HTML for indentation in WordPress, you may encounter some common issues. Here are a few issues and their possible solutions:
- Indentation not appearing: Ensure that you have correctly added the opening and closing <blockquote> tags around the desired text. Also, check that you are in the “HTML” mode of the editor and not the “Visual” mode.
- Inconsistent indentation: If your indentation is not consistent across different paragraphs or sections, make sure you are applying the <blockquote> tags consistently to each block of text.
- Overlapping indentation: Be cautious when nesting HTML tags for indentation. Avoid nesting <blockquote> tags within each other, as it can cause overlapping and incorrect indentation.
By being aware of these common issues and using HTML tags appropriately, you can effectively utilize HTML indentation in WordPress to create visually appealing and well-structured content.
In the next section, we will explore the option of using plugins for indenting in WordPress, providing even more flexibility and functionality.
Using Plugins for Indenting in WordPress
While the default WordPress editor and HTML provide basic indentation capabilities, using plugins can offer additional features and flexibility for indenting in WordPress. Listed below are some advantages of indenting in WordPress.
Why Consider Using Plugins for Indenting
Plugins can greatly enhance your ability to indent content in WordPress. They often provide advanced formatting options, customizable settings, and automation features that make the indentation process more efficient. Here are a few reasons why you might consider using plugins for indenting:
- Extended Functionality: Plugins can offer additional formatting options beyond what is available in the default editor, allowing you to create unique indenting styles and effects.
- Ease of Use: Plugins often provide a user-friendly interface and intuitive controls, making it easier for users of all skill levels to indent their content without requiring coding knowledge.
- Automation and Bulk Editing: Certain plugins allow you to automatically indent specific types of content or apply indentation to multiple sections or pages at once, saving you time and effort.
Popular Indenting Plugins
There are numerous plugins available for indenting in WordPress. Here are a few popular options worth exploring:
- TinyMCE Advanced: While primarily known for its advanced text editing capabilities, this plugin also offers options for indenting paragraphs and lists within the WordPress editor.
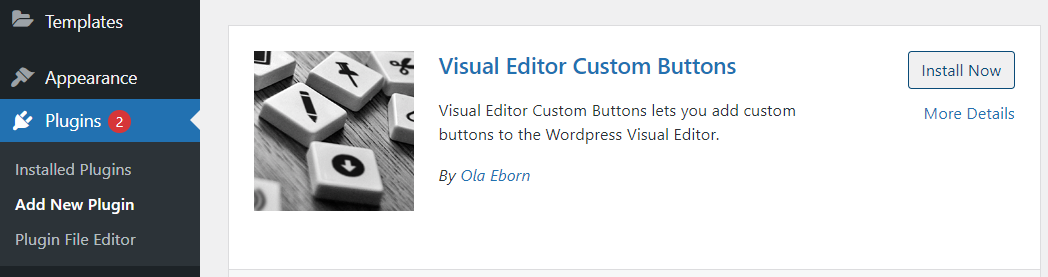
- Visual Editor Custom Buttons: This plugin allows you to add custom buttons to the WordPress editor’s toolbar, including buttons for indenting and outdenting content.
- Ultimate TinyMCE: With an extensive range of features, this plugin enhances the functionality of the WordPress editor and includes options for indenting text and applying custom styles.
How to Use a Plugin for Indenting
To use a plugin for indenting in WordPress, follow these general steps:
- Enter your WordPress admin dashboard and navigate to the “Plugins” section. Click on “Add New.” Utilize the search bar to find the preferred indenting plugin.
- Proceed to install and activate the plugin of your choosing.
- Access the plugin’s settings or options page, usually located under the “Settings” or “Tools” section of the dashboard.
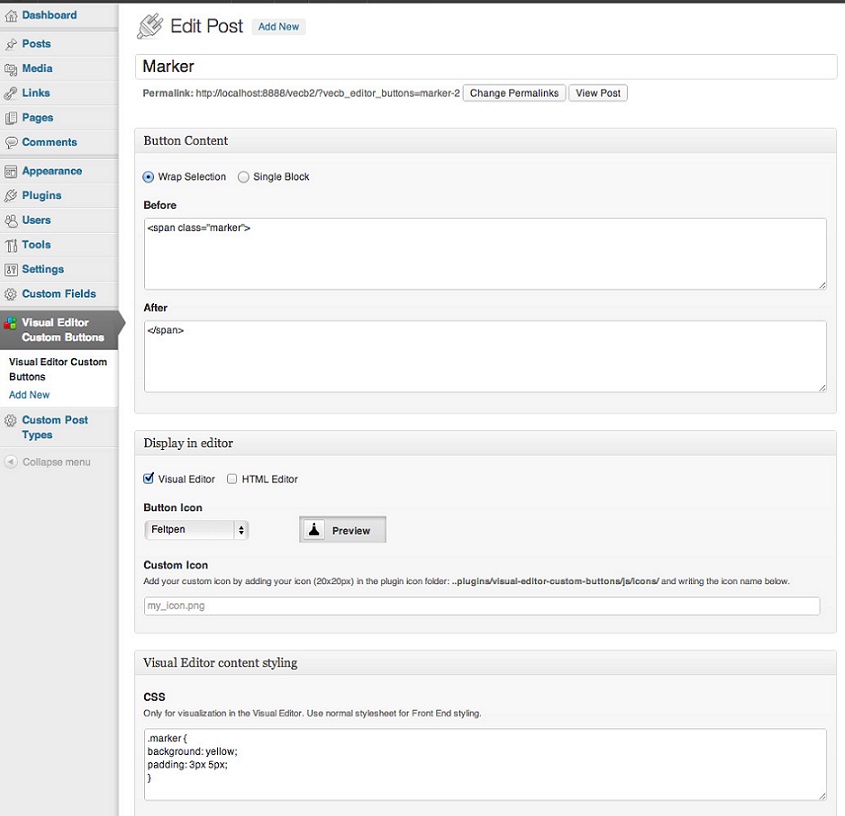
- Configure the plugin settings as per your expectations, such as specifying the indentation style, selecting the content types to indent, or enabling automation features.
- Save your settings and start using the plugin’s indentation functionality within the WordPress editor.
It’s important to note that the installation and usage steps may vary slightly depending on the specific plugin you choose. Therefore, it’s recommended to refer to the plugin’s documentation or support resources for detailed instructions.
In the next section, we will explore best practices and tips for effective indentation in WordPress, helping you make the most out of your indenting efforts.
Indenting in WordPress: Best Practices and Tips
To ensure that your indentation in WordPress is effective and visually appealing, it’s important to follow best practices and consider some helpful tips. In this final section, we will explore key recommendations that will enhance your indenting efforts.
When and Where to Use Indents
- Paragraphs: Use indentation to visually separate paragraphs, making them easier to read and distinguish from one another.
- Lists: Indent list items to clearly indicate their hierarchical structure and improve readability.
- Code Snippets: Properly indent code snippets to enhance readability and make it simpler for developers to understand and work with the code.
Common Mistakes and How to Avoid Them
- Over-indentation: Avoid excessive indentation, as it can make your content look untidy and difficult to read. Stick to a consistent and moderate level of indentation.
- Inconsistent Indentation: Maintain consistency in your indentation throughout the content to create a professional and organized appearance.
- Forgetting to Indent: Remember to apply indentation consistently, especially when working with long-form content or complex code snippets.
Additional Tips for Effective Indenting
- Use a Style Guide: If you have a team of writers or contributors, consider creating a style guide that includes guidelines for indentation to ensure consistency across your website.
- Preview and Test: Always preview your content before publishing to check how the indentation appears on different devices and screen sizes. Make adjustments as necessary.
- Utilize Visual Editors: If you are not comfortable with HTML coding, consider using visual editors or plugins that provide a user-friendly interface for indenting.
- Regularly Review and Update: As your content evolves, periodically review and update the indentation to maintain consistency and readability.
By following these best practices and tips, you can effectively utilize indentation in WordPress to create visually appealing, well-structured, and easily readable content.
Conclusion
Proper indentation is a valuable technique for enhancing the organization, readability, and professionalism of your WordPress content. Whether you use the default WordPress editor, HTML, or plugins, mastering the art of indentation will greatly improve the visual appeal and user experience of your website.
Remember to consider the importance of indentation, explore different methods, and choose the approach that best suits your needs. With consistent indentation and attention to detail, your content will stand out and engage your readers effectively.
