
We live in a world where staying in touch with your customers is essential. Though the mailing system lets you keep in touch with your customers, a contact form goes a long way. Many people need more clarification about adding a contact form to their website as they think it requires much coding knowledge. Luckily, a contact form plugin is available in WordPress, making our task hassle-free.
Why do we need Contact Form 7?
The email system for keeping in touch with your customers is long gone. Besides, having an email as the only option to contact gives an invitation to a lot of spam. Here are the reasons why you need a contact form:
- Protection from Spam: The contact form blocks spam and puts a stop to almost all email spam.
- Specific Information: In the email system, chances are that customers may miss out on providing the necessary information. If you use the contact form on your website, you have the liberty to ask for the required information and get exactly what you want.
- Time saver: Once the information is submitted, customers are eager to get a response from you. They might send you inquiries through multiple emails, which is frustrating. Through the contact form, an auto generated response can be sent, like “We’ll get back to you in 24 hours”. This assures the user that his query is being heard and a response is guaranteed.
Installing Contact Form 7 on WordPress
Let’s start with installing the contact form on your WordPress website.
- Login to your WordPress Admin Dashboard.
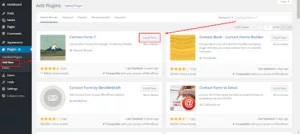
- Go to Plugins> Add New.
- Search for “Contact Form 7” in the search bar.
- Next is to Click on Install and then Activate the plugin to begin with the process.
- After the plugin is successfully activated, you will see the Contact tab in the left panel.
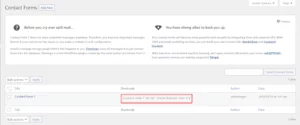
Go to Contact>Contact Forms
This will help you manage multiple forms too.
6. Now, a sample contact form is available to use. Simply copy the shortcode in the front of the name Contact Form 1.
Go to Pages> Add New > Give Title to your new Page > Paste the Shortcode> Publish
On publishing, the page would look like this:
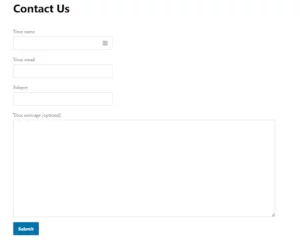
Voila! Your Contact Form is ready in no time!
Do you have different needs than this contact form? Or did you not like the layout? WordPress has got you covered, as you can customize this contact form.
Customizing Contact Form 7
When you create a new Contact Form, you can see many tags available that would help you to customize your form.
Contact> Add New
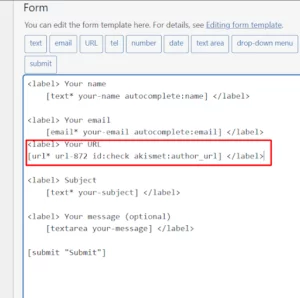
To explain with an example, let’s add an URL field to this contact form.
Click on the URL tab; you’ll get a box to specify your requirements for the URL field. Fill in the necessary details and click on Insert tag.
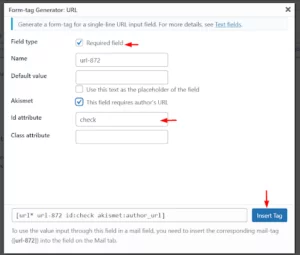
Once the tag is inserted, it will show the following changes in the code:
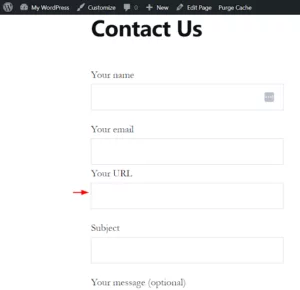
Click on Save and then view the page for the result.
How would you customize your email settings? Simple as it is! Just go to the Mail tab while editing your contact form.
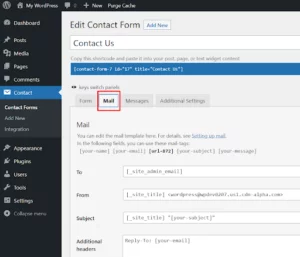
For mail headers of requisites like To, From, and Subject, Contact Form 7 has setting fields. Additional Header fields in the Mail and Mail (2) sections are intended solely for adding Cc or Bcc headers to your email.
Like other Mail fields, you can enter any header lines into the field and insert any mail tags into any location in each header line.
Securing Contact Form
As the industry develops, automated bots have become smarter and more intelligent. This has resulted in spam being a serious security issue for contact forms. Since contact forms are often accessible to the public Internet, web scrapers can readily send spam to your mailbox. Thankfully, there is a technique that helps to secure your contact form against spammers.
Adding reCAPTCHA to the Contact Form
If you have ever completed a form on the web, reCAPTCHA technology created by Google to distinguish automated bot activity will likely be familiar to you. Older versions of reCAPTCHA (V2) necessitated the completion of a challenge or puzzle. However, the most recent version (V3) does not require any action from the user. It instead runs in the background to detect the difference between humans and bots. As Contact Form 7 supports reCAPTCHA V3, it is recommended as it offers a better experience for visitors. To get started with reCAPTCHA, you must generate an API key. Follow the steps below to set up reCAPTCHA for your Contact Form.
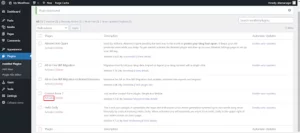
- Install and activate reCAPTCHA for the Contact Form 7 plugin.
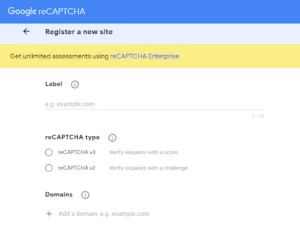
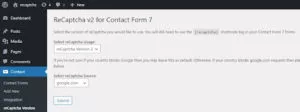
- Configure the reCAPTCHA for Google V2 here. Fill in the necessary details and click on submit.
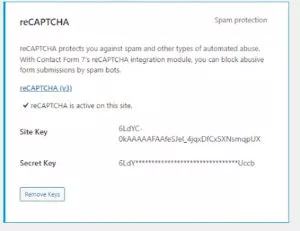
- On successful submission, you will receive a secret key and a site key. Copy both keys.
- After this, log in to your WordPress account.
Go to Dashboard>Contact>Integration.
- Select reCAPTCHA.
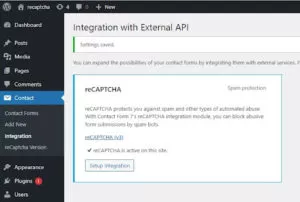
- Enter the secret key and site key and click on Save Changes.
- After this, open your contact form. Contact>Contact Forms and paste [recaptcha] shortcode before the SUBMIT button.
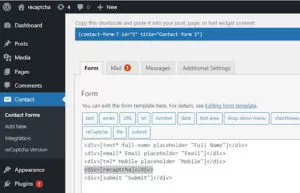
You can find this shortcode at Contact> reCaptcha Version.
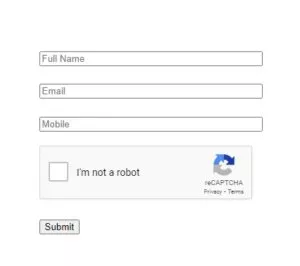
You’ll notice a reCAPTCHA logo on your contact form page after configuring reCAPTCHA in Contact Form 7. This indicates that reCAPTCHA is in use and guarding your contact form against spam entries.
Conclusion
Adding a contact form would provide easy customer communication and help you provide better solutions. We hope this blog will help you to set up your contact form as well as customize and secure it. Do let us know your queries in the comment box below.
