
Did you know that every second, about 6,000 tweets pop up on Twitter? That’s over 350,000 tweets in a minute, 500 million tweets each day, and a whopping 200 billion tweets every year. With this flood of information, even if your tweets are awesome, chances are they might get lost in the crowd.
The same goes for other social networks; your posts could disappear in the feeds. That’s why it’s smart to repost your best stuff online a few times.
In this article, you’ll learn a simple and free solution: the Revive Old Post plugin, which automates this process for you.
Why Repost Older Content?
There are good reasons to reshare your old posts. First off, it helps you connect better with your current readers. There are two big reasons why your readers might miss your posts: either they get buried in their feeds or because social networks limit how many people see them. Reposting helps with both. You can share your content when it suits you, making sure your regular readers see it. And you can repost it at other times for people in different time zones using plugins, social media scheduling tools, or social media aggregators
Another reason to repost is to grab the attention of new readers. As your blog gets more popular, new fans won’t have seen your older posts. Reposting gives them a chance to discover your earlier stuff.
I’ve noticed that even reposting old content on Twitter gets quite a few retweets, though not as many as the first time around. So, it’s a smart move to keep your audience engaged and make sure your best content doesn’t get lost in the online noise.
Repost content from – Revive OId Post Plugin
Revive Old Post is a well-known plugin that makes sharing your content easy. Even with the free edition, you are able to:
- Share both new and old posts.
- Choose the minimum time between publishing articles.
- Decide how many posts to repost.
- Add a special hashtag for reposted articles.
- Include a link to your website.
- Exclude certain categories or specific articles from the repost list.
If you’re lucky enough to have the premium version, you’ll also get features like support for custom record types, the option to use multiple social networking accounts, LinkedIn support, and more.
For this article, we’ll be focusing on the free version.
How to Repost an Old Article in a Social Network?
Setting up Revive Old Post is as easy as any other plugin. Once activated, a new tab will appear in your console. In this tab, you can:
1. Accounts:
- Set up social networks for automatic publishing.
2. General Settings:
- Adjust details like the minimum time between publishing articles and how old records can be reposted.
3. Blog Format:
- Choose the format and content you want to share.
4. Schedule (Only in the premium version):
- Create a custom schedule for content.
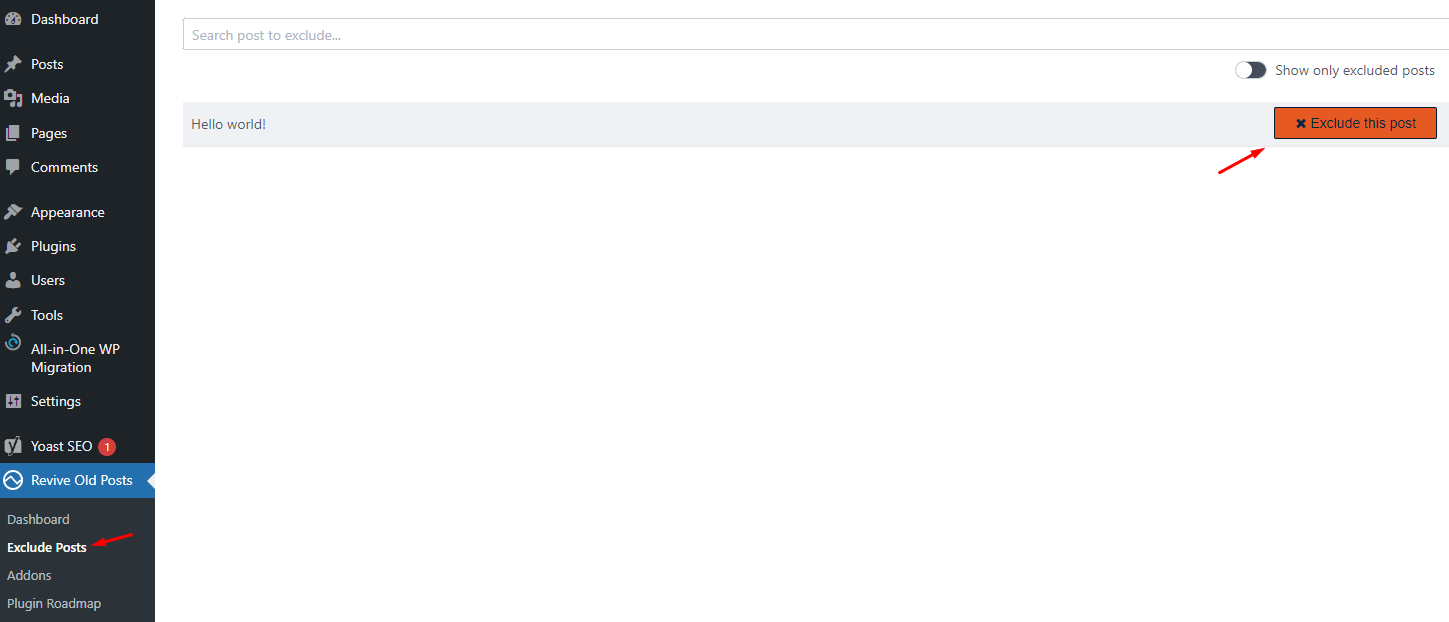
Additionally, there’s an “Exclude Posts” tab where you can choose specific posts that you don’t want to automatically repost. This gives you control over which content gets a second round of sharing.
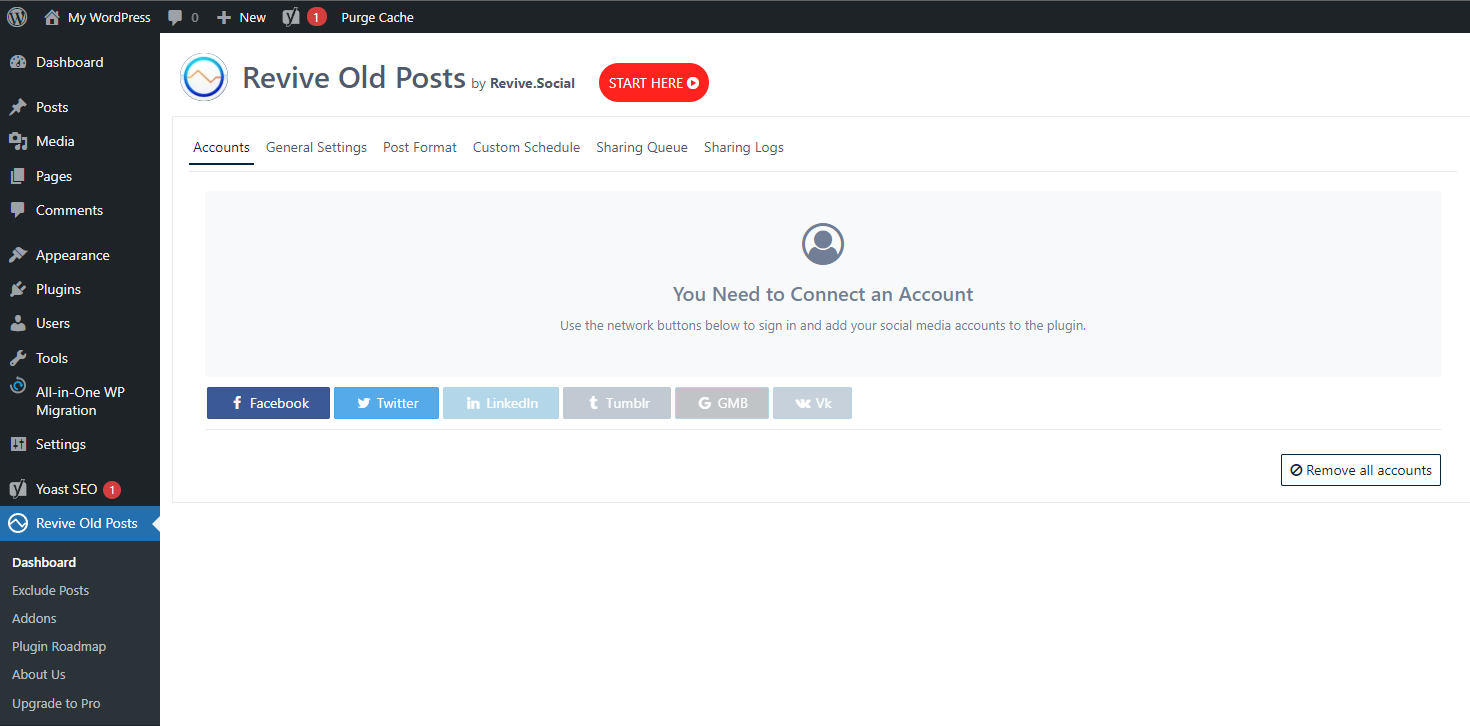
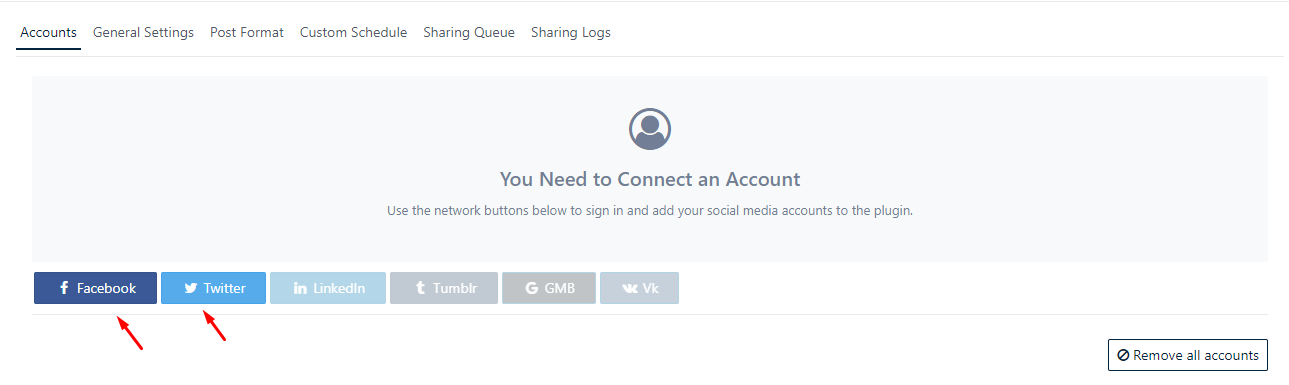
After you’ve activated Revive Old Post, the initial step is to connect it with your social network accounts. To begin, head to the main page of the plugin settings. Simply click on “social network icon” for the social network you want to link:
Revive Old Post will then prompt you to grant permission to use the selected social network. For instance, if you’re adding a Twitter account, the authorization process will involve:
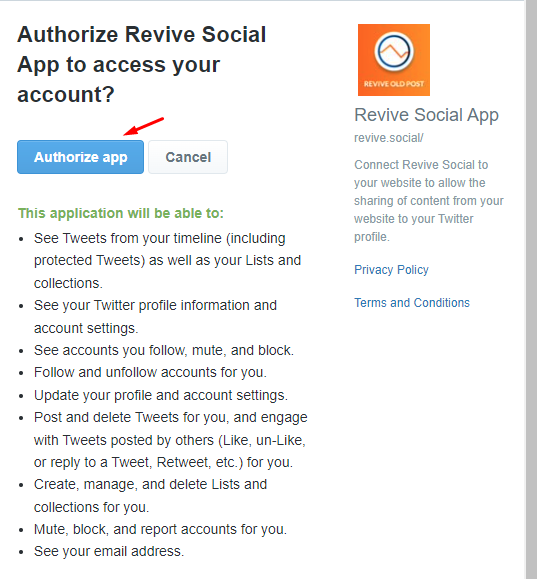
Set up auto-publishing
Once your social networks are connected, you can set up a schedule for automatically publishing your posts. Navigate to the General Settings Tab for this:
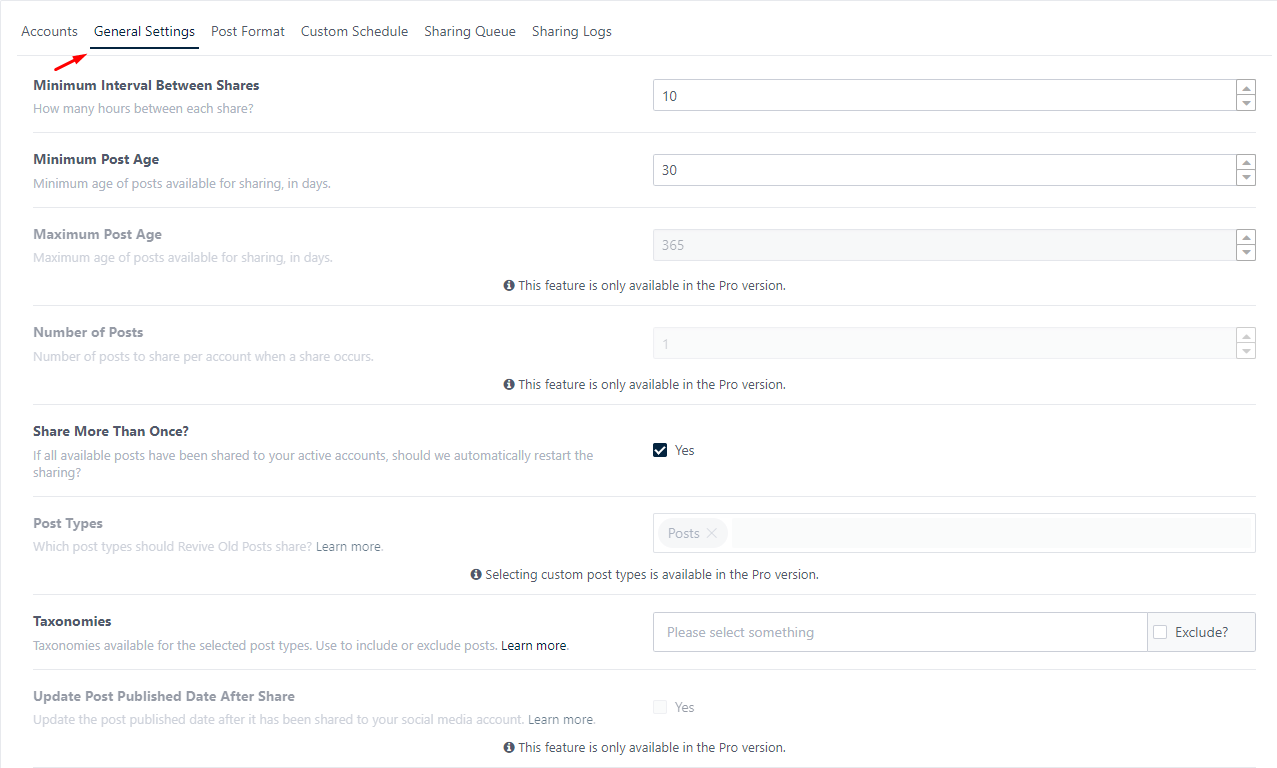
Here’s what you need to adjust:
- Minimum interval between shares: Determine the minimum time gap between post publications. For example, if you want your content shared no more than once every 4 hours, input “4”.
- Minimum entry age: Set the minimum number of days since the publication date. For instance, if you don’t want to repost anything less than two weeks old, enter “14”.
- Maximum entry age: Establish the maximum number of days from the publication date. If, for instance, you don’t want to repost entries older than three months, input “90”.
- Number of posts: Decide how many posts should be published at a time. The default “1” is usually a good choice.
For more detailed settings, you can also include or exclude categories, choose the image size, and configure statistics. These settings give you fine control over how your posts are automatically shared.
Select the appearance of posts
Now it’s time to set how the plugin will present your posts. Navigate to the Post Format tab for this.
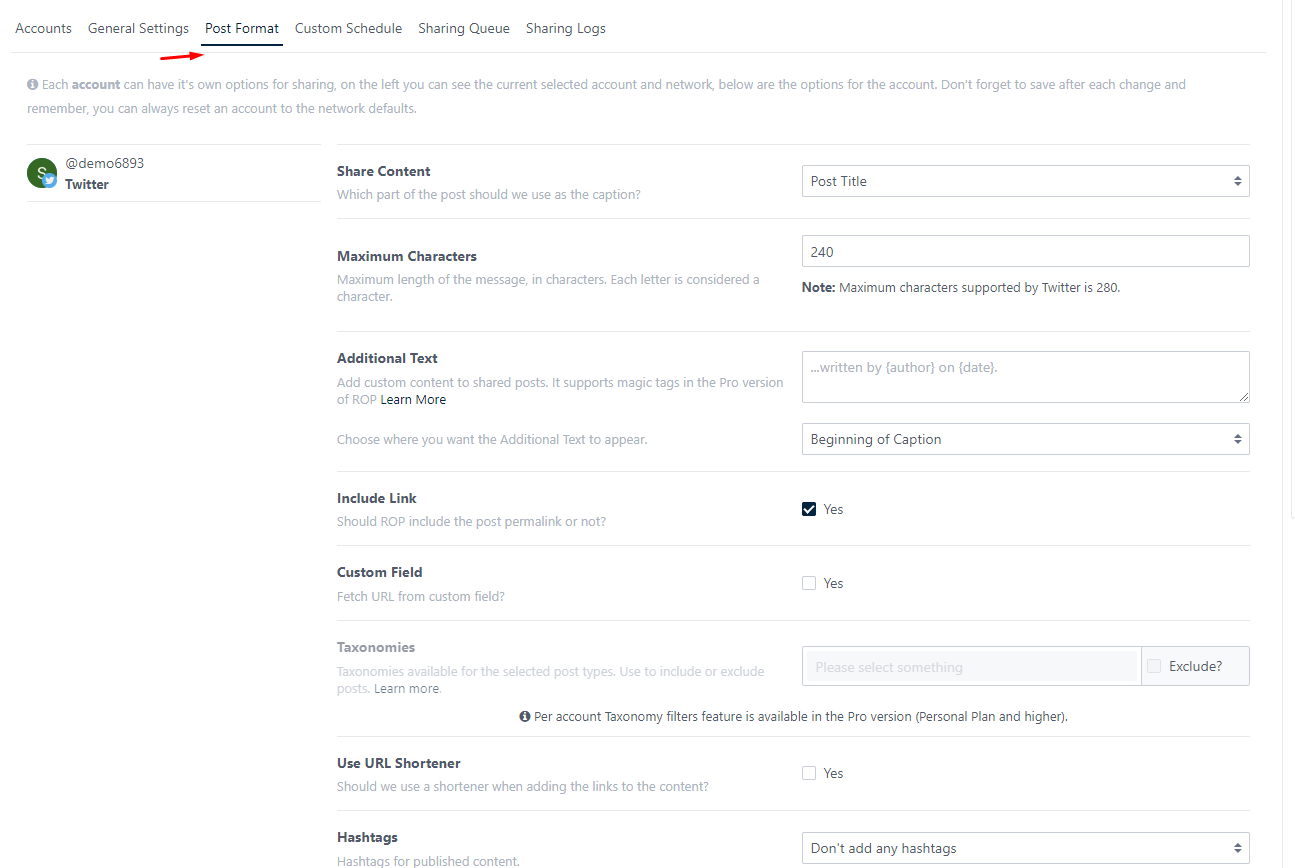
Here are the key configurations:
- Content recording: Choose which part of the content to include. Typically, the headline works best.
- Additional text: Insert extra text at the beginning or end of the articles if desired.
- Setting the URL: Decide if you want to include a link in your post and whether to use a short URL.
- Hashtags: Pick a hashtag that will be automatically inserted.
Once you’ve made these choices, you can click on “SEE the SAMPLE POST” to preview an example of how your future repost will look. This lets you ensure everything appears just the way you want it.
Repost it Now
Once you’re happy with the preview, go ahead and hit “START SHARING”:
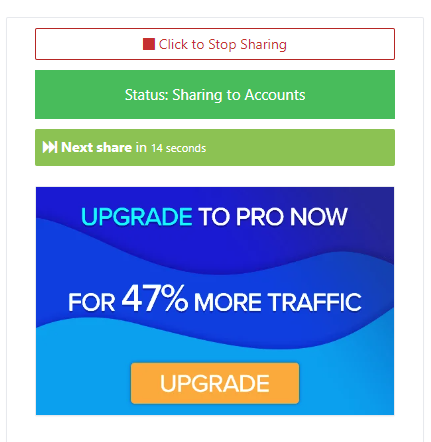
Revive Old Post will give you a countdown and let you know when the next post will be published:
Remember, Revive Old Post follows the rules you set in the General Settings tab for reposting. If you ever want to exclude a specific post from being reposted, simply go to the Exclude Posts section.
Setting up Revive Old Post should only take you around 10-15 minutes. After the setup, the plugin will work quietly in the background, reposting all your old posts.
As you can see, configuring this plugin is super easy. While you use this tool, don’t forget to explore other ways to engage with your users. There’s a whole world of possibilities to keep your audience interested!
Conclusion
In a nutshell, Revive Old Post stands out as a convenient plugin for effortlessly resharing your older articles on social networks. With a user-friendly setup process and customizable options, it ensures your valuable content gets a second chance to shine. After a quick configuration, this plugin works silently in the background, bringing life back to your old posts and maintaining a consistent online presence.
FAQs on Revive Old Post
How long does it take to set up Revive Old Post?
Setting up Revive Old Post is a breeze and should take you only about 10-15 minutes. Once configured, the plugin seamlessly operates in the background, automating the reposting of your older articles.
Can I control which posts are excluded from reposting?
Absolutely. If there are specific posts you don’t want to repost, you can easily exclude them. Navigate to the “Exclude Posts” section in the plugin settings to manage which content gets a pass on reposting.
What happens after I press “START SHARING”?
Pressing “START SHARING” initiates Revive Old Post to begin reposting according to the rules you set in the General Settings tab. The plugin provides a countdown and keeps you informed about when the next post will be published, ensuring a controlled and scheduled reposting process.
