
Over the years, the art of crafting web pages has undergone an incredible transformation thanks to the dynamic duo of PHP and Bootstrap. As applications continue to evolve, becoming more powerful and efficient in their functionalities, the combination of PHP and Bootstrap has risen to the forefront, enabling the creation of web applications that are not just efficient, but also visually stunning. Bootstrap works like magic, streamlining the website design process by harnessing HTML and CSS-based templates.
Now, I know you’re here to learn about creating a PHP Admin Dashboard with Bootstrap 5. But hey, if you’re considering taking a circumvent with ready-made templates, I’ve got some options for you – both free and paid. I’ll even throw in some free source code for you to explore.
Oh, and let’s not forget about those cool PHP dashboards. These nifty tools, whether single-tab wonders or multi-tab marvels, add a touch of pizzazz to your PHP projects. They’re like the interactive storytellers of the coding world, presenting data in all sorts of snazzy ways. These dashboards usually play nice with bigger projects and thrive in browser environments. What’s their secret sauce? Well, it’s the seamless connection between PHP and JavaScript that makes these dashboards tick.
So, Let us dive right in.
What Is PHP Bootstrap Integration?

When we talk about PHP Bootstrap integration, we refer to the creation of a robust system that handles dynamic server requests while employing the Model-View-Controller (MVC) architecture. This design ensures that functionality can be altered for each unique application component without necessitating comprehensive changes to the entire project. By combining the capabilities of PHP and the design flexibility of Bootstrap, developers can expedite web development and create aesthetically pleasing user interfaces.
Benefits of PHP Bootstrap Integration
The fusion of PHP and Bootstrap offers a myriad of advantages to developers. It simplifies the construction of complex web applications, making it easier to manage intricate functionalities. The use of PHP with Bootstrap enables developers to build responsive and visually captivating web applications that provide seamless user experiences.
Developers who choose to incorporate Bootstrap within their PHP projects gain the following benefits:
- Rapid Design: Bootstrap provides a collection of pre-designed HTML and CSS templates that expedite the design process, saving developers valuable time.
- Responsive Interfaces: The combination of PHP and Bootstrap facilitates the creation of responsive and mobile-first web pages, ensuring a consistent user experience across different devices.
- Dynamic Interaction: PHP’s server-side scripting capabilities coupled with Bootstrap’s interactive JavaScript components allow developers to create web applications that offer dynamic user interactions.
Administration dashboard functionality
Here are some of the features (functionality) Admin dashboards perform a number of standard tasks, including:
User Account Management: Administrators can create new user accounts, change user information, and delete user accounts using admin dashboards.
Content management: By offering tools for managing website content, these dashboards make it simple to update and modify material.
Analytics: Administrative dashboards frequently incorporate analytics technologies that monitor website metrics including:
- Page views
- Unique visitors
- Bounce rates
- Conversion rates.
Customization: Admin dashboards may provide customization options to change the look or operation of the website, allowing administrators to customize the platform to meet their needs.
Requisite for PHP and Bootstrap
Before we start creating an PHP and Bootstrap integration, ensure that your system meets the following prerequisites:
- PHP version 8.0 or later
- MariaDB version 10.x
- Bootstrap version 5.0 or later
Essential Requirements
- Proficiency in PHP programming
- Familiarity with Bootstrap’s CSS and JavaScript components
- A functional local development environment (such as XAMPP or WAMP)
- Access to a web server for hosting your PHP applications
To run all the web applications smoothly, I’m hosting all my applications on the Nestify Enterprise Hosting because I get a highly secured and optimized solution without delay or data loss. You can try out for yourself – Login it.
PHP Admin DashBoard With Bootstrap Templates
Here are some of the best free and paid Bootstrap admin templates I found.
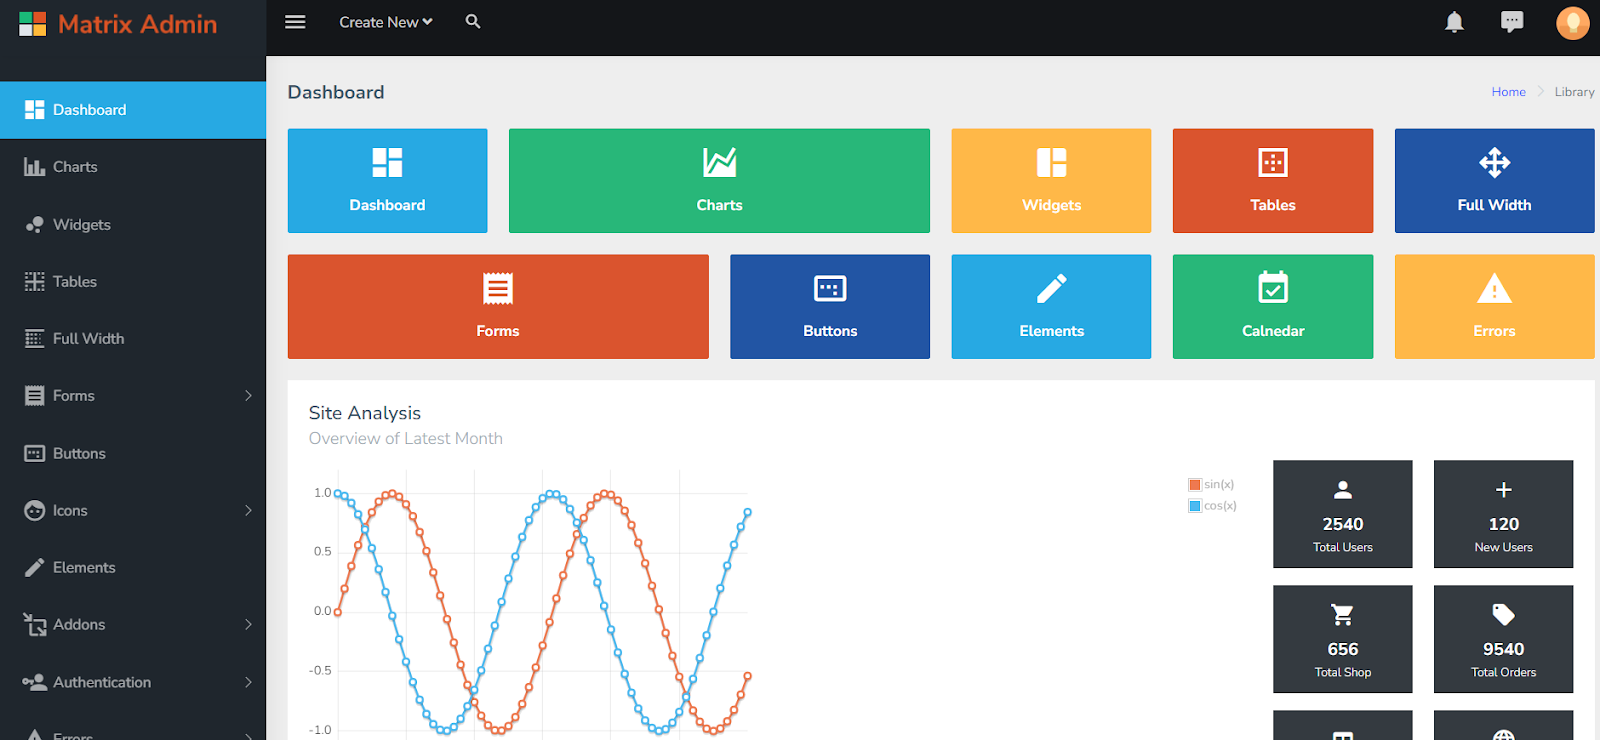
- Matrix Bootstrap 5 template – Free
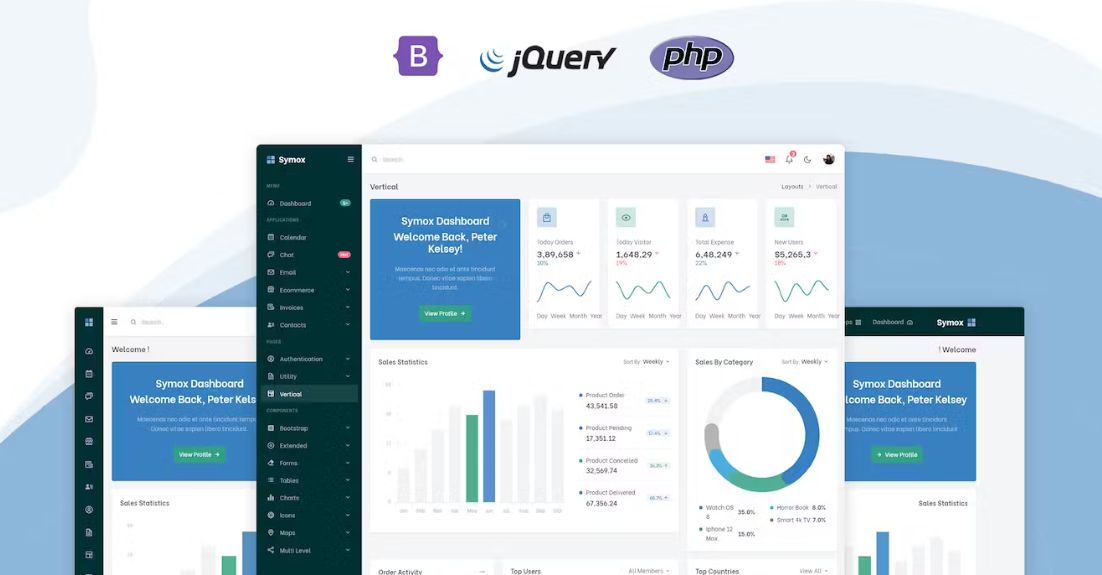
- Symox – PHP Admin & Dashboard Template – Paid with Subscription

Some more templates:
- Vuesy – Admin & Dashboard Template – Paid with subscription
- Material Dashboard 2 Bootstrap – Free
- Now UI Bootstrap – Free
Now that you have explored some templates, let’s create a PHP admin dashboard With Bootstrap manually.
Establish a MySQL Database and Tables
The following query must be used to create a MySQL database:
Name of the database: admin_panel
Step #1: Create Tables
Use the below SQL queries to create and edit the tables.
Users Table
CREATE TABLE `nestify_users` (

`id` int(11) NOT NULL AUTO_INCREMENT,

`username` varchar(100) NOT NULL,

`email` varchar(100) NOT NULL,

`password` varchar(100) NOT NULL,

`created_at` datetime NOT NULL DEFAULT CURRENT_TIMESTAMP,

`updated_at` datetime NOT NULL DEFAULT CURRENT_TIMESTAMP ON UPDATE CURRENT_TIMESTAMP,

PRIMARY KEY (`id`)

) ENGINE=InnoDB DEFAULT CHARSET=latin1;
Products Tables
CREATE TABLE `nestify_products` (

`product_id` int(22) NOT NULL AUTO_INCREMENT,

`product_name` varchar(22) NOT NULL,

`product_price` int(22) NOT NULL,

`product_cat` varchar(22) NOT NULL,

`product_details` varchar(22) NOT NULL,

`created_at` datetime NOT NULL DEFAULT CURRENT_TIMESTAMP,

`updated_at` datetime NOT NULL DEFAULT CURRENT_TIMESTAMP ON UPDATE CURRENT_TIMESTAMP,

PRIMARY KEY (`product_id`)

) ENGINE=InnoDB DEFAULT CHARSET=latin1;
Sales Table
CREATE TABLE `nestify_sales_stats` (

`id` int(22) NOT NULL AUTO_INCREMENT,

`sales` int(22) NOT NULL,

`month` varchar(25) NOT NULL,

`pending_orders` int(55) NOT NULL,

`revenue` int(55) NOT NULL,

`visitors` int(55) NOT NULL,

`created_at` datetime NOT NULL DEFAULT CURRENT_TIMESTAMP,

`updated_at` datetime NOT NULL DEFAULT CURRENT_TIMESTAMP ON UPDATE CURRENT_TIMESTAMP,

PRIMARY KEY (`id`)

) ENGINE=InnoDB DEFAULT CHARSET=latin1;
Step #2: Registration
<?php

if ($_SERVER["REQUEST_METHOD"] === "POST" && isset($_POST['reg_user'])) {

    $username = sanitizeInput($_POST['username']);

    $email = sanitizeInput($_POST['email']);

    $password_1 = sanitizeInput($_POST['password_1']);

    $password_2 = sanitizeInput($_POST['password_2']);

    $errors = [];

    if (empty($username)) {

        $errors[] = "Username is required";

    }

    if (empty($email)) {

        $errors[] = "Email is required";

    }

    if (empty($password_1)) {

        $errors[] = "Password is required";

    }

    if ($password_1 !== $password_2) {

        $errors[] = "The two passwords do not match";

    }

    if (empty($errors)) {

        $hashedPassword = password_hash($password_1, PASSWORD_DEFAULT);

        $userCheckQuery = "SELECT * FROM users WHERE username=? OR email=? LIMIT 1";

        $stmt = $db->prepare($userCheckQuery);

        $stmt->bind_param("ss", $username, $email);

        $stmt->execute();

        $result = $stmt->get_result();

        $user = $result->fetch_assoc();

        $stmt->close();

        if (!$user) {

            $insertQuery = "INSERT INTO users (username, email, password) VALUES (?, ?, ?)";

            $stmt = $db->prepare($insertQuery);

            $stmt->bind_param("sss", $username, $email, $hashedPassword);

            $stmt->execute();

            $stmt->close();

            $_SESSION['username'] = $username;

            $_SESSION['success'] = "You are now registered and logged in";

            header('location: login.php');

            exit();

        } else {

            if ($user['username'] === $username) {

                $errors[] = "Username already exists";

            }

            if ($user['email'] === $email) {

                $errors[] = "Email already exists";

            }

        }

    }

}

function sanitizeInput($input) {

    return htmlspecialchars(trim($input));

}

// Connect to your database ($db) here

// Start your session ($_SESSION) here

?>
Step #3: Login
<?php

if ($_SERVER["REQUEST_METHOD"] === "POST" && isset($_POST['login_user'])) {

    $username = sanitizeInput($_POST['username']);

    $password = sanitizeInput($_POST['password']);

    $errors = [];

    if (empty($username)) {

        $errors[] = "Username is required";

    }

    if (empty($password)) {

        $errors[] = "Password is required";

    }

    if (empty($errors)) {

        $query = "SELECT * FROM users WHERE username=?";

        $stmt = $db->prepare($query);

        $stmt->bind_param("s", $username);

        $stmt->execute();

        $result = $stmt->get_result();

        $user = $result->fetch_assoc();

        $stmt->close();

        if ($user && password_verify($password, $user['password'])) {

            $_SESSION['username'] = $username;

            $_SESSION['success'] = "You are now logged in";

            header('location: index.php');

            exit();

        } else {

            $errors[] = "Wrong username/password combination";

        }

    }

}

function sanitizeInput($input) {

    return htmlspecialchars(trim($input));

}

// Connect to your database ($db) here

// Start your session ($_SESSION) here

?>

Create a new file called errors.php and paste the following code in it for errors:

<?php if (!empty($errors)) : ?>

<div class="error">

    <?php foreach ($errors as $error) : ?>

        <p><?php echo htmlspecialchars($error); ?></p>

    <?php endforeach; ?>

</div>

<?php endif; ?>
Step #4: Create the Product Page
Next step is to create a product.php page and page the below code in it:
<?php

include('pserver.php');

?>

<!DOCTYPE html>

<html lang="en">

<head>

<meta charset="utf-8">

<meta http-equiv="X-UA-Compatible" content="IE=edge">

<meta name="viewport" content="width=device-width, initial-scale=1, shrink-to-fit=no">

<meta name="description" content="">

<meta name="author" content="">

<title>SB Admin - Start Bootstrap Template</title>

<!-- Bootstrap core CSS-->

<link href="vendor/bootstrap/css/bootstrap.min.css" rel="stylesheet">

<!-- Custom fonts for this template-->

<link href="vendor/font-awesome/css/font-awesome.min.css" rel="stylesheet" type="text/css">

<!-- Custom styles for this template-->

<link href="css/sb-admin.css" rel="stylesheet">

</head>

<body class="fixed-nav sticky-footer bg-dark" id="page-top">

<!-- Navigation-->

<nav class="navbar navbar-expand-lg navbar-dark bg-dark fixed-top" id="mainNav">

<a class="navbar-brand" href="index.php">Start Bootstrap</a>

<button class="navbar-toggler navbar-toggler-right" type="button" data-toggle="collapse" data-target="#navbarResponsive" aria-controls="navbarResponsive" aria-expanded="false" aria-label="Toggle navigation">

<span class="navbar-toggler-icon"></span>

</button>

<!-- ... (Rest of the navigation code) ... -->

</nav>

<div class="content-wrapper">

<div class="container-fluid">

<ol class="breadcrumb">

<li class="breadcrumb-item">

<a href="index.html">Dashboard</a>

</li>

<li class="breadcrumb-item active">Product Page</li>

</ol>

<div class="row">

<div class="col-12">

<h1>Create Product </h1>

</div>

<div class="col-md-8">

<form method="post" action="product.php">

<div class="form-group">

<label>Product Name</label>

<input type="text" class="form-control" name="pname" required>

</div>

<div class="form-group">

<label>Product Price</label>

<input type="text" class="form-control"  name="pirce" required>

</div>

<div class="form-group">

<label>Product Category</label>

<input type="text" class="form-control" name="pcat" required>

</div>

<div class="form-group">

<label>Product Details</label>

<textarea class="form-control" name="pdetails" required></textarea>

</div>

<button type="submit" class="btn btn-primary" name="reg_p">Submit</button>

</form>

</div>

</div>

</div>

<footer class="sticky-footer">

<div class="container">

<div class="text-center">

<small>Copyright © Your Website 2018</small>

</div>

</div>

</footer>

<a class="scroll-to-top rounded" href="#page-top">

<i class="fa fa-angle-up"></i>

</a>

<!-- Logout Modal-->

<div class="modal fade" id="exampleModal" tabindex="-1" role="dialog" aria-labelledby="exampleModalLabel" aria-hidden="true">

<!-- ... (Rest of the modal code) ... -->

</div>

<script src="vendor/jquery/jquery.min.js"></script>

<script src="vendor/bootstrap/js/bootstrap.bundle.min.js"></script>

<script src="vendor/jquery-easing/jquery.easing.min.js"></script>

<script src="js/sb-admin.min.js"></script>

</div>

</body>

</html>
Next step is to add a product in the database, and to do that create a pserver.php file in the root folder and paste the below code in it.
<?php

if ($conn->connect_error) {

    die("Connection failed: " . $conn->connect_error);

}

$pname = mysqli_real_escape_string($conn, $_POST['pname']);

$price = mysqli_real_escape_string($conn, $_POST['price']);

$pcat = mysqli_real_escape_string($conn, $_POST['pcat']);

$pdetails = mysqli_real_escape_string($conn, $_POST['pdetails']);

$sql = "INSERT INTO products (product_name, product_price, product_cat, product_details)

VALUES ('$pname', '$price', '$pcat', '$pdetails')";

if ($conn->query($sql) === TRUE) {

    echo '<script>alert("New record created successfully");</script>';

} else {

    echo "Error: " . $sql . "<br>" . $conn->error;

}

$conn->close();

?>
Step #5: Make the Data Visual
I have to use the correct database tables to populate the Bootstrap datatable. Join the database and the datatable.
To fill the Bootstrap datatable, use the following code. Let’s add the following code to the table update:
<div class="table-responsive">
<table class="table table-bordered" id="dataTable" width="100%" cellspacing="0">
<thead>
<tr>
<th>ID</th>
<th>Name of Product</th>
<th>Price of Product</th>
<th>Product Category</th>
<th>Product Details</th>
</tr>
</thead>
<tfoot>
<tr>
<th>ID</th>
<th>Name of Product</th>
<th>Price of Product</th>
<th>Product Category</th>
<th>Product Details</th>
</tr>
</tfoot>
<tbody>
<?php
$servername = "localhost";
$username = "root";
$password = "";
$dbname = "registration";
// Create connection
$conn = new mysqli($servername, $username, $password, $dbname);
if ($conn->connect_error) {
die("Connection failed: " . $conn->connect_error);
}
$sql = 'SELECT * from products';
$result = $conn->query($sql);
if ($result->num_rows > 0) {
while ($row = $result->fetch_assoc()) {
echo '<tr>';
echo '<th>' . $row['product_id'] . '</th>';
echo '<td>' . $row['product_name'] . '</td>';
echo '<td>' . $row['product_price'] . '</td>';
echo '<td>' . $row['product_cat'] . '</td>';
echo '<td>' . $row['product_details'] . '</td>';
echo '</tr>';
}
} else {
echo '<tr><td colspan="5">0 results</td></tr>';
}
$conn->close();
?>
</tbody>
</table>
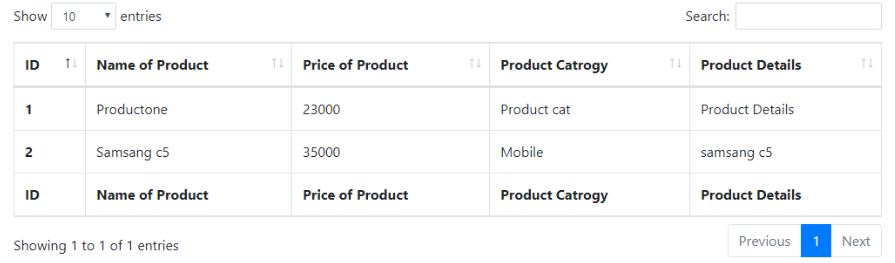
</div>Here is how the code should look a like.
Step #6: Setup the Databoard
The entire code for the dashboard display is provided here for you to paste into index.php file:
<!DOCTYPE html>

<html lang="en">

<head>

  <meta charset="utf-8">

  <meta http-equiv="X-UA-Compatible" content="IE=edge">

  <meta name="viewport" content="width=device-width, initial-scale=1, shrink-to-fit=no">

  <meta name="description" content="">

  <meta name="author" content="">

  <title>SB Admin - Start Bootstrap Template</title>

  <!-- Bootstrap core CSS-->

  <link href="vendor/bootstrap/css/bootstrap.min.css" rel="stylesheet">

  <!-- Custom fonts for this template-->

  <link href="vendor/font-awesome/css/font-awesome.min.css" rel="stylesheet" type="text/css">

  <!-- Page level plugin CSS-->

  <link href="vendor/datatables/dataTables.bootstrap4.css" rel="stylesheet">

  <!-- Custom styles for this template-->

  <link href="css/sb-admin.css" rel="stylesheet">

</head>

<body class="fixed-nav sticky-footer bg-dark" id="page-top">

  <!-- Navigation -->

  <nav class="navbar navbar-expand-lg navbar-dark bg-dark fixed-top" id="mainNav">

    <a class="navbar-brand" href="index.php">Start Bootstrap</a>

    <!-- ... (Rest of the navigation code) ... -->

  </nav>

  <div class="content-wrapper">

    <div class="container-fluid">

      <!-- Breadcrumbs -->

      <ol class="breadcrumb">

        <!-- ... (Breadcrumbs content) ... -->

      </ol>

      <!-- Icon Cards and PHP Code -->

      <?php

      // ... (Rest of the PHP code) ...

      ?>

    </div>

  </div>

  <!-- Bootstrap core JavaScript and Custom Scripts -->

  <script src="vendor/jquery/jquery.min.js"></script>

  <script src="vendor/bootstrap/js/bootstrap.bundle.min.js"></script>

  <script src="vendor/jquery-easing/jquery.easing.min.js"></script>

  <script src="vendor/chart.js/Chart.min.js"></script>

  <script src="vendor/datatables/jquery.dataTables.js"></script>

  <script src="vendor/datatables/dataTables.bootstrap4.js"></script>

  <script src="js/sb-admin.min.js"></script>

  <script src="js/sb-admin-datatables.min.js"></script>

  <script src="js/sb-admin-charts.min.js"></script>

</body>

</html>
Conclusion
Creating a PHP admin dashboard with Bootstrap 5 opens up a world of possibilities for enhancing your web development workflow. From responsive layouts to interactive charts and robust security features, Bootstrap 5 empowers you to build feature-rich admin interfaces that cater to modern web standards. By following the guidelines and insights provided in this guide, you’re well-equipped to embark on your journey of creating a PHP admin dashboard that stands out in the competitive landscape of web development.
FAQ’s on PHP admin dashboard with Bootstrap
How can I get started with Bootstrap 5?
To start with Bootstrap 5, you need to include the Bootstrap CSS and JavaScript files in your project. You can either download the files directly from the Bootstrap website or link to the Bootstrap CDN for easy integration.
Is Bootstrap 5 suitable for beginners?
Yes, Bootstrap 5 is beginner-friendly due to its extensive documentation and user-friendly components. Even if you’re new to web development, you can quickly grasp the basics and start building stunning interfaces.
Can I customize the Bootstrap 5 components?
Absolutely! Bootstrap 5 provides various customization options. You can modify colors, typography, spacing, and even create your own custom components to match your project’s branding.
Do I need to be an expert in PHP to create a PHP admin dashboard?
While having a solid understanding of PHP is beneficial, you don’t need to be an expert. This guide will provide you with step-by-step instructions, making it accessible for developers at all levels.
