
The WordPress block editor offers a robust and user-friendly approach to designing and structuring pages and posts. One of its key features is the ability to create layouts with nested blocks. This functionality allows users to insert multiple blocks within a single parent block, resulting in a more organized and visually appealing content structure. It also provides the flexibility to customize each block individually, maintaining a cohesive and consistent design throughout the site.
Many users leverage features such as reusable blocks, nested blocks, and tables to streamline their content creation process and enhance workflow efficiency. Experience with these tools has revealed effective strategies for maximizing the potential of the Gutenberg block editor.
Understanding Nested Blocks
The Gutenberg nested block feature in WordPress enables you to place one or more blocks inside another block, allowing for a more flexible and dynamic layout structure. Nested blocks are a game-changer for creating complex, multi-element designs. Instead of stacking individual blocks sequentially, you can group multiple blocks together within a parent block, giving you greater control over your content’s appearance.
For example, you can nest several Image blocks within a Group block to showcase a collection of photos from an event or a series of artworks. This approach allows you to organize content visually and logically, creating a seamless experience for your audience.
The key benefit of nested blocks is the ability to manage and style different elements independently while still maintaining a cohesive design. Each nested block can be customized separately without altering the others, offering more granular control over the content and layout.
In addition to improved organization, nested blocks also help streamline the content creation process. By grouping related blocks together, you can work more efficiently and make your content look polished and professional with less effort.
Also Read: Mastering the WordPress Block Editor: Dos and Don’ts
How to Organize Content Like a Pro: Mastering Nested Blocks in WordPress
1. Maximize Design Flexibility
Nested blocks open up a world of design possibilities. By allowing you to place one block inside another, they enable the creation of sophisticated and dynamic layouts with minimal effort. For example, you can group multiple columns, images, text, and buttons within a single parent block, which allows for more advanced page designs than traditional WordPress blocks.
This design flexibility helps you create visually appealing and well-structured web pages that can accommodate various content types. Whether you’re building landing pages, portfolios, or product showcases, nested blocks give you the freedom to design complex layouts without needing to write custom code.
2. Enhance Content Organization
One of the biggest advantages of nested blocks is their ability to help you organize content more efficiently. Instead of stacking individual blocks randomly, nested blocks allow you to group related content under a single parent block. This organization is particularly useful for longer posts or pages with diverse content types, as it makes the layout cleaner and easier to follow.
You can nest blocks like images, text, and buttons into a single section, making the page structure more intuitive and logical. This improved organization helps both content creators and readers navigate the content seamlessly, resulting in a more streamlined workflow and better content presentation.
3. Boost User Experience
Nested blocks provide more options for integrating interactive elements into your content, thereby improving the overall user experience. For instance, by nesting buttons, galleries, forms, or videos within a group block, you can make your content more engaging and interactive. These elements encourage user interaction, increase time spent on the page, and help direct users toward important calls to action.
Interactive features such as hover effects, animations, or slide shows can be easily incorporated using nested blocks, making your site feel more dynamic and user-friendly. When users have a positive, engaging experience on your site, they are more likely to return and recommend it, improving overall engagement.
4. Improve SEO
The structure and organization of your content can have a direct impact on your website’s search engine optimization (SEO). By improving readability and user engagement through nested blocks, you can create more SEO-friendly content. Well-organized pages with clear sectioning and content hierarchy are easier for search engines to crawl and index.
For example, nesting blocks like headings, images, and paragraphs within logical parent blocks makes the content more digestible for both users and search engines. Additionally, using interactive elements effectively can increase user engagement, which is a key factor in SEO. Search engines prioritize user experience signals such as time on page and interaction, so optimizing your content structure with nested blocks can indirectly boost your rankings.
5. Streamline Content Creation
Using nested blocks makes content creation far easier and more efficient. Instead of manually adjusting each individual block, you can quickly group related content together, making updates and changes faster. For example, if you need to adjust the layout of a group of text and images, you can modify the parent block without having to adjust each element individually.
This results in a more streamlined content creation process, especially for larger websites with frequent updates. Nested blocks also allow for greater reusability, as blocks can be saved as reusable blocks, which can then be inserted into other posts or pages with a single click. This reduces redundancy and accelerates content production, especially when working on multiple similar layouts or designs.
Selecting and Creating the Nested Blocks
To begin, navigate to your WordPress admin dashboard. You can either open an existing post or create a new one using the block editor.
Once you’re in the block editor, look for the Add Block button represented by a ‘+’ symbol, located in the top-left corner of your screen. Click on this button to open the block selection menu.
In the block search bar, type “Group” to locate the Group block., and then click on it to add it to your page. This will serve as the parent block for your nested blocks.

Once you have inserted the Group block, it’s time to start adding content to it. To do so, click the + button inside the group block, which allows you to insert child blocks within the parent.
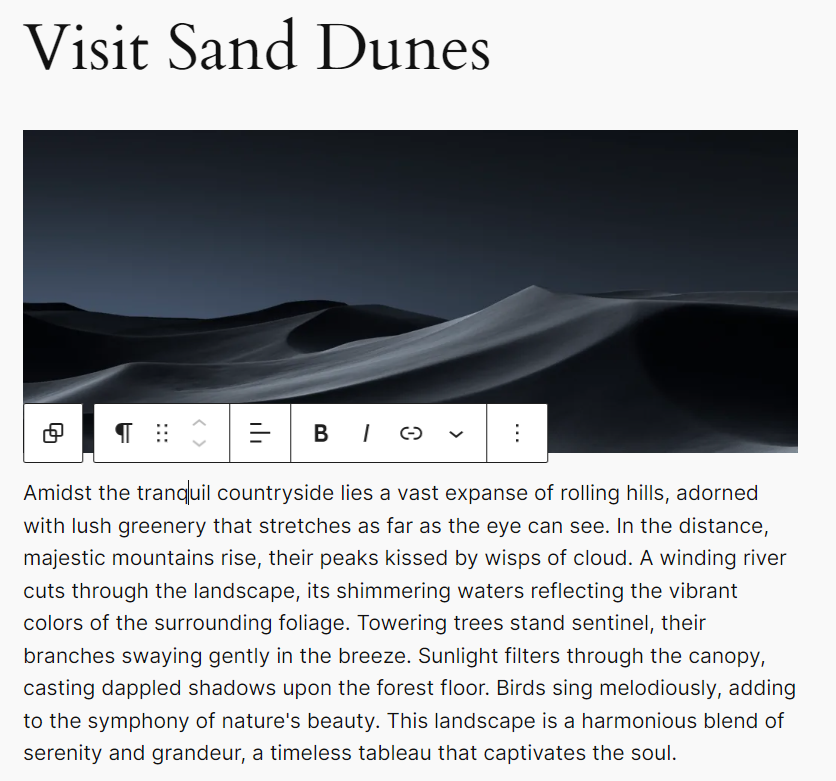
For this tutorial, we’ll start by adding a Paragraph block, followed by an Image block, and then a Call-to-Action button. These blocks will now be nested within the Group block, creating a structured layout.

- After adding these child blocks, click on the Group button in the block toolbar at the top of the screen. This designates the Group block as the parent block of all the nested content. At this point, you’ve created a ‘nested block,’ which consists of multiple blocks inside a parent block.
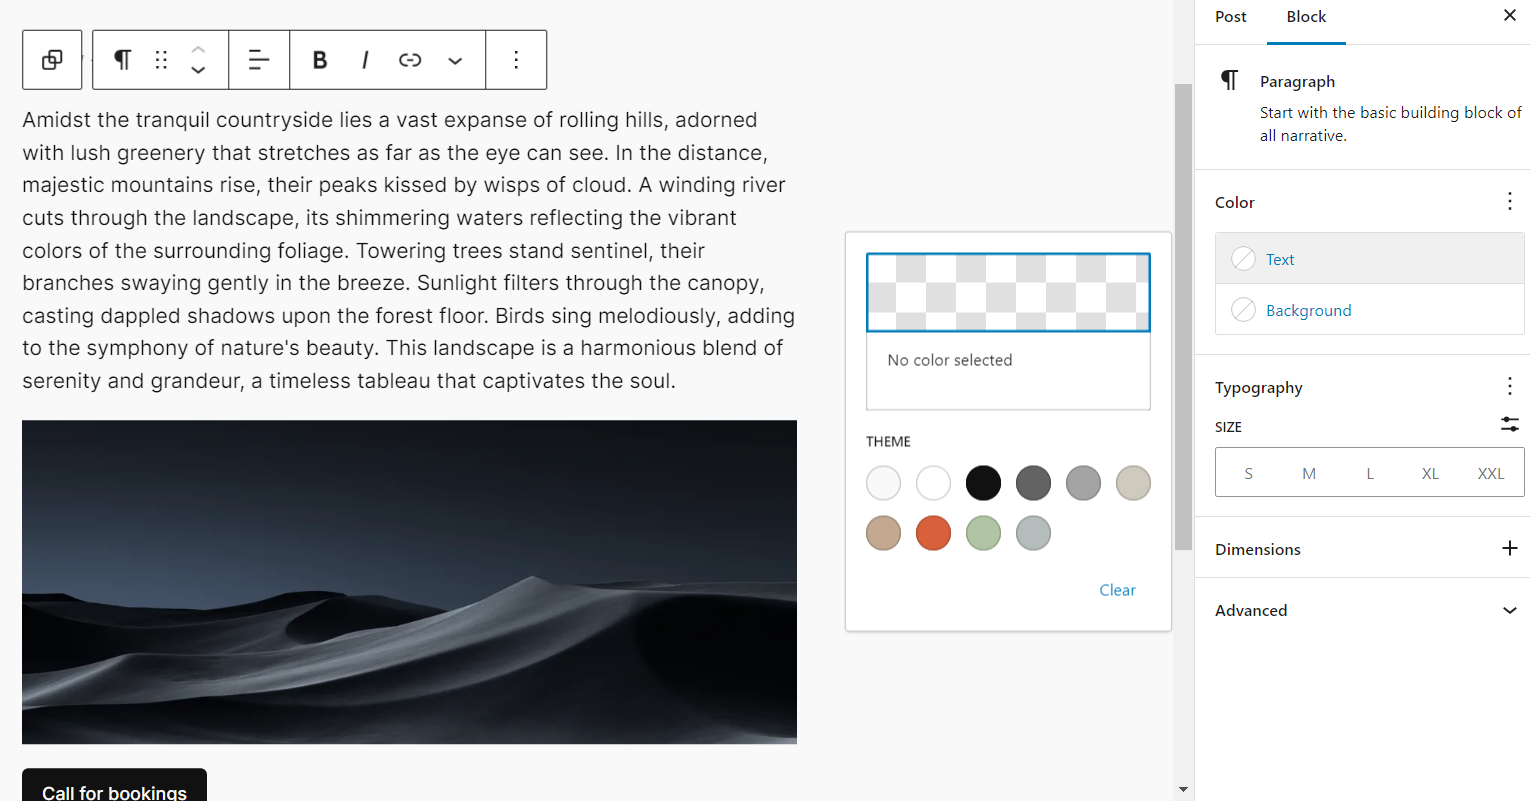
- To further customize your nested blocks, you can adjust the individual settings of each block. Simply click on the block you wish to modify, and the block settings will appear in the right column of the screen. Here, you can tweak the background color, text color, size, and other settings for each block without affecting the others.
- For instance, you can change the background color of the paragraph block while leaving the image and button blocks unchanged.
Fine-tuning the Nested Block Settings
After nesting multiple blocks, you can fine-tune their individual settings by clicking on each block, which will unveil the block settings in the right column of the screen.
Within this interface, you can tweak the background color, text color, and size of each block independently without affecting the other blocks that are nested.
To configure the settings of all such blocks collectively, click the ‘Group’ button in the block toolbar at the top. This action will reveal the parent block settings in the right column of the page.
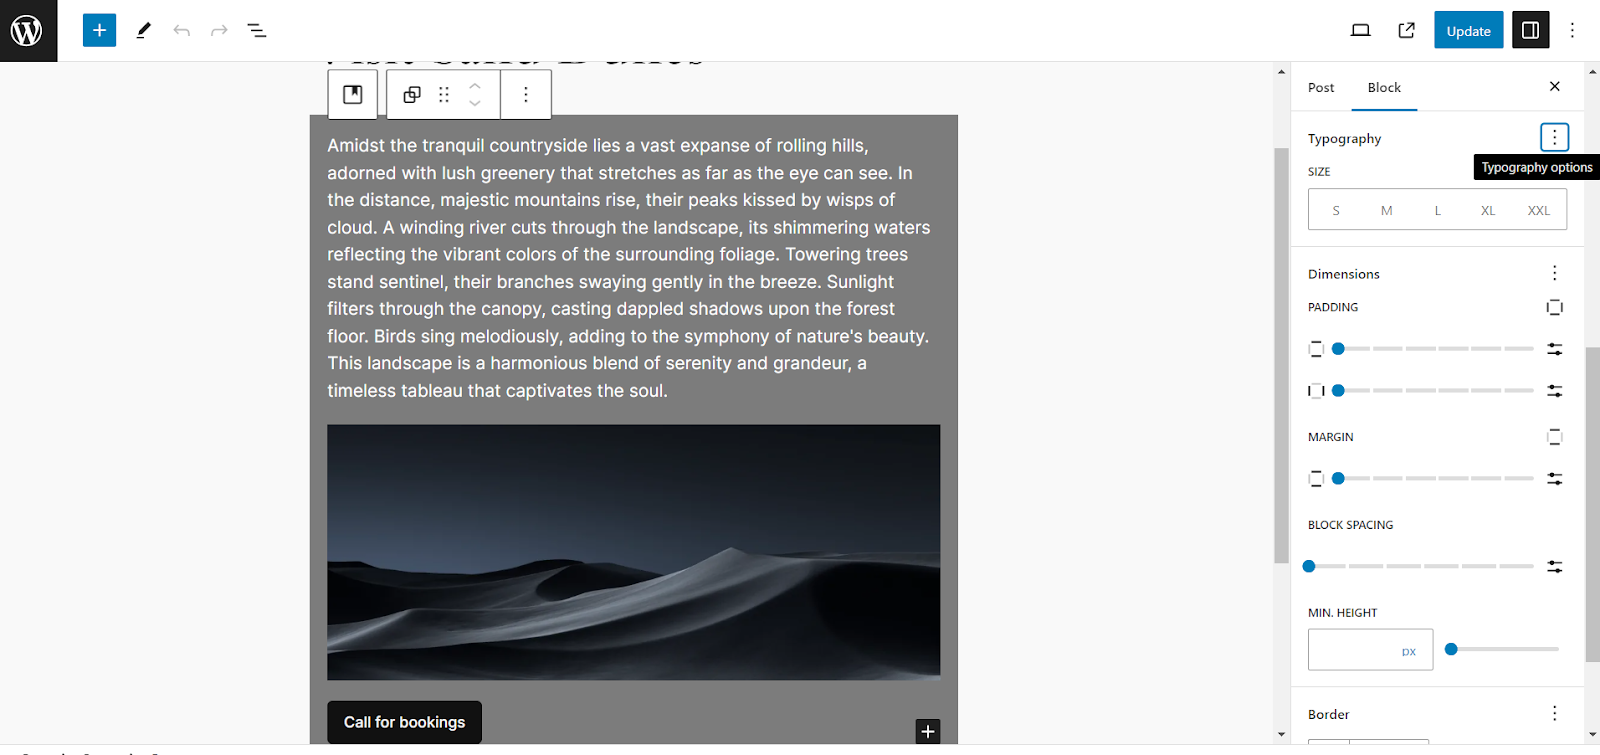
Here, you can adjust the justification, orientation, background color, text color, and typography for all nested blocks simultaneously. Keep in mind that these adjustments will apply to all blocks nested within the parent block.
Converting Nested Block into a Reusable Block
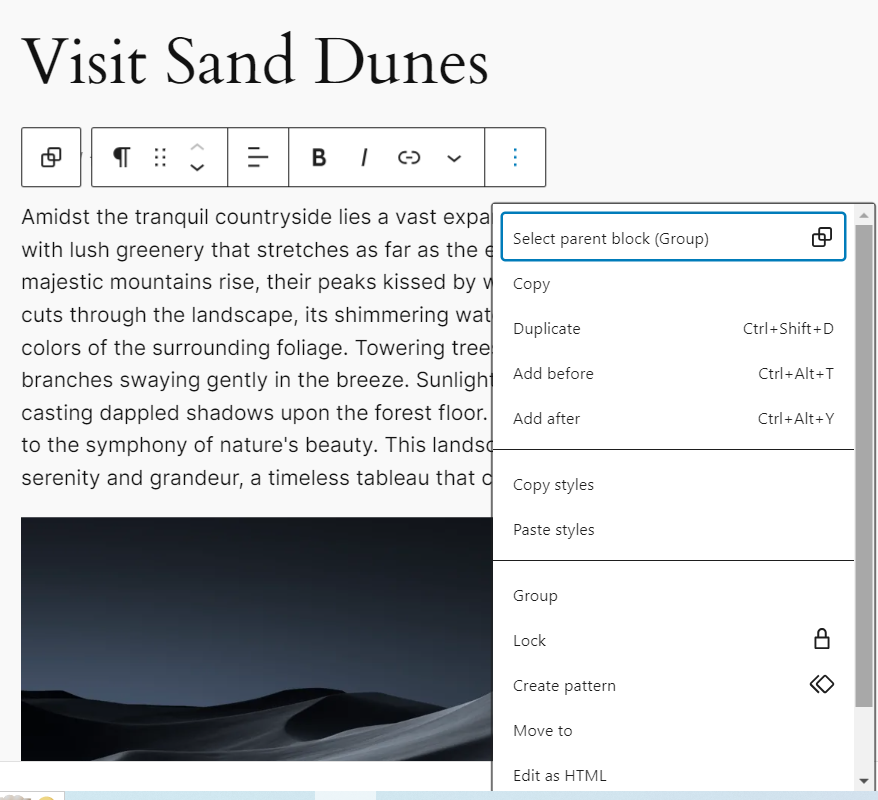
If you wish to convert an existing individual block into nested blocks, simply select the blocks and click on the 3 dots which is termed as the ‘Options’ button in the top toolbar of any block. This action prompts a menu where you can select the ‘Create Pattern.’ Click on it to create a pattern and name it. Once a pattern is created, you can reuse it as a ‘Reusable Block’ anywhere on your website.

A new reusable block will be generated, allowing you to add multiple blocks within it. Once you’ve finished, remember to click the ‘Publish’ or ‘Update’ button to preserve your changes.
In our demonstration, we nested a Paragraph, Image, and a call-to-action button within a Group block, resulting in the appearance showcased above.
Considerations for Selecting Nested Blocks in WordPress
1. Customization Options
One of the primary factors to consider is the level of customization the nested block offers. Does the block allow for adjustments in design, such as color, font, size, spacing, or background? Customization options are vital for tailoring the design to meet your specific branding or style preferences.
Depending on your website’s needs, you may require blocks that enable full control over individual elements, like text alignment, padding, borders, or advanced CSS customization. The more customizable the block is, the easier it will be to create a unique and consistent design across different pages and posts.
2. Compatibility with Themes and Plugins
Another important consideration is ensuring that the nested block is compatible with your WordPress theme and any other plugins you’re using. Compatibility issues can lead to unexpected behavior, layout problems, or even the inability to display certain elements correctly.
Before selecting a nested block, check its compatibility with your theme to make sure it aligns with your site’s overall structure. Additionally, ensure that the block doesn’t conflict with other plugins, particularly those related to performance, SEO, or page building. Testing for compatibility will help prevent problems down the line and ensure smooth functionality.
3. Ease of Use and Learning Curve
Ease of use is a critical factor, especially if your team or content creators are not familiar with advanced WordPress features. Some nested blocks come with a steeper learning curve due to their advanced settings or multi-step configurations. On the other hand, some are intuitive and easy to implement, which can be more efficient for a team that needs to work quickly.
Evaluate the block’s learning curve and determine how much time and effort will be needed to master it. If you are working with beginners or prefer to minimize the time spent on learning, opt for blocks that offer simple, user-friendly interfaces with clear instructions or documentation.
4. Available Features and Functionality
Not all nested blocks are created equal when it comes to features. Some provide more robust options than others, such as built-in layouts, interactive elements, or media display settings. For instance, certain blocks allow you to add multiple columns, buttons, or images with specific settings that help you create a unique layout.
Evaluate the features provided by each block to see if they match your website’s requirements. Consider the functionality you need—whether it’s advanced design tools, multimedia integration, or layout controls—and check that the block can provide these capabilities without the need for excessive customization or third-party plugins.
5. Purpose and Goal Alignment
It is essential to assess how well a nested block serves the specific purpose of the page or post. Different types of content—such as product pages, portfolio displays, or blogs—may require different design approaches. A nested block should be selected based on how well it supports the content’s goals and enhances the user experience.
For example, if you’re showcasing a gallery, you might need a nested block that easily organizes images in a visually appealing grid, while a text-heavy page may require a nested block that allows for structured formatting. Make sure the block is not just visually appealing but also effective in achieving the page’s intended purpose, whether it’s increasing engagement, presenting information clearly, or driving conversions.
Effortlessly Build Complex Layouts with WordPress
Nested blocks in WordPress offer a powerful way to build highly flexible, organized, and visually appealing web pages. By grouping related content under a parent block, they streamline the design process, help create complex layouts with ease, and ensure that your content is structured in a way that improves both readability and user experience. Additionally, the enhanced structure provided by nested blocks contributes to better SEO, as search engines favor well-organized, easily navigable content.
If you’re looking to take your WordPress site to the next level, nested blocks are an excellent tool to explore. They simplify content creation, allow for more creative freedom, and give you greater control over your website’s layout. To get started, consider leveraging the Nestify’s free trial to experience all the advanced features it has to offer. With Nestify, you can enhance your site’s performance, optimize your workflow, and unlock a host of powerful tools to create the perfect design.
FAQs on How to Step Up Your Web Design Game
How do I ensure accessibility when using nested blocks?
To guarantee accessibility, opt for nested blocks equipped with accessibility features like screen reader support and keyboard navigation. Moreover, conduct thorough testing of your nested blocks across various devices and screen dimensions to ensure optimal display and functionality for every user.
Are there any limitations to nesting blocks in WordPress?
While nesting blocks offer great flexibility, some blocks may have limitations or conflicts when nested within certain parent blocks. It’s important to refer to the WordPress documentation or plugin documentation for guidance on compatible nested blocks.
How do nested blocks affect website performance?
Nested blocks, when used excessively or in overly complex layouts, can potentially impact website performance by slowing down page loading times. It’s recommended to balance visual appeal with performance optimization to ensure a smooth user experience.
How do I troubleshoot issues with nested blocks?
If you encounter any issues with nested blocks, such as formatting discrepancies or layout errors, you can troubleshoot by reviewing the block settings, checking for compatibility issues between nested blocks, and consulting WordPress forums or documentation for solutions.
