
In today’s interconnected world, reaching a global audience is essential for many businesses and organizations. One effective way to attain this is by creating a multilingual website that caters to users from different language backgrounds. WordPress is the most famous content management system and offers various plugins to simplify the process. Among these, the WordPress Multilingual (WPML) plugin stands out as a powerful tool for creating a multilingual website with ease. In this blog post, let’s take you through the process of setting up a multilingual website using the WPML plugin.
Steps To Use WPML Plugin
Step 1: Install and Activate the WPML Plugin
The first step is to install the WPML plugin on your WordPress website. If you don’t have this plugin, then go to their official website to download and buy it. Choose a plan that best fits your audience requirement. They will ask you to register and create your account with them.
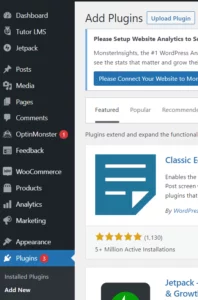
After buying, you will get a zip file which you need to save on your desktop/laptop. We made use of Nestify dashboard for your reference. Go to your WordPress dashboard, select Plugin >> Add New >> Upload plugin.
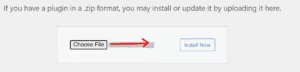
Upload your plugin’s zip file.
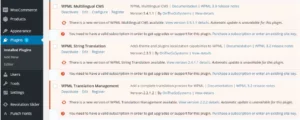
Plugin extensions will appear in the dashboard
Step 2: Choose Your Languages
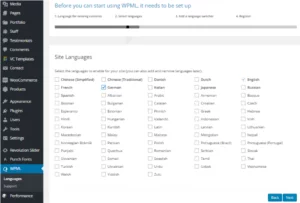
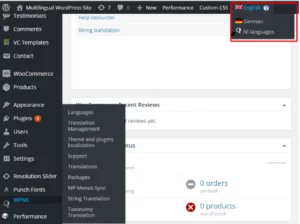
After activating the WPML plugin, it’s time to select the languages for your multilingual website. WPML supports a wide range of languages, allowing you to select the ones that is best understood by your target audience. To configure the languages, go to “WPML” in your WordPress dashboard and click on “Languages.”
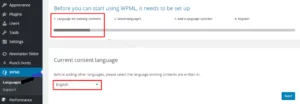
Here, you can add or remove languages and set a default language for your website.
Step 3: Configure Language Switcher
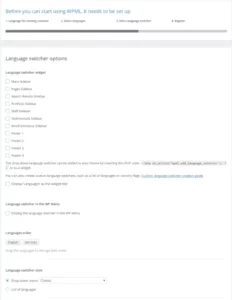
The language switcher allows visitors to switch between different language versions of your website. WPML offers several options for displaying the language switcher, such as a dropdown menu, flags, or a list. To configure the language switcher, go to “WPML” and click on “Language Switcher.” Select the display options that align with your website’s design and user experience preferences.
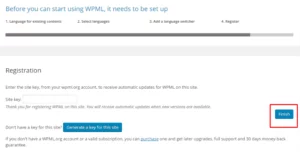
Step 4: Register your account
You need to go through a registration process. You need to ensure that you type your site key in the designated “Site key” section. If you don’t have a site key yet, you can generate one by selecting the option “Generate a key for this site.”
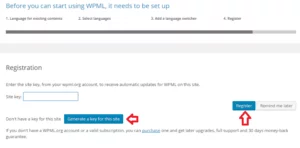
Once you click on “Generate a key for this site,” you will be automatically directed to the WPML.org page. On this page, you will find a newly generated site key specifically for your WordPress website.

Lastly, copy and paste the key in the Site key area and then click the Finish button.
Step 5: Translate Your Content
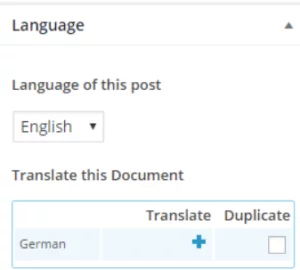
With the basic setup completed, it’s time to translate your website’s content into different languages. WPML makes the translation process intuitive and user-friendly. It enables you to translate posts, pages, custom post types, taxonomies, and more. To translate your content, go to the “Posts” or “Pages” section in your WordPress dashboard. Create a new post in your preferred language, like English.
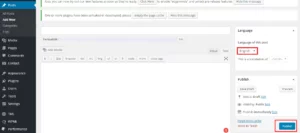
Next, select the content you want to translate and click on the “+” icon under the desired language column. This will create a new translation editor where you can enter the translated content.
Step 6: Manage Translated Content
Once you have translated your content, WPML provides a comprehensive interface to manage and organize your multilingual content efficiently. You can view all the translations associated with a specific page or post and easily edit or update them. WPML also offers advanced features such as translation management, allowing you to assign translations to specific translators, track progress, and maintain translation consistency.
Step 7: SEO Considerations
For a multilingual website, it’s crucial to consider search engine optimization (SEO) to ensure your content ranks well in different languages. WPML is SEO-friendly and allows you to optimize each language version independently. You can customize URLs, meta tags, and titles for each translation, helping search engines understand and index your multilingual content accurately.
Step 8: Test and Launch
Before launching your multilingual website, it’s essential to thoroughly test all the language versions to ensure a smooth user experience. Check for any translation errors, broken links, or layout issues that might arise due to language variations. Once you are satisfied with the translations and website functionality, it’s time to launch your multilingual website and reach a wider global audience.
Conclusion
Creating a multilingual website using the WordPress WPML plugin empowers you to connect with diverse audiences across different languages. Follow the steps in the above blog post to seamlessly translate and manage your content, customize language switchers, and optimize your website for improved SEO. WPML offers a user-friendly interface and a range of fantastic features that make the process of creating a multilingual website with WordPress a smooth and efficient experience. With your newly multilingual website, you can expand your reach, increase engagement, and ultimately achieve your global communication goals.
FAQs
Is the WPML plugin compatible with all WordPress themes?
Yes, WPML is compatible with most WordPress themes. However, it’s always a great practice to check the compatibility of your chosen theme with WPML before proceeding. You can visit the WPML website or consult the theme developer for compatibility information.
Can I translate all types of content using WPML plugin?
Yes, WPML allows you to translate a multitude of content, including posts, pages, custom post types, taxonomies, menus, widgets, and more. It provides a comprehensive translation management system to handle all your multilingual content effectively.
Can I add new languages to my multilingual website after it’s launched?
Yes, you can add new languages to your multilingual website at any time using the WPML plugin. Simply go to the WPML settings, select the new language, and start translating your content into the added language. WPML is like a cakewalk to expand your language options even after the initial setup.
Does WPML plugin handle right-to-left (RTL) languages?
Yes, WPML fully supports RTL languages, allowing you to create multilingual websites in languages such as Arabic, Hebrew, Persian, and more. It provides RTL support for both the front-end and back-end of your WordPress website.
Does WPML plugin offer professional translation services?
No, WPML does not provide translation services directly. However, it integrates with several popular translation services and plugins, such as WPML Translation Management and translation services like ICanLocalize and Gengo. These integrations allow you to connect with professional translators for high-quality translations if needed.
