
In today’s digital world, where content is key to building a solid online presence, having a backup plan for your website is more important than ever. WordPress, one of the leading content management systems, offers numerous tools to help you efficiently manage and protect your content. One such handy feature is the ability to export a single page in WordPress.
Being able to export single page in WordPress opens up a world of possibilities. Whether you’re looking to back up a specific page, move it to another WordPress site, or create a duplicate for testing, mastering the art of exporting individual pages is a valuable and time-saving skill for any WordPress user.
Viable Reasons to Export Single Page in WordPress
1. Creating a Backup
Website backups are essential to protect your content from unforeseen events such as server crashes, hacking attempts, or accidental data loss. By exporting single pages, you can ensure that you have a copy of your important content stored separately, allowing you to easily restore it if needed.
2. Transferring Pages to Another WordPress Site
Whether you’re redesigning your website or collaborating with others, you may need to transfer specific pages from one WordPress site to another. Exporting a single page allows you to extract the content and import it into a different site effortlessly.
3. Testing or Staging Purposes
Before making any significant changes to your live website, it’s wise to test them on a staging environment. Exporting a single page allows you to duplicate it in a controlled testing environment, ensuring that any modifications or updates you make won’t affect your live site until you’re ready.
Getting Started: Preparing Your Website to Export Single Pages
Preparing your website before you export single pages help to ensure a smooth and successful export process. It involves taking necessary precautions to avoid potential issues such as missing media files, broken links, or formatting errors. By following these steps, you can minimize the chances of encountering problems during the export and import process.
1. Update WordPress and Plugins
Before exporting a single WordPress page, it’s crucial to have an up-to-date WordPress installation and all your plugins updated to their latest versions. This helps ensure compatibility and minimizes the risk of encountering errors during the export process. Check for updates in the WordPress dashboard and update accordingly.
2. Check Theme Compatibility
If you’re using a custom theme or a third-party theme, make sure it is compatible with the version of WordPress you are using. Incompatible themes can cause issues with the export process, so it’s essential to verify compatibility and update the theme if necessary.
3. Review Permalinks Structure
Permalinks are the URLs that point to your individual pages and posts. It’s important to ensure that your permalinks are set up correctly before exporting a single page. Go to the WordPress dashboard, navigate to Settings > Permalinks, and choose a permalink structure that is both user-friendly and search engine optimized.
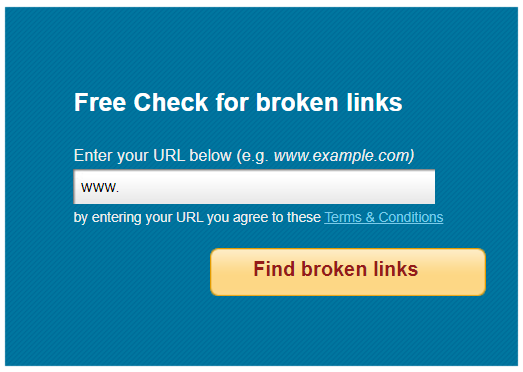
4. Check for Broken Links
Broken links can hinder the export process and cause issues when importing the page to another WordPress site. Use a reliable broken link checker plugin or an online tool to assess your website for broken links and fix them before exporting the single page.
5. Ensure Media Files are Properly Linked
If your page contains images or other media files, make sure they are properly linked within the content. Check that all media files are correctly displayed and that the URLs are pointing to the correct locations. This step is crucial to prevent missing media files after importing the page to another site.
By following these preparatory steps, you can ensure that your website is in optimal condition for exporting a single page. Now that you have prepared your website, we can move on to the next section, which covers the actual process of using the WordPress export tool.
Using the WordPress Export Tool
Once you have prepared your website to export single pages, you can proceed to use the WordPress Export Tool. This section will walk you through the steps of using the tool to export a single page from your WordPress site.
A. Navigating to the WordPress Export Tool
1. Log in to Your WordPress Dashboard
Type your username and password to access the dashboard section of your WordPress site.
2. Navigate to the Export Tool
In the WordPress dashboard, locate the Tools menu on the left-hand side. Hover over it, and a sub-menu will appear. Click on the Export option.
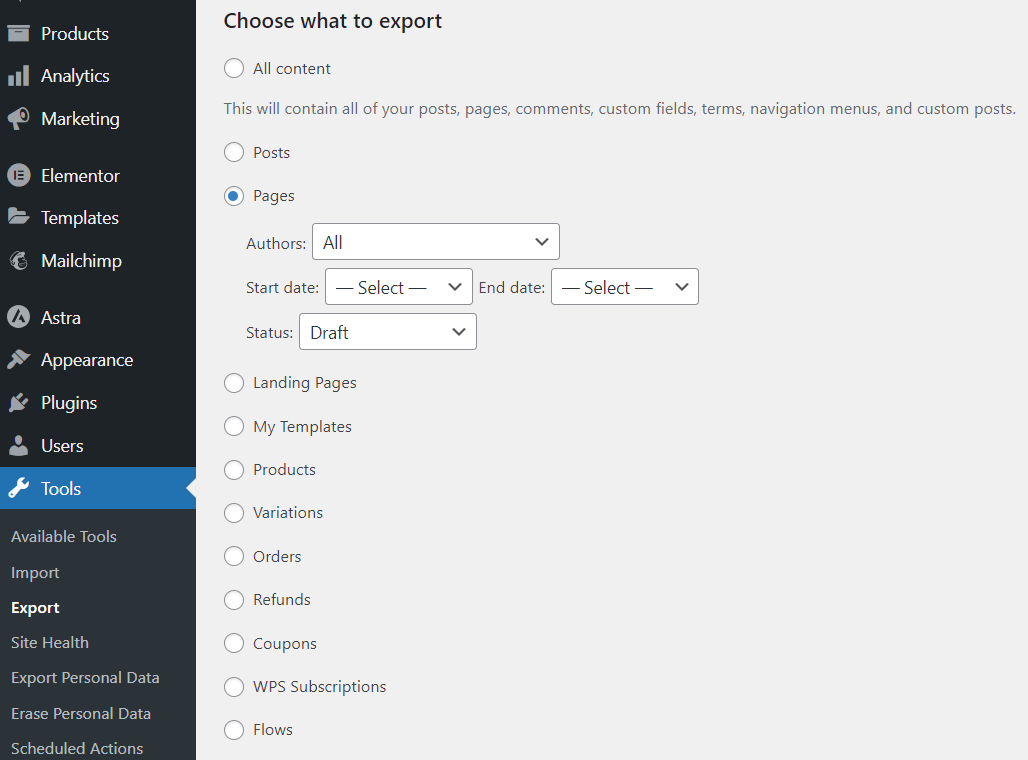
B. Selecting a Single Page for Export
1. Choose the Content to Export
On the Export screen, you will see several options for what content you can export. To export a single page, select the Posts option.
2. Specify the Page to Export
By default, the export tool will export all posts. To export a single page, you need to specify it in the tool. Look for the options to filter the export by post type, author, category, or date range. Choose the appropriate filters to narrow down the export to the specific page you want to export.
C. Running the Export and Downloading the XML File
1. Review Export Settings
Before initiating the export, take a moment to review the selected filters and ensure they match your requirements. Double-check that the correct page is selected for export.
2. Click on the Export Button
Once you are satisfied with the export settings, click on the Export button to start the export process. WordPress will generate an XML file containing the content of the selected page.

- Save the XML File
After the export process is complete, a download prompt will appear. Choose a specific location on your computer to save the XML file. It is recommended to name the file descriptively, making it easier to identify the exported page later.

Congratulations! You have successfully exported a single page from your WordPress site using the WordPress Export Tool. The next section will cover the process of importing the exported page to another WordPress site.
Importing the Exported Page to Another WordPress Site
A. Installing and Activating the WordPress Import Plugin
1. Log in to the WordPress Dashboard
Access the admin area of the WordPress site where you want to import the exported page.
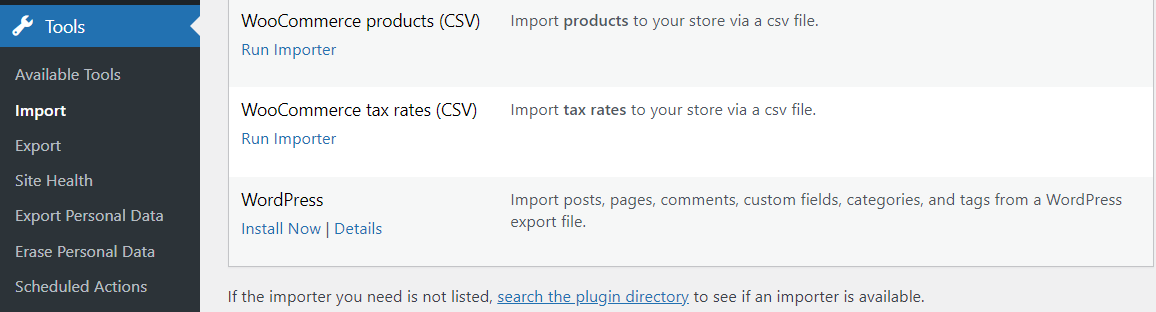
2. Navigate to the Import Tool
In the WordPress dashboard, locate the Tools menu on the left-hand side. Hover over it, and a sub-menu will appear. Click on the Import option.
3. Install the WordPress Import Plugin
If you haven’t installed the WordPress Import plugin yet, you will be prompted to install it. Click on the “Install Now” option mentioned under the WordPress Import option. Next, click on the Activate Plugin & Run Importer link to activate the plugin.
B. Running the Import Process
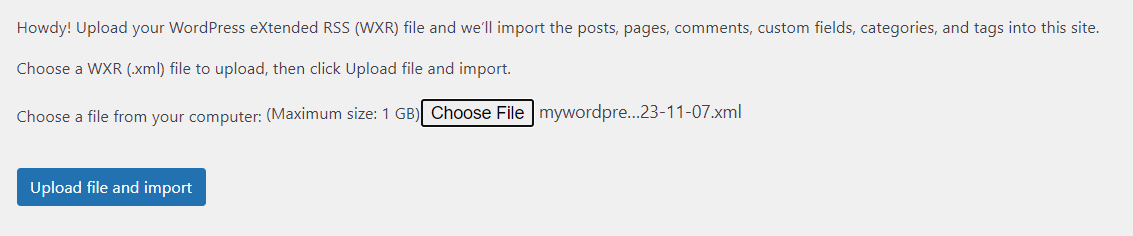
1. Select the XML File
On the Import screen, click on Choose File and go to the location where you saved the exported XML file. Select the file and upload the file.
2. Map Authors
During the import process, you may need to assign the content to existing authors or create new ones. WordPress will give you options to map the content to the appropriate authors. Select the desired option and proceed.
3. Import Attachments
If the exported page contains media files, you will be given the option to import attachments.
4. Submit and Import
Once you have made the necessary selections, click on the Submit button to start the import process. WordPress will process the XML file and import the content of the exported page.
C. Verifying the Page Import on the New Site
After the import process is complete, it’s essential to verify that the page has been successfully imported to the new WordPress site. Follow these steps for a seamless transition to the next site:
1. Preview the Imported Page
Visit the pages section of your WordPress dashboard and locate the imported page. Click on the page to preview it and ensure that the content, formatting, and media files are intact.
2. Inspect Links and Media Files
Click on the links within the imported page to verify that they are functioning correctly. Additionally, check if the media files associated with the page are displaying properly.
Troubleshooting Common Issues to Import and Export Single Pages
A. Correcting Failed Export or Import
1. Check Server Resources
If the export or import process fails, it could be due to limited server storage. Contact your hosting provider to make sure that your server has sufficient memory and processing power to handle the import or export single page tasks. Consider upgrading your hosting plan if necessary.
2. Split Large XML Files
If the exported XML file is too large, it may fail to import. In such cases, you can split the XML file into smaller chunks using third-party tools or plugins. Then, import the smaller files one by one.
3. Increase PHP Memory Limit
PHP memory can also cause export or import failures. Increase the PHP memory limit by making changes in the wp-config.php file or contacting your hosting provider for assistance.
4. Disable Conflicting Plugins
Conflicts between plugins can disrupt the processes of import and export single page. Temporarily deactivate all non-essential plugins and attempt the export/import again. If successful, reactivate the plugins one at a time to identify the conflicting plugin.
B. Dealing with Missing Media Files After Import
1. Verify Media File Paths
If media files are not displaying after importing the page, check if the file paths in the content are correct. If your media files were stored in a different directory on the original site, you may need to update the file paths manually to reflect the new site’s directory structure.
2. Make Use of a Search and Replace Plugin
To update file paths in bulk, you can utilize a search plugin and replace the plugin. Install and activate a reliable plugin that allows you to search for the old file paths and replace them with new ones.
3. Manually Upload Missing Media Files
If the media files are missing entirely, you may need to manually upload them to the new site. Locate the missing files on your original site, download them, and then upload them to the appropriate location on the new site.
C. Resolving Other Common Import and Export Errors
1. Check File Permissions
Assess that the file permissions for the XML file and media files are set correctly. The recommended permissions for files are usually 644, and for folders, it is 755.
2. Disable Security Plugins
Security plugins can sometimes interfere with the export or import process. Temporarily disable security plugins and attempt the export/import again.
3. Update WordPress and Plugins
Outdated versions of WordPress or plugins can lead to compatibility issues during the export/import process. Make sure your WordPress installation and all plugins are up to date.
Export Single Page in WordPress for Seamless Site Management
In this comprehensive guide, we’ve explored the importance of why to export single page in WordPress and provided a detailed, step-by-step walkthrough of the export and import process. By following the outlined steps and troubleshooting tips, you can confidently back up your content, transfer pages between sites, and conduct testing without any hassle.
Now that you have the knowledge to manage your WordPress pages with ease, why not take your website performance to the next level? Start your free trial with Nestify today and enjoy fast, reliable hosting with exceptional support for WordPress. Experience effortless page management and enhanced site speed—sign up now!
FAQs on The Best Way to Export Single Pages in WordPress for Backup or Transfer
Can I export multiple pages at once in WordPress?
Yes, the WordPress Export Tool lets you export multiple pages by selecting the “All Content” option or choosing multiple individual pages to export.
Will the page content (like images and links) be transferred when exporting/importing?
Yes, when you export a page using the WordPress Export Tool, the associated content, including images and links, should be included in the XML file for import into the new site.
How do I back up my WordPress pages before exporting?
You can back up your pages by using a WordPress backup plugin or exporting your pages to an XML file as a precautionary measure before making any changes or transfers.
