
In the world of web design, every detail matters. From selecting the perfect color palette to organizing content, every element plays a crucial role in crafting an aesthetically pleasing and user-friendly website. One such element that often goes unnoticed but significantly impacts the overall layout is the margin.
Changing margins in WordPress offers essential space around your content, giving it room to breathe and ensuring that it doesn’t appear cramped or disorganized. Margins enhance the visual appeal of a site, allowing users to navigate smoothly and absorb the information without feeling overwhelmed. Adjusting margins in WordPress can be an effective way to fine-tune your site’s layout, making it more visually attractive and user-friendly.
If you’re a WordPress user looking to improve your site’s design by changing margins, you’re in the right place. In this blog, we’ll walk you through the process of adjusting margins in WordPress, covering the basics and offering tips for specific elements. Let’s dive in and start transforming your website into a visually stunning and engaging platform.
Understanding the Basics: The Importance of Margins in Web Design
In the world of web design, the concept of margins may seem like a small detail, but it plays an important role in developing visually appealing and user-friendly websites. Understanding the basics of margins and their importance will give you a solid foundation for making effective design decisions in WordPress.
Why Margins in WordPress Matter?
1. Visual Appeal
Margins provide space around the content, creating a sense of balance and preventing elements from appearing cramped or cluttered. Properly adjusted margins allow the content to breathe and make it more visually appealing to visitors.
2. Readability
Well-defined margins help improve the readability of your website’s content. Ample spacing between paragraphs, images, and other elements makes it easier for users to scan and absorb information without feeling overwhelmed.
3. Navigation
Margins in WordPress play a role in guiding users’ eyes across the page. They help create a clear visual hierarchy, making it easier for visitors to identify key elements and navigate through your website effortlessly.
4. Responsive Design
With the alarming use of mobile devices, responsive design has become crucial. Margins play a significant role in ensuring that your website adapts seamlessly to different screen sizes. By adjusting margins, you can optimize the layout for a better user experience on various devices.
5. Branding and Style
Margins in WordPress are essential in maintaining a consistent aesthetic throughout your website. By carefully adjusting margins, you can create a cohesive and professional appeal that aligns with your brand’s style and identity.
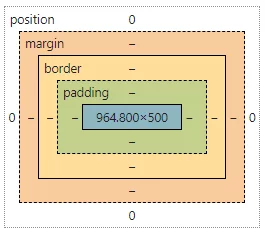
Learn about box model in WordPress design here.
How Margin Adjustments in WordPress Can Impact Your Design
- Content Type: Different types of content may require varying margin settings. For example, margins for paragraphs of text may differ from margins for images or videos. Consider the nature of your content and adjust margins accordingly to create an optimal visual presentation.
- Whitespace: Whitespace, also recognized as negative space, refers to the empty areas surrounding content. It is an essential design element that affects the overall look and feel of your website. Adjusting margins in WordPress can help achieve the desired balance between content and whitespace.
- Page Layout: The overall layout of your website influences how margins should be adjusted. Whether you have a sidebar, multiple columns, or a full-width design, understanding the layout structure is crucial for determining the appropriate margin settings.
- Consistency: Consistency is key in web design. Ensure that your margin adjustments are consistent across different pages and sections of your website. This will create a cohesive and harmonious user experience.
Educate yourself about readability trends in the world of website design and development here.
Locating Where to Change Margins in WordPress to Achieve a Clean, Balanced Look
When it comes to changing margins in WordPress, the first step is to locate where you can make these adjustments within the WordPress dashboard. WordPress provides various options and settings that allow you to modify margins effectively. In this section, we will guide you through the process of finding the relevant settings or options to change margins in WordPress.
Identifying the Relevant Settings or Options in the WordPress Dashboard
- Custom CSS Code
For users comfortable with advanced customization, adding custom CSS code is a powerful option for modifying margins. You can typically add custom CSS code directly through the WordPress dashboard under the “Appearance” menu, or in a separate “Custom CSS” section, depending on the theme or additional plugins installed.
- Appearance Menu
In the WordPress dashboard, start by navigating to the “Appearance” menu. This section includes various options related to the visual design of your website, such as WordPress theme settings, customization tools, and layout adjustments.
- Theme Customizer
Within the “Appearance” menu, click on the “Customize” option. The WordPress theme customizer enables you to make live adjustments to your site’s design, including fine-tuning margins and other layout elements.
- Theme Options or Settings
Some WordPress themes come with their own dedicated options or settings pages, often accessible through the “Appearance” menu or a theme-specific section. Check for options under layout, design, or typography, as these may include settings to adjust margins or padding.
- Page Builder Plugins
If you’re using a page builder plugin such as Elementor, Beaver Builder, or Divi, you may find margin settings within the plugin interface. These page builders allow you to tweak margins, padding, and spacing in the settings of individual elements or sections.
Editing Page Margins in WordPress: The Ultimate Know-How
Adjusting page margins in WordPress is a fundamental aspect of customizing the layout and design of your website. In this section, we will explore two popular methods to change margins in WordPress: using the built-in Customizer and utilizing a page builder plugin.
A. Using the Built-in Customizer
1. Accessing the Customizer
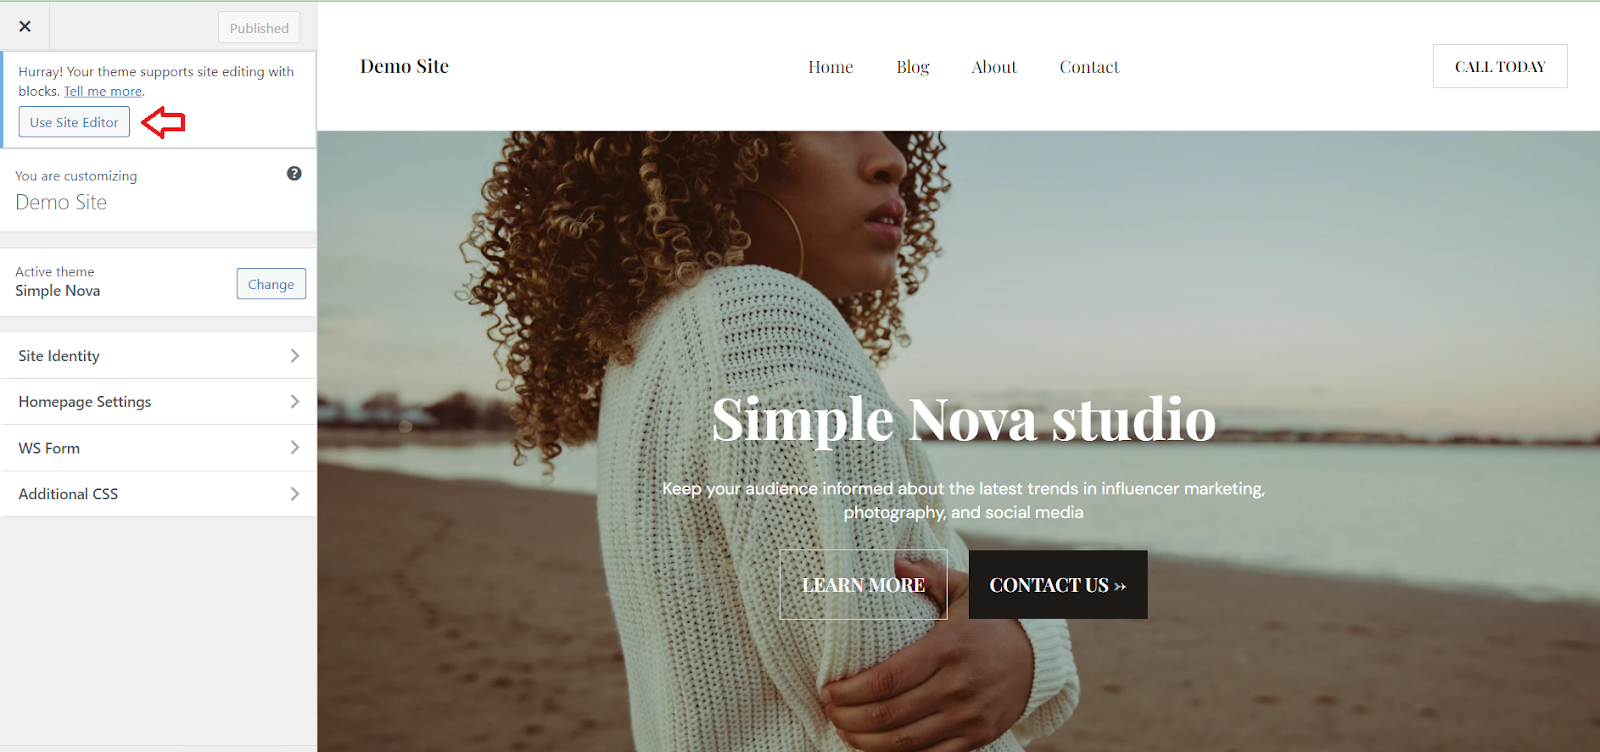
In the WordPress dashboard, navigate to the “Appearance” menu and click on “Customize.” This will launch the built-in Customizer tool. Click on site editor (please note: Some themes provide this option while some don’t.)
2. Selecting the Relevant Section
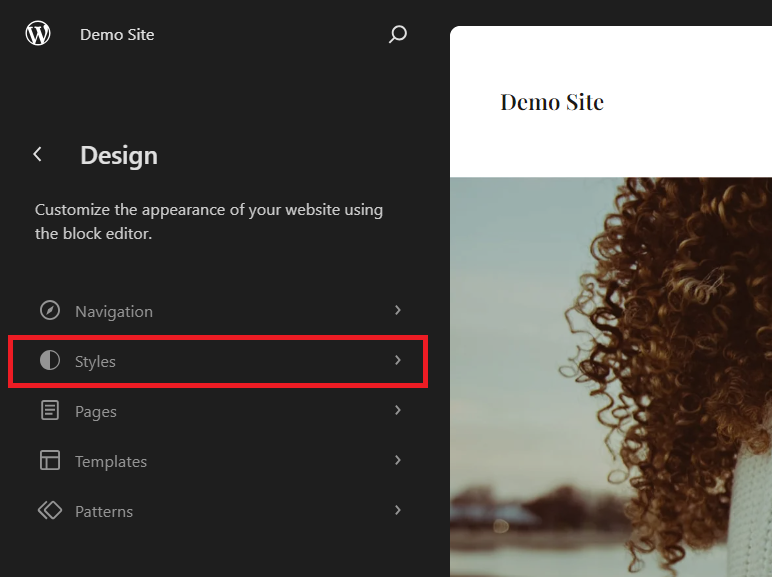
Within the Customizer, you will see a list of options organized in a sidebar or panel. Look for the section related to styles and then select the option of “edit styles”. It will redirect you to the layout, design, or theme settings on the right panel. The specific name of this section may vary depending on your theme.
3. Locating Margin Settings
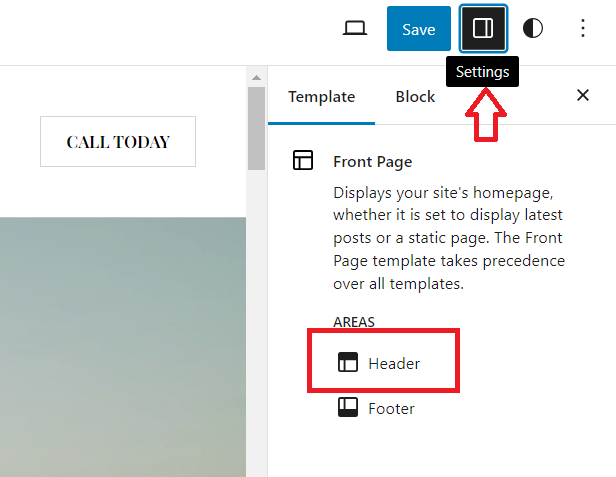
Once you have located the relevant section, explore the available settings to find options related to margins in WordPress. These settings may be organized by specific elements or sections of your website, such as headers, footers, or content areas.
4. Adjusting Margin Values
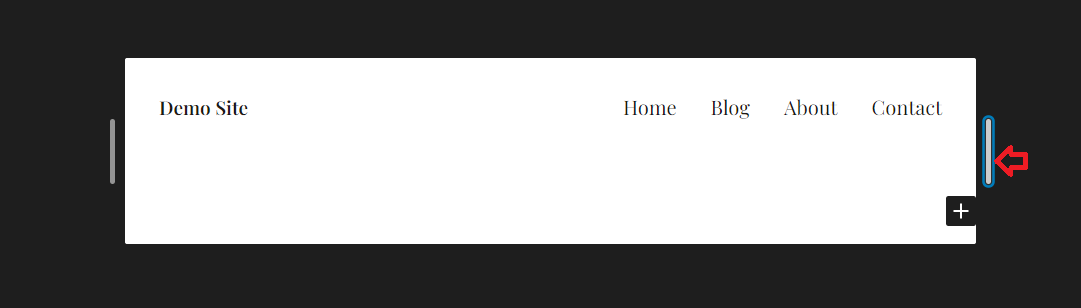
Depending on the Customizer tool, you may have the option to adjust margin by dragging the margins until you achieve the desired margin adjustments. Remember to preview the changes in real time to ensure they align with your vision.
5. Saving and Publishing
Once you are satisfied with the margin adjustments, click on the “Save” or “Publish” button within the Customizer to apply the changes to your live website. Make sure to test your website on different devices to ensure the margins appear as intended.
B. Using a Page Builder Plugin
1. Installing and Activating a Page Builder Plugin
If you haven’t already installed and activated a page builder plugin of your choice, Popular options include Elementor, Beaver Builder, or Divi. These plugins provide more advanced customization options, including the ability to adjust margins in WordPress.
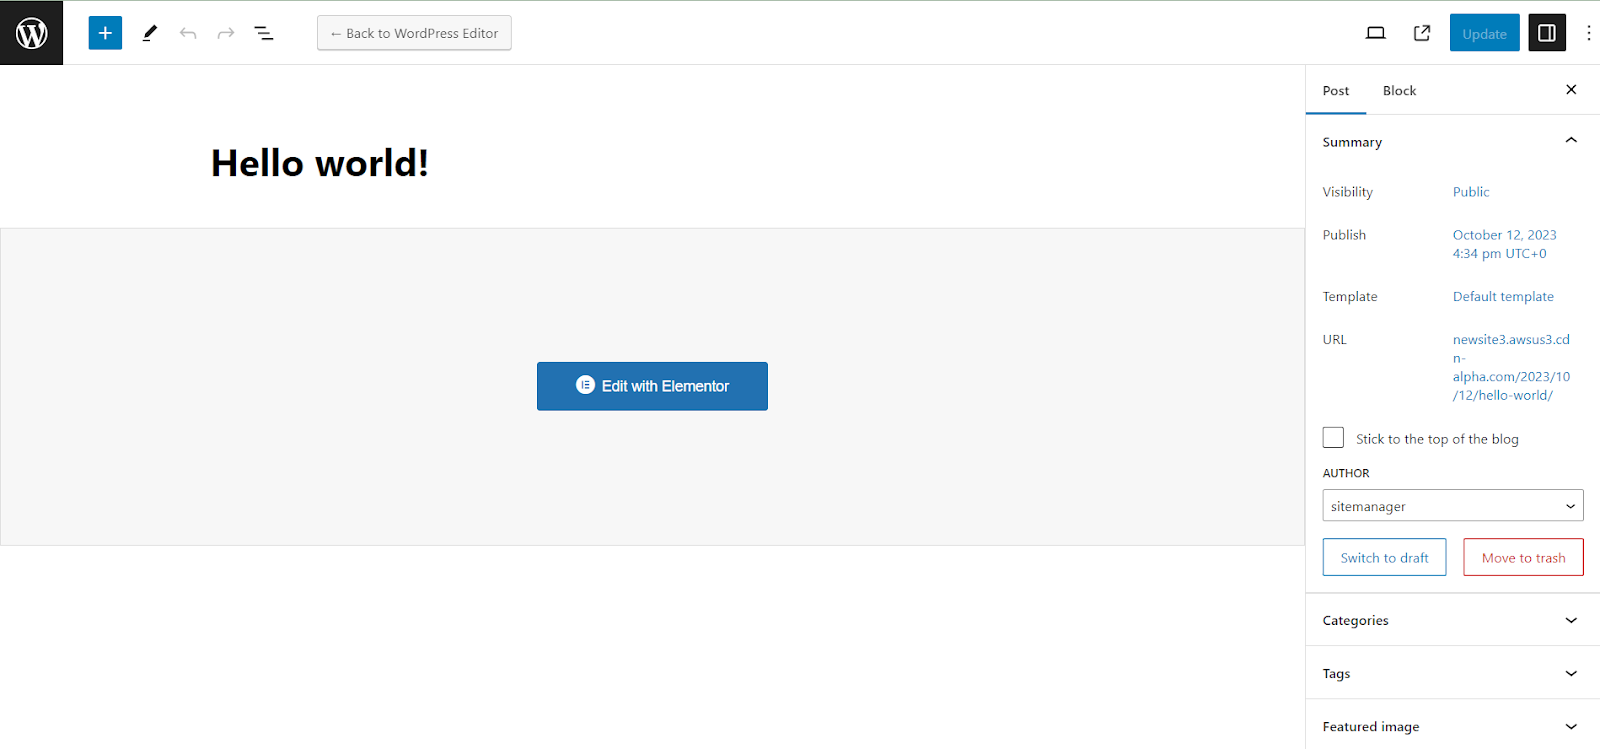
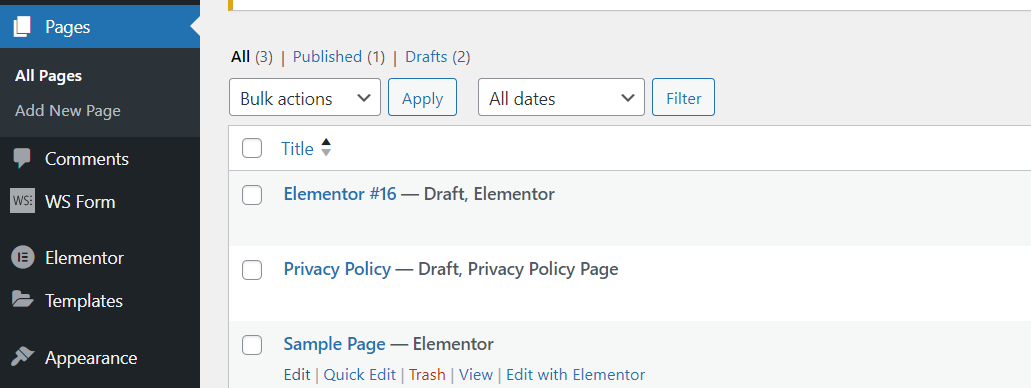
2. Editing or Creating a Page
In the WordPress dashboard, navigate to “Pages” and either edit an existing page or create a new one with the help of the page builder plugin. Most page builders offer an “Edit with [Page Builder Name]” button when editing a page.
3. Accessing Margin Settings
Once you are in the page builder interface, look for the page settings where you want to adjust the margins. Each page builder has its own interface and terminology, but generally, you can access margin settings by selecting the element and exploring the available options or settings panel.
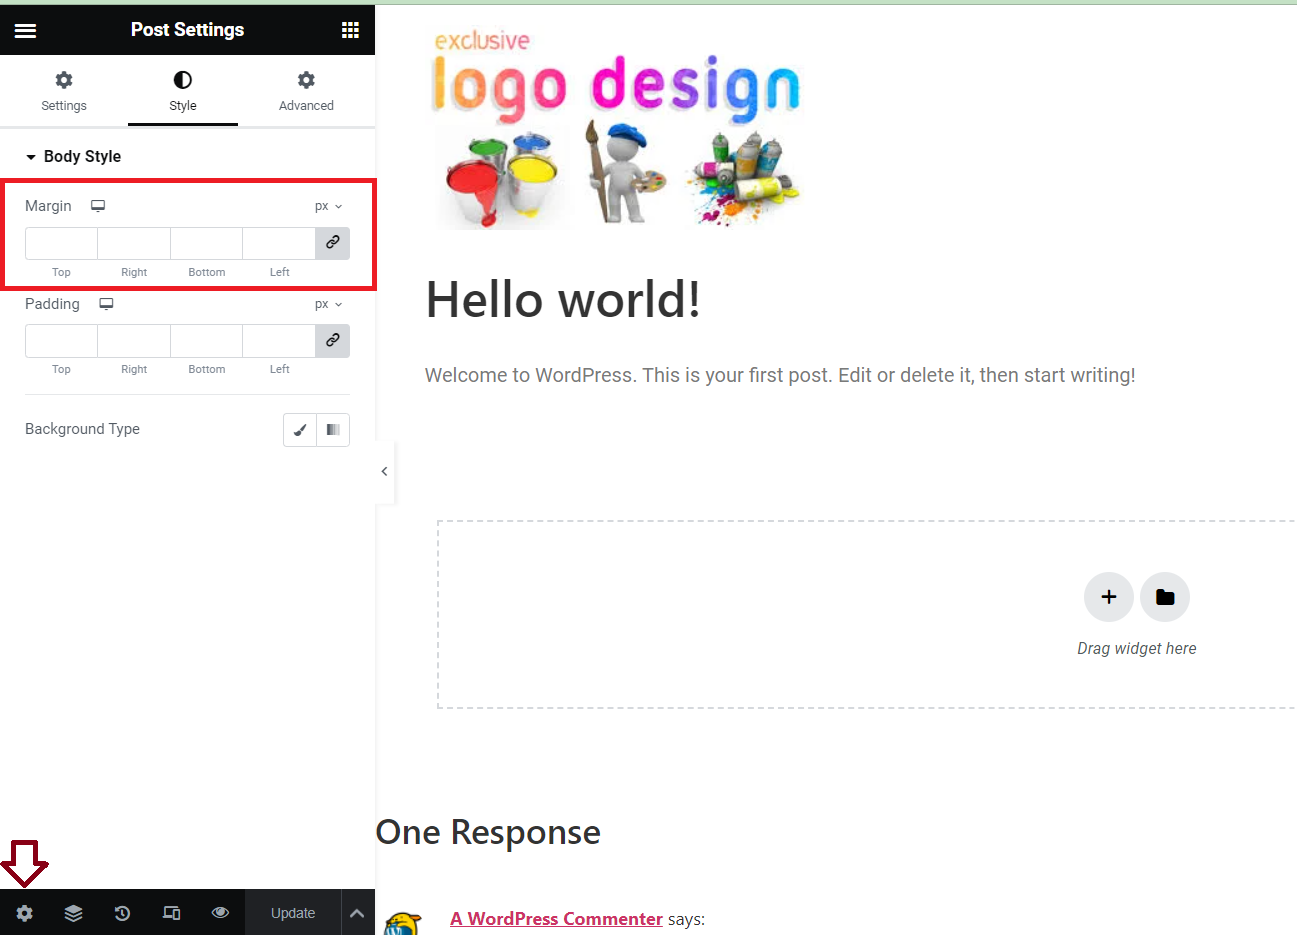
4. Adjusting Margin Values
Within the page builder’s settings or options panel, look for options related to margins, spacing, or padding. These options may be located under a “Layout” or “Style” tab. Use sliders, input fields, or drag-and-drop functionality to adjust the margin values until you achieve the desired spacing.
5. Updating and Previewing
After making the necessary margin adjustments, save or update the page within the page builder interface. Preview the page to ensure the margins appear as intended. It’s also recommended to test the page on different devices to ensure a consistent experience.
How to Change Margins in WordPress Theme
Changing margins in a WordPress theme can be an effective way to customize the overall layout and design of your website. In this section, we will explore two methods for changing margins in WordPress themes: modifying theme settings and using custom CSS.
A. Modifying Theme Settings
1. Theme Options
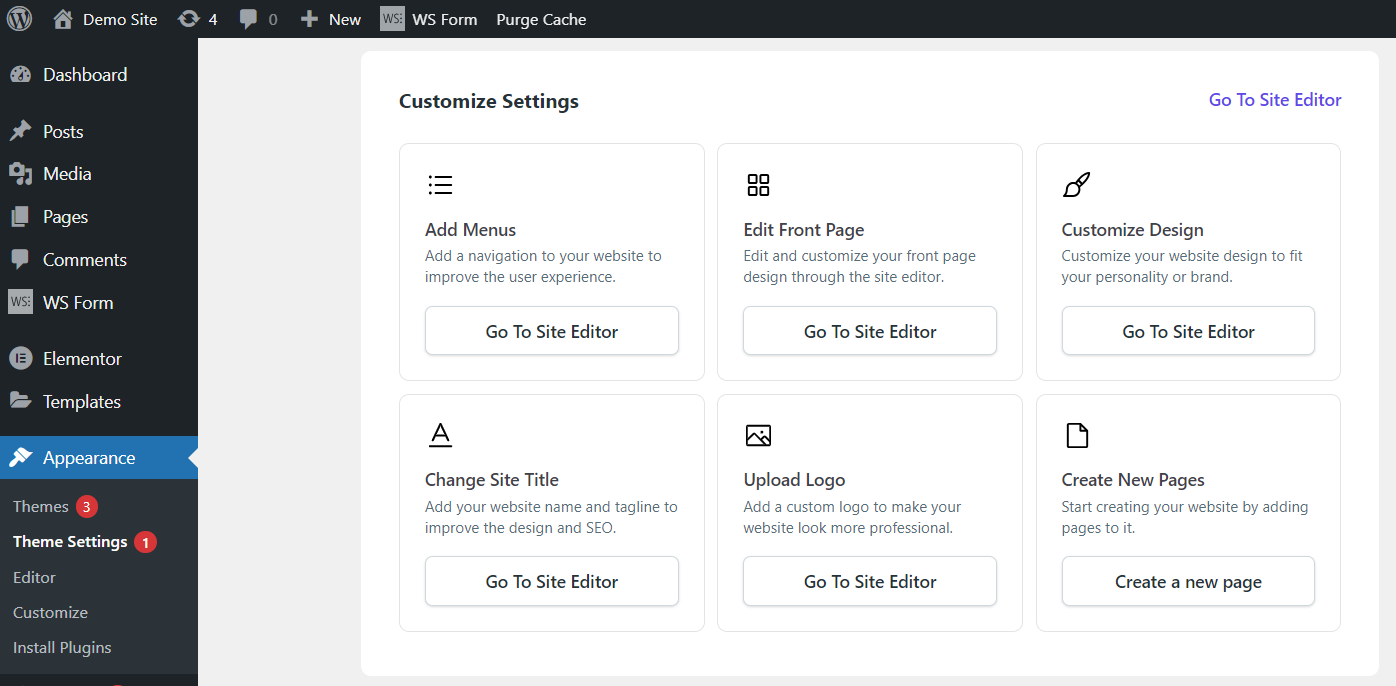
Some WordPress themes provide built-in options for adjusting margins. These options are typically found within the theme settings or customization panel. To access these settings, navigate to the “Appearance” menu in the WordPress dashboard and look for the theme settings or customization options. Click on “Go to Site Editor” of any of the pages you want to change the margins of.
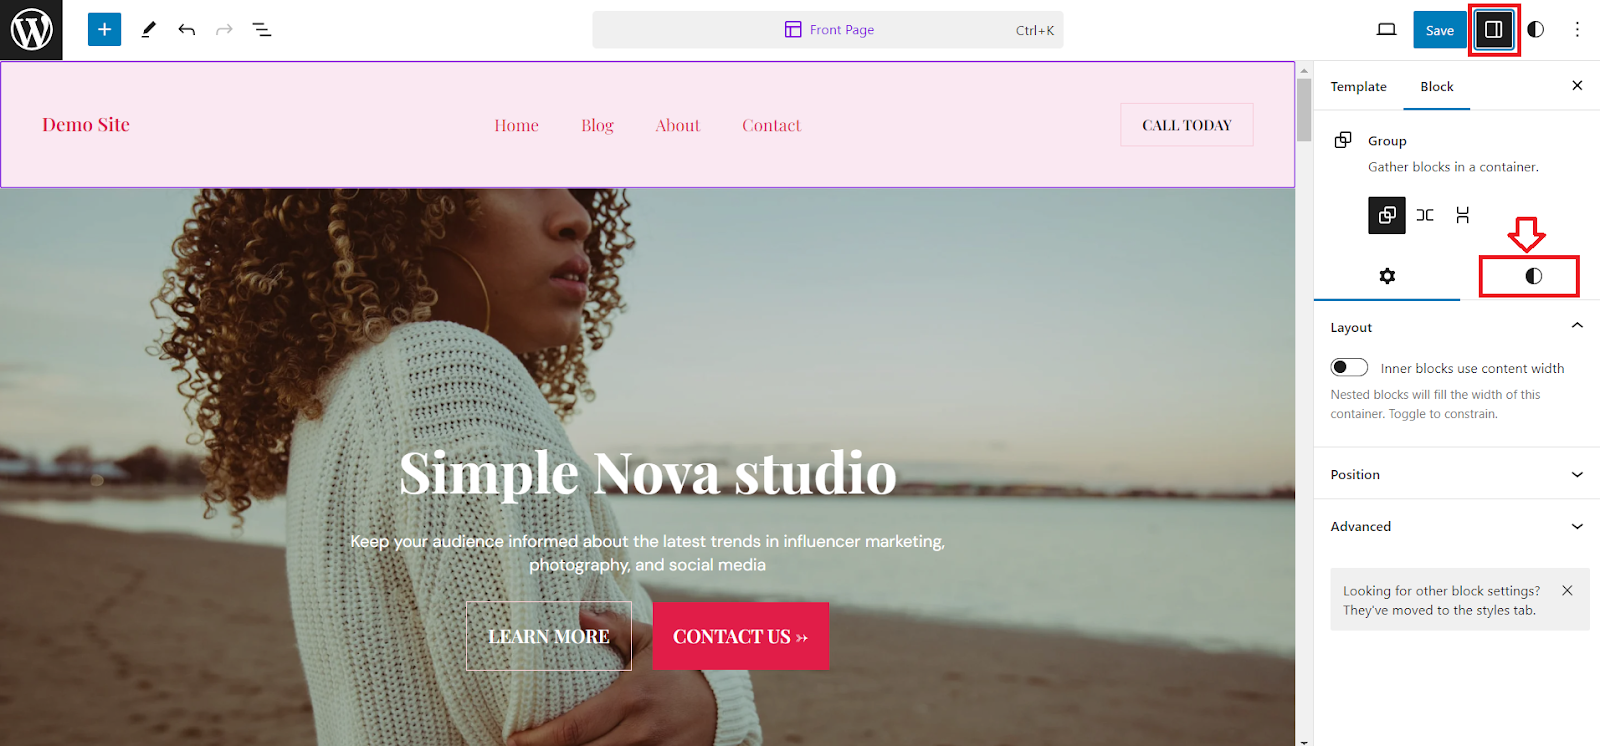
2. Selecting the Relevant Section
Within the Customizer, you will see a list of options organized in a sidebar or panel. Look for the section related to styles and then select the option of “edit styles”. It will redirect you to the layout, design, or theme settings on the right panel. The specific name of this section may vary depending on your theme.
3. Locating Margin Options
Once you are in the theme settings or customization panel, explore the available options for adjusting margins. Look for options related to layout, spacing, or typography. Depending on the theme, you may find global margin settings that apply to the entire website or specific settings for individual sections or elements.
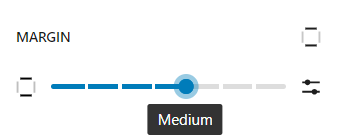
4. Adjusting Margin Values
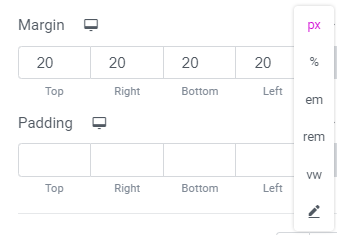
Within the theme settings, you will likely have the ability to adjust margin values using sliders, input fields, or dropdown menus. Experiment with different values from small to xxlarge to achieve the desired margin adjustments. Remember to save or apply the changes before previewing your website.
5. Preview and Test
After adjusting the margin settings, preview your website to see how the changes affect the overall layout. Test your website on other devices and screen sizes to make sure the margins appear as intended.
B. Using Custom CSS
1. Accessing Custom CSS
If you are comfortable working with code, using custom CSS allows for more precise control over margins. To access the custom CSS editor, navigate to the “Appearance” menu in the WordPress dashboard and look for the “Customize” option. Within the Customizer, you may find a dedicated section for adding custom CSS. Alternatively, some themes provide a separate “Custom CSS” option under the “Appearance” menu.
2. Targeting Elements
To change margins using custom CSS, you need to identify the specific elements or sections for which you want to adjust margins. This can be done by inspecting the website using your browser’s developer tools or referencing the theme’s documentation.
3. Writing CSS Code
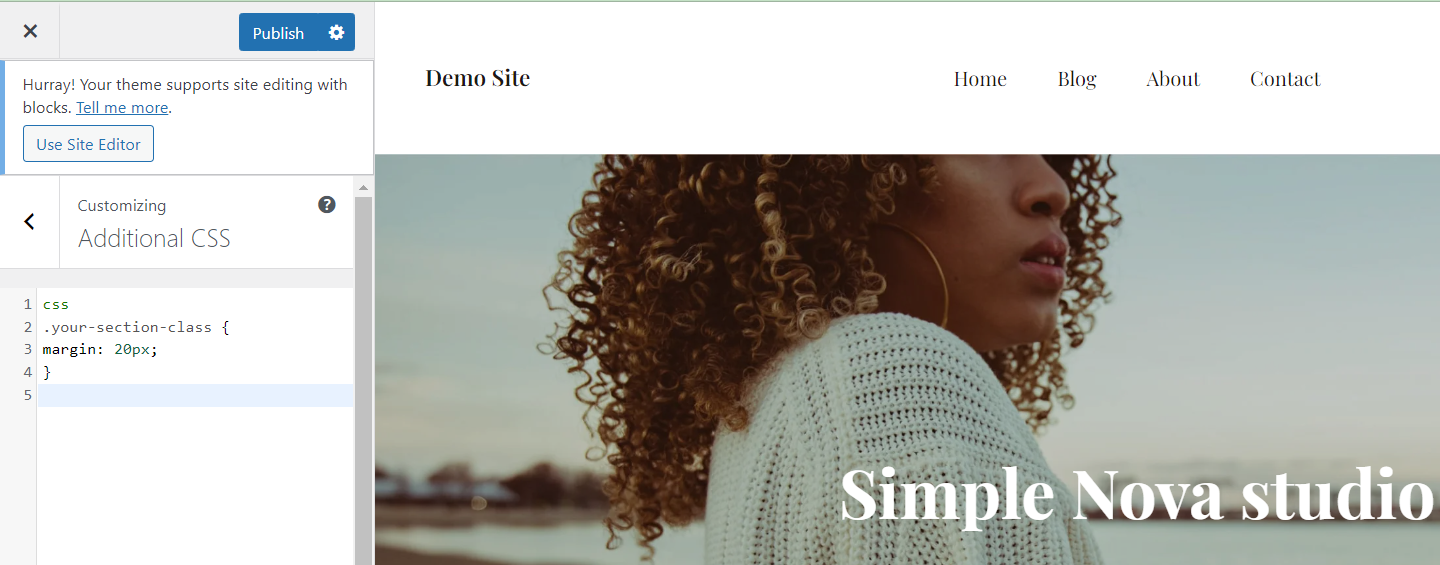
Once you have identified the elements, write CSS code to target them and adjust the margins. For example, to change the margin for a specific section, you might use a code snippet like:
.your-section-class {

margin: 20px;

}
Replace .your-section-class with the appropriate CSS selector for your desired element or section, and adjust the margin values according to your needs.
4. Applying Custom CSS
After writing the CSS code, save or apply the changes in the custom CSS editor. Preview your website to see the updated margins. If necessary, make further adjustments to the CSS code and reapply until you achieve the desired margin changes.
How to Change Margins in WordPress for Specific Elements
Changing margins for specific elements in WordPress allows you to fine-tune the spacing and alignment of different content elements on your website. In this section, we will explore how to change margins for images, text blocks, and widgets.
A. Changing Margins for Text or Images
1. Identifying the Image
Locate the image for which you want to adjust the margins. This can be an image within a post, page, or widget area. Click on “Edit” under the page.
2. Using the Image Block Editor
If you are using the block editor (Gutenberg), select the image block and look for the “Block Settings” panel on the right side of the editor.

3. Adjusting the Margins
Within the panel layout, you should find options to adjust margins or spacing.

4. Using Custom CSS
Alternatively, if you prefer more precise control, you can use custom CSS to adjust the margins for images. Target the specific image or image class using CSS selectors and adjust the margin properties accordingly.
B. Changing Margins in WordPress for Widgets
1. Accessing Widget Settings
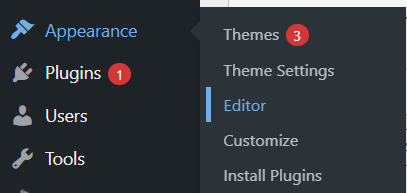
In the WordPress dashboard, navigate to “Appearance” and select “Editor.” This will open the widgets management interface.
2. Selecting the Widget
Locate the widget for which you want to change the margins in WordPress. Click on the widget to access its settings.
3. Widget Styling Options
Depending on the theme or widget, you may find specific options for adjusting margins or spacing within the widget settings. Look for options related to layout, spacing, or margins.

4. Using Custom CSS
If the widget settings do not provide margin adjustment options, you can utilize custom CSS. Target the specific widget or widget class using CSS selectors and adjust the margin properties accordingly.
Fine-Tuning Your WordPress Layout: Change Margins with Ease
Optimizing your WordPress site layout requires attention to every detail, including how you change margins in WordPress. By following the steps in this guide, you now have the knowledge and tools to effectively adjust margins, improving your site’s overall design and user experience.
With a well-optimized layout, your WordPress site will stand out and leave a lasting impression on your visitors. Now, armed with this insightful knowledge, go ahead and take control of your website’s margins in WordPress to develop a visually stunning and user-friendly online presence.
Want to take your site’s performance to the next level? Start your free trial with Nestify today and enjoy fast, reliable WordPress hosting with outstanding support. Sign up now and elevate your website. Happy designing!
FAQs on Achieving a Clean, Balanced Look: How to Change Margins in WordPress
Can I set different margins for different sections of my WordPress site?
Yes, you can set different margins for various sections of your site using page builders, custom CSS, or individual block settings. This allows for unique spacing for each section.
Is it possible to adjust margins for a specific post or page in WordPress?
Yes, you can adjust margins for specific posts or pages through the block editor, page builders, or by adding custom CSS targeting individual pages.
What’s the best way to adjust margins for mobile responsiveness in WordPress?
Use responsive CSS settings or media queries to adjust margins specifically for mobile devices, ensuring that your site looks great on all screen sizes.
