
Discovering a Google blacklist warning attached to your website is akin to stumbling upon a warning sign on a treacherous path. It’s a jolt to the system, a signal that something sinister may be lurking beneath the surface. This unsettling revelation often leaves website owners grappling with a multitude of questions: How did this happen? What are the implications? And most importantly, how can it be fixed?
Let us answer all of your questions in this blog. Go on to read it.
What is the Google Blacklist?
Google strives to ensure a safe search experience for its users. As part of its Safe Browsing initiative, Google flags sites containing malicious content or spam with various browser warning messages such as “Deceptive site ahead,” “This site may harm your computer,” “Phishing attack ahead,” “Site ahead contains malware,” “This site may be hacked,” and “This website has been reported as unsafe.” If you encounter any of these Google blacklist warnings, it’s a strong indication that your site has been hacked and needs immediate attention.
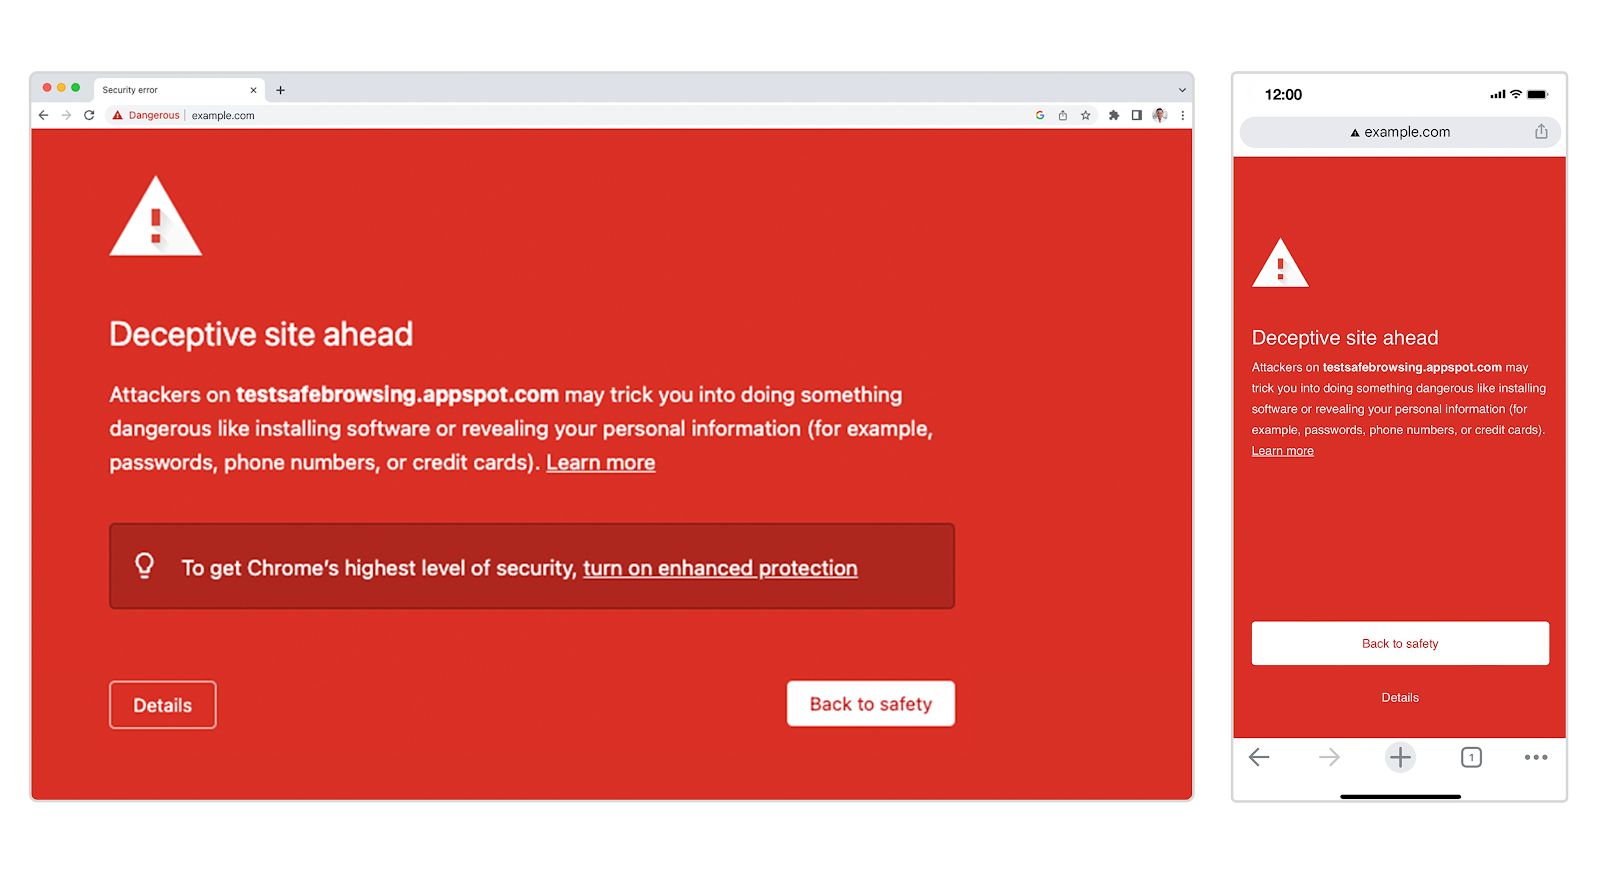
Google blacklists thousands of websites daily that it deems unsafe, usually because they contain malware or deceptive content. When your website URL is blacklisted, visitors coming from search engines will see a prominent red notice or a “Dangerous” sign in the URL bar.
However, the consequences extend beyond these Google blacklist warnings. Google will deindex a blacklisted website, causing it to disappear from search results. This leads to a considerable drop in organic traffic as your site’s pages no longer appear in Google searches. Additionally, many antivirus programs, web hosts, and browsers that refer to the Google blacklist may also flag or suspend your website.
Steps to Fix Google Blacklist Warning?
Step 1: Cross-check if Your Website is Blacklisted by Google
Before you can fix any Google blacklist warnings, it’s crucial to confirm whether your WordPress site is blacklisted by Google. Ideally, Google will notify you via email if your site has been flagged for malware, providing helpful links to forums and articles for resolving the problem. However, there are other methods to determine if your site is blacklisted. Here is the list:
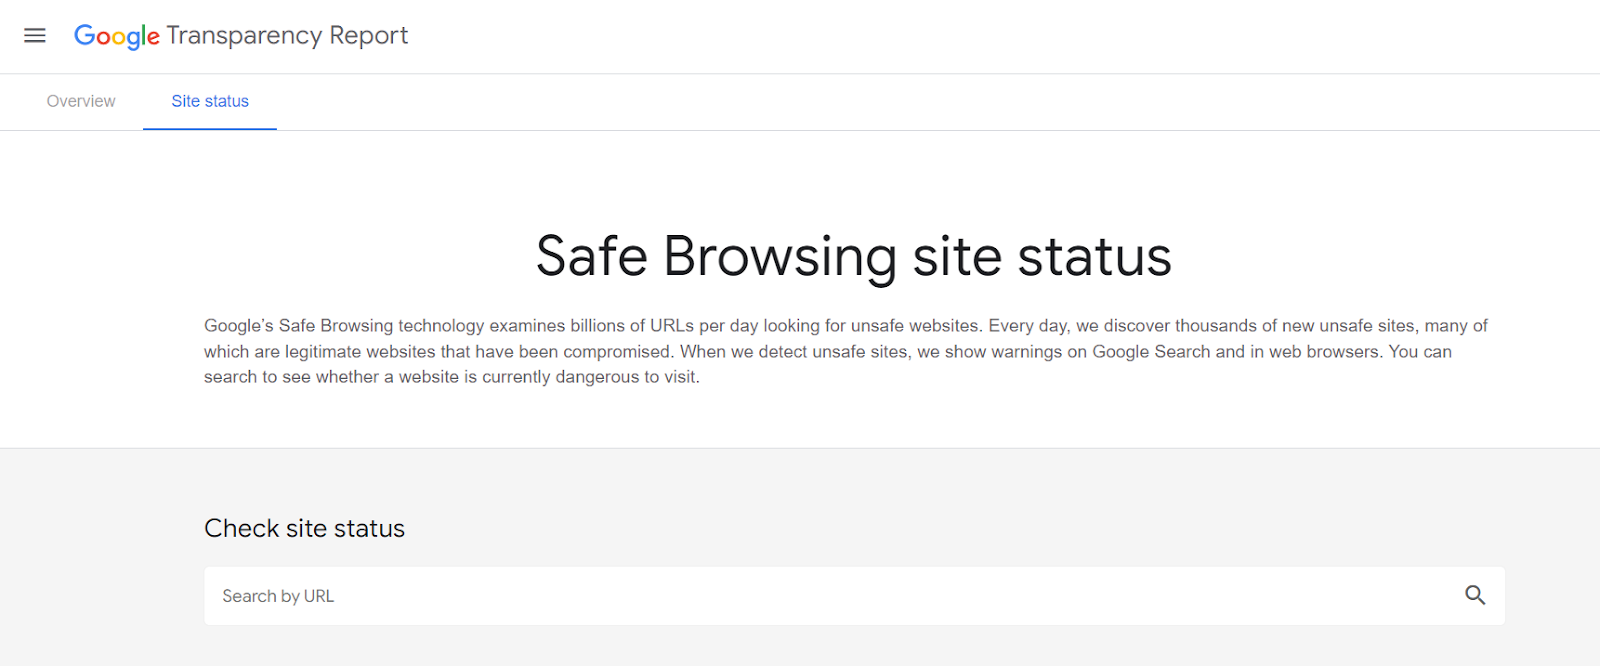
- Type your site name in Google Safe Browsing and check the status of your website.
- Another quick method to check Google blacklist is to scan your site for malware infections. A website scanner can identify the issues causing the warnings within minutes, confirming whether malware is indeed the culprit.
- Google your website and check the results to see if your pages are indexed or if spam pages appear. Google may ban your website from search results, making it unfindable without the direct address.
- Review activity logs for unusual user activity that might indicate a compromised admin account.
- Examine analytics data for unusual spikes or drops in traffic.
- Check Google Search Console for warnings under the Security Issues tab. Familiarize yourself with Search Console, as you’ll use it to file a review request later. Ensure you have admin access.
- Avoid using nulled themes and plugins, which often contain malware and backdoors.
- Be aware that antivirus programs may block your website. Investigate any customer complaints about this issue promptly.
- Finally, use the Google Transparency Report to check if your website is blacklisted. This is a reliable way to confirm if your site is on the Google blacklist.
Step 2: Remove Malware from Your Site
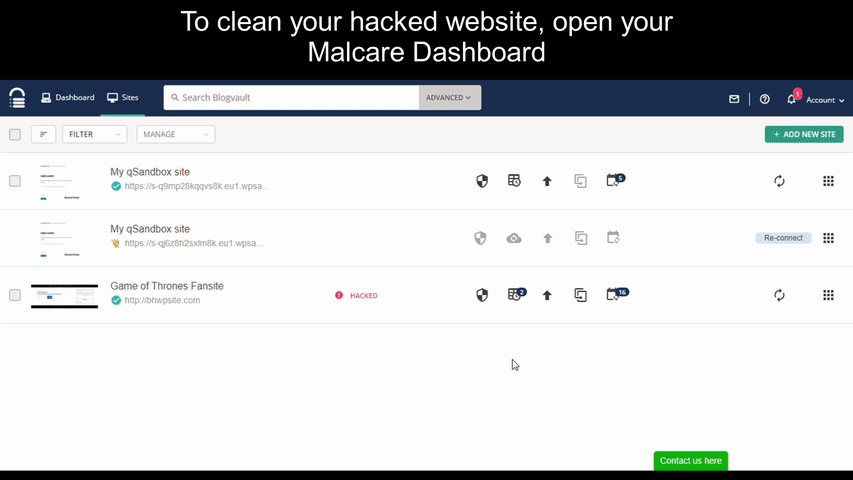
Now that we’ve confirmed malware on your website, it’s time to clean it up. We recommend using MalCare’s one-click auto-clean feature for this task. MalCare is a top-tier security plugin that not only scans your site daily for hacked files and vulnerabilities but also allows you to clean hacks instantly from your dashboard.
If you have already installed MalCare for the free scan, simply upgrade to clean your website. If not, follow these steps:
- Install MalCare software on your website.
- Check if the website has synced with MalCare servers.
- Scan your website from the dashboard.
- Auto-clean when prompted to remove the malware.
It’s that simple. MalCare uses a sophisticated algorithm to check every file and database table for hacks without relying on simple file matching.
If the hack isn’t fully cleaned, you can request support from MalCare’s team of security engineers. They will thoroughly inspect your website and remove the hacked files. This service is included in your subscription.
Additionally, MalCare offers ongoing protection with daily scans, an integrated firewall to defend against malicious traffic, and a powerful, user-friendly dashboard.
Step 3: Manually Clean Your Website
- Gain access to your website if it’s suspended. Contact your web host to whitelist your IP for cleaning.
- Obtain a list of hacked files from your web host or Google Search Console. While helpful, this list may not address underlying vulnerabilities, so don’t rely solely on it.
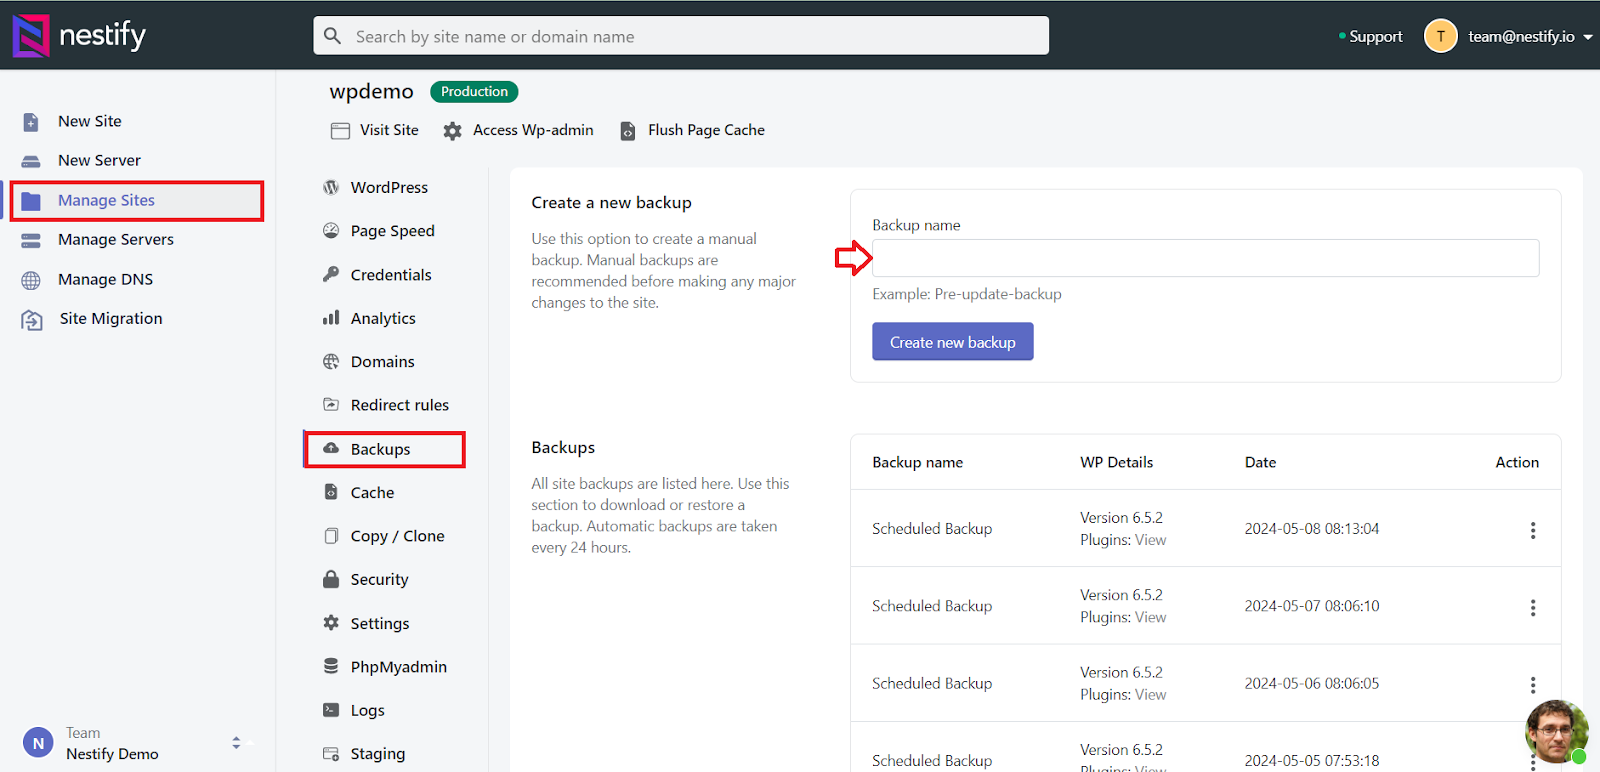
- Immediately back up your website. While hacked, it’s still functional. This backup ensures you have a working version if cleaning efforts cause issues. If you are a Nestify user, then one-click backup is available.
- Remove fake plugins. Review your list of plugins and themes for any outliers. These may be fake plugins—hacked files posing as plugins. They typically contain minimal files and odd names. You can also check if a plugin is legitimate by searching for it in the repository.
Step 4: Follow a Post-Cleanup Checklist
- Restore cleaned files to your website’s backend
Access cPanel and utilize the File Manager to replace files and phpMyAdmin to replace the database. Start by deleting existing files before copying your clean files into their respective locations. Alternatively, employ FTP or SFTP to manage your website restoration; while it is more reliable, it can be a tedious process.
- Install a Malware Plugin for Future Safety
Caches store previous versions of your website to enhance performance, potentially retaining malware. Google frequently scans cached website versions, detecting malware therein. This often leads to review requests being rejected.
While malware removal plugins effectively eradicate malicious content from your site, they can’t reverse all actions taken by hackers, such as creating unauthorized user accounts or tampering with sitemaps. After the cleanup, it’s crucial to address such damage manually to restore your site’s functionality.
Additionally, malware is notoriously persistent, often reappearing by exploiting backdoors or recurring vulnerabilities. It’s akin to an endless game of whack-a-mole. To mitigate this risk, make sure to use this comprehensive security checklist. Following these steps helps prevent hackers from re-entering WordPress sites after being removed.
- Install a reliable security plugin with an integrated firewall to safeguard your WordPress site
The security plugins play a vital role in scanning, cleaning, and preventing Google blacklist warnings. They have the capability to swiftly identify and resolve malware issues while offering continuous protection through their advanced firewall.
Also Read: Tips To Maintain a Malware-Free WordPress Website In 2024
Step 5: Re-submit Sitemaps

Re-submitting correct sitemaps is essential, especially in cases where malware manipulates a site’s Google search results. Hackers may add numerous pages to exploit SEO and deceive Google. They achieve this by submitting sitemaps containing URLs of illegitimate pages, replacing your genuine sitemap.
Given that your site has been blacklisted by Google, malicious sitemaps are scrutinized during the review process for removal from this list. Hence, it’s crucial to verify your sitemap on Google Search Console following a malware incident.
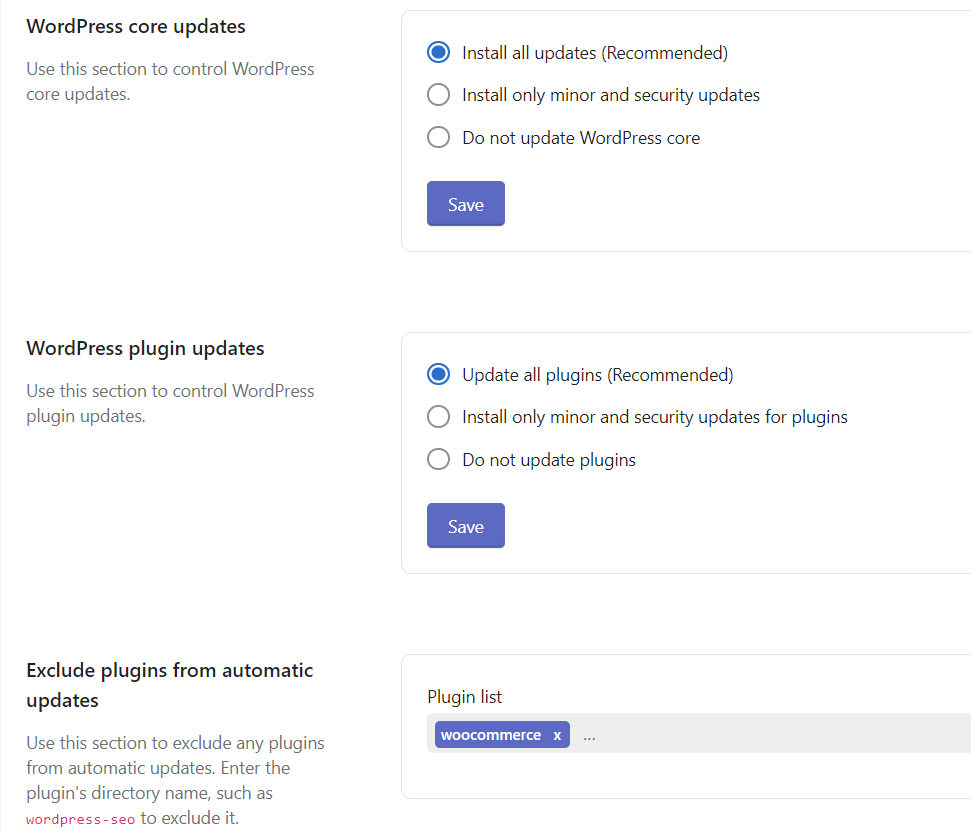
Step 6: Update Your WordPress Core, Themes, and Plugins
Keeping your WordPress core, plugins, and themes up to date is vital for maintaining security. New versions often include patches for critical vulnerabilities, protecting your site from potential attacks and Google blacklist warnings. Hackers are quick to exploit known vulnerabilities, making timely updates essential to prevent security breaches. If you are a Nestify user, you can complete this task in one click.
Although updates may occasionally be inconvenient and pose compatibility issues, the risk of leaving your site vulnerable outweighs any temporary inconvenience. To manage updates effectively and minimize disruptions like a Google blacklist warning, it’s advisable to regularly back up your site and utilize a staging environment for testing.
Step 7: Correct Bad SEO Practices
Correcting bad SEO practices is essential for the health of your website and business. Google takes a firm stance against any tactics associated with black hat SEO.
While it’s understandable to desire increased website traffic, resorting to manipulative strategies for quick results can lead to long-term repercussions. Therefore, it’s crucial to remove any of the following practices from your website before requesting a review:
– Cloaking: Ensure that Google indexes the same version of your website that visitors see.

– Scraping: Refrain from using bots to extract data from other websites.
– Keyword stuffing: Focus on presenting valuable content and then optimizing it with relevant keywords.
– Paid backlinks: Instead of purchasing backlinks, consider collaborating with other website administrators for mutual backlinking opportunities, particularly if your content aligns.
– Duplicate content: Produce original content and remove any duplicated material.
Additionally, Google disapproves of other SEO strategies that may be deceptive. The guiding principle should be to deliver value to visitors through your content, products, and services while avoiding any practices that could be construed as deceptive or Google blacklist practices.
Step 8: Get Your Website Re-checked from Google
To request a review from Google, it’s imperative to make sure that your website is completely free of malware. Run a thorough scan to confirm this before proceeding with the review request. This step is critical because Google will reject the review if any traces of malware are found on your site.
It’s important to note that Google reviews these requests manually. Therefore, repeated rejections may result in being flagged as a ‘Repeat Offender.’ In such cases, a waiting period of 30 days is required before filing a new request.
Follow these steps for Google blacklist removal:
- Access your Google Search Console account.
- Navigate to the Security Issues tab and scroll to the bottom of the screen.
- Click the ‘Request a review’ button.
- Fill out the form detailing all the steps taken to resolve the security issues.
- Submit the form.
Final Thoughts
In conclusion, addressing a Google blacklist warning is a critical task, as it directly impacts site visibility, user trust, and overall online reputation. By following the steps outlined in this guide, you can effectively resolve Google blacklist warnings and restore their site’s integrity. Remember, prioritizing website security not only safeguards against future threats but also ensures a positive user experience and sustained online presence.
FAQs
Can I avoid getting Google blacklist warnings in the future?
Yes, you can take proactive measures to avoid your website from being blacklisted by Google in the future. This includes regularly updating software, using reputable security plugins, implementing strong passwords, and monitoring your site for suspicious activity.
What are some common reasons for websites to get Google blacklist warnings?
Websites can be blacklisted by Google for various reasons, including malware infections, phishing attacks, hacked content, deceptive practices, and violations of Google’s webmaster guidelines. It’s imperative to address these problems promptly to avoid long-term repercussions.
