
Did you know that over 43% of websites on the internet are powered by WordPress? With such a vast user base, delivering a smooth and informative experience in the WordPress admin dashboard is crucial. One of the most effective ways to do this is through WordPress admin notices—custom messages that allow you to display important information, updates, or reminders to users directly within the backend. Whether you need to alert admins about plugin updates, communicate system errors, or offer helpful tips, these notices ensure your messages are seen and acted upon.
In fact, adding well-timed and relevant admin notices can drastically improve workflow efficiency and reduce user errors. In this guide, we’ll show you how to create and manage custom admin notices in WordPress, ensuring that you can effectively communicate with users and enhance their experience in the dashboard.
Understanding WordPress Admin Notices
Admin notices in WordPress are messages that appear at the top of the WordPress admin dashboard and other admin pages. These notices serve as a communication tool to provide users with important information related to the website or the WordPress environment. They can convey a wide range of messages, such as system updates, error notifications, alerts about plugin or theme issues, security warnings, reminders for actions to take, or even promotional offers.
These notices are typically displayed in a colored box, which helps differentiate the type of message being presented. For example:
- Informational messages are often in blue and can include general updates or non-urgent details.
- Success messages often appear in green and indicate that a task or action has been completed successfully.
- Warning messages usually show up in yellow or orange and may notify users of potential issues or actions that require attention.
- Error messages typically appear in red and highlight problems or failures that need to be resolved.
Adding WordPress Admin Notices Using a Plugin
Step 1: Install and Activate the Plugin
Navigate to your WordPress admin dashboard.
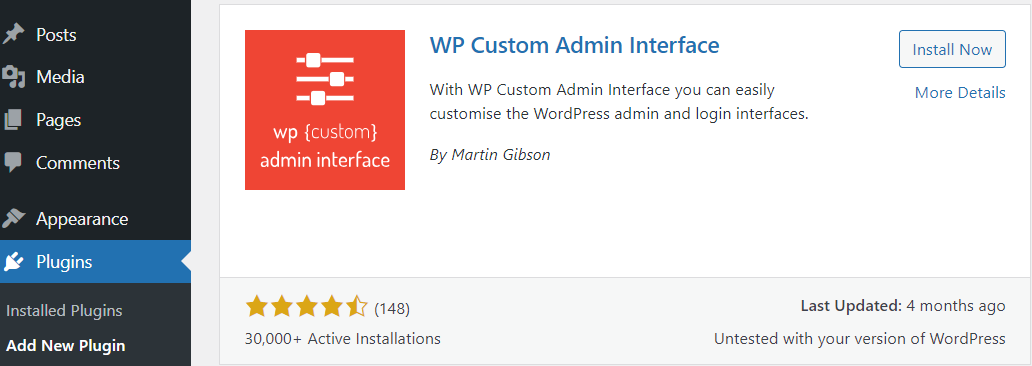
Go to Plugins » Add New and search for “WP Custom Admin Interface.”
Install and activate the plugin.
Step 2: Access Plugin Settings
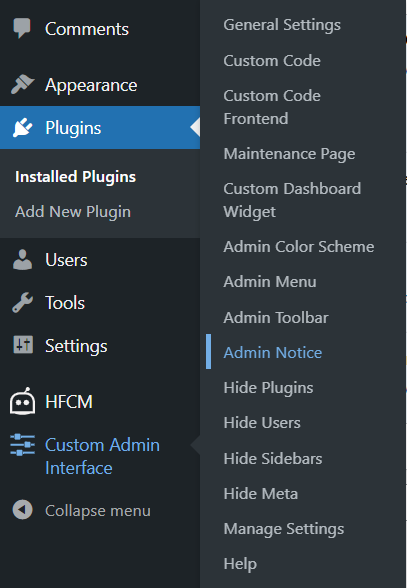
After activation, locate the new menu item Custom Admin Interface » Admin Notice in the WordPress admin sidebar.
You’ll be taken to the plugin’s settings page, which resembles the Classic Editor interface.
Step 3: Insert Admin Notice Message
Scroll down to the text editor, where you can add custom admin notices. You can either use plain text or take advantage of the shortcode options available above the visual editor.
For example, the shortcode [WEBSITE_URL] will automatically insert your site’s domain name.
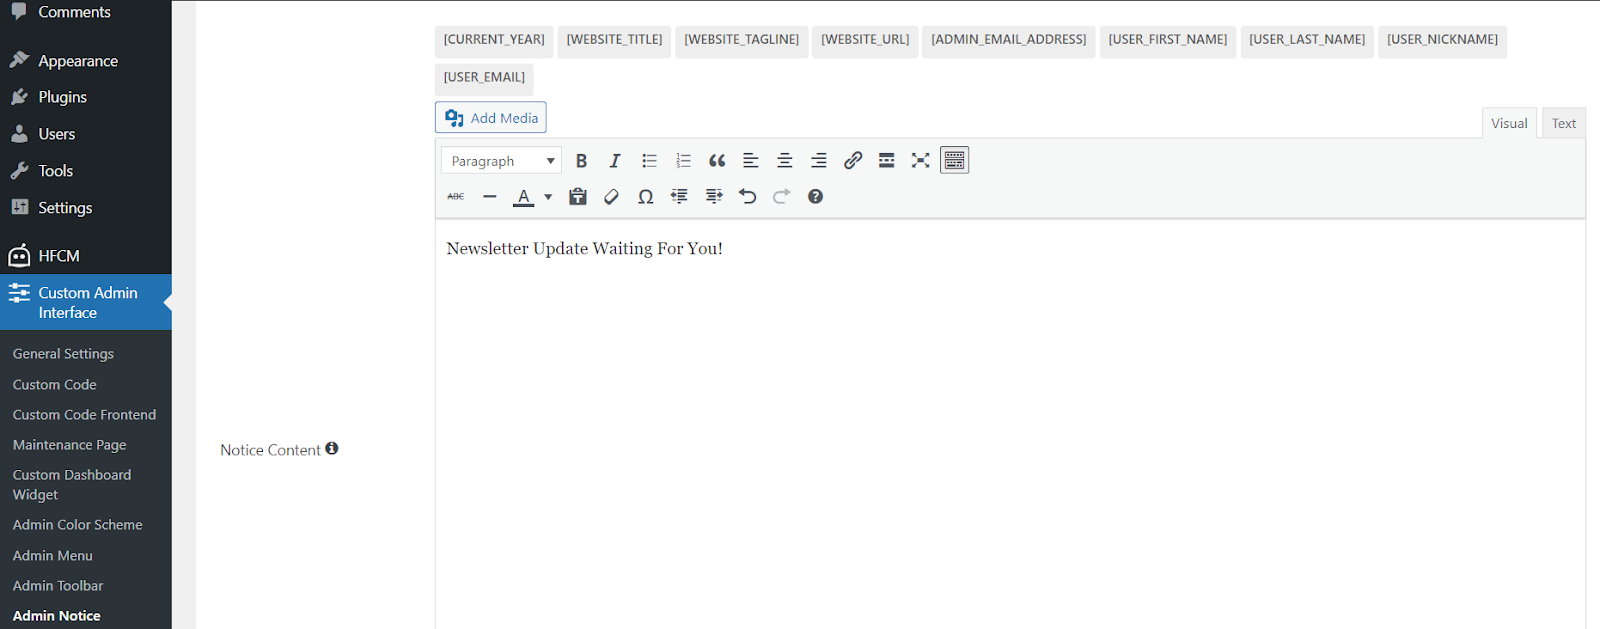
Step 4: Customize Notice Content
Optionally, add images or other media files to your notice. Use the toolbar above the text box to stylize the text according to your preferences.

Step 5: Choose Notice Color
Next, choose the color scheme in your custom display for WP admin notice.
Here are the default options:
- Green: For success messages.
- Blue: For important but non-urgent info.
- Yellow: For warning messages.
- Red: For error alerts.
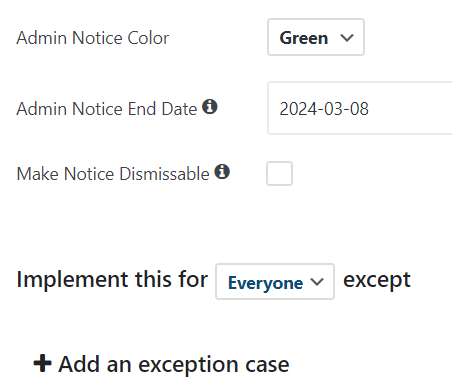
Step 6: Set Notice Expiration Date
Decide if your own custom admin notice should have an expiration date. If you want the notice to disappear after a set time, input the end date. Otherwise, leave it blank for a persistent notice.
Step 7: Enable Dismissal Option
Decide whether to make the notice dismissable. Recommended for green or blue notifications, but you may want to keep warnings or errors visible until resolved.
Step 8: Define Visibility Settings
Choose whether the notice should be visible to everyone or specific user roles only. If selecting specific roles, click the ‘+’ button to specify which roles should see the custom admin notices in WordPress.
Step 9: Save Settings
Once you’ve configured the custom admin notice to your satisfaction, click the ‘Save All Settings’ button to apply the changes.
By following these steps, you can create and customize custom admin notices with ease, effectively communicating important information to users within your WordPress dashboard.
Adding Custom Admin Notices with Programmatic Alerts
If you’re comfortable coding, crafting an admin notice from scratch isn’t overly complex. However, it does mean updating the code each time you want a new message, which can be tedious.
That’s why we recommend using the plugin mentioned earlier. It offers convenience without the need for coding skills, making it ideal for those unfamiliar with PHP.
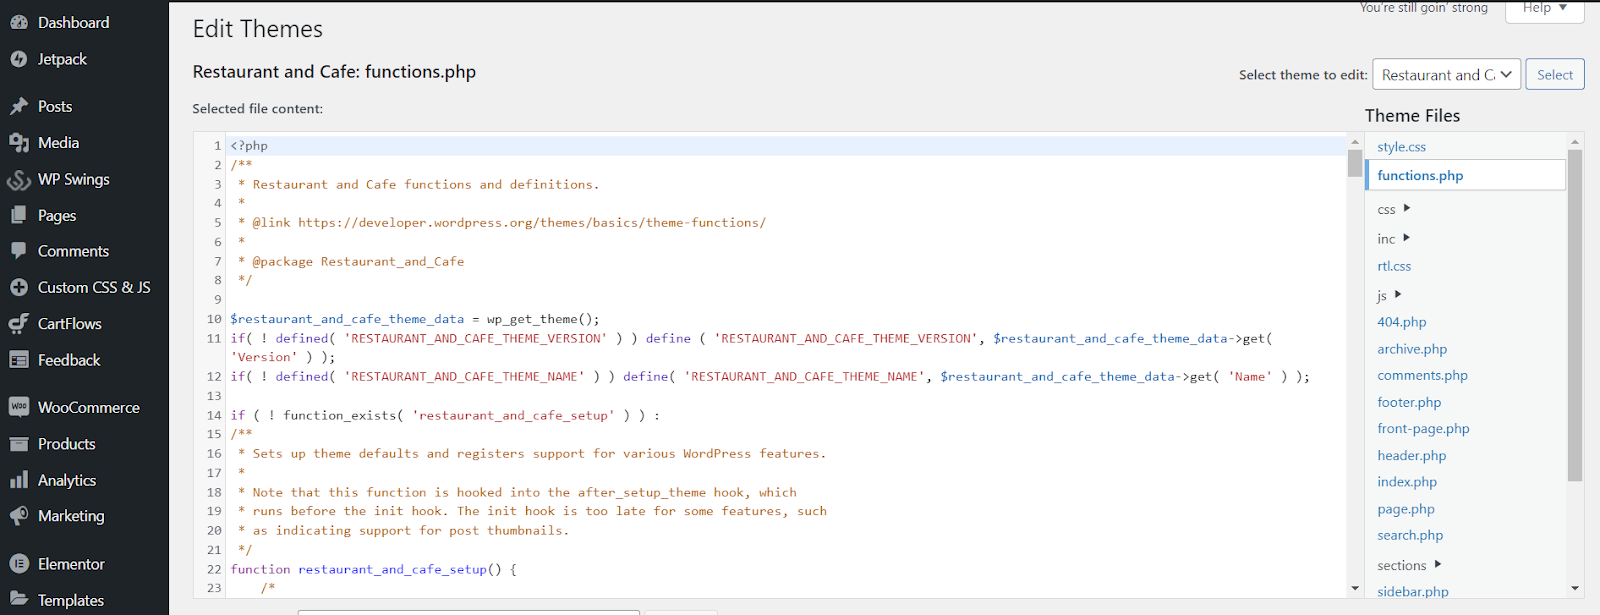
To implement the notice manually, access your theme’s functions.php file. You can do this via cPanel, a File Manager plugin, or directly through WordPress’s theme file editor for custom admin notices.
Step 1: Access the Functions File
Navigate to the functions.php file in your theme editor in “Appearance”.
Step 2: Insert Code
Add the provided PHP code to the functions.php file to display the admin notice in WordPress.
/**

 * Adding the Admin Notice

 */

function wpb_admin_notice_warn() {

    echo '<div class="notice notice-warning is-dismissible">

          <p>Remember to add internal links to recently published posts!</p>

          </div>';

}

add_action( 'admin_notices', 'wpb_admin_notice_warn' );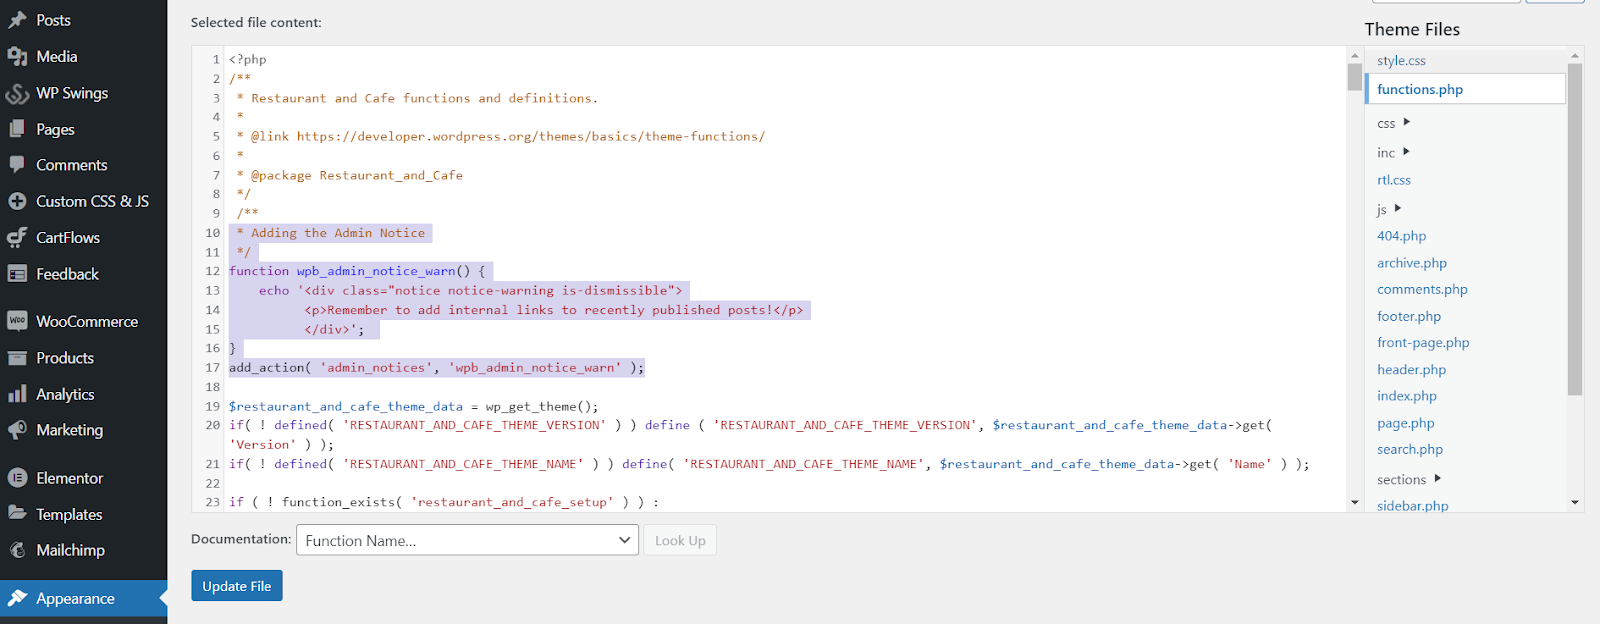
Step 3: Save Changes
After pasting the code, save the functions.php file.
Once saved, return to your WordPress admin dashboard to view the message displayed by the notice.
- Creating Notice Content: Within the functions file, you can craft the content of your custom admin notice using HTML markup and PHP code. This content can include messages, links, buttons, or any other elements necessary to convey the intended information to users.
- Styling Notices: Custom admin notices can be styled using CSS to complement the design and branding of your WordPress site. You can apply styles to elements such as text color, background color, border, padding, and margins to ensure that the notices are visually appealing and attention-grabbing.
- Adding Dismissibility: To enhance user experience, you can make custom admin notices dismissible by adding the is-dismissible class to the notice container. This allows users to hide the notice if they no longer wish to see it, providing them with control over their dashboard experience.
function custom_admin_notice() { ?> <div class="notice notice-success is-dismissible"> <p>This is a custom admin notice!</p> </div> <?php } add_action('admin_notices', 'custom_admin_notice');- Conditional Display: You can conditionally display custom admin notices based on specific criteria using PHP logic within the functions file. For example, you may only want to display a notice to users with certain roles or on specific admin pages. By incorporating conditional statements, you can tailor the visibility of your notices to meet the needs of your users.
Advanced Techniques to Add WordPress Admin Notices
For more advanced scenarios, you can explore additional techniques such as:
- Persistent Notices: Storing notice dismissal status in the user meta or options table to make notices persistent across sessions.
- AJAX-powered Notices: Using AJAX to fetch dynamic content for admin notices without refreshing the page.
- Notice Positioning: Adjusting the positioning of admin notices using CSS or JavaScript.
Boosting WordPress Site’s Communication with Custom Admin Notices: Best Practices
1. Clarity and Conciseness
The most important rule when creating admin notices is to ensure they are clear and concise. Each notice should deliver a single, straightforward message without unnecessary detail or jargon. Avoid long-winded explanations, as these can cause confusion or make users overlook the notice altogether. Make sure the language is simple and the intent is immediately clear, so users understand exactly what action, if any, they need to take.
2. Relevance and Timeliness
Admin notices should always be relevant and timely. Display notifications only when they are necessary for users to see at that moment. For example, alert users to urgent security issues, updates, or actions that require immediate attention. Avoid showing outdated notices or irrelevant information that doesn’t serve the user’s immediate needs. Irrelevant notices can clutter the admin area and detract from the user experience.
3. Moderation and Avoidance of Overuse
While admin notices are a helpful tool, they should be used sparingly. Overloading the admin dashboard with too many notices can overwhelm users and create a chaotic experience. Limit the number of notices that appear at once, and prioritize critical messages over less important ones. This approach helps maintain a clean, organized, and user-friendly dashboard that focuses attention where it’s needed most.
4. Consistent Branding and Styling
Custom admin notices should match your website’s design aesthetic to provide a cohesive user experience. Use consistent colors, typography, and visual elements that align with your overall site branding. This consistency will help users quickly recognize and understand the notices within the context of your site’s interface. For example, use your site’s primary color for success messages and a contrasting color for errors to make notices easy to differentiate.
5. Accessibility Considerations
Accessibility is a critical consideration when designing admin notices. Ensure your custom notices are readable and accessible to all users, including those with visual impairments. Use high-contrast colors for text and background to improve readability, and avoid relying on color alone to convey meaning. Also, make sure text sizes are large enough to be legible on all screen sizes and that any images included in notices have alternative text (alt text) descriptions for screen readers.
6. Testing Across Environments
Before rolling out custom admin notices, it’s important to test them across multiple browsers, devices, and screen sizes to ensure they are displayed correctly everywhere. Admin notices should be responsive and adapt to various screen resolutions, ensuring they remain easily readable and usable on desktop computers, tablets, and smartphones. Test notices for compatibility with different browsers (Chrome, Firefox, Safari, etc.) to avoid display issues.
7. User Control and Interaction
Giving users control over the notices enhances their experience. Admin notices should be dismissible, allowing users to close them once they’ve read or acted upon the message. If the notice is time-sensitive, consider including a “remind me later” option, so users can act at a more convenient time. A well-implemented dismissible notice reduces clutter and prevents the dashboard from becoming too cluttered with outdated information.
8. Localization and Internationalization
If your site caters to a global audience, it’s essential to consider localization (adapting notices for specific languages or regions) and internationalization (ensuring your notices are easily translatable). Customize admin notices so they can be translated into various languages, allowing users to interact with your site in their preferred language. Always ensure that notice text is clear and can be easily translated without causing confusion in other languages.
9. Security Considerations
Security is paramount when adding custom admin notices. Always follow security best practices to protect your site and users from potential vulnerabilities, such as cross-site scripting (XSS) attacks. Ensure that any data included in the notices is sanitized and validated to prevent malicious code from being injected. Also, avoid using notices to display sensitive user information or internal server data that could be exploited if compromised.
10. Documentation and User Guidance
Provide users with clear guidance about the purpose and actions related to each admin notice. For complex notices, consider adding links to documentation or tooltips that explain what the notice means and what steps the user should take. This can help reduce confusion and make it easier for users to act on the information provided. Clear documentation also helps new users or admins who might not be familiar with certain notices or their importance.
Enhance Your WordPress Experience with Custom Admin Notices and Nestify
Custom WordPress admin notices are an invaluable tool for improving communication within your WordPress site’s admin dashboard. They help keep users informed, deliver critical updates, and create a more engaging, streamlined experience. By using hooks and customization options, developers can easily create notices that are relevant, user-friendly, and tailored to their site’s specific needs.
If you’re looking to take your WordPress site’s performance, security, and management to the next level, consider Nestify for faster speeds, enhanced performance, and hassle-free hosting. With Nestify’s free trial, you can experience premium features like advanced caching, optimized WordPress environments, and 24/7 support at no cost. Try it now and see how Nestify can help elevate your WordPress experience—effortlessly!
Optimizing Admin Notices for Better UX: Common FAQs
Can I use custom admin notices for plugin or theme updates?
Yes, you can use custom admin notices to alert users about plugin or theme updates. This is a common use case, and notices can be set to display whenever updates are available, so administrators and other relevant users are informed. Custom notices can also provide additional information, such as a link to changelogs or instructions for performing updates.
How do I add custom admin notices without coding?
If you’re not comfortable with coding, there are several WordPress plugins that allow you to add custom admin notices easily. Plugins like WP Notification Center, Admin Notices Manager, or Simple Admin Notices let you create and manage notices through a user-friendly interface, without the need for custom code.
Are there any performance impacts from adding custom admin notices?
Typically, custom admin notices have a minimal impact on your site’s performance, but if you’re adding too many or using inefficient code, it could slightly slow down the dashboard loading time. To avoid performance issues, keep the notices lightweight, limit their use to important messages, and ensure that the code you use to display notices is optimized.
