
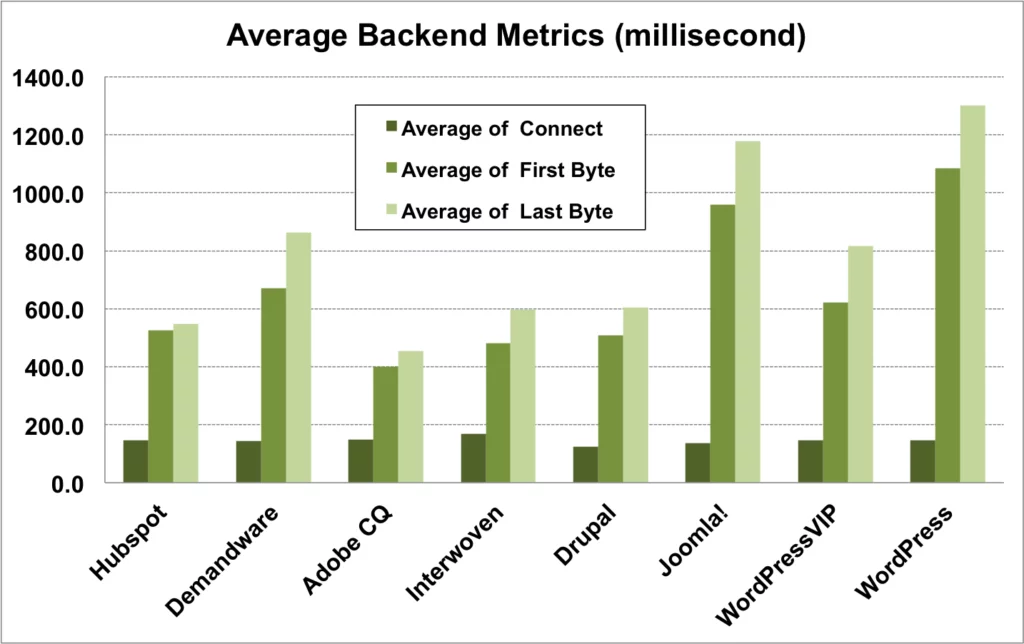
In today’s digital landscape, the need for speed has never been more paramount. As users demand lightning-fast experiences and search engines reward speedy sites, the performance of your Drupal website can make or break its success. To put it simply, website optimization is not just a feature; it’s a necessity.
As the renowned web performance expert Steve Souders once said, “Speed matters. It’s the most important feature of any website.” This statement rings truer than ever, backed by staggering statistics that illuminate the critical importance of website speed:
- According to Google, for every additional second it takes a mobile page to load, conversion rates can drop by up to 20%.
- Amazon famously calculated that a one-second delay in page load time could cost them $1.6 billion in sales annually.
- A study by Akamai revealed that 47% of users expect a web page to load in two seconds or less, and 40% will abandon a site if it takes more than three seconds to load.
In this blog, we embark on a journey through the world of Drupal website optimization, exploring proven strategies, powerful tools, and expert insights to supercharge your website’s performance. Whether you’re a Drupal veteran or just beginning your web optimization journey, this guide will equip you with the knowledge and resources to unlock the full potential of your Drupal-powered site. So, let’s dive in and make speed your website’s ultimate superpower!
Strategies to Amp Up Drupal Website Optimization:
1. Ensuring your Drupal Website’s Modules and Site Remain Up-to-Date

Website administrators sometimes overlook or unintentionally neglect the importance of updating the modules on their websites. However, this oversight can have detrimental consequences. As time goes by, outdated modules can accumulate, causing your website to become burdened and sluggish. Consequently, visitors may experience slow loading times across various browsers. Speed is a pivotal factor, which is why periodic module updates are essential. Therefore, the initial step towards enhancing the speed of your Drupal website is to promptly update each and every module.
Importance of Module Updates:
- Security: Outdated modules are often vulnerable to security threats. Updates frequently include security patches that protect your website from potential breaches.
- Performance: As web technologies advance, module updates may include optimizations that enhance your website’s performance, resulting in faster loading times.
- Compatibility: Updates ensure that modules remain compatible with the latest versions of Drupal and other dependencies. This compatibility is vital to maintain the overall functionality of your website.
Steps to Update Modules:
- Regularly Check for Updates: Make it a routine to check for module updates. Most modules provide notifications within the Drupal admin panel when updates are available.
- Backup Your Website: Before performing any updates, create a full backup of your website. This precautionary step ensures that you can restore your site in case anything goes wrong during the update process.
- Update Modules Sequentially: Start by updating one module at a time. This approach allows you to monitor any potential issues that may arise with specific updates.
- Test After Updates: After updating a module, thoroughly test your website to ensure that everything functions correctly. Pay close attention to features that rely on the updated module.
Tools to Assist with Updates:
- Drupal Update Status Module: This module helps you track available updates for all installed modules, themes, and Drupal core.
- Backup and Migrate Module: This module simplifies the process of creating backups of your Drupal website before performing updates.
2. Optimizing Website Performance by Uninstalling Unused Modules

In the pursuit of a faster Drupal website, one crucial step that often gets overlooked is the removal of unused modules. Every module you have installed adds overhead and consumes code execution time. The more modules you accumulate, the longer it takes for your code to execute. This extended execution time translates directly into slower page load times, which can be detrimental to user experience and SEO rankings. Therefore, to enhance website speed, it’s imperative to uninstall all unnecessary modules, rather than simply disabling them. Disabling modules might give the appearance of inactivity, but they still contribute to code execution time. Here’s an in-depth look at why and how to uninstall unused modules, along with some helpful tools:
Importance of Uninstalling Unused Modules:
- Reduced Overhead: Each module adds its own set of files and database entries. By removing unused modules, you reduce the overhead on your website’s server resources and database.
- Faster Execution: Fewer modules mean less code to process during page requests, resulting in faster execution and, consequently, quicker page load times.
- Improved Security: Unused modules can become security liabilities if not kept up to date. Uninstalling them ensures that there are no potential vulnerabilities lurking in your site’s code.
Steps to Uninstall Unused Modules:
- Module Audit: Begin by conducting an audit of all the modules currently installed on your Drupal website. Identify which modules are actively used and which are not.
- Backup Your Site: Before making any changes, create a comprehensive backup of your website. This ensures you have a restore point in case anything goes wrong during the uninstallation process.
- Uninstall Modules: Access the Drupal admin panel, navigate to the “Extend” section, and uninstall the modules you’ve identified as unused. Drupal provides an uninstall option for each module.
- Test Your Site: After uninstalling modules, thoroughly test your website to ensure that its core functionality remains intact. Pay attention to any features or functionalities that may have been affected by the removal of specific modules.
Tools to Assist with Uninstallation:
- Module Filter: This module makes it easier to navigate and manage your list of modules by providing various filters and sorting options.
- Drush: Drush is a command-line tool for Drupal that allows you to manage modules, including uninstallation, more efficiently.
3. Enhancing Drupal Website Speed with a Content Delivery Network (CDN)

To optimize page load times, implementing a Content Delivery Network (CDN) is a crucial strategy. CDNs play a pivotal role in improving the performance of Drupal websites by hosting various elements of the site, including CSS, JavaScript, and media files, and serving them to visitors from the nearest geographical location. This results in significantly faster page load times, contributing to a smoother user experience. Let’s delve into the details of why CDNs are essential and how to implement them, along with some recommended tools and analytics:
Importance of a Content Delivery Network (CDN):
- Geographical Optimization: CDNs distribute website content to multiple servers worldwide. When a user requests a page, the CDN serves content from the server nearest to the user’s location, reducing latency and accelerating load times.
- Load Balancing: CDNs efficiently balance website traffic across their network of servers. This prevents server overload during traffic spikes, ensuring consistent website performance.
- Bandwidth Savings: By offloading the delivery of static files (e.g., images, CSS, and JavaScript) to CDNs, you can reduce the bandwidth usage of your hosting server, potentially saving costs.
- Improved SEO: Faster loading times positively impact search engine rankings, as search engines prioritize user experience. CDNs help boost SEO by providing quicker access to website content.
Steps to Implement a CDN:
- Choose a CDN Provider: Select a reputable CDN provider that aligns with your website’s needs and budget. Popular CDN providers include Cloudflare, Akamai, and Amazon CloudFront.
- Configure Your CDN: Set up an account with your chosen CDN provider and configure it to work with your Drupal website. This typically involves updating DNS records to route traffic through the CDN.
- Integrate with Drupal: Depending on your CDN provider, you might need to install a Drupal module or use a CDN-specific configuration to seamlessly integrate your website with the CDN.
- Test and Monitor: After implementation, thoroughly test your website to ensure that it’s serving content through the CDN correctly. Monitor performance to identify any issues or areas for improvement.
Tools to Assist with CDN Implementation:
- Nestify: Nestify offers a comprehensive CDN service with easy integration for Drupal websites. It also provides analytics and security features. It is known for its robust performance and security features.
Analytics for CDN Performance:
- Google Analytics: Monitor website performance and user behavior by integrating Google Analytics. You can track metrics like page load times, bounce rates, and user locations to assess the impact of the CDN on your website.
- CDN-Specific Analytics: Many CDN providers offer analytics tools that provide insights into how the CDN is performing, including data on caching efficiency, traffic distribution, and error rates.
4. Maximizing Website Speed with Bandwidth Optimization

Bandwidth optimization is a pivotal technique aimed at accelerating website loading times by consolidating CSS and JavaScript files, enabling them to load concurrently. This parallel processing significantly enhances user experience, as visitors can start viewing various page elements almost instantly. Here, we’ll delve into the significance of bandwidth optimization and explore how to implement it, along with recommended tools:
Importance of Bandwidth Optimization:
- Faster Loading Times: By aggregating CSS and JavaScript files, you reduce the number of HTTP requests required to load a webpage, leading to quicker loading times.
- Improved User Experience: Visitors can start interacting with your site sooner since critical page elements like text and images appear faster, enhancing overall user satisfaction.
- Lower Bandwidth Usage: Reduced file size and fewer HTTP requests mean lower bandwidth consumption, potentially saving on hosting costs.
Steps to Implement Bandwidth Optimization:
- Audit and Identify Files: Begin by analyzing your website’s CSS and JavaScript files. Identify which files are essential for initial page rendering and which ones can be deferred.
- Minify and Compress: Minify your CSS and JavaScript files by removing unnecessary whitespace and comments. Additionally, enable compression (gzip or Brotli) to reduce file sizes further.
- Combine Files: Merge multiple CSS files into one and do the same for JavaScript files. This consolidation reduces the number of file requests, improving load times.
- Asynchronous Loading: For non-essential JavaScript files, consider loading them asynchronously. This allows the critical content to load first, while less essential scripts load in the background.
Tools to Assist with Bandwidth Optimization:
- Asset Cleanup: This WordPress plugin helps you manage and optimize CSS and JavaScript files by allowing you to selectively disable them on specific pages or posts.
- Autoptimize: Autoptimize is a popular plugin for WordPress that automates CSS and JavaScript optimization. It combines and minifies files while providing granular control over the optimization process.
- GruntGulp: Grunt and Gulp are JavaScript task runners that can be configured to automate CSS and JavaScript minification, combination, and optimization as part of your website’s build process.
Testing and Analytics:
- PageSpeed Insights: Google’s PageSpeed Insights tool assesses your website’s performance and provides suggestions for optimization, including bandwidth improvements.
- WebPageTest: This tool allows you to test your website’s loading speed from multiple locations and provides detailed insights into how your pages load.
5. Optimizing Website Images with Image Styles in Drupal
Images are often one of the heaviest elements on a website, and they can contribute to slower loading times due to their large file sizes. However, Drupal provides a core feature called “Image Styles” that allows you to optimize images for various screen sizes, significantly reducing load times. This feature not only enhances performance but also ensures that your website looks great on screens of all sizes. Let’s explore the importance of using Image Styles and how to implement them in Drupal, along with some recommended tools and plugins:
Importance of Image Styles:
- Faster Loading: By creating different image sizes for various screen resolutions and device types, you ensure that visitors download only the image size they need. This reduces load times, especially for mobile users with slower connections.
- Improved User Experience: Images optimized for specific screen sizes maintain their quality and aspect ratio, enhancing the overall user experience. Images will look sharp and fit perfectly on any device.
- Responsive Design: Image Styles support responsive design by automatically selecting the appropriate image size based on the user’s device, screen size, and resolution.
Implementing Image Styles in Drupal:
- Enable the Image module: If not already enabled, navigate to the Drupal admin panel, go to “Extend,” and enable the “Image” module.
- Create Image Styles: Go to the “Configuration” section and select “Media” > “Image styles.” Here, you can create various image styles based on your website’s design and layout. Common styles include thumbnail, medium, and large.
- Apply Image Styles: When adding or editing content that includes images, you can select the desired image style for each image. Drupal will then automatically generate and serve the appropriately sized image to users.
- Responsive Images: To make images truly responsive, use the
<picture>element or thesrcsetattribute in your HTML to specify multiple image sources for different screen sizes and resolutions. Drupal supports this feature natively.
Tools and Plugins for Image Optimization:
- ImageAPI Optimize: This Drupal module helps optimize image quality and compression settings. It’s particularly useful for ensuring that your images maintain their visual quality while reducing file sizes.
- ImageMagick: Drupal often uses ImageMagick as its image processing toolkit. It offers powerful image optimization capabilities and can be integrated with Drupal for advanced image processing.
Analytics and Monitoring:
- Drupal Site Audit: Drupal offers various audit and reporting tools that can help you monitor image performance, such as load times and the sizes of images on your website.
- Google PageSpeed Insights: Use this tool to analyze your website’s performance, including image optimization. It provides recommendations for further improvements.
6. Enhancing Website Performance with Image Optimization in Drupal 8

Drupal 8 comes equipped with a valuable feature in its core – Image Optimization. This feature allows you to fine-tune the compression ratio of images, which in turn plays a crucial role in optimizing page load times. By efficiently compressing images, you not only enhance website performance but also improve user experience. Here, we’ll delve into the significance of Image Optimization in Drupal 8 and explore how to utilize this feature, along with recommended tools and plugins:
Importance of Image Optimization:
- Faster Load Times: Image compression reduces the file size of images while maintaining acceptable visual quality. Smaller image files lead to faster loading times, particularly for visitors on slower internet connections.
- Bandwidth Savings: By optimizing images, you reduce the amount of bandwidth required to load your website. This can translate into cost savings, especially if you’re on a hosting plan with bandwidth limitations.
- Improved SEO: Faster loading times contribute positively to search engine rankings, as Google and other search engines prioritize user experience in their algorithms.
Implementing Image Optimization in Drupal 8:
- Enable the Image Optimize Module: Start by enabling the “Image Optimize” module in Drupal 8. If it’s not already enabled, you can find and activate it in the “Extend” section of the admin panel.
- Configure Image Optimize: Once the module is enabled, configure its settings to suit your requirements. You can set the compression ratio for various image styles, ensuring that images are optimized according to your preferences.
- Create Image Styles: In Drupal 8, image styles define how images are displayed on your website. Create custom image styles to apply specific optimization settings. For instance, you might have an “Article Image” style with lower compression for featured images and a “Thumbnail” style with higher compression for smaller images.
- Apply Image Styles: When adding or editing content that includes images, you can select the appropriate image style for each image. Drupal will automatically apply the configured optimization settings for that style.
Tools and Plugins for Image Optimization:
- ImageOptim: ImageOptim is a standalone tool that can optimize images before uploading them to your Drupal website. It’s particularly useful for ensuring that images are already optimized before Drupal processes them.
- TinyPNG: TinyPNG is an online image optimization tool that can be integrated into your Drupal workflow. It offers both manual and automated image compression.
Analytics and Monitoring:
- Drupal Image Toolkit: Drupal provides built-in tools and reports to monitor image usage and performance. You can analyze image-related metrics, such as load times and sizes, through Drupal’s admin panel.
- Google PageSpeed Insights: Utilize this Google tool to assess your website’s performance, including image optimization. It provides suggestions for further improvements.Google PageSpeed Insights
7. Accelerating Drupal Websites through Cache Optimization
One of the most powerful methods for enhancing the speed of Drupal websites is to optimize the native caching system. This integral system is designed to store all webpage components in an easily accessible location after a user’s initial visit. Upon their return, these cached page elements are swiftly loaded, leading to a substantial improvement in website load speed. In this detailed guide, we’ll explore the importance of cache optimization, how to implement it in Drupal, and recommended tools and plugins to streamline the process:
Importance of Cache Optimization:
- Faster Load Times: Caching reduces the time it takes for web pages to load by delivering pre-rendered content. This ensures that visitors experience quicker load times, enhancing user satisfaction.
- Server Resource Efficiency: By serving cached content, the server doesn’t need to regenerate the entire webpage for every visitor, which saves server resources and reduces server load.
- Enhanced Scalability: Well-optimized caching can handle high levels of website traffic more efficiently, making your website more scalable.
Implementing Cache Optimization in Drupal:
- Enable and Configure Caching: Access your Drupal admin panel and navigate to “Configuration” > “Performance.” Here, you can enable caching and configure caching options. Drupal offers several caching mechanisms, including:
- Page Caching: This caches entire web pages for anonymous users.
- Block Caching: Blocks can be cached independently.
- Views Caching: Cache views to reduce database queries.
- Dynamic Page Cache: Improves performance for authenticated users by caching parts of the page.
- Set Cache Lifetimes: Determine how long items should be cached. Depending on your content, you may set different cache lifetimes for various elements.
- Implement External Caching: Consider using external caching solutions like Varnish or a content delivery network (CDN) to further optimize caching and distribute cached content globally.
- Use Cache Clearing Strategically: When updating or adding content, be mindful of clearing the cache appropriately to ensure that visitors see the latest content.
Tools and Plugins for Cache Optimization:
- Varnish: Varnish is a popular reverse proxy caching server that can dramatically improve website performance by caching content and serving it quickly to visitors.Varnish
- Memcached and Redis: These are in-memory data stores that can be used to store cache data. They provide fast access to cached content and can be integrated with Drupal.MemcachedRedis
Analytics and Monitoring:
- Drupal’s Cache Reports: Drupal provides cache reports within its admin panel, allowing you to monitor cache usage and efficiency.
- New Relic: New Relic offers application performance monitoring that includes cache analysis, helping you identify areas for optimization.New Relic
8. Leveraging Advanced Caching in Drupal with Tools and Plugins
In addition to Drupal’s core caching features, you can further optimize your website’s performance using various tools and plugins that enhance the capabilities of the internal cache module and the internal dynamic page cache module. Let’s explore these tools and plugins that can help you harness advanced caching in Drupal:
Tools for Advanced Caching:
- Redis or Memcached: These are in-memory data stores that can be integrated with Drupal to boost caching performance. They provide extremely fast access to cached data, making them ideal for high-traffic websites.
- Varnish: Varnish is a powerful reverse proxy cache that sits in front of your web server. It can cache entire web pages and deliver them quickly to visitors, reducing the load on your web server.
Drupal Modules and Plugins for Advanced Caching:
- Cache Expiration Module: The Cache Expiration module allows you to set rules for when cached pages should expire. This is especially useful for content-heavy websites where you want to ensure that cached pages stay up to date.
- Boost Module: The Boost module generates static HTML versions of your pages and serves them to anonymous users. It’s particularly effective for websites with a lot of anonymous traffic.
- Advanced CSS/JS Aggregation Module: This module builds upon Drupal’s core aggregation features by providing more control over how CSS and JavaScript files are aggregated and cached.
- Purge Module: The Purge module integrates with various external caching systems and CDNs to ensure that cached content is invalidated when changes are made on your website.
Monitoring and Optimization:
- New Relic: New Relic offers application performance monitoring that includes cache analysis. It helps you identify areas for optimization and provides insights into how caching impacts your website’s performance.
- XHProf and Web Profiler: These Drupal modules allow you to profile your website’s performance, including caching. You can identify bottlenecks and areas that may benefit from caching improvements.
9. Enhancing Your Drupal Site: Unveiling the Vital Role of Hosting with Nestify

While the earlier-discussed tips and strategies undoubtedly play a pivotal role in optimizing your Drupal website’s performance, their true potential can only be realized if your hosting provider is up to the task. In fact, your choice of a hosting provider stands as one of the most pivotal factors influencing your site’s speed, stability, and security. It’s not merely an option; it’s an imperative to choose a hosting provider that aligns seamlessly with your website’s unique needs. In this comprehensive guide, we delve into the paramount significance of your hosting provider and how making the right selection can revolutionize the performance of your Drupal site.
The Critical Role of Your Hosting Provider:
- Performance: A reputable hosting provider, such as Nestify, offers meticulously optimized server configurations and abundant hardware resources. This translates into a seamlessly running Drupal site that loads with lightning speed—a characteristic crucial for enhancing user satisfaction and bolstering SEO rankings.
- Stability: Reliability is key. A dependable hosting provider minimizes downtime, ensuring that your website remains accessible around the clock, every day of the year. Unplanned outages can tarnish your site’s reputation and undermine the overall user experience.
- Security: Hosting providers shoulder a significant responsibility in fortifying your website against security threats. They implement rigorous security protocols and furnish you with tools to shield your site from malware, hacking endeavors, and other digital perils.
- Scalability: As your website evolves and attracts an escalating stream of traffic, your resource needs may surge. An adept hosting provider offers scalability options, empowering you to effortlessly expand your hosting resources as the demand arises.
Selecting the Optimal Hosting Provider:
- Assess Your Needs: Begin by scrutinizing your website’s prerequisites, including anticipated traffic levels, resource demands, and any specialized features like e-commerce functionality. Different hosting providers cater to distinct website types.
- Thorough Provider Evaluation: Dive deep into research when evaluating hosting providers. Seek out comprehensive reviews, performance benchmarks, and authentic customer testimonials. Pay heed to factors like server locations, support quality, and pricing structures.
- Embrace Managed Hosting: Consider embracing managed hosting solutions, like Nestify, which assume the mantle of server management, security enforcement, and performance optimization. This allows you to concentrate on crafting compelling website content and functionality.
- Performance Trials: Many hosting providers extend the courtesy of free trials. Seize this opportunity to subject your Drupal site to performance tests on their servers before making a commitment.
Nestify: Elevating Drupal Hosting:
Nestify offers a meticulously tailored managed cloud hosting solution for Drupal that merits your serious consideration. Here’s why:
- Unparalleled Performance: Nestify collaborates with a spectrum of leading cloud providers, including AWS, Google Cloud, and DigitalOcean, ensuring peak performance levels.
- User-Friendly: Setting up and managing your Drupal site on Nestify is a seamless process, even if you’re a novice in the world of web hosting.
- Seamless Scalability: Nestify empowers you to effortlessly scale your hosting resources in tandem with your website’s burgeoning needs.
- Robust Security: Prioritizing the safety of your site, Nestify incorporates features such as regular OS patching and bestows complimentary SSL certificates.
- Round-the-Clock Support: The Nestify support team stands at your service 24/7, ready to assist with any inquiries or concerns.
Conclusion:
From the need for speed and the power of caching to the importance of responsive design and choosing the right hosting provider, every aspect of Drupal website optimization plays a crucial role. It’s a journey that requires continuous effort, regular monitoring, and a commitment to delivering the best possible website to your audience.
Remember, website optimization is not a one-time task but an ongoing process. As technology evolves and user expectations change, your Drupal website must adapt to remain competitive. Embrace the principles of performance, security, and user experience to ensure your Drupal site not only meets but exceeds the expectations of your audience.
FAQs on Drupal Website Optimization:
What is the significance of mobile responsiveness in Drupal optimization?
Mobile responsiveness ensures your site looks and functions well on various devices. Google rewards mobile-friendly websites with higher search engine rankings, making it crucial for SEO.
Is website optimization a one-time effort, or is it an ongoing process?
Website optimization is an ongoing process. Technology evolves, user expectations change, and website content updates are necessary. Regularly monitoring and improving your Drupal site’s performance is essential for long-term success.
How can I monitor the performance of my Drupal website?
Use tools like Google PageSpeed Insights, WebPageTest, and Google Analytics to monitor performance metrics, user behavior, and page load times. Regularly review reports and analytics to identify areas for improvement.
