
With a map view, you may display your locations, hours, and contact details with WordPress Contact Info widget. This lets you have a detailed list of contacts in your widget sidebar.
This simple guide will show you how to create a contact info widget in WordPress so your visitors can seamlessly reach out to you.
With this straightforward update, you may display details like your address, fax or phone number, email address, social network profiles, and more. This kind of information must be displayed to benefit customers’ convenience and company prospects.
Why Add a Contact Info Widget in WordPress?
1. Enhanced Accessibility for Website Visitors
One of the main advantages of adding a contact info widget to your WordPress site is that it improves accessibility for your visitors. Whether your website is a business page, a blog, or a portfolio, ensuring that your contact details are always visible makes it easier for visitors to get in touch with you. Without the need to navigate through multiple pages or search for a contact form, users can instantly find important information like your email address, phone number, or social media profiles.
This ease of access is especially important for those users who may be looking for quick assistance or are considering making a purchase. A contact info widget places vital details in a prominent position, often in the sidebar or header, which can be accessed from any page of your website. This instant access is crucial for enhancing user satisfaction.
2. Mobile-Friendliness and Convenience
With the increasing trend of mobile browsing, having a contact info widget becomes even more essential. Smartphones and tablets have limited screen space, so visitors may struggle to find your contact details unless they are easily visible. A contact info widget ensures that users on mobile devices can easily find and use your contact information without having to zoom in, scroll through long pages, or perform multiple clicks.
Whether it’s a potential customer trying to reach you for more information or someone looking for a quick way to ask a question, the contact info widget makes it effortless. On a mobile site, this widget can be designed to fit neatly into the layout, keeping the page clean and professional while still providing convenient access to your contact details.
3. Builds Trust and Credibility with Your Audience
Trust is a crucial component of any successful website. Whether you’re running a business, offering services, or managing a blog, providing your contact information in a clear and easy-to-find location can help build trust with your audience. When visitors see that you’re accessible and open to communication, it reinforces a sense of credibility and professionalism.
In particular, businesses that rely on direct communication with clients (such as service providers or consultants) benefit from a contact info widget, as it shows that you’re available to address any questions or concerns. For visitors, knowing they can easily contact you for support or inquiries helps foster a sense of reliability. This transparency encourages users to engage with you further, whether through customer support, consultations, or general inquiries.
4. Encourages Immediate Engagement
One of the strongest reasons to add a contact info widget is its potential to encourage immediate engagement. A simple click or tap on the contact widget can allow visitors to connect with you directly—whether that’s via email, phone, or social media. For businesses, the quicker and easier it is for potential customers to reach out, the better your chances of converting leads into sales.
The placement of the widget ensures that users don’t have to waste time searching for your contact details. The ease of contact can prompt visitors to engage with you right away, whether it’s to request a service, ask a question, or simply to show interest in your offerings. The more accessible and visible the contact information, the more likely people are to reach out.
5. Saves Time for Visitors
One of the most significant pain points for users is difficulty finding essential information on a website. Time is valuable, and if visitors have to sift through multiple pages to find your contact details, they may become frustrated and leave your site. A contact info widget eliminates this problem by providing easy access to your contact information with just one click.
This saves users valuable time and frustration, especially for those who are in urgent need of support or information. Having the contact details displayed clearly in a widget means that visitors don’t have to navigate away from their current page or scroll through long sections of text to find your phone number, email, or address.
6. Fully Customizable to Fit Your Brand and Needs
WordPress offers a high degree of customization, and the contact info widget is no exception. You can tailor the widget to match your website’s design, ensuring that it blends seamlessly with your overall theme. Whether you prefer a minimalist design, bold icons, or even a pop-up contact form, the widget can be customized to fit your brand’s identity.
For example, you can select which contact details to display—email, phone number, or even live chat options—and choose whether to include social media links. You can also adjust the widget’s positioning, ensuring it appears in the header, sidebar, or footer depending on the layout of your site. This flexibility makes the widget a perfect tool for every website, from personal blogs to e-commerce stores.
7. Boosts Search Engine Optimization (SEO) and Local Search Visibility
Having a clear and visible contact info widget can contribute to improving your website’s SEO, especially for local businesses. Search engines, like Google, value transparency, and providing consistent, easy-to-find contact details can improve your website’s credibility in their eyes. For local businesses, including your physical address and a link to your Google Maps listing in the widget can help you rank higher in local search results.
Quick and Easy Steps to Create a Contact Info Widget for WordPress
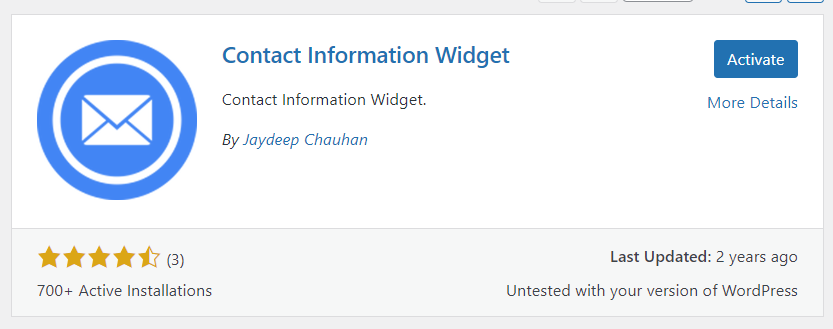
Step 1: Install the Contact Information Widget Plugin
After the installation is complete, the Activate button will appear. Click on it to activate the plugin on your WordPress site.
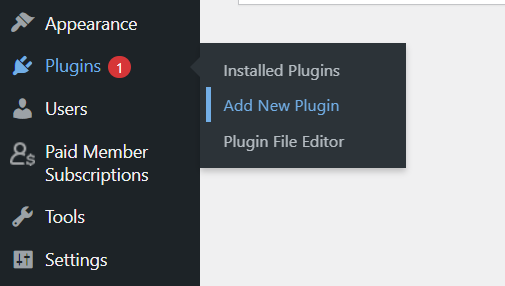
Access the Plugins Section:
From your WordPress dashboard, navigate to the left-hand menu and click on Plugins.
Then, click on Add New.
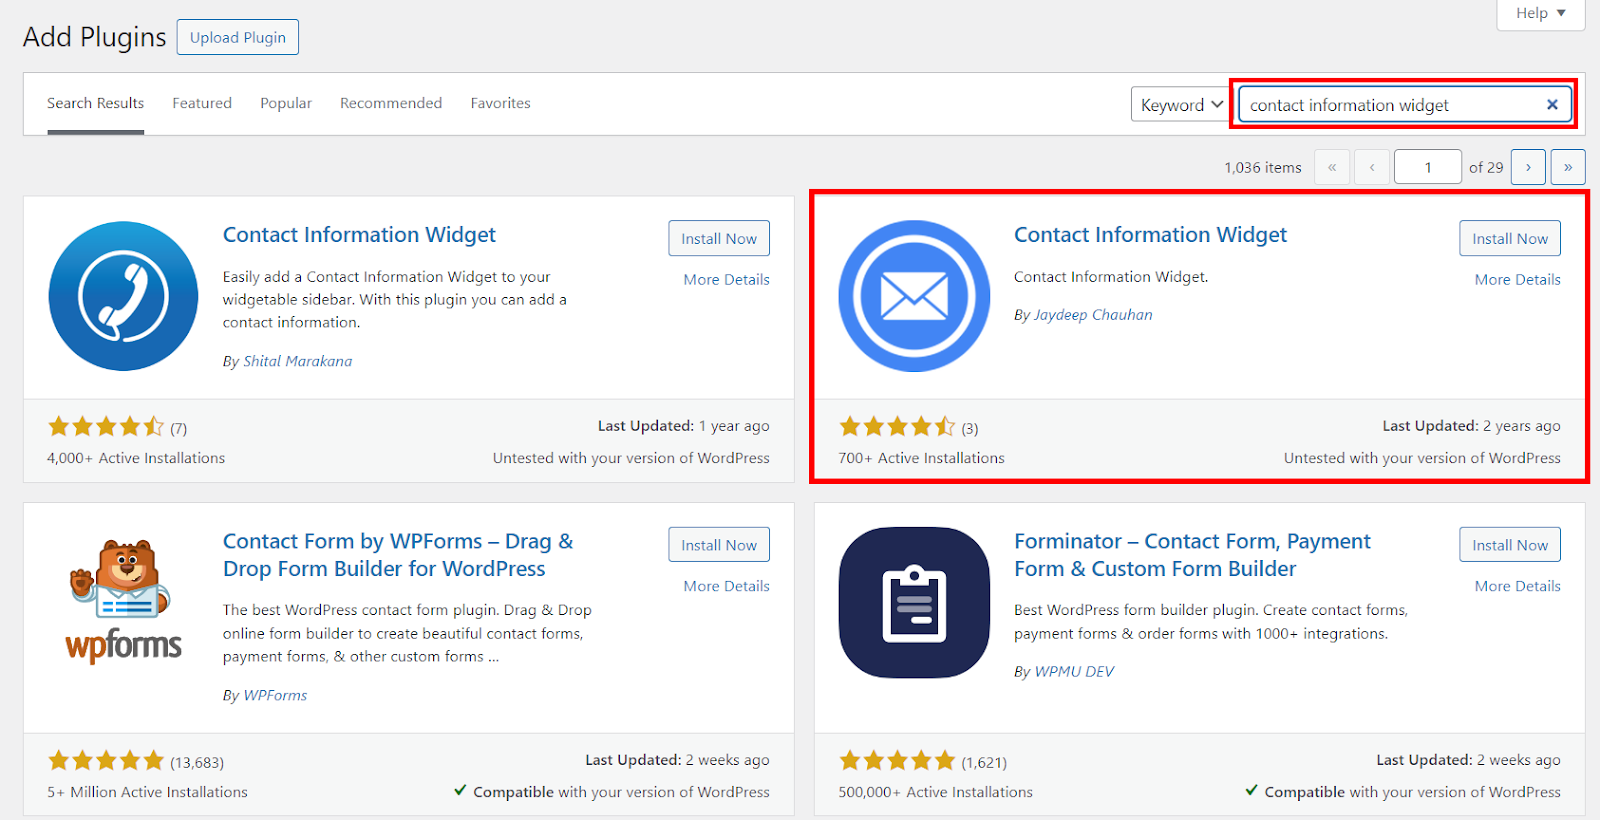
Search for the Plugin:
In the search bar at the top-right corner, type Contact Information Widget.
A list of available contact widget plugins will appear, and you can select any one of them that suits your needs.
Install the Plugin:
Once you’ve found the plugin you want to use, click on the Install Now button next to it.
Step 2: Add the Contact Information Widget to Your Site
Once you find the Contact Information Widget, click on it to add it to the selected widget area (in this case, the sidebar).
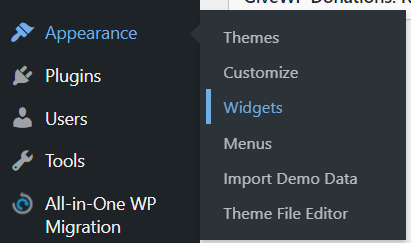
Go to the Widget Section:
To start adding the widget to your site, navigate to Appearance in the left-hand menu of the WordPress dashboard.
Click on Widgets.
Select a Widget Area:
You’ll be taken to a page where you can see all the available widget areas on your WordPress site. These can include the sidebar, footer, header, or other widget-ready areas.
In this example, we’ll select the Sidebar widget area, but the steps are identical for other widget areas.
Add the Contact Information Widget:
Look for the newly installed Contact Information Widget. You can do this by clicking the + button, which will show you all available widgets.
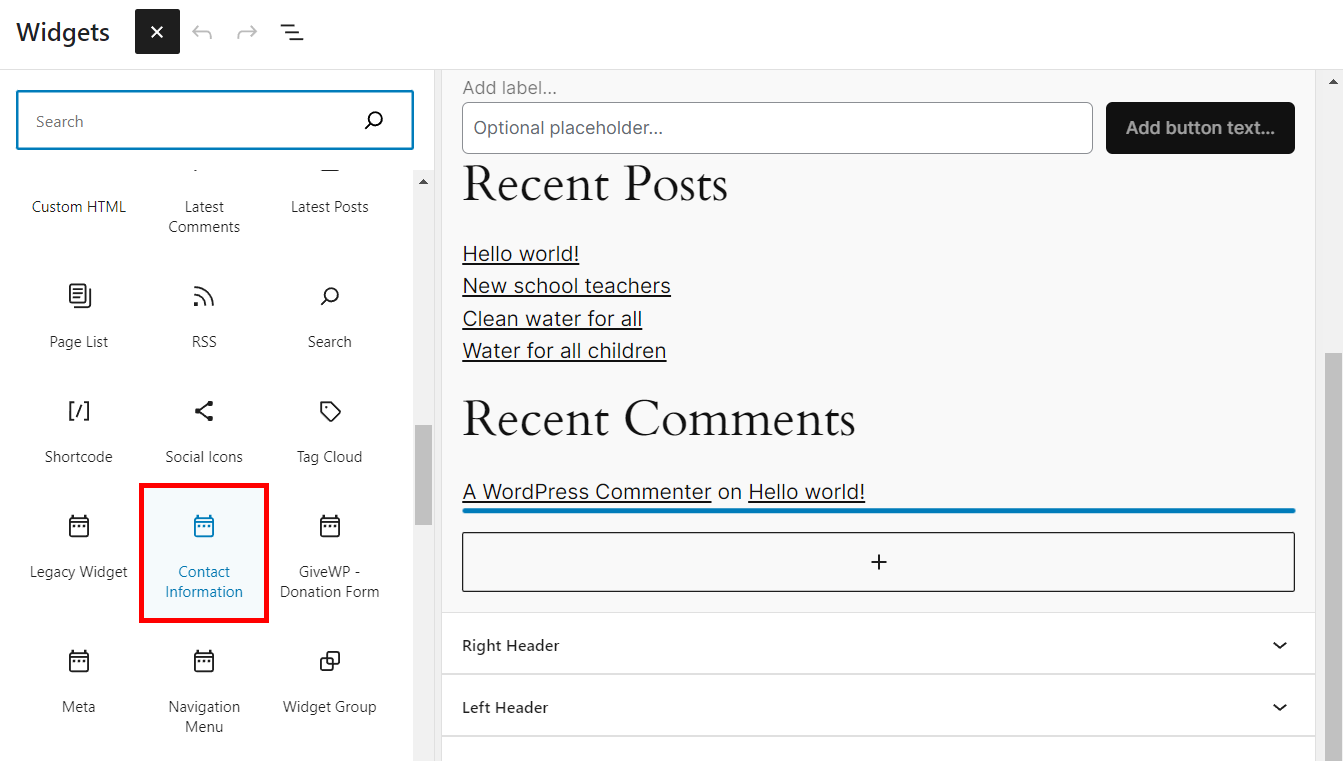
Step 3: Fill in Your Contact Information
After saving, you can go to the front end of your website to check if the Contact Information Widget is showing up in the sidebar or wherever you’ve added it. If everything looks good, your visitors can now easily find your contact details.
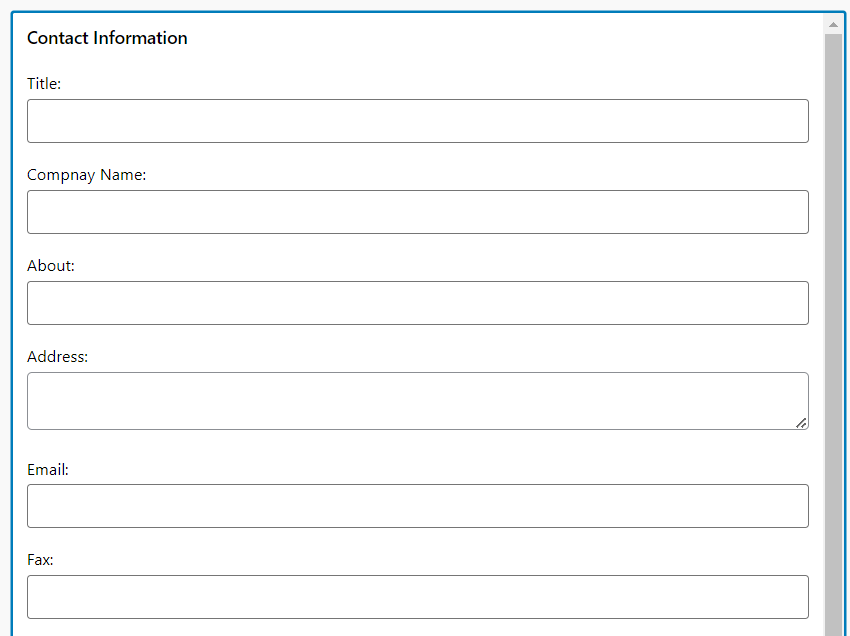
Enter Your Details:
After selecting the widget, a form will appear where you can fill in the contact details.
Typically, you’ll need to enter:
Company Name (or your name if it’s a personal site)
Address (physical location or P.O. box)
Phone Number
Email Address
Widget Title (a title like “Contact Information” is recommended for clarity)
Save Your Changes:
Once you’ve entered all the relevant contact information, don’t forget to save the widget.
Click the Update button in the top-right corner to save your changes.
Verify the Widget:
When you’re finished, save the changes by selecting the “Update” button at the top right corner. Then, you can verify that the widget is visible on your website.
You are done figuring out how to put your contact details on the WordPress website’s sidebar. You can return to this widget area and adjust the data if necessary.
Note: If you wish to provide more than one contact, you can add the same widget to the same space and fill it in with different information.
Also read: How to Create WordPress Custom Widgets [2023 Guide]
Step 4: Make Adjustments If Necessary
Additionally, if you want to provide more than one contact (such as a phone number and a different email), you can add multiple instances of the Contact Information Widget to the same widget area, each with different contact details.
Adding The Contact Information Widget
If you need to make changes to the contact information later, simply return to the Widgets section under Appearance. From there, you can edit the widget and update the information as needed.
First, go to WordPress’ widget section. For that, click on Appearance and choose the widgets option. Once inside, select the widget area that you wish to use.
Other Contact Info Widget Plugins to Try
1. Contact Widgets For Elementor
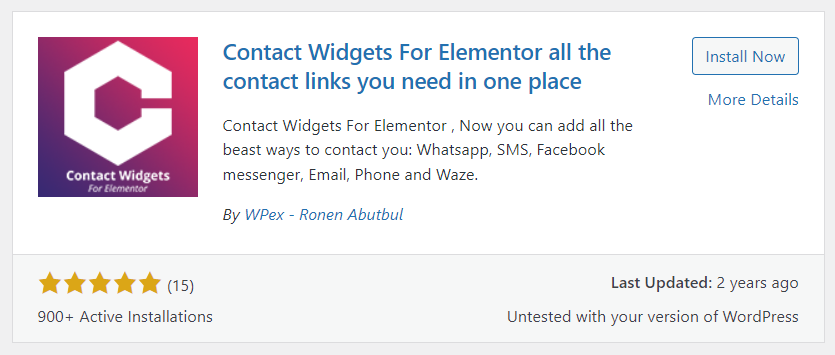
If you use Elementor to create your website, it is recommended that you install the Contact Widgets for Elementor plugin. It provides everything a person could ask for. Additionally, to use this add-on, you must have Elementor installed.
It will enable you to give a contact widget six alternatives. These include Waze, Facebook, WhatsApp, SMS, Email, and Phone. You can enter your business details on each one so clients can reach you through the preferred channel.
When it comes to design, you may completely customize the look of any item and even write a unique description for it. You may include, for example, whether your phone services are available during a specific period.
2. Contact Information Widget
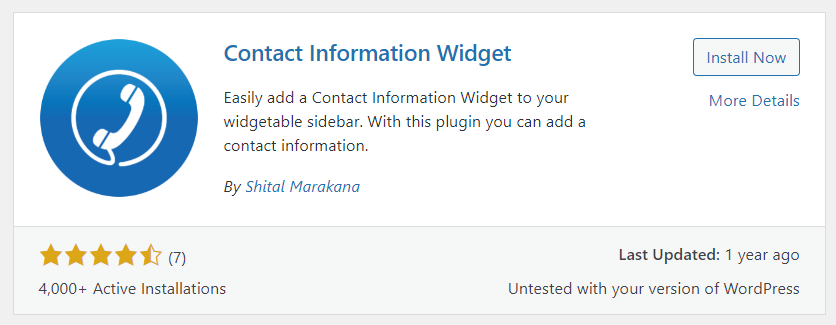
You may be wondering, “Is this the same plugin as the tutorial?” at this point. Indeed, despite sharing the same name, they are two different plugins. A fantastic substitute is the Contact Information Widget.
And for good reason—it functions very similarly to the original plugin.
The information you desire can be entered into the plugin’s fields by you. These consist of details like the name of the company, address, phone number, fax number, email address, and you may even add a link to a Google Maps page.
Every field has an icon, but you may customize them at will by modifying the relevant CSS. In the end, it is an easy-to-use plugin that fulfills the requirements of any website wishing to include a contact form in a widget.
Read also: 6 Proven Tips to Stop Contact Form Spam in WordPress
Streamlining Communication: Add a Contact Info Widget on WordPress
By giving users quick access to your contact details, you not only streamline communication but also build trust and establish a more professional presence.
The steps above make it simple to integrate this widget seamlessly into your site, ensuring that visitors can effortlessly reach out to you. But here’s something to keep in mind: while the widget shows up on every page of your site, placing it in the footer can give it a more polished and less intrusive look. If you’re running a business site, it’s also a smart move to display the contact info only on your dedicated contact page to keep things neat and organized.
Additionally, to protect your email from spam, consider hiding or obfuscating your business email address. It’s a small tweak that can save you from dealing with a flood of unwanted messages.
Want to take your website to the next level? With Nestify Hosting, you get blazing-fast speeds, unbeatable security, and hassle-free scalability to keep your WordPress site running smoothly. Whether you’re just starting out or scaling up, Nestify’s reliable hosting solutions are built to support your growth. Get started with Nestify today and elevate your website’s performance to new heights!
FAQs on Improving User Interaction with a Clean, Responsive Contact Info Widget on WordPress
Can I customize the Contact Info Widget to match my website’s design?
Yes, you can customize the look of the Contact Info Widget to match your website’s design by adjusting settings like fonts, colors, and layout within the WordPress widget editor or through custom CSS.
Is including a Contact Info Widget necessary if I already have a dedicated contact page?
While having a dedicated contact page is essential, including a Contact Info Widget in your website’s sidebar or footer ensures that crucial contact details are readily available on every page, making it easier for visitors to reach out to you without having to navigate away.
Can the users include social media links in the Contact Info Widget?
You can add the links to your social handles in the Contact Info Widget, allowing visitors to connect with you across various platforms. This can further enhance your website’s accessibility and engagement.
Will adding a Contact Info Widget affect my website’s performance?
No, adding a Contact Info Widget typically minimizes your website’s performance as it’s a lightweight feature primarily consisting of text and links. However, ensuring that your WordPress theme and plugins are optimized for performance to maintain overall site speed and responsiveness is essential.
