
Are you looking to enhance the design of your WordPress website by adding vertical lines? Vertical line in WordPress can be a powerful visual element that can help separate content and create a more aesthetically pleasing layout. In this blog, let’s dig more into the methods to add vertical lines in WordPress, including using the Block Editor, HTML, CSS, and plugins.
Understanding the Basics: Importance of Vertical Lines in WordPress Design
Vertical lines play a crucial role in the design of WordPress websites. They serve as visual elements that can enhance the overall aesthetics and organization of your content. In this section, we will explore the importance of vertical lines in WordPress design and how they can elevate the user experience.
Enhancing Visual Hierarchy
One of the key benefits of incorporating vertical lines in your WordPress design is that they help establish a clear visual hierarchy. By creating a visual separation between different sections or elements on a page, vertical lines help guide the user’s eye and improve readability. They provide a visual cue that helps users understand the relationships between different content blocks or sections, making it easier for them to navigate and consume information.
Creating Structure and Organization
Vertical lines also contribute to the overall structure and organization of your website. They can be used as dividers between different sections, such as separating the main content area from the sidebar or distinguishing between different modules on a page. The presence of vertical lines adds a sense of order and professionalism to your website layout, making it visually appealing and hassle-free to navigate.
Drawing Attention and Focus
Another advantage of vertical lines is their ability to draw attention and focus. By strategically placing vertical lines around important elements or sections, you can highlight and emphasize specific content. This can be particularly useful for showcasing key features, call-to-action buttons, or important information that you want to stand out. Vertical lines act as visual cues that guide the user’s attention and ensure they don’t miss important details.
Improving User Experience
Vertical lines contribute to an improved user experience by creating a visually pleasing and organized layout. They help users quickly understand the structure of the page, find relevant information, and navigate through the content effortlessly. When used correctly, vertical lines can enhance overall user engagement and satisfaction, making your website more user-friendly.
Reflecting Brand Identity
Vertical lines can also be used to reflect your brand identity and establish a consistent visual style. By incorporating vertical lines that align with your brand’s color scheme, typography, or overall design aesthetics, you can create an integrated and branded experience for your website visitors. Consistency in design elements helps build trust and recognition, making your website more memorable and reinforcing your brand image.
In summary, vertical lines play a significant role in WordPress design by enhancing visual hierarchy, creating structure and organization, drawing attention, improving the user experience, and reflecting brand identity. By understanding the importance of vertical lines, you can strategically incorporate them into your WordPress website to elevate its design and make a positive impact on your audience.
Adding Vertical Lines with the Block Editor
Adding vertical lines using the Block Editor in WordPress is a convenient and user-friendly approach. In this section, we will explore why using the Block Editor is a great option for adding vertical lines and guide you through the process step by step.
Why Use the Block Editor for Vertical Lines?
The Block Editor, also known as Gutenberg, has been the default editor in WordPress since version 5.0. It presents a modern and intuitive interface that permits you to create and customize your website’s content using blocks. One of the benefits of using the Block Editor for adding vertical lines is that it provides a visual editing experience. You can see a live preview of your changes as you work, making it easier to design and customize your vertical lines according to your preferences.

Additionally, the Block Editor offers a wide range of blocks, including specific blocks for creating separators and dividers. These blocks are designed to help you add vertical lines effortlessly without the need for coding or third-party plugins. By utilizing the built-in blocks, you can maintain a lightweight and optimized website without relying on additional resources.
Choosing the Right Block for Your Vertical Line
Before adding a vertical line with the Block Editor, you need to select the appropriate block for your desired design. The Block Editor offers several blocks that can be used to create vertical lines, such as the Divider block, Separator block, or Spacer block. Each block provides different customization options and visual styles, allowing you to achieve the desired look and feel for your vertical line.
Step-by-Step Guide to Adding a Vertical Line with the Block Editor
Now, let’s walk through the process of adding a vertical line using the Block Editor in WordPress:
- Access your WordPress admin dashboard to modify an existing post or generate a new one.
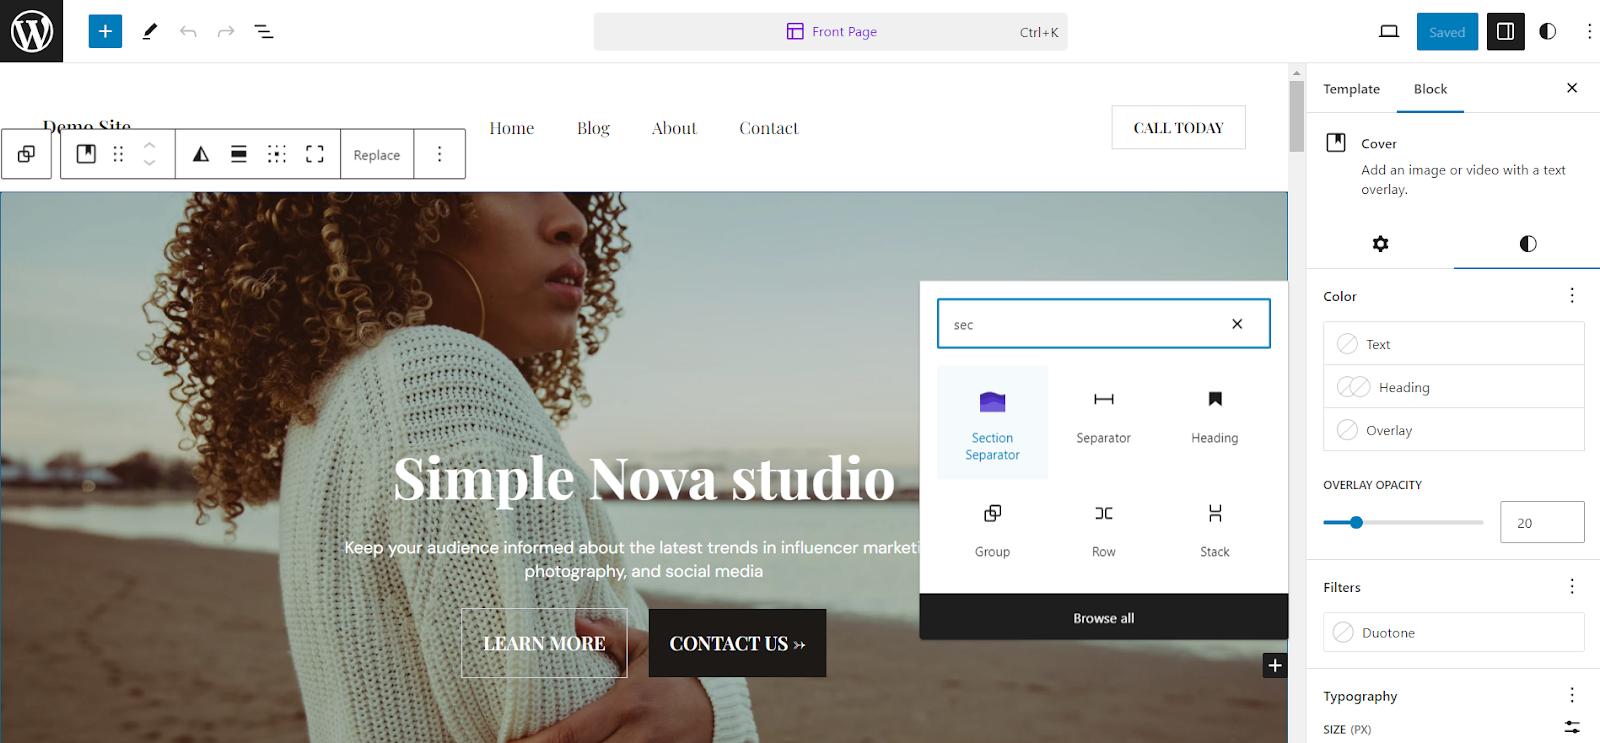
- In the Block Editor, hit the “+” button to add a new block to the post.
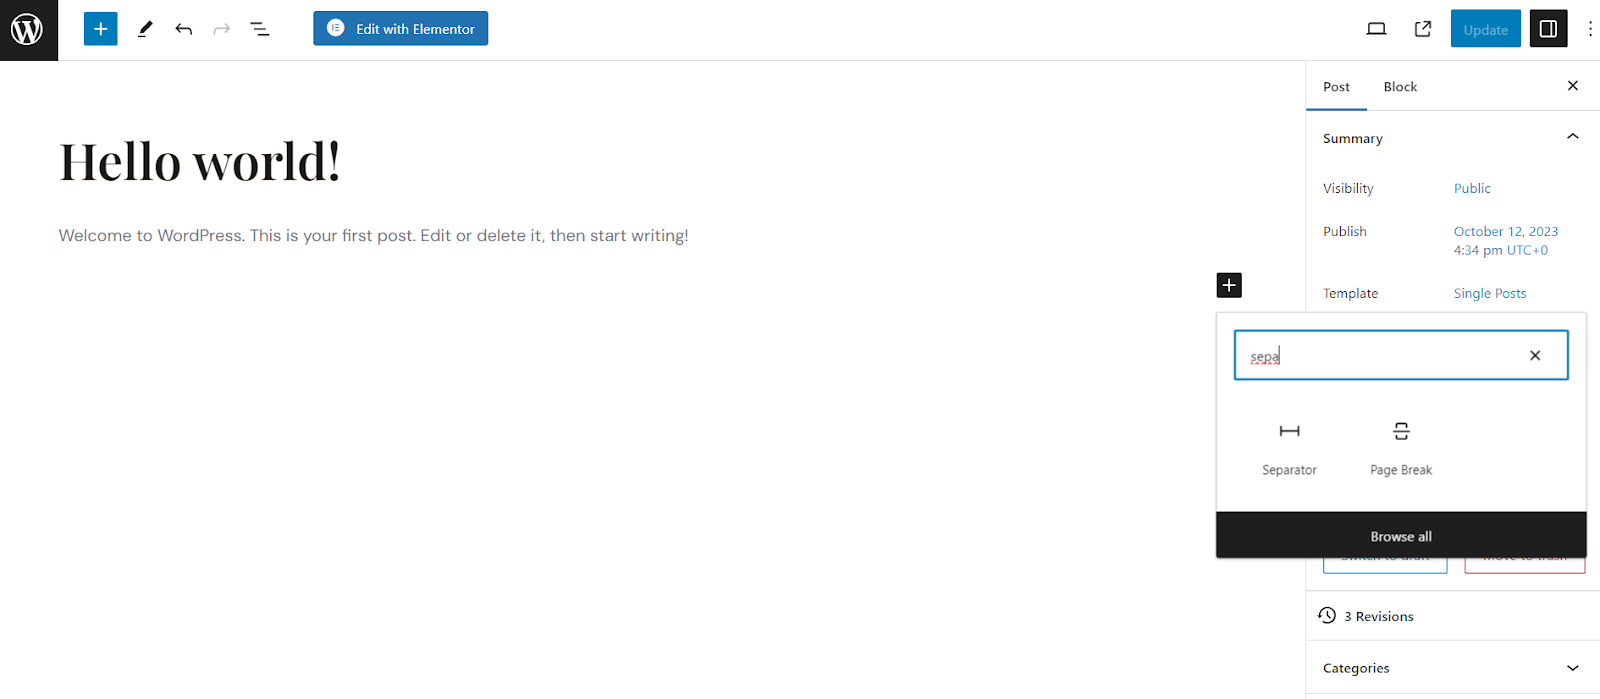
- In the block search bar, type “Divider” or “Separator” to locate the appropriate block.
- Click on the desired block to add it to your content.
- Customize the vertical line by adjusting the settings provided by the block. This may include options for line style, color, thickness, alignment, margins, and spacing.
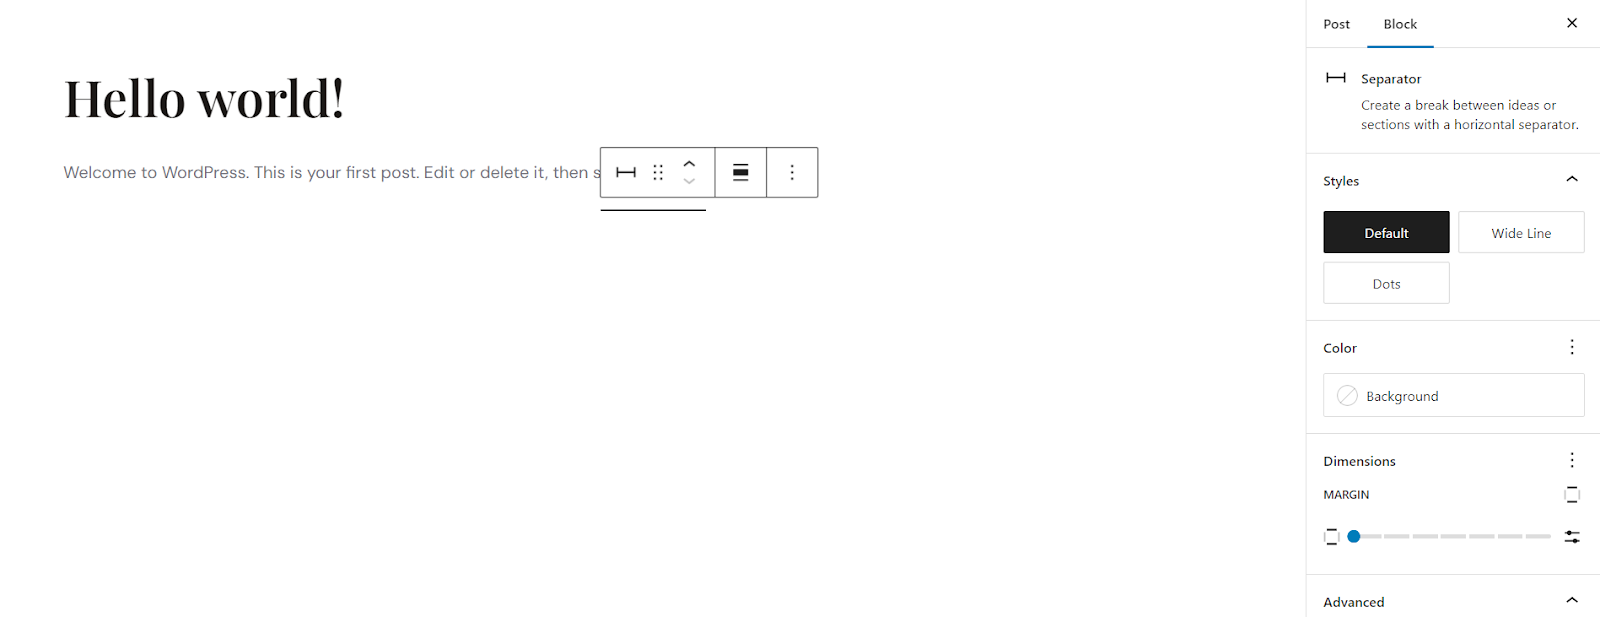
- Preview your changes to ensure the vertical line appears as desired.
- Continue adding any additional content or blocks to complete your page or post.
- Once you are satisfied with your changes, click on the “Publish” or “Update” button to let the changes take place on your website.
By following these steps, you can add a vertical line to your WordPress website using the Block Editor. Experiment with different blocks and customization options to achieve the desired visual effect for your vertical lines.
Adding vertical lines with the Block Editor provides a straightforward and efficient method for enhancing the design of your WordPress website. The visual editing experience and the availability of dedicated blocks make it accessible to users of all skill levels, allowing you to create professional and visually appealing vertical lines without extensive coding or reliance on external plugins.
Adding Vertical Lines with HTML
Adding vertical lines using HTML code gives you more control over the design and customization of your WordPress website. In this section, we will explore the role of HTML in WordPress, provide you with the necessary HTML code to create a vertical line and guide you through the step-by-step process.
Understanding the Role of HTML in WordPress
HTML (Hypertext Markup Language) is the usual markup language utilized for creating the structure and content of website pages. In the context of WordPress, HTML is responsible for defining the elements and layout of your website. By utilizing HTML code, you can directly manipulate the look and feel of your WordPress website, including adding vertical lines.
What HTML Code You Need to Create a Vertical Line
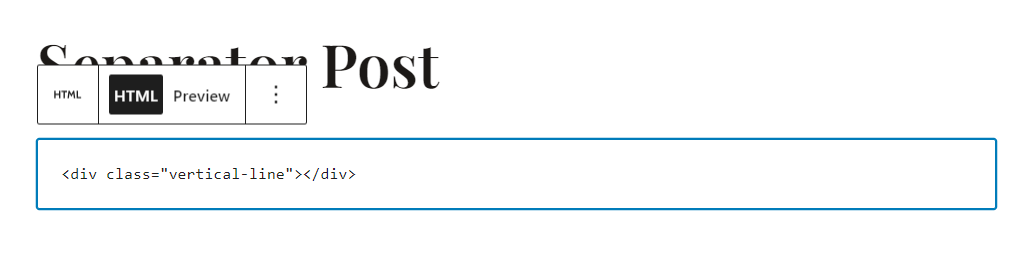
To add a vertical line using HTML, you can make use of the <div> element combined with CSS styling. <div> represents a division or container element, and the class attribute assigns a specific class name to the element. You can customize the class name according to your preference. The class name is used to style the vertical line using CSS.
Step-by-Step Guide to Adding a Vertical Line with HTML
Now, let’s walk through the process of adding a vertical line using HTML in WordPress:
- Log in to your WordPress admin dashboard.
- Locate the page or post where you want to add the vertical line.
- Switch to the HTML editor mode.
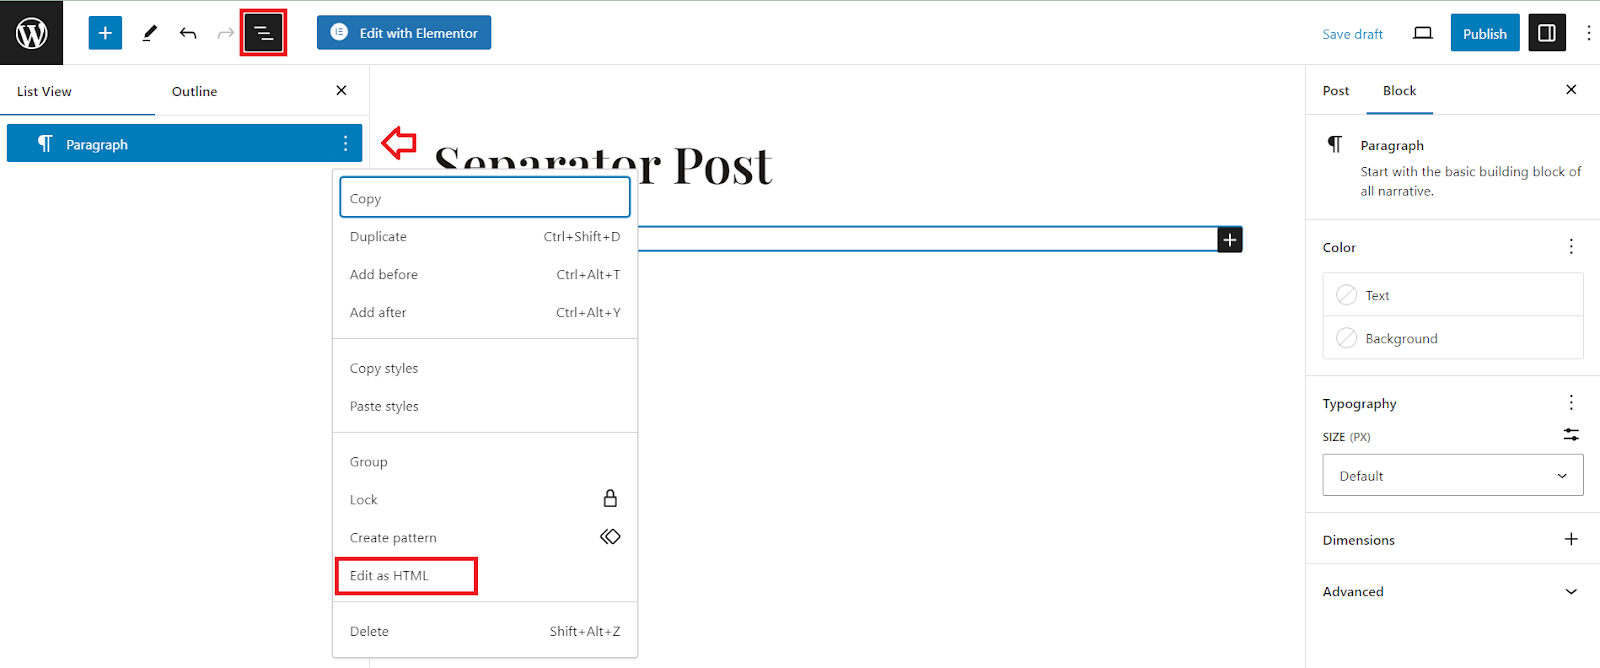
- Locate the appropriate position where you want to insert the vertical line.
- Insert the HTML code <div class=”horizontal-line”></div> at the desired location.
- Save or update the page or post to apply the changes.
By following the above steps, you can successfully add a vertical line using HTML code in WordPress.
It’s important to note that after adding the HTML code, the vertical line will appear as a simple solid line. To customize the appearance of the vertical line, you will need to apply CSS styling, which we will explore in the next section.
Adding vertical lines with HTML gives you the flexibility to design and customize the vertical line according to your specific requirements. By combining HTML with CSS, you can achieve various visual effects and styles for your vertical lines, allowing you to create a unique and personalized design for your WordPress website.
Adding Vertical Lines with CSS
Adding vertical lines using CSS (Cascading Style Sheets) provides you with extensive control over the design and appearance of your WordPress website. In this section, we will explore the role of CSS in WordPress, provide you with the necessary CSS code to create a vertical line and guide you through the step-by-step process.
Understanding the Role of CSS in WordPress
CSS is a powerful styling language used to control the presentation and layout of web pages. In WordPress, CSS allows you to customize the design elements of your website, including adding vertical lines. By applying CSS code, you can define the visual properties such as color, size, position, and style of your vertical lines.
What CSS Code You Need to Create a Vertical Line
To create a vertical line using CSS, you can utilize the border-left property to define a vertical border. Here’s an example of the CSS code you can use to create a vertical line:
css

.vertical-line {

border-left: 1px solid #000;

}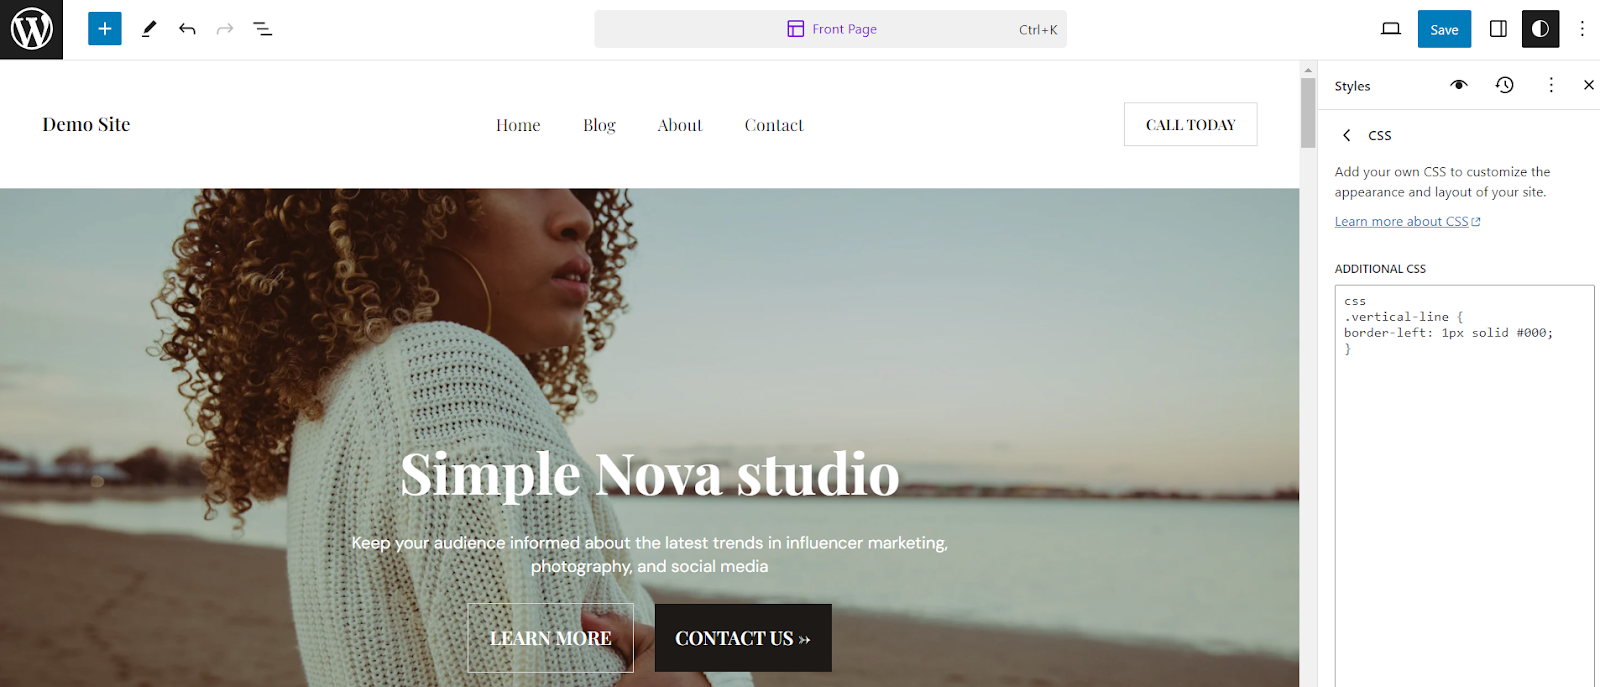
In the above code, .vertical-line refers to the class name assigned to the HTML element that will display the vertical line. You can customize the class name according to your preference. The border-left property specifies the style, width, and color of the left border, effectively creating a vertical line.
Step-by-Step Guide to Adding a Vertical Line with CSS
Now, let’s walk through the process of adding a vertical line using CSS in WordPress:
- Log in to your WordPress admin dashboard.
- Locate the page or post where you want to add the vertical line.
- Switch to the CSS editor mode or locate the custom CSS section of your theme or plugin.
- Insert the CSS code .vertical-line { border-left: 1px solid #000; } in the appropriate location.
- Save or update the page or post to apply the changes.
By following the above steps, you can successfully add a vertical line using CSS code in WordPress.
It’s important to note that the above CSS code creates a basic vertical line with a solid black color (#000). You can seamlessly alter the style, width, and color of the vertical line by modifying the values in the CSS code. Experiment with different CSS properties to achieve the desired visual effect for your vertical lines.
Adding vertical lines with CSS provides you with the versatility to create unique and visually appealing designs for your WordPress website. By combining CSS with HTML, you can further enhance the appearance of your vertical lines and create a cohesive and professional look for your website.
Using Plugins to Add Vertical Lines
Using plugins to add vertical lines in WordPress offers a convenient and efficient method, especially for users who prefer a streamlined approach or have limited coding knowledge. So, here’s a step-by-step guide to adding a vertical line using plugins.
Why Consider Plugins for Adding Vertical Line
Utilizing plugins offers a convenient and user-friendly method to augment the functionality and design of your WordPress website. By employing plugins for the addition of vertical lines, you can streamline the process and save time, sidestepping the need for manual coding or intricate CSS customization. Plugins often offer a range of pre-designed vertical lines with various styles and customization options, making it simple to achieve the desired look without the need for technical expertise.
Popular Plugins for Adding Vertical Lines
There are several plugins available in the WordPress repository that specialize in adding vertical lines. Here are a few popular options:
- Section Separator: Separator Pro is a feature-rich plugin that allows you to add stylish vertical lines, dividers, and separators to your WordPress website. It presents a wide range of customization options, including line style, color, width, and spacing.
- Ultimate Addons for Gutenberg: This plugin extends the functionality of the Block Editor by adding new blocks, including a separator block. It provides a simple and intuitive way to add vertical lines within your content using the Block Editor.
- Elementor: Elementor is a power-packed page builder plugin that offers a dedicated widget for adding vertical lines. With its drag-and-drop interface and extensive styling options, you can easily create visually appealing vertical lines within your Elementor-designed pages.
These are just a few examples, and there are many other plugins available in the WordPress ecosystem that offer vertical line functionality. Explore the plugin repository or conduct a search to find the one that best suits your needs.
Step-by-Step Guide to Adding a Vertical Line with Plugins
Now, let’s walk through the process of adding a vertical line using a plugin in WordPress:
- Log in to your WordPress admin dashboard.
- Go to the “Plugins” section and click on “Add New.”
- Search for the plugin you want to use (e.g., “Separator Pro”).
- Install and activate the plugin.
- Follow the plugin’s documentation or instructions to configure the settings and options.
- Once configured, go to the page or post where you want to add the vertical line.
- Use the plugin’s interface or blocks (if available) to insert and customize the vertical line.
- Preview your changes to ensure the vertical line appears as desired.
- Save or publish the post to make the vertical line live on your website.
By following the aforementioned steps, you can effortlessly add a vertical line to your WordPress website using plugins. Remember to explore the plugin’s documentation or support resources for more detailed instructions and customization options.
Using plugins to add vertical lines provides a hassle-free and efficient way to enhance your WordPress website’s design. With a great range of plugins available, you can easily find the one that fulfills your needs and preferences, allowing you to create visually appealing vertical lines without the need for extensive coding or manual customization.
Conclusion
Adding a vertical line in WordPress is an easy yet effective way to enhance the visual appeal and structure of your content. Whether you’re separating sections, highlighting key points, or just adding a stylistic touch, the methods discussed in this blog provide versatile options for users of varying technical proficiency. Experiment with these techniques, choose the one that best fits your needs and elevate the presentation of your WordPress content with a sleek and professional vertical line.
