
IWhen a DNS server fails to respond, your browser is no longer able to resolve domain names—like example.com—into their corresponding IP addresses (e.g., 192.0.2.1). This process, known as DNS resolution, is the foundational step in accessing any website on the internet. Without it, your connection request can’t reach the server hosting the site, effectively severing internet access for that domain.
In the context of a WordPress website, whether you’re running a personal blog, an e-commerce store, a learning management system, or a business portfolio, this error can have significant consequences. Downtime caused by DNS issues not only disrupts the user experience but can also negatively impact search engine rankings, conversion rates, and brand reputation—especially if the problem persists without timely resolution.
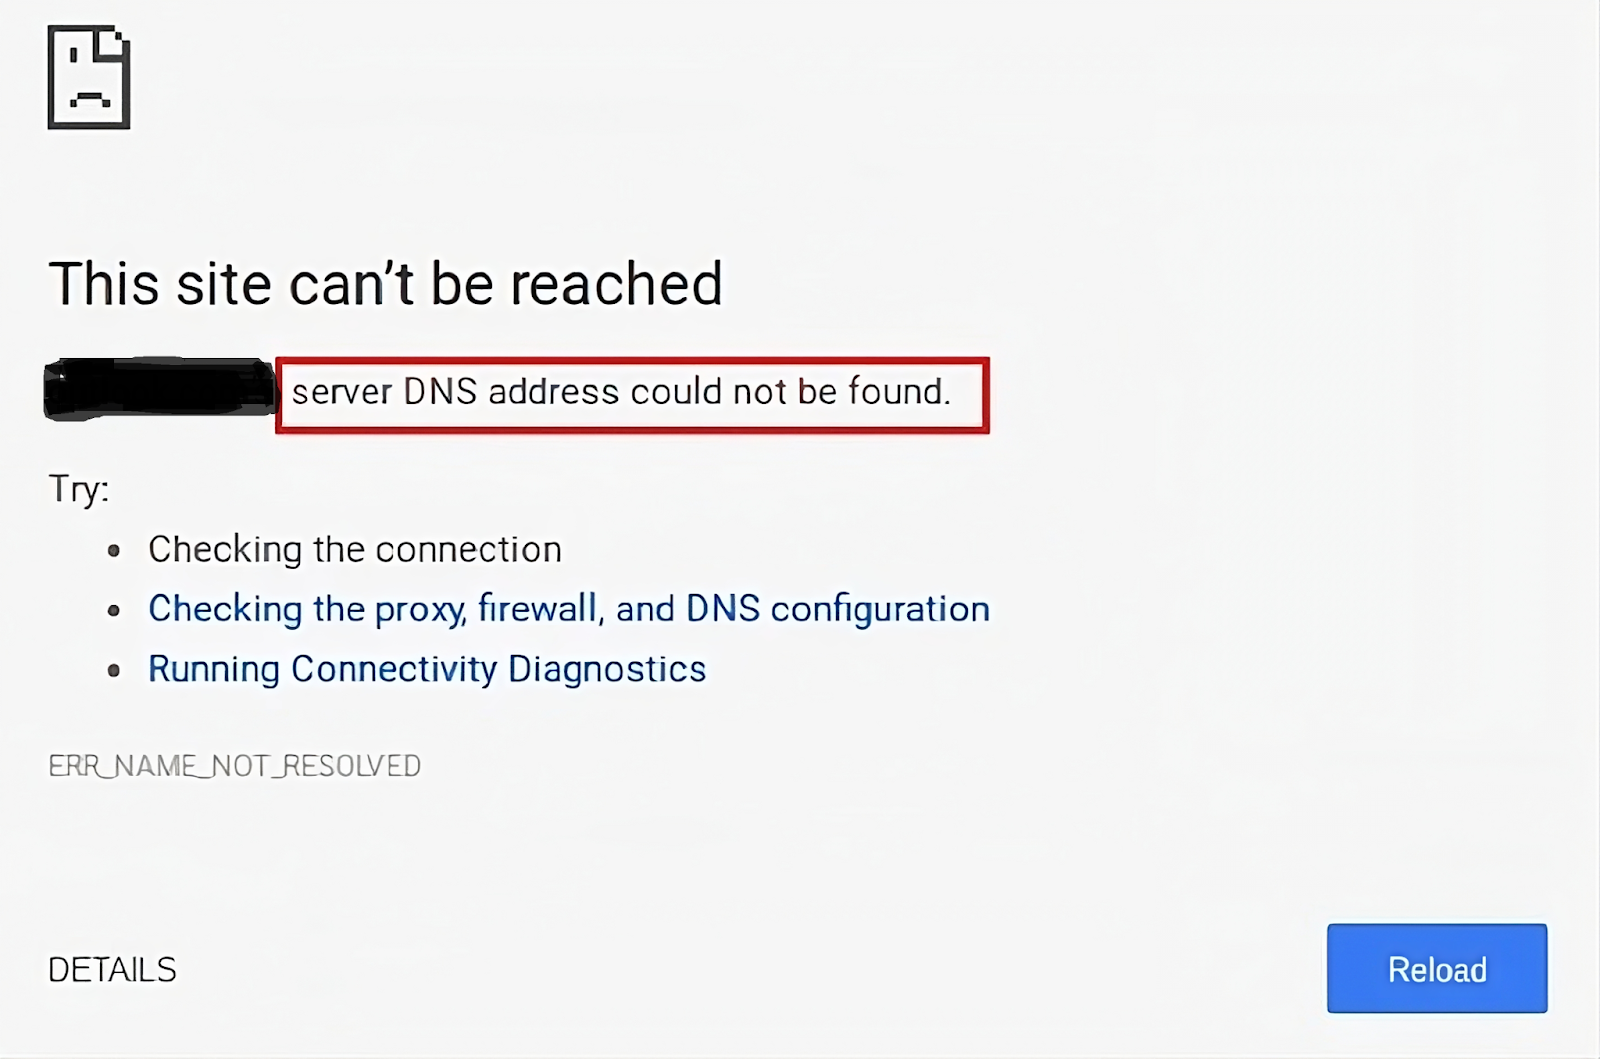
What Exactly is the “DNS Server Not Responding” error in WordPress?
This error signals that your browser is unable to connect to the DNS server, meaning it can’t resolve the domain name into a usable IP address. As a result, even though your site is live, users (and you!) can’t access it.
This is more than a minor nuisance—it halts traffic, disrupts user experience, and can stall your work, especially if you rely on WordPress for business or blogging.
Why It’s a Big Deal for WordPress Users
For bloggers, small businesses, e-commerce owners, or agencies using WordPress, the DNS server error isn’t just a technical glitch—it’s a full stop in operations:
- No Visitors: Users trying to access your domain are met with a browser error.
- Revenue Loss: If you run a WooCommerce store, downtime directly impacts sales.
- SEO Damage: Prolonged DNS issues can lead to search engine crawlers flagging your site as unreliable.
- Admin Access Blocked: Even you, the admin, may not be able to log into the dashboard to make fixes.
Learn about server overload issues.
Common Causes of DNS Server Not Responding Errors in WordPress
1. Faulty or Unstable Internet Connection
A weak or intermittent internet connection can prevent your device from communicating with DNS servers. Sometimes, even a momentary drop in connectivity can break the DNS lookup process. Wireless connections are more prone to this issue than wired ones.
2. Misconfigured DNS Settings
If your device or router is configured with incorrect DNS addresses—or if your domain’s DNS records (like A records or nameservers) aren’t properly set up through your hosting or registrar—your browser will fail to resolve the domain. Misconfigured settings are a leading cause of DNS failure during domain migrations or DNS propagation delays.
3. Outdated or Faulty Network Adapter Drivers
Network adapter drivers allow your operating system to communicate with your network hardware. If these drivers are outdated, corrupted, or incompatible with recent updates, they can interfere with DNS resolution and block connections.
4. Browser or Firewall Interference
Some web browsers, particularly those with enhanced security settings or outdated cache, can mishandle DNS lookups. Similarly, aggressive firewall or antivirus settings can block outbound DNS requests or incoming responses, mistakenly treating them as threats.
5. DNS Provider Outages or Issues
Not all DNS servers are created equal. If you’re using your Internet Service Provider’s (ISP) default DNS servers and they’re experiencing an outage or slowdown, you may see the DNS error—even though your website and internet connection are working. Public DNS options like Google (8.8.8.8) or Cloudflare (1.1.1.1) are often more reliable.
6. VPN or Proxy Server Conflicts
Virtual Private Networks (VPNs) and proxy servers reroute your web traffic for privacy or regional access—but they often come with their own DNS settings. If your VPN’s DNS servers are slow or blocked, it can prevent DNS resolution entirely. Proxy settings configured incorrectly can also lead to similar issues.
Quick Fixes for Tech-Savvy Users (Start Here Before Troubleshooting Further)
If you’re confident with system settings and looking to resolve the “DNS Server Not Responding” error fast, start with these rapid-fire actions. They often solve the issue without needing a deep dive:
1. Switch to a Different Browser
Your current browser might be misbehaving or caching a bad DNS route.
Try this:
- Swap Chrome for Firefox, Safari, or Edge.
- If the site loads in the new browser, your original browser may have corrupted cache or extensions causing DNS hiccups.
2. Restart Your Modem and Router
Sometimes, DNS issues stem from a flaky internet connection or cached DNS routes at the router level.
How to do it:
- Power down both your modem and router.
- Wait 60 seconds, then plug them back in.
- Give them a few minutes to fully reconnect.
3. Test on a Different Device or Network
Narrow down the problem source—your device, router, or ISP.
Try this:
- Use another phone, tablet, or laptop on the same network.
- Or switch to a mobile hotspot or neighbor’s Wi-Fi.
- If it works elsewhere, the issue is isolated to your original device or router.
4. Manually Change Your DNS Server
By default, your ISP assigns DNS servers, but they may be slow or down.
Set DNS to a faster or more reliable option:
- Google Public DNS:
8.8.8.8and8.8.4.4 - Cloudflare DNS:
1.1.1.1and1.0.0.1
Update this under your network settings (Windows, macOS, or router-level).
5. Clear Your DNS Cache
A corrupted local DNS cache can point your system to outdated or wrong IP addresses.
Flush DNS to reset it:
- Windows: Run
ipconfig /flushdnsin Command Prompt - macOS: Use Terminal: nginxCopyEdit
sudo dscacheutil -flushcache; sudo killall -HUP mDNSResponder - Chrome (Android): Navigate to
chrome://net-internals/#dnsand click Clear host cache
6. Temporarily Disable Antivirus and Firewall
Security software may be blocking or filtering DNS responses.
What to do:
- Temporarily disable your antivirus and firewall.
- Check if your site loads.
- If it works, adjust your firewall or add DNS/resolver exceptions before re-enabling.
7. Disable IPv6
Some networks and older routers have trouble resolving domains over IPv6.
Solution:
- Disable IPv6 from your network adapter settings (Windows or macOS).
- Restart your device and test DNS resolution again.
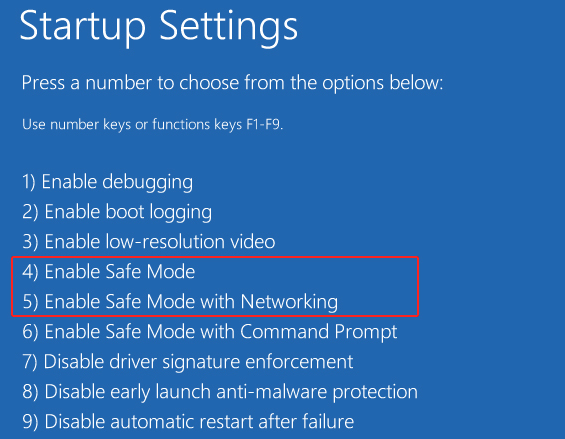
8. Boot Into Safe Mode With Networking
This environment loads minimal drivers and disables third-party apps that may interfere with networking.
How to boot:
- Windows: Hold Shift, click Restart, then navigate:
Troubleshoot > Advanced Options > Startup Settings > Enable Safe Mode with Networking - macOS: Restart and immediately hold the Shift key until login.
If DNS works in Safe Mode, a background service or application is likely the culprit.
9. Update Your Network Adapter Drivers
Outdated or corrupted network drivers can cause DNS and connectivity failures.
Steps (Windows):
- Open Device Manager
- Expand Network adapters
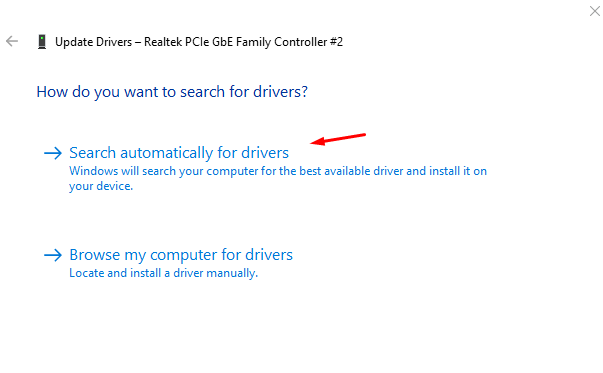
- Right-click your active adapter > Update driver
- Choose Search automatically for drivers
For best results, also check your manufacturer’s site for the latest driver version.
💡 Still Not Fixed?
If none of these quick interventions work, don’t worry—scroll down to explore 9 deeper solutions with step-by-step guidance tailored for WordPress users.
Fix “DNS Server Not Responding” Error in WordPress 9 Simple Ways
The following part of the post will provide detailed information as well as several solutions to the error. Don’t worry about system-specific issues; the methods described here will address Windows and Mic issues.
1. Check your internet connection
You may see the ‘DNS server not responding’ error because your internet connection has been disconnected. So, before beginning, make sure you are currently connected to the internet.
If your Wi-Fi is connected but the issue persists, try restarting your internet connection by turning your computer on and off.
Alternatively, you can disconnect your router from the power supply and wait at least a minute before reconnecting it.
2. Try a Different Browser
Second, try another browser and see if it resolves the DNS issue. It could be as simple as switching browsers or updating the one you’re currently using.
How do you switch browsers?
Open a new one and try surfing some websites. For example, if you often use Chrome or Safari, try Firefox or Edge instead. If trying a different browser resolves the issue, your current browser may require an update, or you may need to remove and reinstall it. However, if you continue to see the DNS Server Not Responding notice, the problem is not with your browser.
You might also try opening the page in a private tab, such as through Chrome’s Incognito mode.
If you can view the website with another browser, it suggests the problem is with your default web browser.
3. Fixing Network Problems
To address the “DNS server isn’t responding” error, start by troubleshooting network issues. This method helps identify and resolve any detected network problems efficiently.
Here’s how to run network diagnostics on both Windows and Mac computers:
Run Windows Network Diagnostics
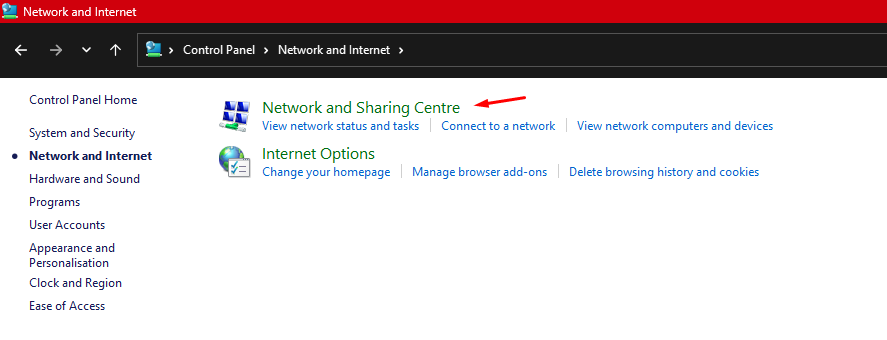
- Go to the Control Panel, then Network and Internet > Network and Sharing Center.
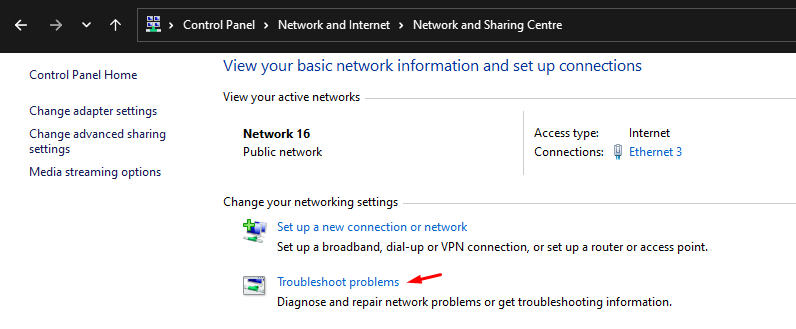
- Under “Change your networking settings,” select the Troubleshoot problems option.
- Click on Additional Troubleshooters -> Internet Connections -> Run the troubleshooter.
Wait for the troubleshooting process to finish. Follow any on-screen instructions if an error message appears to fix the DNS issues.
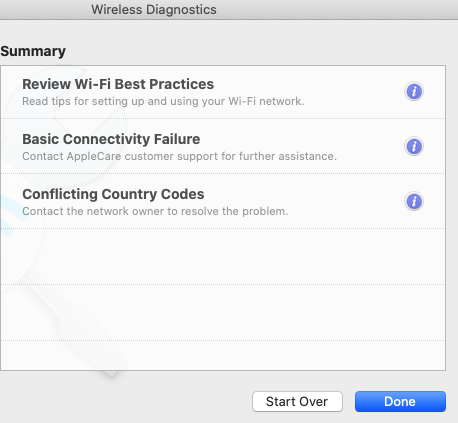
Configure Wireless Diagnostics on Mac
- Close all open applications and connect to the problematic network.
- To view the Wi-Fi status icon in the menu bar, choose it while holding down the Option key. Click Open Wireless Diagnostics after that.
- After the scanning process, click the Info icon in the Summary window to gather more details about each entry on the list.
If this method doesn’t resolve the DNS server problem, proceed to the next step.
4. Connect to a different device
Connect a different device to the same home network and visit the site you’re having difficulties with.
If the second device can view the web page over the same network, the issue is with your primary device.
However, if you are still unable to access the website with additional devices connected to the same network, your router may be the source of the problem.
Using additional connections, such as mobile data, can also help to ensure that the connection failure is not caused by the site itself.
5. Boot PC in Safe Mode
If your operating system isn’t functioning correctly, it could lead to the “DNS server not responding” error.
To determine if this issue stems from your operating system, you should restart your computer in safe mode. Safe mode is a simplified version of your operating system that limits the files and resources used by your device.
Here’s how to start your computer in safe mode on Windows:
- Go to the Start menu, click the Power button, press the Shift key, and select Restart.
- On the “Choose an option” window, click on Troubleshoot -> Advanced options.
- Select Startup Settings under Advanced options and click Restart.
- Press F5 on the keyboard to choose the Safe Mode with Networking option.
For Mac users, here’s how to boot your computer in safe mode:
- Navigate to the Apple menu -> Shut Down. Wait for about 10 seconds after your device shuts down.
- Power on your Mac and immediately press and hold the Shift key until you see the login screen.
If your network connection functions properly in safe mode, it suggests that third-party software could be causing the “DNS server not responding” issue. To address this, you’ll need to identify and remove the problematic application from your PC.
6. Disable antivirus software and/or your firewall
Antivirus software and firewalls secure your device by monitoring traffic. These tools can occasionally interfere with your internet connection and cause DNS server issues.
As a result, you should temporarily disable your antivirus and/or firewall protection to see if they are the source of the problems.
If this solves the problem, check that your protection is turned back on.
Then, go through the settings to see if there is anything linked to DNS that is causing you issue. If your software package offers support, it may be worth contacting your provider for assistance.
7. Turn off your VPN
VPNs, or virtual private networks, add an extra degree of online anonymity by delivering data to your device via an encrypted tunnel. So far, it’s been rather useful. The issue is that the tunnel may be bypassing your normal DNS servers.
To put this notion to the test, turn off your VPN and try to access the page where you encountered the DNS server issue. If this resolves your issues, restart the VPN and look at the settings. You’re looking for controls for DNS filtering. If you need assistance, contact your VPN provider.
8. Clear DNS Cache
You can manually clear the DNS cache without restarting your device:
Windows:
- Press Win + R and type “CMD”
- Copy this to CMD “ipconfig /flushdns” to clear the DNS cache.

Mac:
- Enter “sudo dscacheutil -flushcache; sudo killall -HUP mDNSResponder” in the Terminal window.
- Hit the Enter key.
- When asked, enter your admin password and hit Enter once again.
iOS:
- Turn on Airplane Mode and then turn it off.
Android:
- Open Chrome and type “chrome://net-internals/#dns” in the search box.
- Select DNS on the left, then tap “Clear host cache”.
Clearing your DNS cache forces your device to request updated mappings of domain names to IP addresses from the DNS server. This is important for accurate network diagnostics.
9. Update Your Network Adapter Driver
A DNS error message might be caused by a hardware or network issue. Regarding the network, you’ll have to rely on your ISP to resolve the issue. However, you may confirm that your network adapter driver functions properly by updating it to the most recent stable version. Driver failures occur more frequently on Windows. Therefore, we will concentrate on those.
The simplest method is to let Windows choose the appropriate drivers and update your adapter automatically.
- Select the Windows menu.
- In the search bar, enter “Device Manager.”
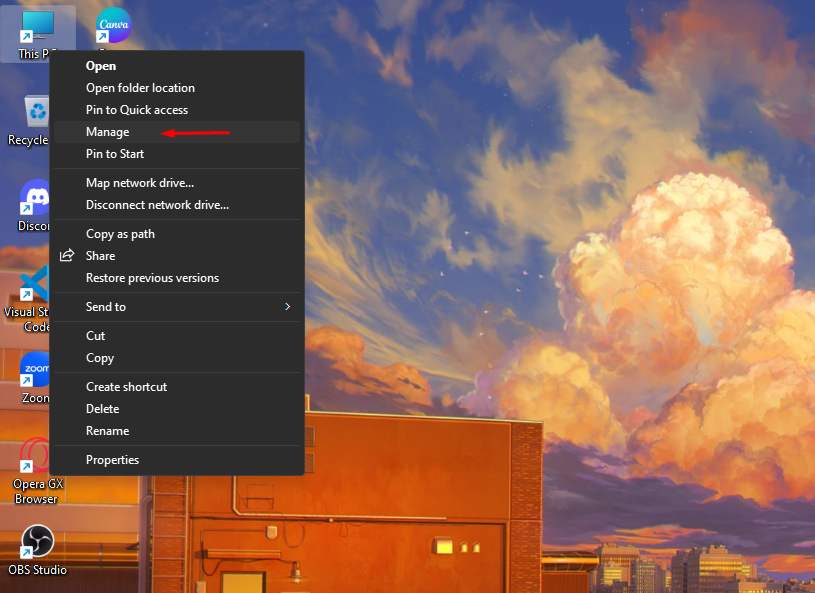
- Open Device Manager
- To expand the menu, double-click Network Adapters.
- Right-click your current adapter and choose Update Driver.
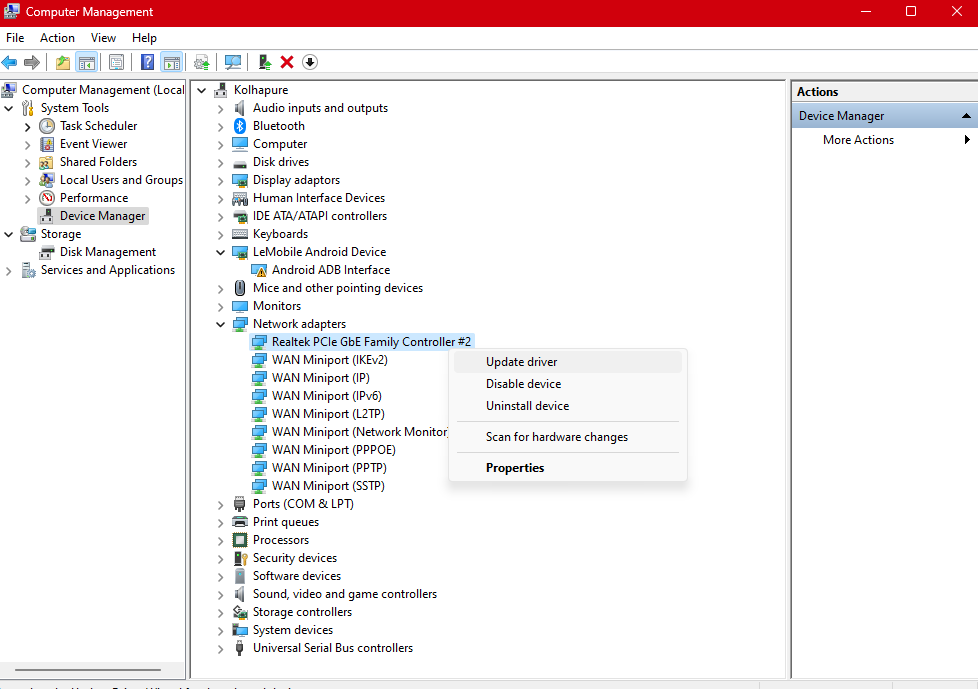
- In the next box, select Search automatically for drivers.
Hope you find the solution to this problem you’re looking for! If you didn’t comment down below, we’ll surely provide you with an updated solution!
Don’t Let DNS Errors Derail Your Business
While troubleshooting can often solve the issue, persistent DNS failures may also point to limitations in your hosting environment. If your current provider isn’t delivering consistent uptime or responsive support, it might be time to consider a better alternative.
🚀 Try Nestify — Built for Speed, Security & Uptime
Nestify offers managed WordPress hosting optimized for performance, security, and reliability—plus built-in DNS management, proactive monitoring, and 24/7 expert support.
✅ No configuration headaches
✅ Built-in caching and CDN
✅ High availability infrastructure
✅ Expert WordPress support
✅ DNS-level performance optimization
🎁 Ready to experience the difference? Start your free trial with Nestify now.
With the right hosting foundation and proper troubleshooting strategies, you’ll spend less time fixing issues and more time building what matters—your content, your audience, and your brand.
FAQs on How to Fix DNS Server Not Responding Error
Is updating network adapter drivers necessary to resolve the DNS server issue?
Yes. Outdated or incompatible network adapter drivers can hinder communication between your device and DNS servers. Updating them ensures optimal performance, supports new DNS protocols, and helps eliminate connectivity errors like “DNS Server Not Responding.”
What should I do if I can’t fix the DNS issue myself?
If you’re still facing issues after applying all recommended solutions:
- Contact your web hosting provider for DNS zone file checks and backend support.
- Reach out to an IT professional or network administrator who can analyze your system and router settings.
- Post your issue on WordPress forums or tech support communities, providing detailed context like browser, OS, plugins, and DNS configurations.
How can I prevent DNS server errors in the future?
To reduce the likelihood of DNS-related disruptions:
- Use premium or public DNS resolvers like Cloudflare (1.1.1.1) or Google DNS (8.8.8.8).
- Keep your WordPress installation, themes, and plugins updated to avoid compatibility issues.
- Regularly clear the DNS and browser cache, especially after migrations or server updates.
- Avoid conflicting VPN, proxy, or firewall settings that may override DNS.
- Enable monitoring tools or uptime alert services that notify you the moment your site goes offline due to DNS failure.
