
“Enabling text compression” refers to the practice of using compression algorithms to reduce the size of text data transmitted over the internet. This process optimizes data transfer efficiency between servers and clients (such as web browsers), offering several key benefits.
Understanding Text Compression:
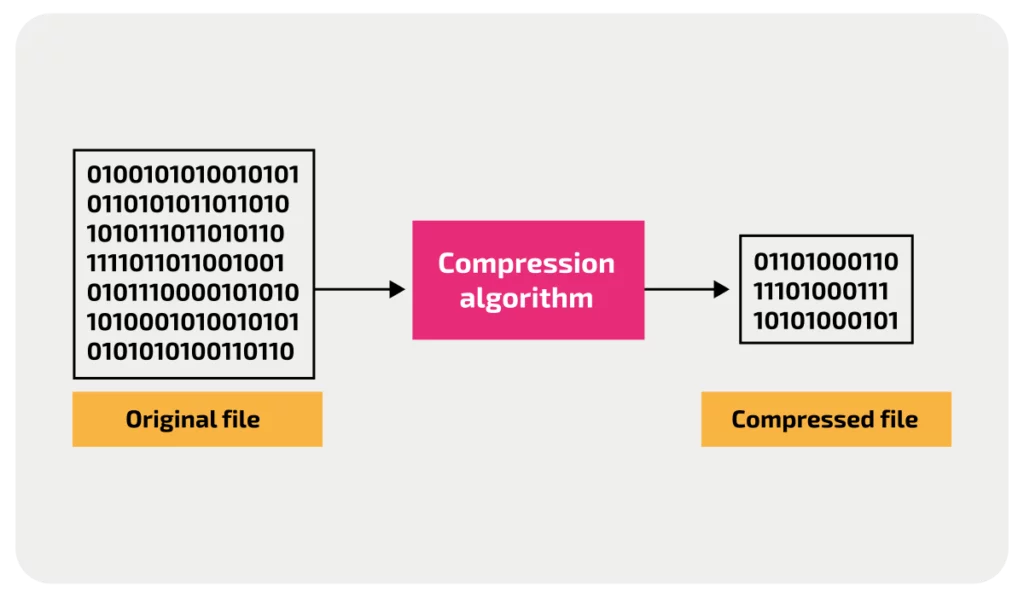
1. Compression Algorithms: Text compression employs algorithms like Gzip, Brotli, and Deflate. These algorithms encode text files such as HTML, CSS, JavaScript, and JSON into a more compact format. This compression significantly reduces the amount of data sent over the network while preserving the original content.
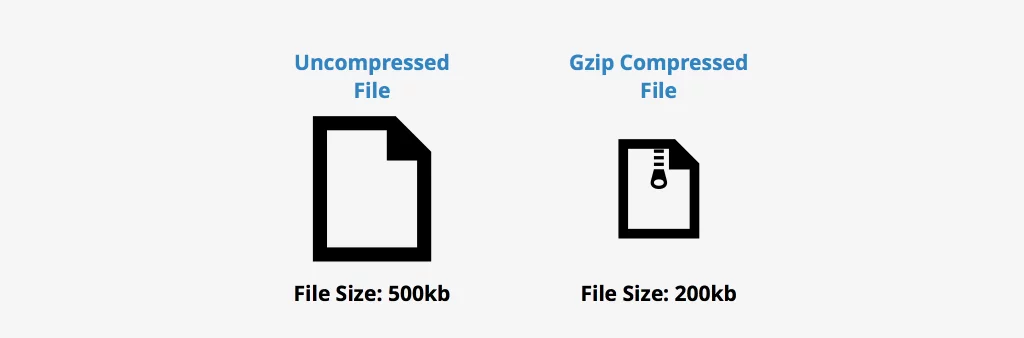
2. Data Size Reduction: The same information can be transmitted using fewer bytes by compressing text files. This reduction in data size is particularly advantageous in improving website loading times and overall network efficiency.
3. Implementation: Enabling text compression typically involves configuring the server to compress text-based files before sending them to clients. Most modern web servers and content delivery networks (CDNs) support text compression, making it accessible and widely adopted in web development practices.
Importance of Text Compression:
1. Faster Load Times: Compressed text files require less time to transmit over the network, leading to faster website loading speeds. This enhanced performance is critical for improving user experience and reducing bounce rates.
2. Bandwidth Efficiency: Text compression conserves bandwidth by reducing the volume of data transferred. This is particularly beneficial for users with limited internet bandwidth or when accessing websites on mobile devices with slower connections.
3. SEO and User Retention: Improved website performance due to text compression contributes positively to search engine optimization (SEO) rankings. Faster loading times also enhance user retention and engagement, as visitors are likelier to stay on a site that loads quickly and efficiently.
How Text Compression Works in Web Development:
Text compression is pivotal in optimizing data transfer efficiency over the internet, particularly in web development contexts. Here’s a detailed explanation of how text compression works and its impact on enhancing user experience:
A. Client Request
When a client, such as a web browser, requests a resource (e.g., a webpage, CSS file, or JavaScript file) from a server, it can indicate its support for compression by including an Accept-Encoding header in the request. This header lists the compression algorithms that the client can handle. For example:
In this example, the client indicates that it can accept responses compressed with Gzip, Deflate, or Brotli algorithms.
B. Server Response
Upon receiving the client request, the server checks the Accept-Encoding header to determine if the client supports compression. If compression is supported, the server compresses the requested resource using one of the supported compression algorithms (e.g., Gzip, Deflate, Brotli). The server then includes the Content-Encoding header in the response to specify the compression method used. For instance:
Here, the Content-Encoding: gzip header indicates that the server has compressed the content using the Gzip algorithm.
C. Decompression by the Client
Upon receiving the compressed response, the client, typically a web browser, automatically decompresses the content using the specified compression algorithm. This decompression process is seamless and transparent to the user. Once decompressed, the client renders the content, such as displaying the webpage or executing the JavaScript code.
Example Scenario
- Request: A web browser requests a webpage from www.example.com and includes Accept-Encoding: gzip, deflate, br in the request headers.
- Response: The server responds with the requested webpage, compressing it using Gzip and including Content-Encoding: gzip in the response headers.
- Decompression: The browser automatically decompresses the received content using the Gzip algorithm and displays the webpage to the user.
Understanding Text Compression Issues and How to Verify Them
What Triggers This Issue?
The issue arises when some or all pages on a website do not have the Content-Encoding header set to br, gzip, or deflate. These headers specify the compression format used for files transferred over the internet. When properly configured, browsers can download these compressed files, decompress them, and display the content to users, leading to faster load times and improved performance.
How to Check the Issue?
To determine if text compression is enabled on a website, several methods can be employed:
1. Using Online Tools
Online tools offer convenient ways to analyze website performance, including text compression settings.
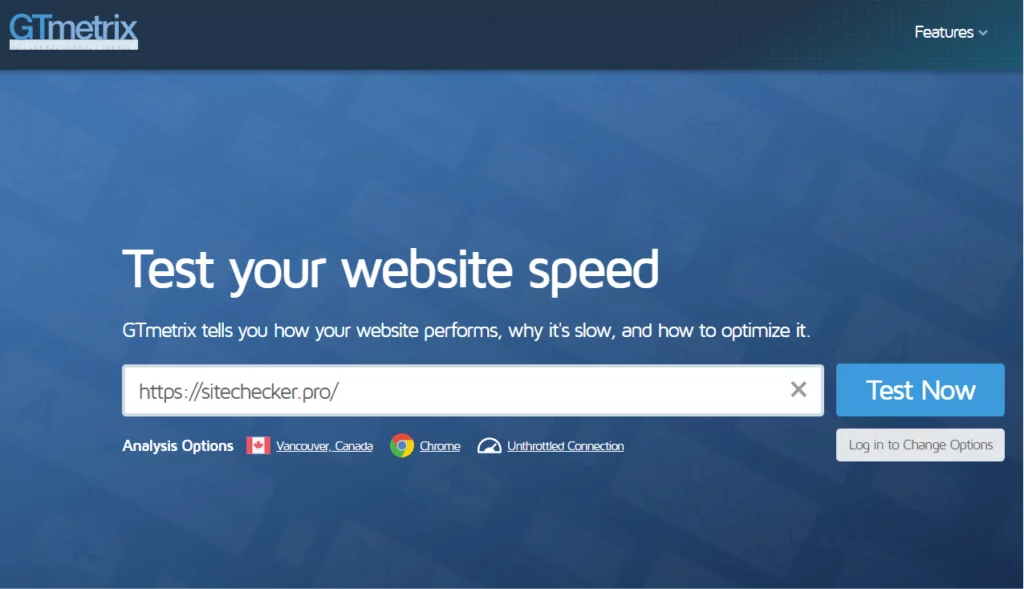
- Visit GTmetrix.
- Enter your website URL and initiate the analysis.
- Review the recommendations or look for the “Enable text compression” section in the report to verify if compression is enabled.
WebPageTest:
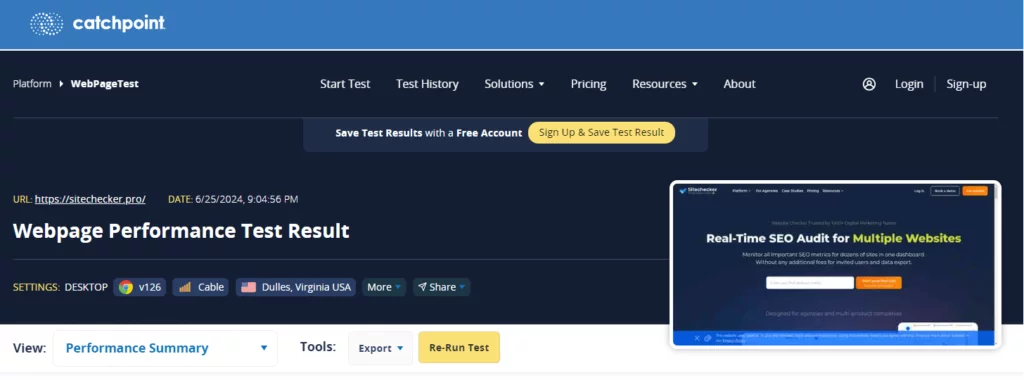
- Go to WebPageTest.
- Enter your website URL and start the test.
- After the test completes, check the performance recommendations or summary to see if text compression is mentioned.
2. Using Command Line Tools
Command line tools provide a direct way to fetch HTTP headers and check for the presence of Content-Encoding headers indicating compression.
cURL:
curl -I -H "Accept-Encoding: gzip, deflate, br" https://yourwebsite.comwget:
wget --header="Accept-Encoding: gzip, deflate, br" -S https://yourwebsite.com3. Using Browser Developer Tools
Browser developer tools provide real-time insights into network requests and headers, making them invaluable for checking text compression.
Google Chrome:
- Open the website in Google Chrome.
- Press F12 or right-click and select “Inspect” to open Developer Tools.
- Navigate to the “Network” tab.
- Reload the page and click on a text-based resource (HTML, CSS, JavaScript).
- In the headers section of the request details, verify the presence of Content-Encoding set to gzip, br, or deflate if compression is enabled.
Mozilla Firefox:
- Open the website in Mozilla Firefox.
- Press F12 or right-click and select “Inspect Element” to open Developer Tools.
- Go to the “Network” tab.
- Reload the page and click on a text-based resource.
- Check the Content-Encoding header in the response headers to confirm compression settings.
How to Fix Text Compression Issues
Fixing the issue of text compression not being enabled involves configuring your web server or content delivery network (CDN) to compress text-based files before transmitting them to clients. Below are step-by-step instructions for configuring various common web servers and CDNs:
Apache
Using .htaccess file:
- Navigate to your website’s root directory and locate the .htaccess file (if it exists).
- Edit the .htaccess file and add the following lines to enable Gzip compression for various file types:
- Save the .htaccess file and upload it to your server if necessary.
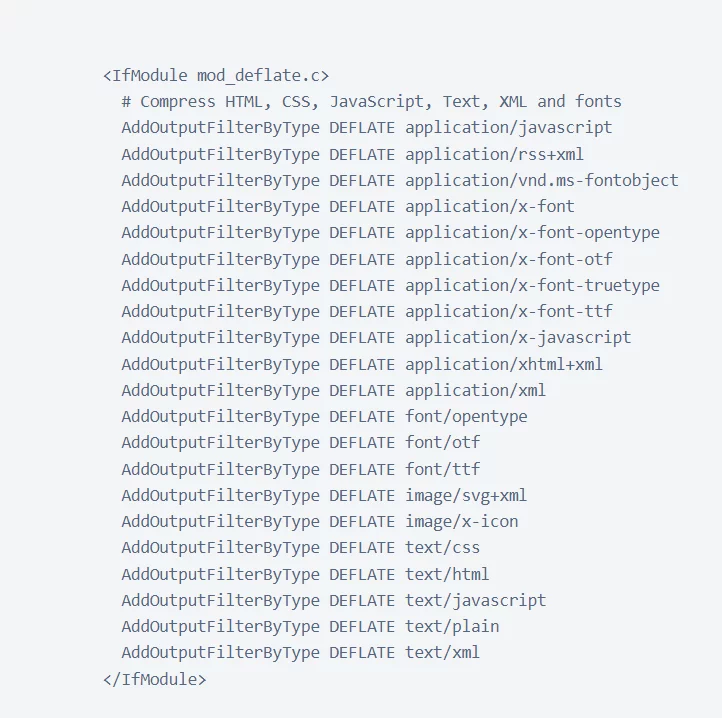
Using httpd.conf or apache2.conf:
- Open your Apache configuration file (httpd.conf or apache2.conf).
- Insert the same lines inside the <IfModule mod_deflate.c> section.
- Save the configuration file.
- Restart Apache to apply the changes:

Nginx
- Open your Nginx configuration file (nginx.conf or a site-specific config file):
sudo nano /etc/nginx/nginx.conf
- Add or update the following lines within the http block to enable Gzip compression for specified file types:
http { gzip on; gzip_comp_level 5; gzip_types text/plain text/css application/json application/javascript text/xml application/xml application/xml+rss text/javascript; gzip_vary on; }Detailed Impact of Data Compression on Core Web Vitals:
Data compression, especially through technologies like GZIP, profoundly influences Core Web Vitals—essential metrics that directly affect user experience and website performance.
1. Largest Contentful Paint (LCP)
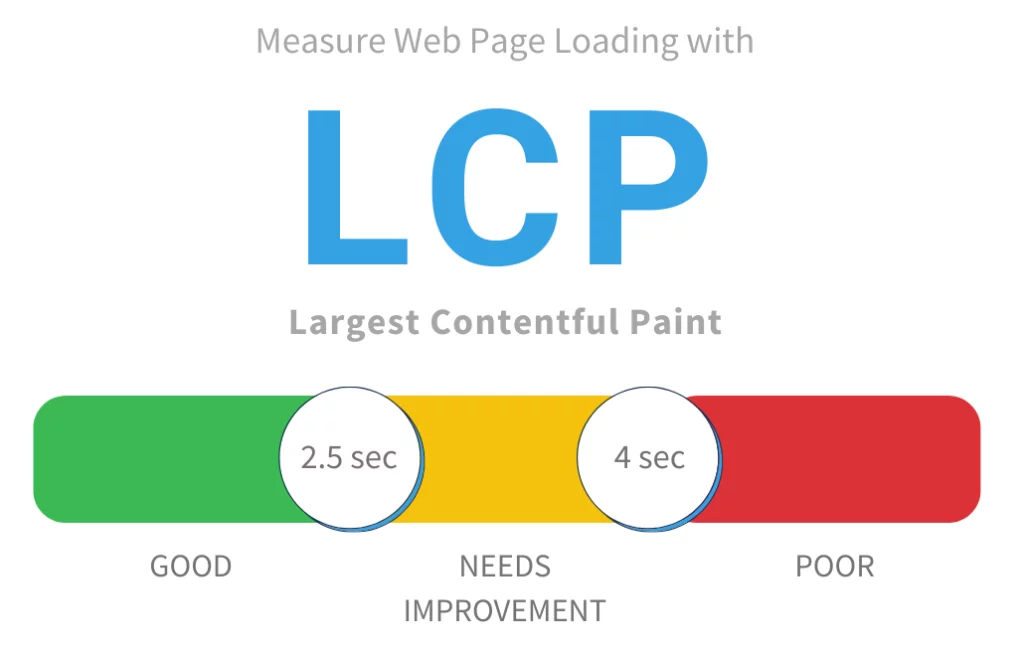
LCP measures how quickly the largest content element (like images or text blocks) loads on a webpage. Implementing GZIP compression reduces the sizes of HTML, CSS, and JavaScript files. This reduction accelerates LCP metrics by ensuring crucial page elements load faster, enhancing the initial visual experience for users.
2. First Input Delay (FID)
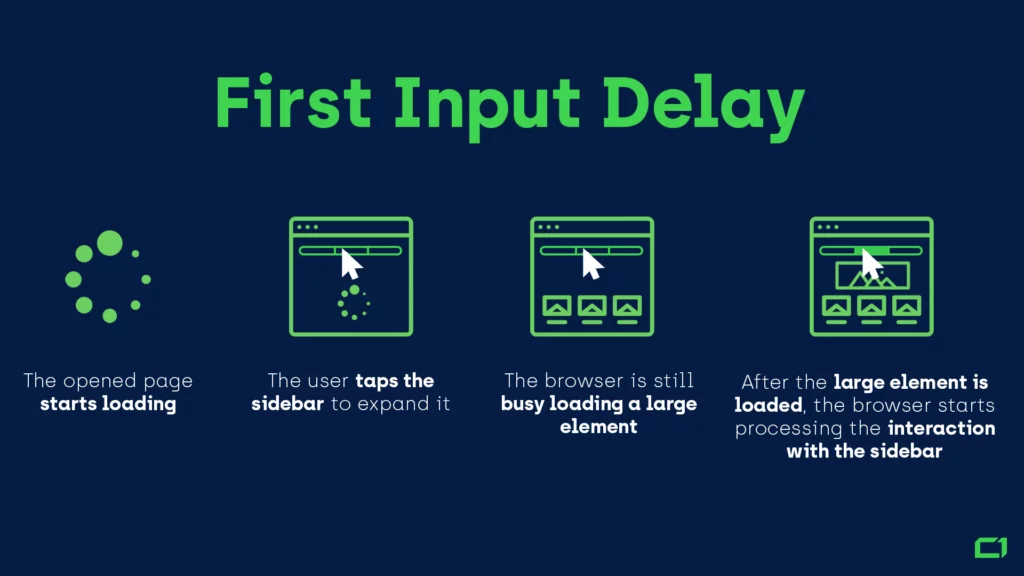
FID assesses how responsive a webpage is to user interactions such as clicks or taps. Due to reduced file sizes, GZIP-compressed data allows browsers to handle these interactions more efficiently. This optimization improves FID scores, making website interactions more immediate and responsive.
3. Cumulative Layout Shift (CLS)
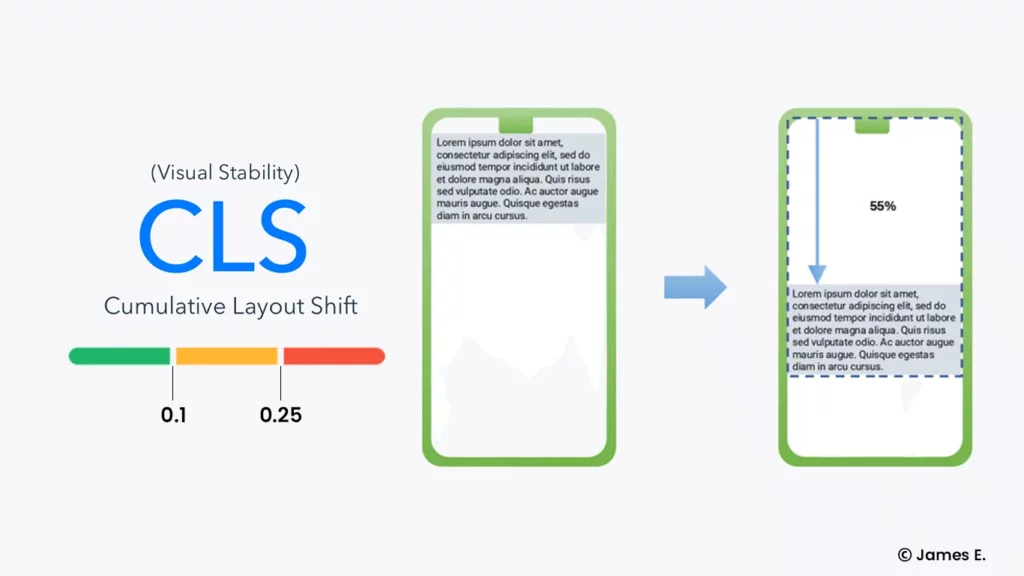
CLS measures unexpected shifts in content layout during page loading. By compressing data with GZIP, websites reduce file transmission times. This results in more stable load processes, minimizing layout shifts and improving CLS scores. Users experience fewer disruptions in content placement, ensuring a smoother browsing experience.
4. First Contentful Paint (FCP)
FCP denotes when the first content appears on the screen. While not directly tied to GZIP compression, faster load times facilitated by compressed resources contribute to quicker FCP scores. This rapid initial load enhances perceived site speed and responsiveness for users.
The Evolution of Core Web Vitals
Enhanced Performance Metrics:
Implementing GZIP compression provides several benefits:
- Optimized File Delivery: Smaller file sizes reduce bandwidth usage and accelerate data transmission, resulting in faster load times.
- Metric Improvement: Enhanced LCP, FID, and CLS metrics indicate improved overall webpage performance, meeting performance benchmarks set by Google and other industry standards.
- Enhanced User Experience: Faster load times and better metric scores lead to higher user satisfaction, lower bounce rates, and increased engagement.
Impact on Lighthouse Performance Scores
GZIP compression effectively reduces file sizes by up to 90%, significantly improving:
- Page Load Speed: Websites experience substantial reductions in loading times across various devices and network conditions.
- Adherence to Standards: GZIP compression aligns websites with rigorous performance criteria outlined by tools like Google PageSpeed Insights and Lighthouse audits, ensuring compliance with best practices in web development.
Plugins for WordPress:
Method 1: WP-Optimize
WP-Optimize is a robust WordPress plugin designed to optimize website performance through advanced techniques, including GZIP compression.
WP-Optimize is tailored to accelerate your WordPress site by compressing web pages and style sheets before they reach the browser. This compression technique significantly reduces file sizes, resulting in faster load times and improved overall performance.
Key Benefits of GZIP Compression
GZIP compression within WP-Optimize focuses on HTML, JavaScript, and CSS files, which often contain redundant text and whitespace. By compressing these files, WP-Optimize enhances website speed and responsiveness.
Comprehensive Optimization Features
WP-Optimize offers a comprehensive set of optimization tools:
- Image Optimization: Compresses images in various formats, offering options for both lossy and lossless compression, and includes a restore originals function.
- Database Optimization: Cleans and optimizes the database by removing unnecessary data and reducing its size, improving database efficiency and site performance.
- Caching Capabilities: Caches posts and pages as static files, reducing server load and speeding up page load times.
- Sophisticated Scheduling: Allows for automated optimizations at specified intervals, ranging from daily to monthly, ensuring consistent peak performance.
- Minification of CSS and JavaScript: Minifies CSS, JavaScript, and HTML files to further optimize loading speeds.
- Additional Premium Features: Provides support for multisite environments, advanced database optimization options, and more, enhancing the plugin’s functionality.
Activation and Setup
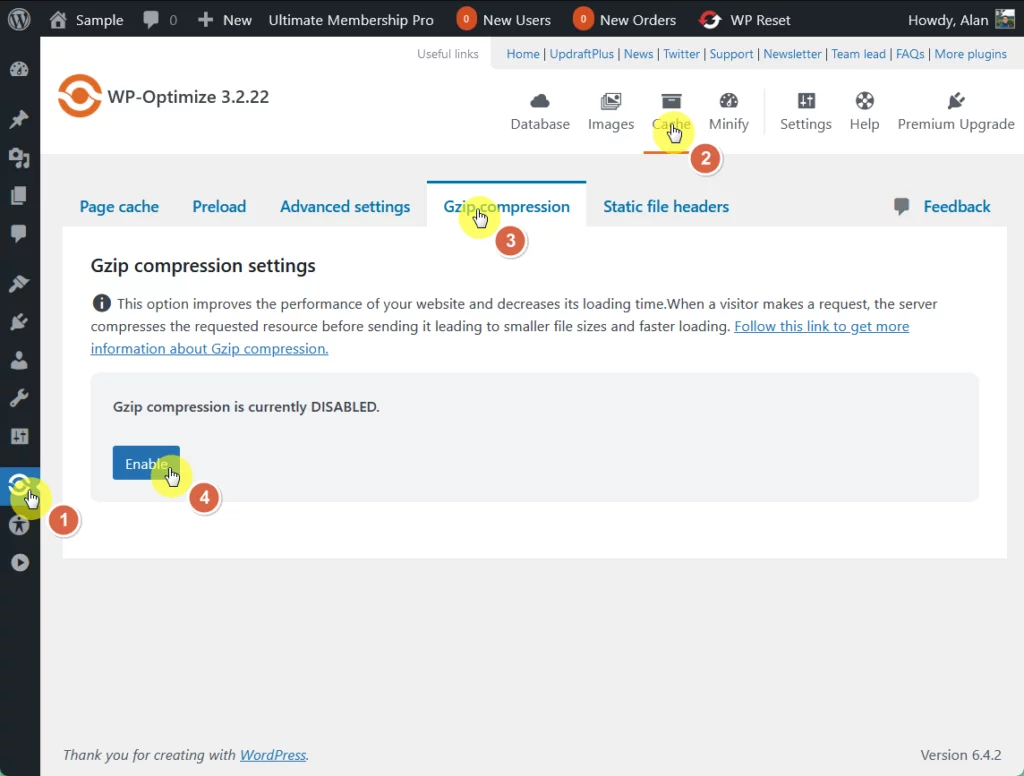
After installing and activating WP-Optimize on your WordPress site:
- Access the Plugin: Navigate to the WP-Optimize section in the WordPress dashboard sidebar.
- Enable GZIP Compression:
- Go to the cache section within WP-Optimize.
- Locate the GZIP compression option.
- Enable GZIP compression by toggling the corresponding button.
Method 2: W3 Total Cache
W3 Total Cache is a powerful WordPress plugin renowned for optimizing website performance through customizable caching and robust optimization techniques.
W3 Total Cache is highly acclaimed for its ability to significantly reduce file sizes, enhancing the speed at which web pages are rendered in browsers. This plugin integrates seamlessly with content delivery networks (CDNs) like Cloudflare, making it a versatile tool for global website optimization.
Key Benefits of W3 Total Cache
W3 Total Cache offers a comprehensive range of features designed to cater to both basic and advanced optimization needs:
- GZIP Compression: Utilizes GZIP compression to reduce the size of HTML, CSS, and JavaScript files, thereby improving website loading times.
- Minification and Concatenation: Reduces file sizes and combines HTML, CSS, and JavaScript files to accelerate delivery and execution.
- CDN Support: Comprehensive support for various CDNs ensures enhanced content delivery and website performance across global regions.
- Browser Caching Options: Detailed settings for browser caching include Last-Modified headers, cache control headers, and entity tags (eTags) to optimize caching efficiency.
- Database Caching: Tailored caching options for different hosting environments, with specific optimizations recommended for shared hosting accounts.
- Customizable Settings: Extensive customization options allow fine-tuning of caching and performance settings, making it suitable for users with varying levels of expertise.
- Cloudflare Compatibility: Seamless integration with Cloudflare provides additional performance and security enhancements.
Activation and Setup
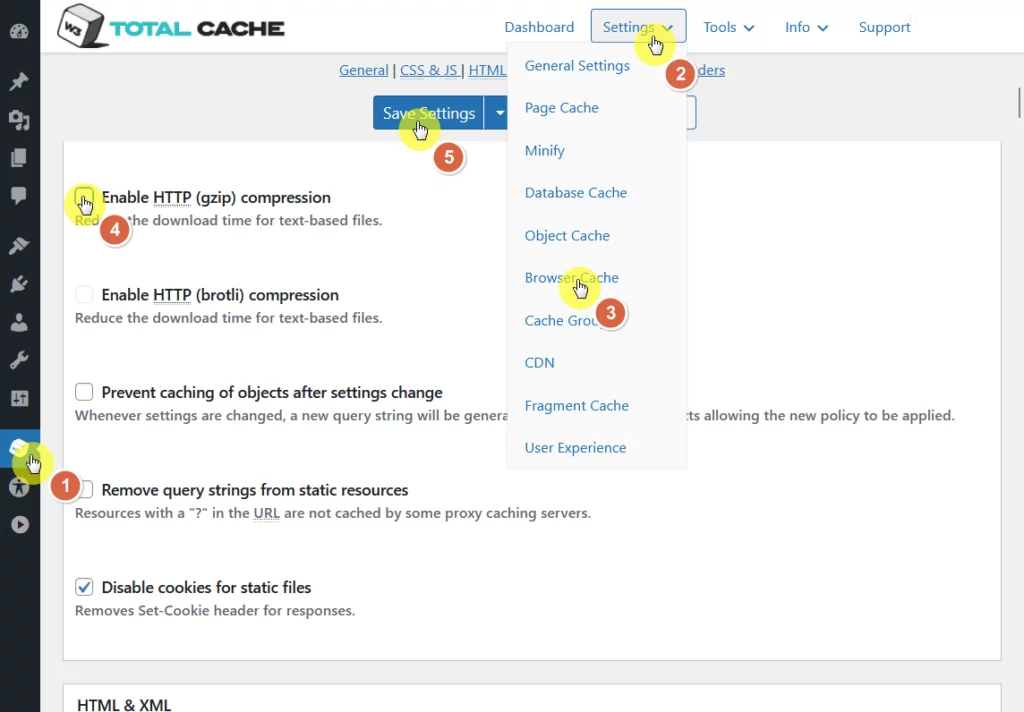
After installing and activating W3 Total Cache on your WordPress site:
- Access the Plugin: Navigate to the W3 Total Cache section in the WordPress dashboard sidebar.
- Enable GZIP Compression:
- Click on the settings dropdown at the top of the page.
- Navigate to the Browser Cache option.
- Scroll through the features until you find the checkbox to enable GZIP compression.
- Check the box to activate GZIP compression.
- Save your settings to apply the changes.
Method 3: WP Rocket
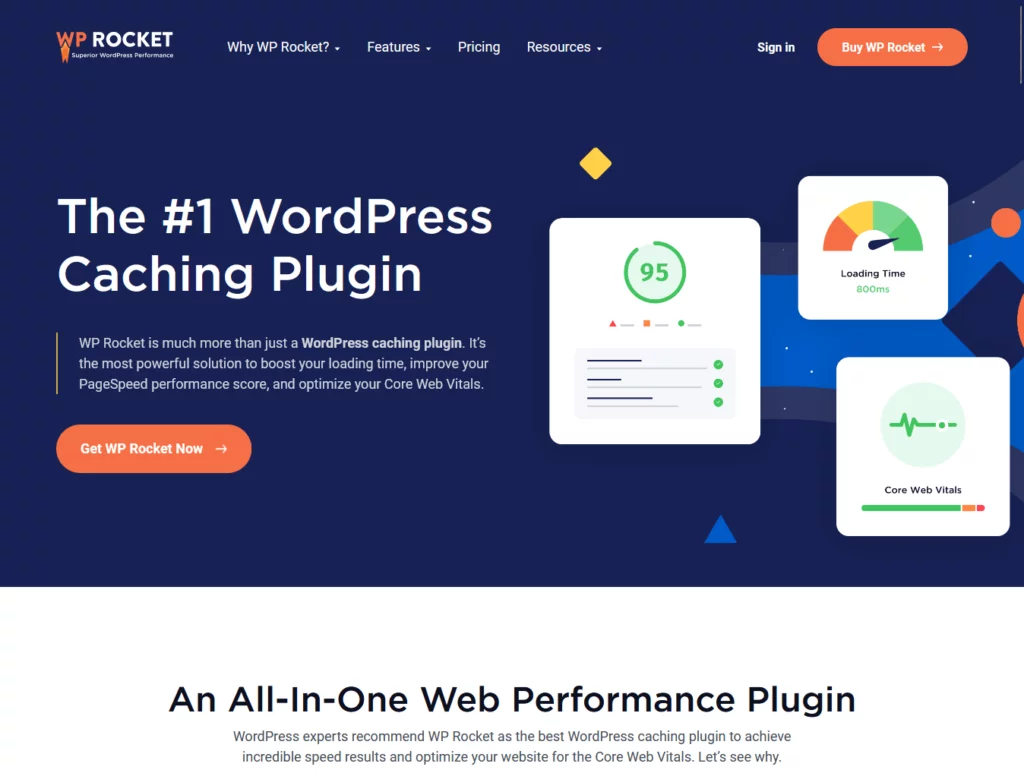
WP Rocket is a highly acclaimed WordPress caching plugin known for its efficient codebase, user-friendly interface, and immediate impact on website performance.
WP Rocket simplifies the process of optimizing WordPress websites, enhancing speed and user experience upon activation. It combines several powerful features, including page caching, GZIP compression, and file optimization, to ensure fast-loading websites with minimal effort.
Key Features of WP Rocket
WP Rocket offers a comprehensive set of features designed to boost website performance effectively:
- GZIP Compression: Automatically reduces the size of HTML, CSS, and JavaScript files, speeding up their delivery to visitors’ browsers.
- Page Caching: Generates static HTML files of your pages to minimize server load and dramatically reduce loading times.
- Cache Preloading: Simulates visits to preload caches, ensuring rapid performance from the first user interaction.
- Browser Caching: Stores frequently accessed files in users’ browsers to decrease load times for repeat visitors.
- File Optimization: Minifies and concatenates CSS and JavaScript files, reducing their size and the number of HTTP requests.
- Lazy Loading for Media: Delays the loading of images and videos until users scroll down the page, improving initial page load times.
- Database Optimization: Cleans and optimizes the WordPress database to enhance efficiency and reduce its size.
- Mobile Detection and Optimization: Ensures optimal performance on mobile devices with specific optimizations tailored to mobile visitors.
- Cloudflare Compatibility: Integrates seamlessly with Cloudflare for enhanced website security and performance.
Activation and Setup
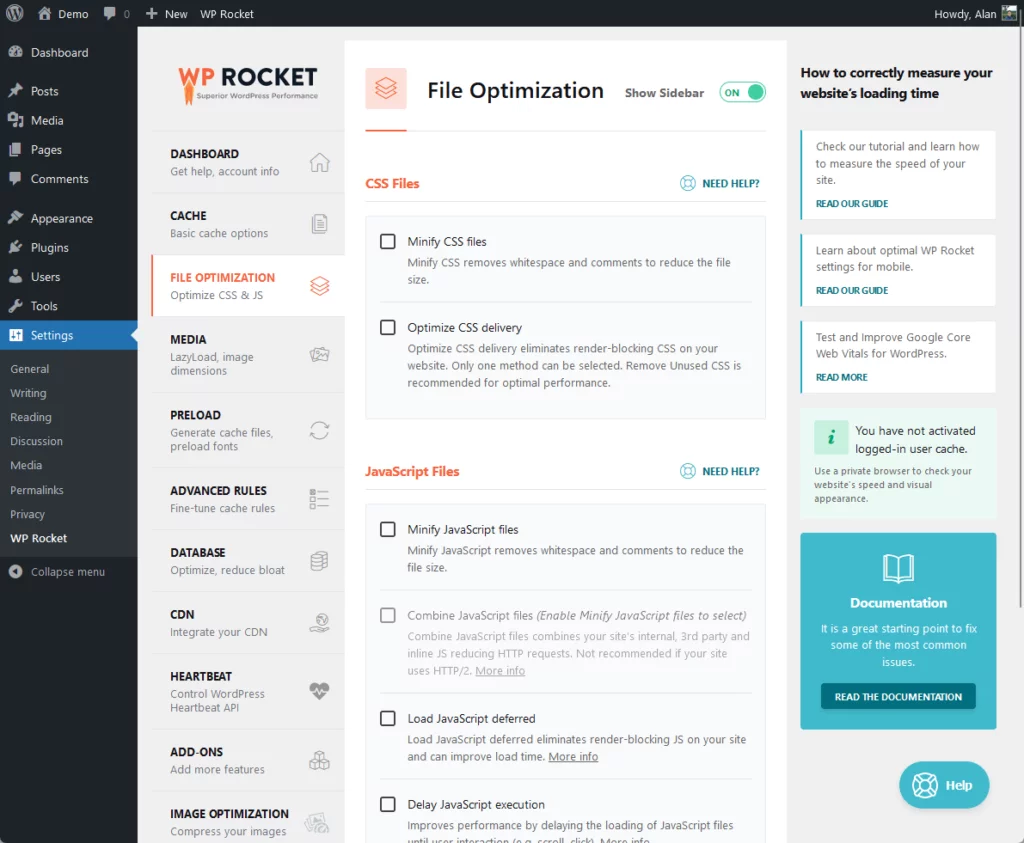
After installing WP Rocket on your WordPress site:
- Access Plugin Settings: Navigate to WP Rocket in the WordPress dashboard sidebar.
- Automatic GZIP Compression: WP Rocket automatically enables GZIP compression on Apache and LiteSpeed servers upon activation, eliminating the need for manual configuration.
- Additional Configuration: Customize settings for file optimization, caching, and other performance-enhancing features as per your website’s specific needs.
