
WordPress Visual Editor – a helpful tool that gives you an idea of how it will look after publishing content. It is equipped with features that help to simplify the process of creating and formatting content for your website. Although the visual editor is a valuable tool, it does have its limitations.
In this article, we show how to make the most of the WordPress visual editor and tell you about some plugin settings and CSS, which will help you to improve your user experience.
1. Get more standard visual editor
Let’s start with the base. If you have studied the visual editor, you can skip this step and proceed to the next.
Visual Editor VS. Text editor
WordPress is equipped with both – A visual and text editor. The text editor shows you the source code of HTML content and allows you to customize the text in full:

You can directly manipulate images and other media files inside the text editor instead of using the Add Media option.
The visual editor uses the WYSIWYG principle. This gives you a better idea of what your content will look like after publication. In the editor, you will see all formatted text and images. However, it does not show how the page or a write-up will fit in your theme, and there is no record of text hyperlinks’ width, style, and color.
Remember that in a text or visual editor, you can always edit the same content block from different angles. Changes you make in the visual editor change the HTML markup of your records. You do not see these tags in the visual editor as a text editor.
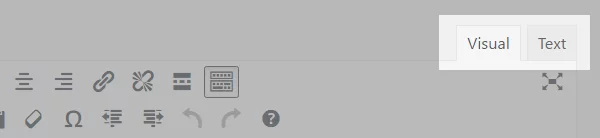
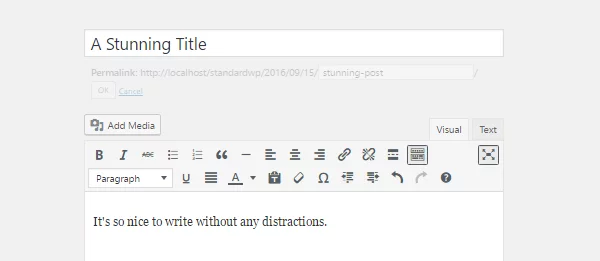
As changes occur regardless of the editor you are using, you can switch between them in the content creation process. To switch from a visual to a text editor (or vice versa) is very easy. Just click on the appropriate tab in the upper right corner of the editor of the posts:
Visual Editor Button
By default, the Visual Editor displays a row of buttons. To display the second row, you can click on the icon in the toolbar, and this button is often called Kitchen Sink. Each button on the panel shows the hero, but you can open the card by moving the mouse over the button:
Most icons are apparent, but there are less well understood. Let’s look at them more closely.
Quote

The quotes button is used to display the quoted text. View the Mode depending on your theme. For example, Here is the section in the front-end Divi:

Other topics may also use a colored box or great quotes. Before publishing, it is best to check the look of a section and change something in the settings if you do not like it.
Insert Read More tag

This button inserts a horizontal line to break the text, as in the image below:
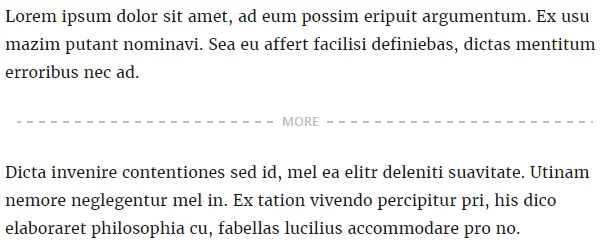
The read More line does not appear on the front-end site when you publish a post. The line controls the length of the piece of text that will be displayed in your posts.
Paste as Text

The paste as Text button is used to clear the text you copied from another source for formatting. If you copy and paste, the reader may appear in an entirely different or can say the desired format. The paste as Text button removes all formatting and HTML tags.
Clear formatting

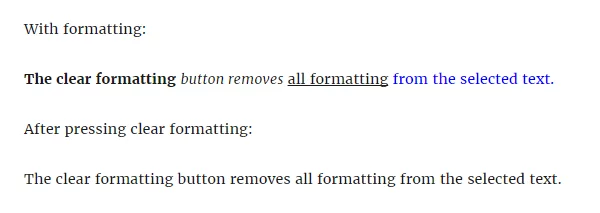
You can use this button to remove all formatting (including bold, italic, underline, and color) of the selected text:
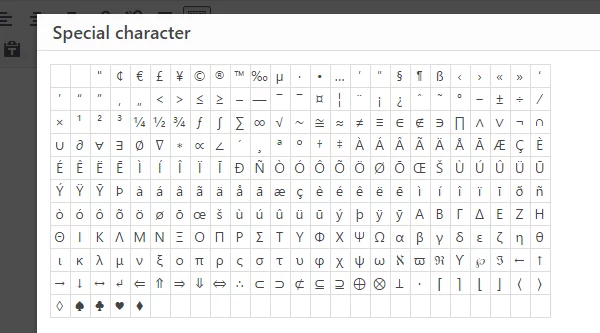
Special symbols

The Special Character button allows you to insert characters that are not generally found on a keyboard, but when you click on a pop-up window:
Keyboard shortcut

Clicking Keyboard Shortcuts, you will see a pop-up window that displays the built-in editor shortcuts. You can use them to accelerate the implementation of specific tasks:
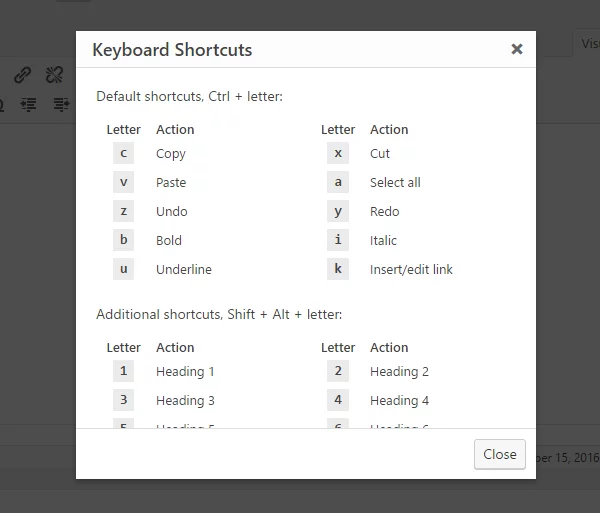
Keyboard shortcuts can offer some additional features that are not in the toolbar, for example, “copy,” “paste,” and “code.” “ID” is used for allocating the code blocks in the text:

Full-screen mode

Some people get distracted because of the editor environment. If you prefer a clean workspace, click on the button, get rid of the side panels, and concentrate on the content.
2. Plugins for the visual editor
A standard visual editor has all the essential features to create and format your content. However, there are many other ways that you can use format. You can do it in a text editor by marking the text with the corresponding HTML tags. Of course, many people are unfamiliar with the code, while others prefer to do it visually.
Fortunately, it is now possible to quickly and easily add functionality to the visual editor with plugins. This section looks at two different plugins to improve your visual editor.
Keep in mind that some features only work with a specific plugin. If you use functions that work through shortcode or plugin, they can stop working after disabling the plugin. That is, after the removal of the plugin, you will need to do minor formatting.
TinyMCE Advanced

With more than one million downloads, TinyMCE Advanced has had enormous success. This easy-to-use plugin allows you to add, edit and delete buttons to WordPress visual editor toolbar. It also allows you to configure up to four rows of controls that will satisfy your needs.
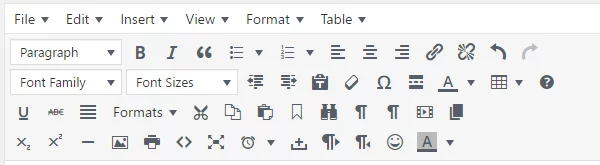
There are additional buttons Font Family, Font Sizes, Insert Date / Time, Page Break, and many others. TinyMCE Advanced simplifies the creation and configuration tables. The plugin allows you to include the menu editor, which offers even more options for creating and editing content.
Please note that the extra buttons do not appear automatically after installation, so you need to go to the plugin’s Settings section and set up a new toolbar. After setting your editor screen will look as follows:
Key Features:
- drag-and-drop Buttons to your panel configuration tools
- Creating and editing tables
- Additional options to insert lists
- Search and replace functions
- Text Alignment
- The ability to insert a page break
- The ability to add emoticons
Price: Free
WP Edit
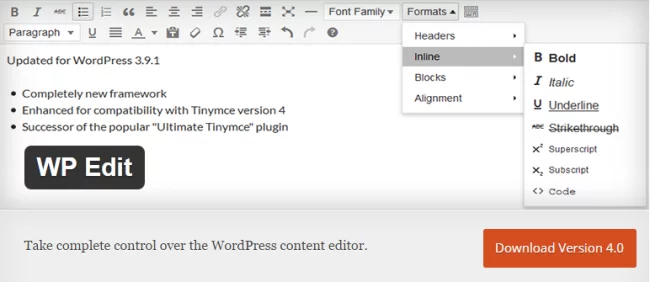
WP Edit is not as popular as the TinyMCE Advanced and has 100,000 active installations, but it also offers a variety of functions. The free version adds a visual editor that has many features and options for the layout that can be used and records and pages.
The Premium version of WP Edit Pro includes two additional rows of buttons and other functions, for example, 80 predefined styles and integration with Dropbox and Google Fonts. You can also use custom fonts and techniques to create a custom editor.
Key Features:
- Insert media files, such as images, videos, and illustrations
- Creating and editing tables
- Easy access to shortcodes
- Insert columns in the content field via shortcodes
- Allowed shortcodes in widgets fields
Price: Basic plugin is free, and the price for the premium version starts from $ 17.50.
3. Setting the display of the content in the editor
The WordPress visual editor has huge limitations that the above plugins cannot solve. Although the WYSIWYG editor gives you an idea about how your content will look, there are still differences between what you see in the editor and how your content appears on the website’s front-end. Using the preview button may seem inconvenient.
Of course, it would be great if you could see how the content will appear when published by the visual editor. Fortunately, you can customize the visual editor to suit your requirement better.
You can also use the frontend editor, as in Divi 3.0. This intuitive editor allows you to edit the page or write directly on the Frontend of your Web site without using the code.
Conclusion
Although WordPress visual editor is a valuable tool, it has its limitations. Using the tips in this article, you can enhance the visual editor and improve the content creation process. Let us remember:
- Make the most of the standard visual editor: Standard visual editor has many features, especially if you are familiar with the interface.
- Add custom functionality: TinyMCE Advanced WP Edit can let you enhance the WordPress visual editor.
- Set the display content in the editor: Further configuration is pretty simple if you feel confident with the code.
Do you have a personal setup for WordPress visual editor? Please share them with us!
